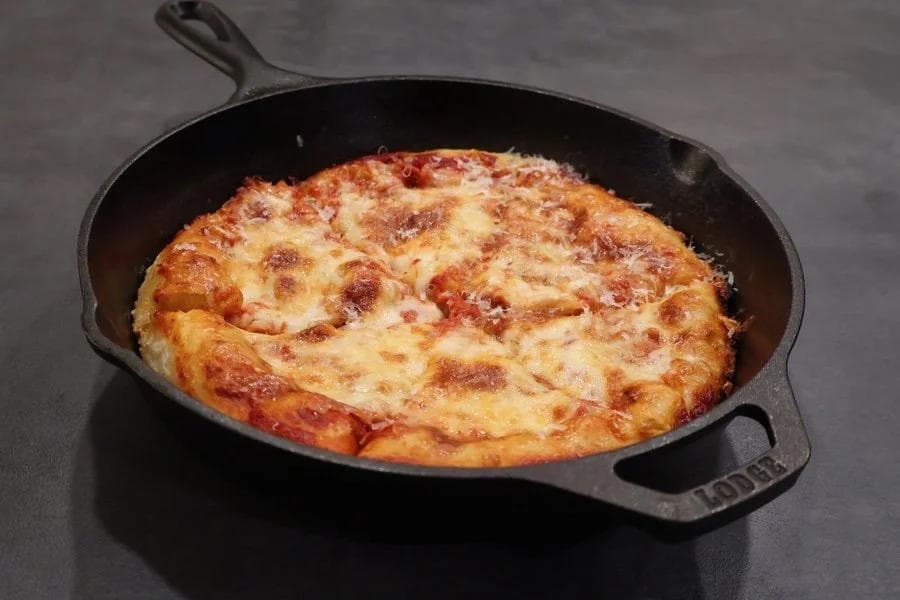
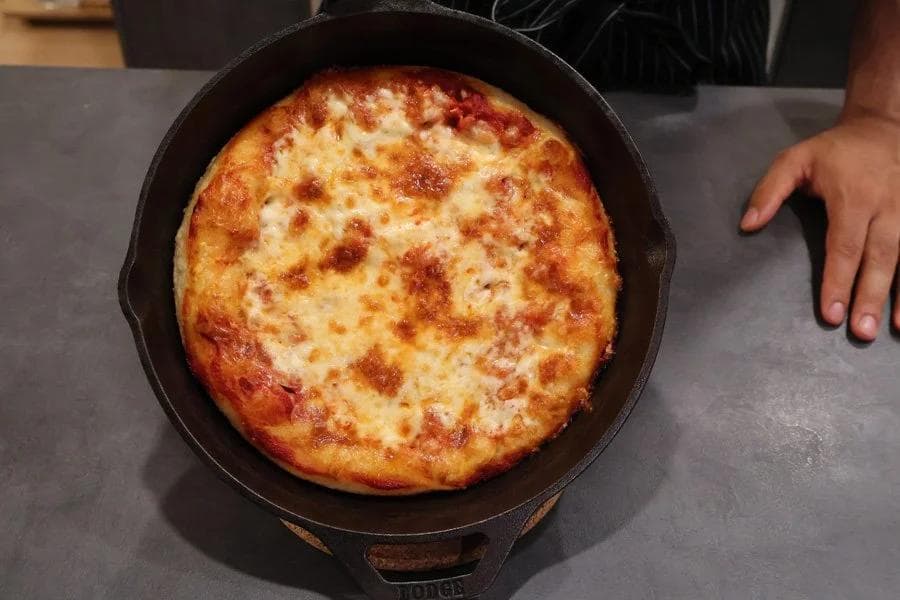
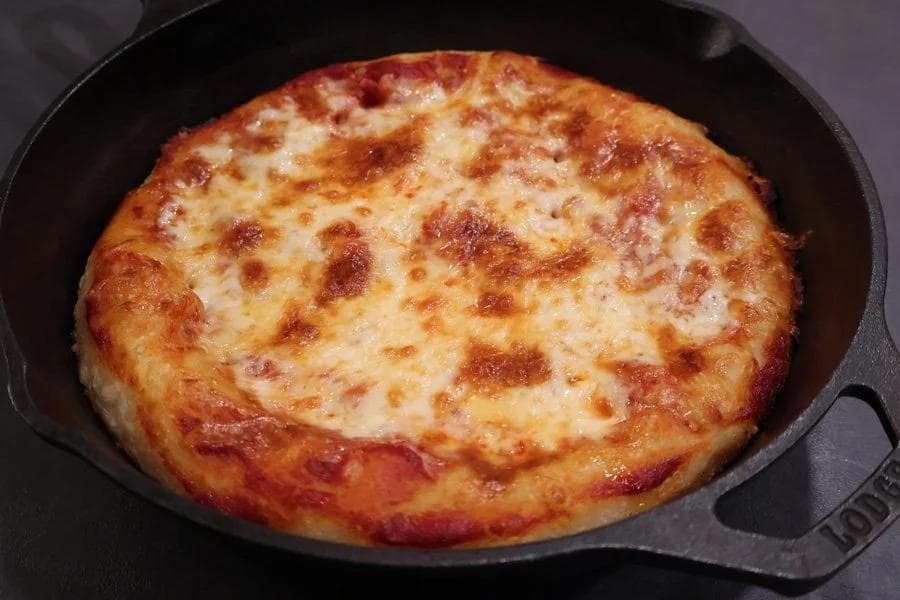
Make the most amazing cast iron pan pizza at home with a perfectly crispy crust and bubbly cheese. Easy to follow and better than delivery, this recipe will become your new favorite.
Who doesn’t love pizza? I’ll be honest when I say that I seriously crave pizza all the time! While I do love to visit some pizzerias or just enjoy a chill evening with delivery, you can’t go wrong with the classic pan pizza. As I mention in my free motivational guide to explore your potential in the kitchen, Make Cooking Fun!, setting some realistic expectations for yourself is key in your cooking journey, so if you really are exhausted, then I don’t blame you for opting for delivery! However, if you’ve already got some pizza dough on hand, then to be honest with you making your very own homemade cast iron pan pizza will take just as long as getting delivery, and it will feel so much more special! After all, who doesn’t love a good homemade pizza?
If your family wants a perfectly crisp and cheesy pan pizza for a special dinner, then you definitely need to make this cast iron pan pizza recipe as part of your Live to Cook one-month challenge. Get started for free by signing up to my email newsletter, plus you’ll get all of my easy to follow and tasty recipes sent straight to your inbox!
Check out the video to follow along with me as I prepare the easiest and most delicious cast iron pan pizza recipe ever! If you’re not already, it would mean a lot to me if you could please subscribe to my YouTube channel, and don’t forget to press the bell button so you always know when a new recipe video is live! Let’s get cooking!
Why You’ll Love This Cast Iron Pan Pizza!
Easy to make: I find making pan pizzas the easiest pizzas to make, actually! Once you have your dough, the prep work for a pan pizza is super simple, as you’ll soon see. There’s very little cleanup when making a pan pizza, and I find that the baking process is much less stressful than a Neapolitan pizza that cooks in minutes, where you really need to baby it!
Perfect crust: A key characteristic of a pan pizza is the flavorful crust. You want it crispier than a regular pizza crust, and we’ll achieve exactly that in our homemade cast iron pan pizza!
Versatile toppings: What’s amazing about making your own pizza is that you can put whatever toppings you want at no extra charge! I’ll list some different topping ideas below that will pair super well with your homemade pan pizza, but of course feel free to do whatever you want!
Satisfying: Ever order delivery and get disappointed? When you’re in control with your own pan pizza, there’s no chance for disappointment! You can add as much cheese as you want, as much sauce as you’d like, cook the crust for as long as you want, in order to achieve your perfect pizza! Once you get started making your own pan pizzas, you won’t want to stop!
What Pizza Dough Are We Using For this Pan Pizza?▼
Although not traditional for a pan pizza recipe, I’m using my Napoletana pizza dough. While we’ll quickly go through the steps in this recipe, if you want more details and extra tips and tricks on making the perfect pizza dough, then I recommend you check out the complete recipe. I love this pizza dough recipe because it’s not too thick, it’s easy to make, and it’s so flavourful. As you can see, it’s also multipurpose since you can use it for a traditional Neapolitan style pizza or a pan pizza, as we will do here. The crust won’t be too dense but still give a perfect pan pizza.
I do recommend you allow the dough to rise for a full 48 hours to give the most flavourful crust, and that’s what I’ll be doing here. However, if you’ve only got 24 hours, then you’ll be all right! However, if you’ve read this and want to indulge in a homemade pan pizza right now, then that’s totally possible! All you’ll need to do is use quick rise yeast and skip the starter.
Can You Use a Store-bought Pizza Dough for This Pan Pizza Recipe?▼
Store-bought pizza dough can be a great alternative if you really want pizza now! Before I divulge further, I do want to call out my own quick 1 hour napoletana dough herewhich can also be adapted into a pan pizza. But, if you really don’t have the extra hour to whip up this dough, just get a store-bought dough and prepare the pizza as directed in my recipe. Of course the biggest factor that would be different would be the crust and flavour in the crust, but it can work great if you can get hands on a well prepared store-bought dough.
Prepping Tips for Cast Iron Pizza
Bring dough to room temp: Let the dough sit at room temperature for about 1 hour before working with it.
Preheat thoroughly: While the dough is proofing in the cast iron pan, start preheating the oven. The oven and pizza stone (if using) should be fully heated for at least 1 hour before baking. For example, if your oven takes 30 minutes to preheat, allow 1.5 hours total to ensure everything is hot enough.
Warm toppings: Take the sauce, cheese, and toppings out of the fridge about 30 minutes before baking so they’re not ice-cold — this helps the pizza cook evenly.
Make sauce ahead: If you’re using a no-cook pizza sauce, prepare it 24 hours in advance so the flavors can meld in the fridge.
Prep cheese: Grate mozzarella ahead of time and store it in an airtight container (or cover with plastic wrap on a plate) in the fridge until ready to use.
Other Questions You May Have!
How Many Pizzas Will the Dough Recipe Make?▼
This Napoletana pizza dough recipe will make enough for 3 small pan pizzas on a 10.25 inch pan. If using a 12 inch pan, divide the dough into 2 portions instead. You can also make the Napoletana pizza of course by following that recipe! Check out how to make a classic Margherita here.
What Size of Cast Iron Pan Are You Using For This Pan Pizza Recipe?▼
For this recipe, I used a 10.25-inch cast iron pan. Here’s how the dough portions translate into pizza sizes (using my dough recipe below for reference):
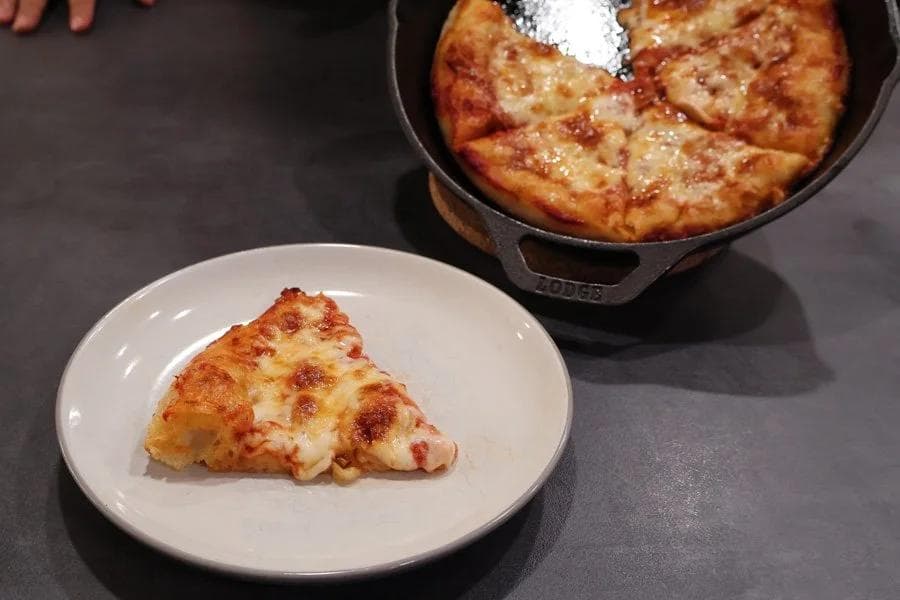
Small Pan Pizza (Pizza Hut “small” equivalent): Use ⅓ of the dough in a 10.25-inch pan. This will yield about 6 small slices.
Medium Pan Pizza: Divide the dough into 2 equal portions. Use one portion in a 12-inch cast iron pan to make a medium pizza with 8 larger slices.
Large Pan Pizza: Use the full dough recipe in a 15-inch cast iron pan, which will yield about 12 slices.
Can A Pan Pizza Be Made Without a Cast Iron Pan?▼
Yes, you don’t have to use a cast iron pan. A heavy stainless steel or oven-safe skillet works too, as long as you oil it well so the dough doesn’t stick. You can even use a cake pan or square baking dish if that’s what you’ve got.
The main thing is getting the pan really hot so the bottom crisps up. That’s why cast iron is the go-to — it holds heat the best and gives you that fried, crunchy crust. Stainless steel or nonstick won’t hold heat the same way, but they’ll still get the job done.
Cooking the whole pizza on the stovetop with just a lid isn’t the same though. That works better for a quick skillet pizza, not a true pan pizza.
What Makes Pan Pizza Unique?
Pan pizza is all about the crust and texture:
The oil in the pan makes the bottom crust crispy and golden, almost like it’s fried.
The inside stays fluffy and airy, more like bread.
Cheese runs right to the edge, so you get those caramelized, crispy cheese corners.
It’s thicker and heavier than a regular pizza, built for lots of sauce and toppings.
What’s The Difference Between Pan Pizza and Chicago Deep Dish?▼
While both are baked in a pan, they’re definitely not the same!
Pan Pizza: Think Pizza Hut, Domino’s, or Papa John’s. The dough is pressed into a shallow pan, proofed, and baked with oil so the bottom gets crispy and golden. The crust is fluffy inside, cheesy on the edges, and topped like a regular pizza.
Chicago Deep Dish: This is more like a pizza pie. The crust is pressed up the sides of a deep pan, almost like a tart shell. Cheese goes on first, then meats/veggies, and finally a chunky tomato sauce on top. It’s way thicker, heavier, and eaten with a fork and knife.
So, pan pizza = fluffy and crispy crust with classic toppings. Deep dish = cheesy, saucy, and almost casserole-like.
Can I Make This Pan Pizza Recipe With All-Purpose Flour?▼
Yes, you can, but I don’t prefer it. Bread flour or 00 flour will give you a chewier, more elastic crust, but all-purpose flour still makes a great pan pizza. The difference is mostly in the texture: all-purpose will give you a softer bite, while bread/00 flour gives that extra chew and structure.
What’s The Best Cheese For this Pan Pizza Recipe?▼
You can’t go wrong with mozzarella cheese! Mozzarella cheese is pully and gooey, making it the perfect choice for pizza. I think it’s pretty much mandatory for a satisfying pizza! However, if you want some extra depth and flavour, then I recommend topping with Parmesan cheese once the pizza has finished baking. For some real cheesy goodness and creaminess, I also like to combine mozzarella with fresh buffalo mozzarella. Another go-to combination of mine is mozzarella along with provolone. Sharp cheeses like Gruyere can also elevate your pizza and add more depth.
Do You Grease Or Flour a Pizza Pan?▼
For pan pizza, you always want to grease the pan, not flour it. The oil is what gives you that signature crispy, golden crust — almost like the dough is shallow-fried on the bottom and sides. In cast iron especially, a good coating of olive oil also prevents sticking and makes it easy to release the pizza after baking. Flour would just burn and make a mess.
How To Get Crispy Edges On Pan Pizza?▼
Crispy edges come from two things:
Oil – Make sure the sides of your pan are brushed with oil so the crust fries against the pan.
Cheese to the edges – Don’t stop the cheese short of the rim. Let it touch the pan. As it bakes, the cheese caramelizes and creates those crispy, lacy edges that make pan pizza unique.
How Can I Make Multiple Pan Pizzas For a Party?▼
The easiest way is to prep ahead:
Make and portion the dough in advance. Keep the dough balls in the fridge (up to 72 hours) and bring them to room temperature an hour before baking.
Use multiple pans if you have them. If not, bake one pizza, let it rest a few minutes, then carefully remove it to a cutting board. Re-oil the pan, stretch in the next dough, and bake the next one.
Keep pizzas warm. Place finished pizzas on a wire rack over a baking sheet in a 200°F oven. This keeps the crust from going soggy while you finish the rest.
Scroll to the bottom of this post or press the “Jump to Recipe” button to see the FULL PRINTABLE RECIPE CARD to see all ingredients and to save the instructions for later! You can also scale the recipe based on how many cast iron pan pizzas you’re looking to make!
For the Pizza Dough
00 flour or bread flour: My first choice will always be 00 flour because it’s specifically made for pizzas and pastas, but if you can’t find it, then the next best choice would be bread flour. I strongly urge you to stay away from all-purpose flour because you won’t get the same flavor and crispiness compared to the other types of flours.
Parmesan cheese: Optional to add when the pizza has finished baking.
Other toppings of your choice: See below for some ideas!
How to Make the Best Cast Iron Pan Pizza
For the Pizza Dough
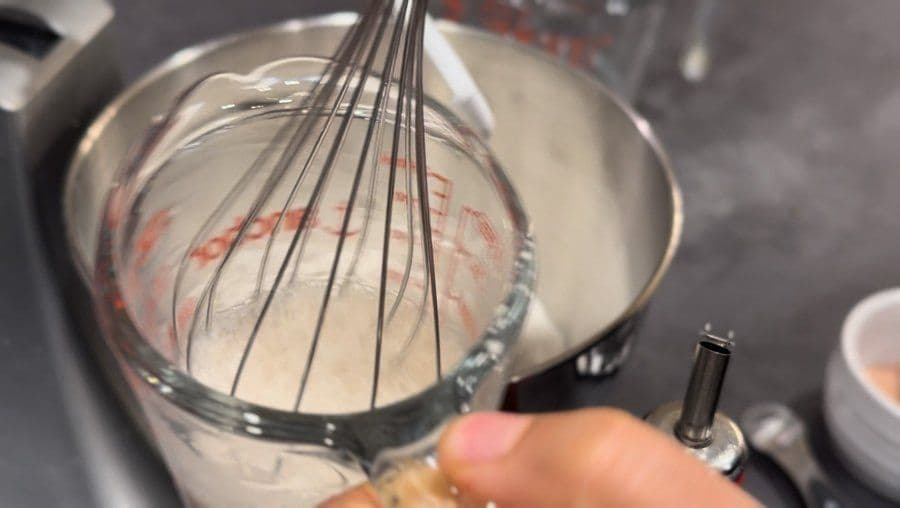
Add yeast and 1/4 Cup of lukewarm water to a bowl and whisk until water is bubbly. Mix until you see no granules of yeast floating on the water. If the yeast doesn't dissolve, the yeast is likely dead and you will have to start over with fresh yeast.
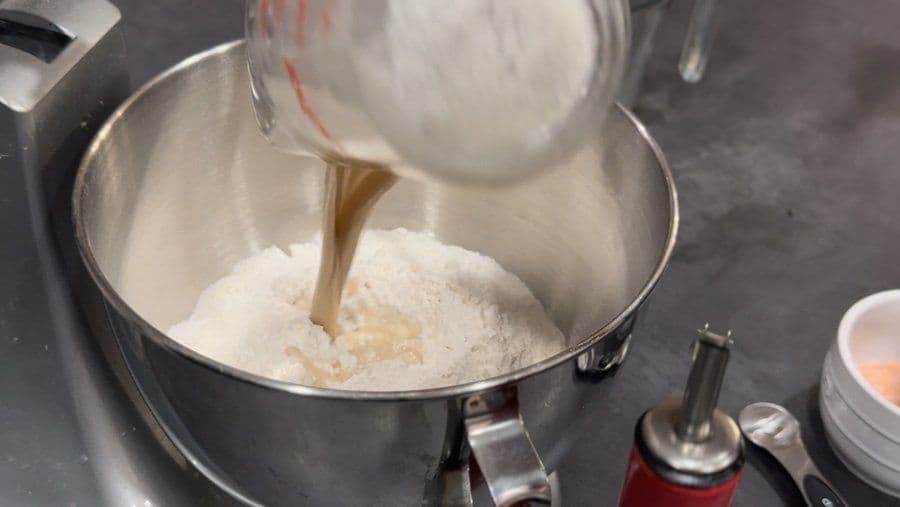
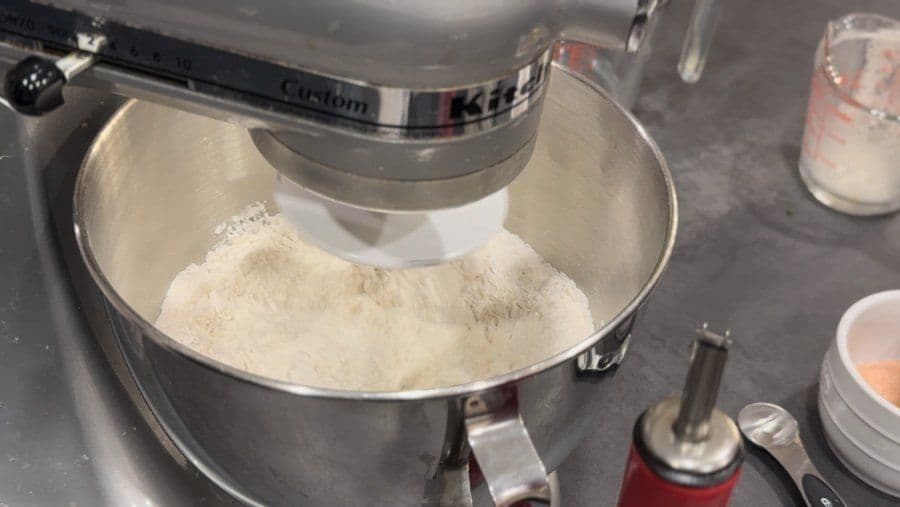
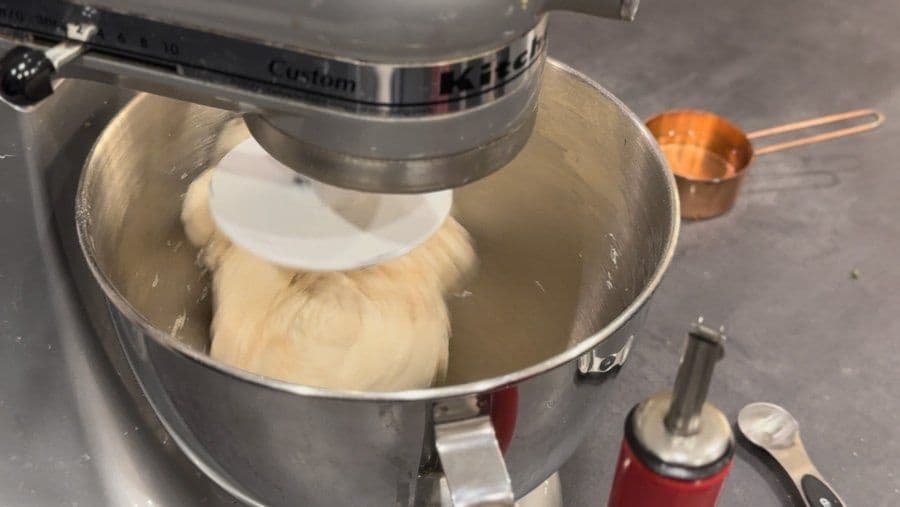
Add flour to the bowl of your kitchen aid mixer and add all of the yeast-water mixture. Then, slowly add most of the cold water while continuing to knead with the dough hook. Add the remaining cold water back in the bowl of yeast water and swirl and add to the dough.
Knead until the dough comes together and you have a soft, pliable dough which is not sticky to touch. Add more flour/water as required to reach this consistency.
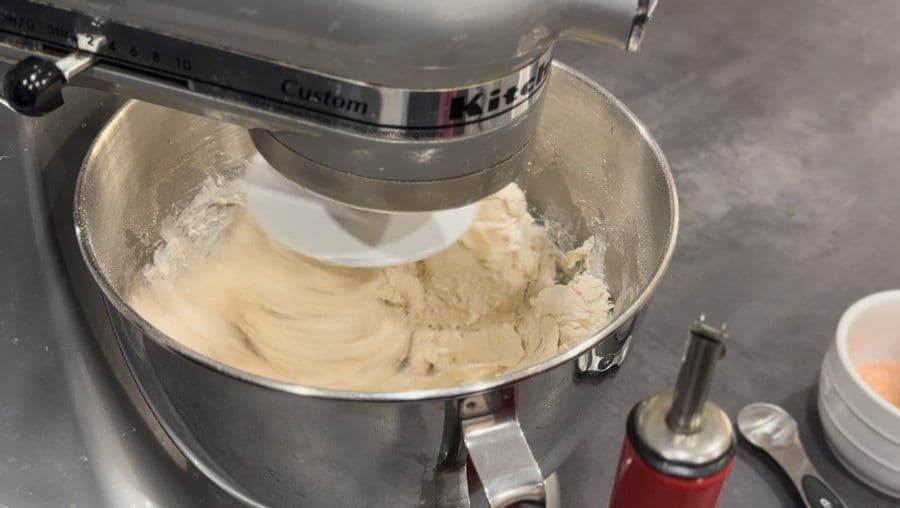
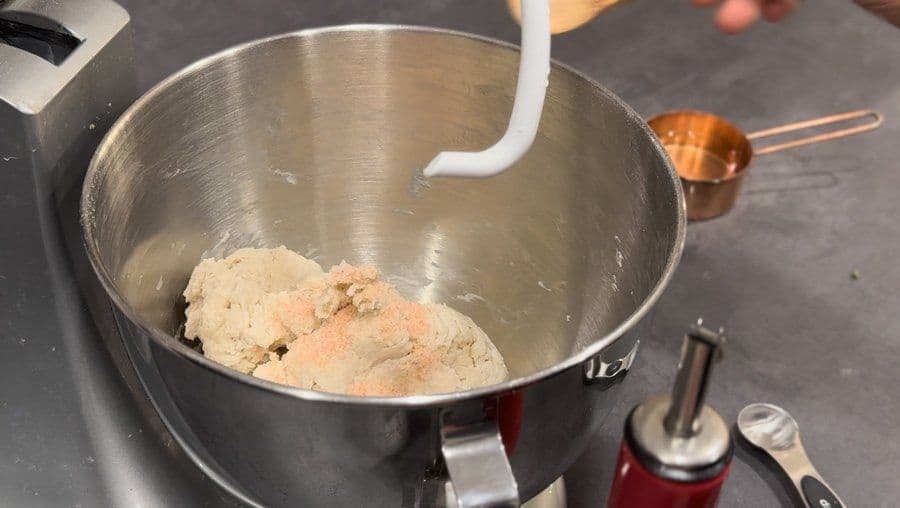
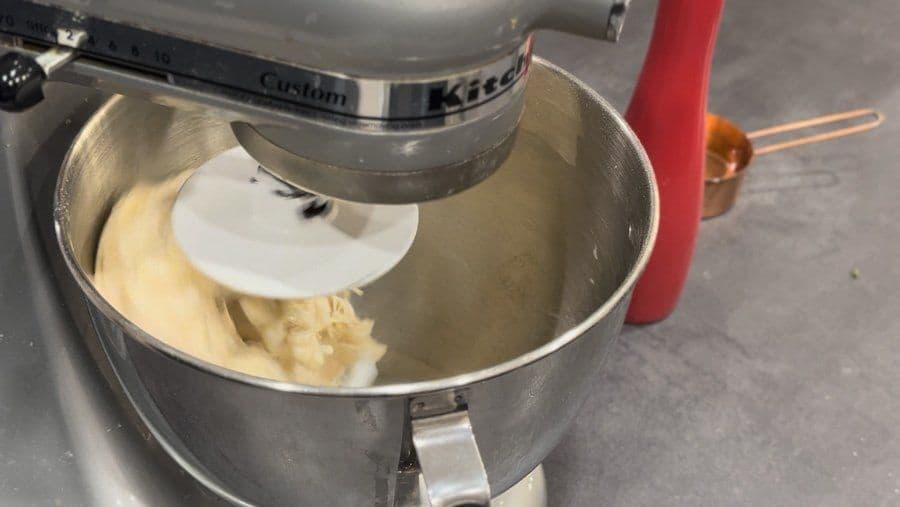
Stop the mixer and add the salt. Knead on low speed for 1 minute.
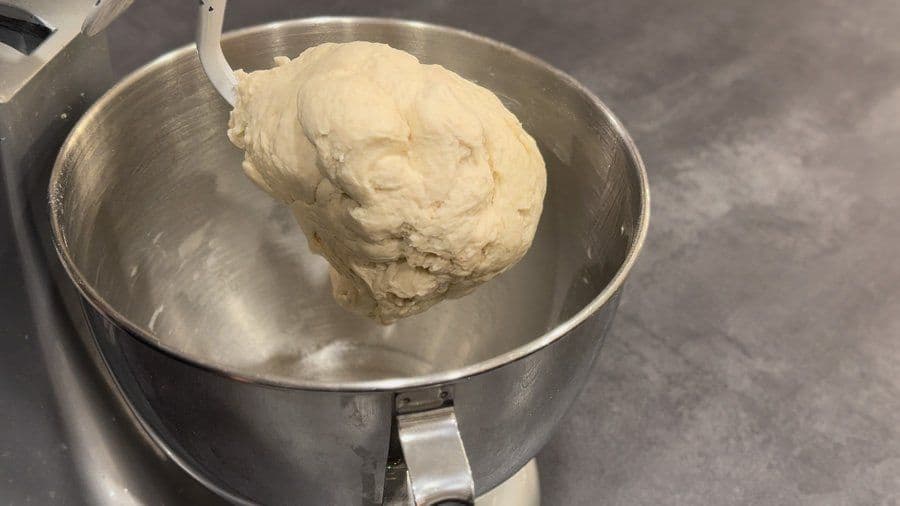
Stop the mixer, add the olive oil and knead on low speed for 1 minute. After 1 minute, remove the dough from the dough hook, place in the bowl of the mixer and knead for 30 seconds to a minute.
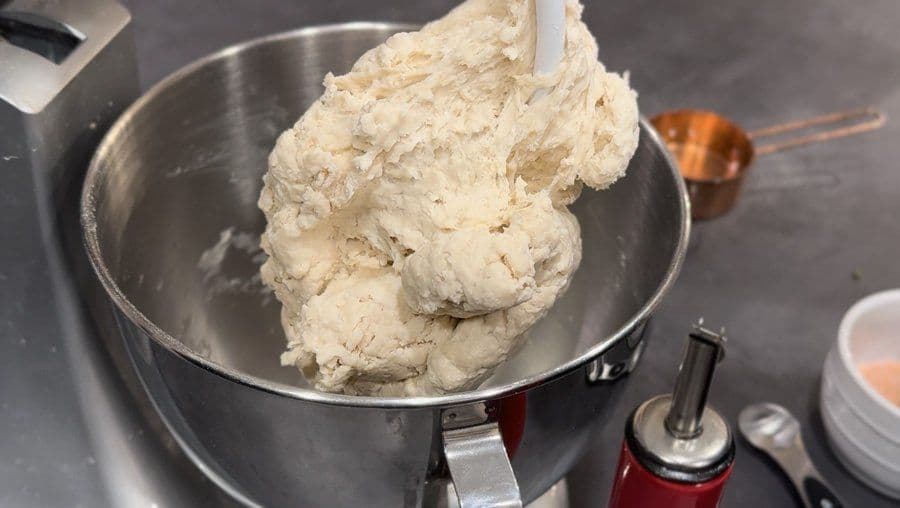
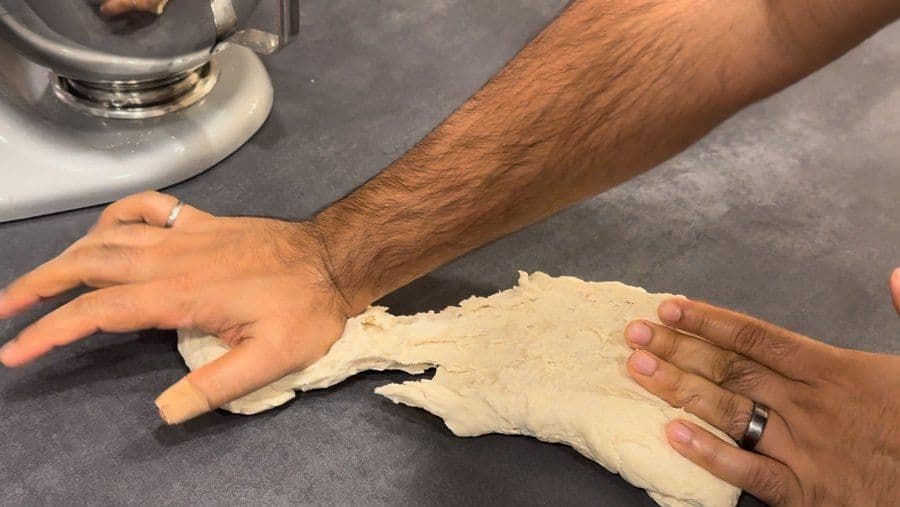
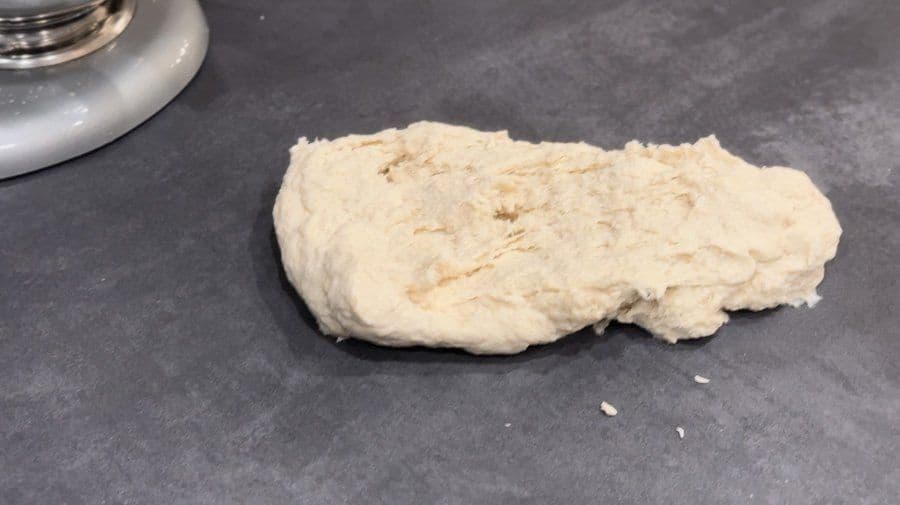
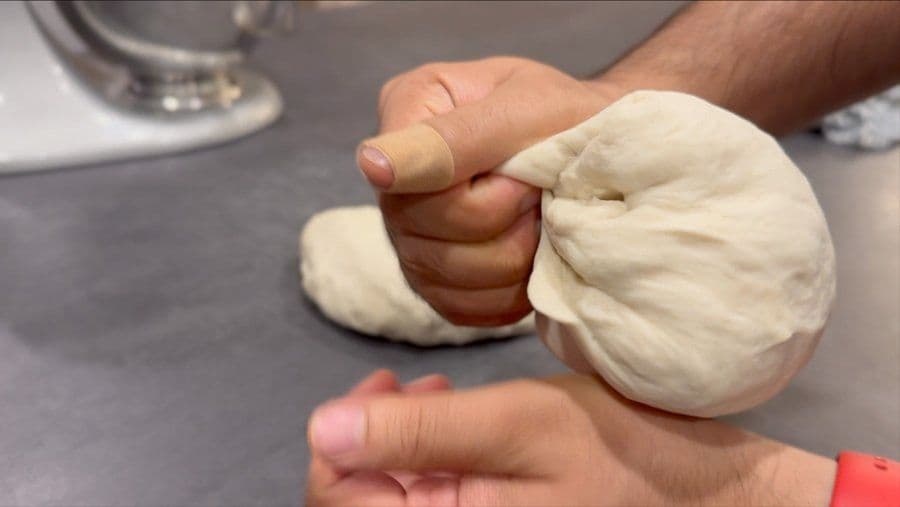
Then, transfer the dough to your countertop and continue kneading, stretch and fold the dough for 1-2 minutes.
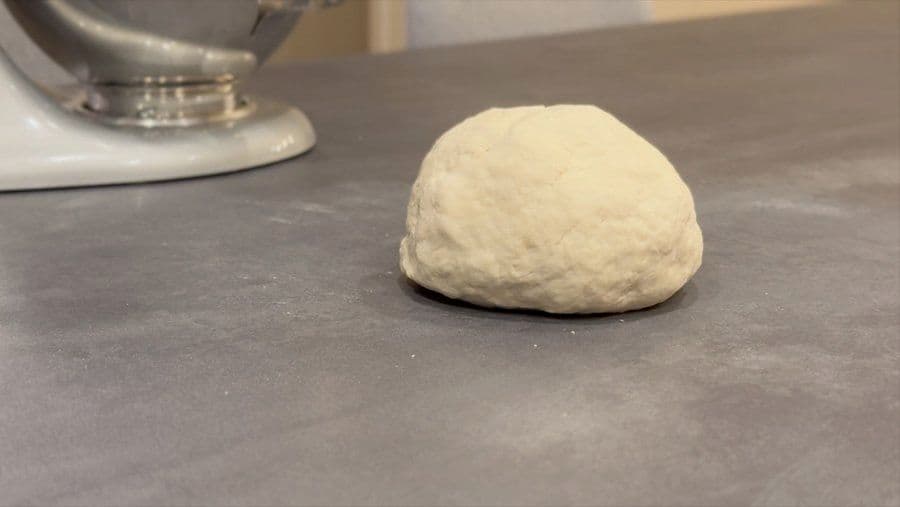
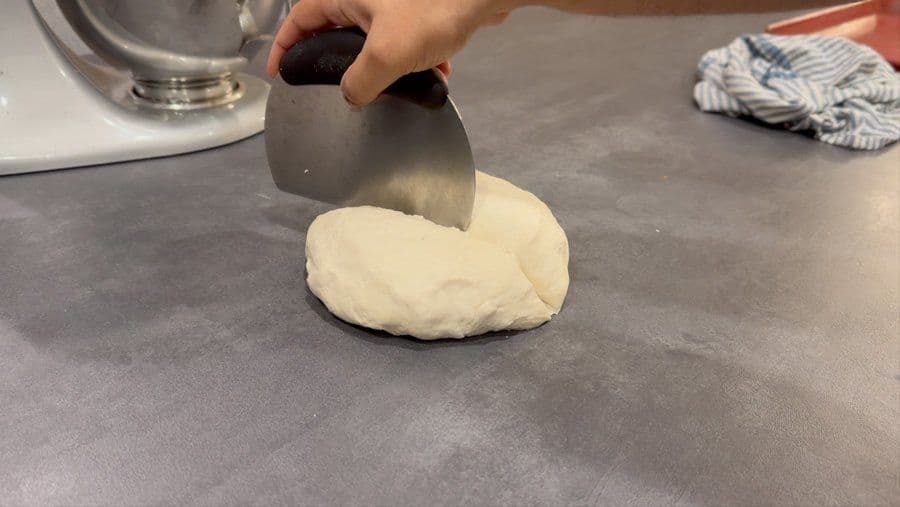
Then, portion the dough into 2 equal parts and for each portion fold the dough onto itself to create a tight surface tension as you seal/pinch the folds. Be careful not to de-gas the dough too much. The portions should resemble a ball of fresh mozzarella. This is a great time to freeze any dough you are not planning to use right away.
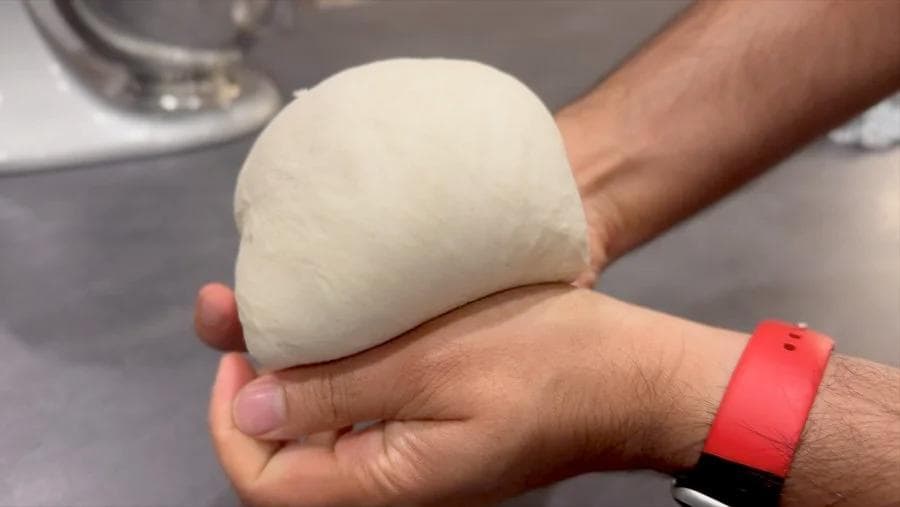
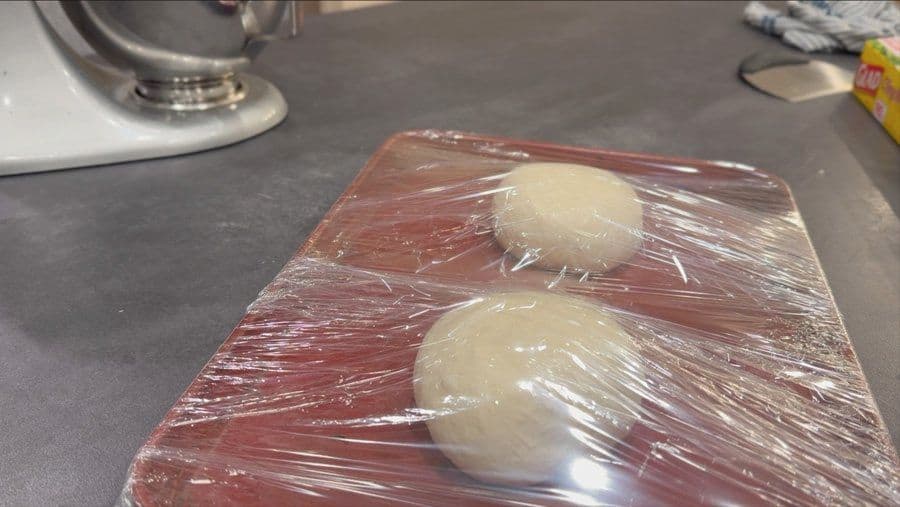
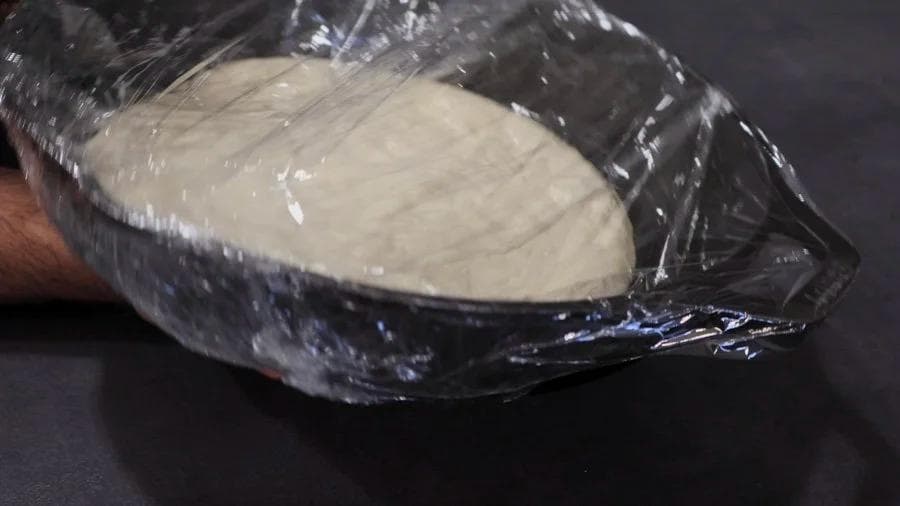
Transfer the dough portions to a baking sheet or plate and cover with 2 layers of plastic wrap. Let the dough rise for at least 24 hours in the refrigerator.
For the Sauce
In a bowl, combine all the ingredients for the sauce and mix well. Adjust with salt for seasoning. If you want more details about this quick no-cook pizza sauce, be sure to check out the recipe here.
For the Pizza
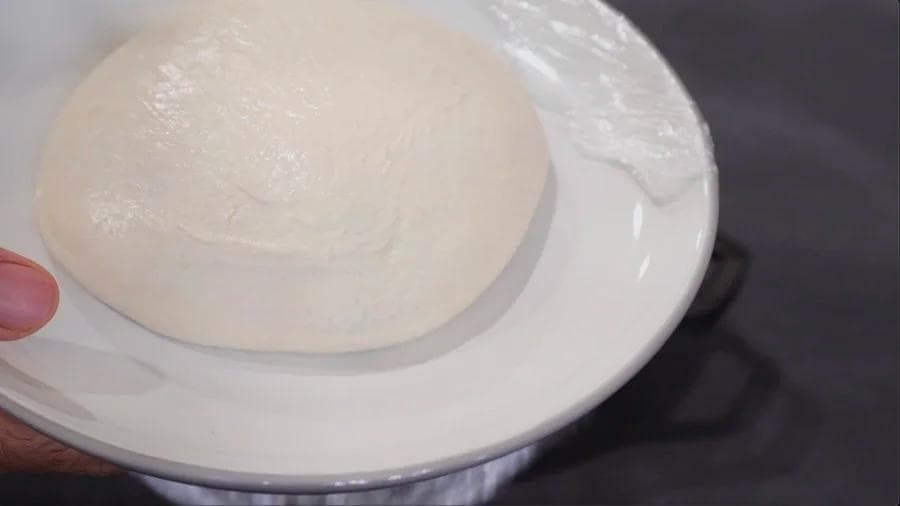
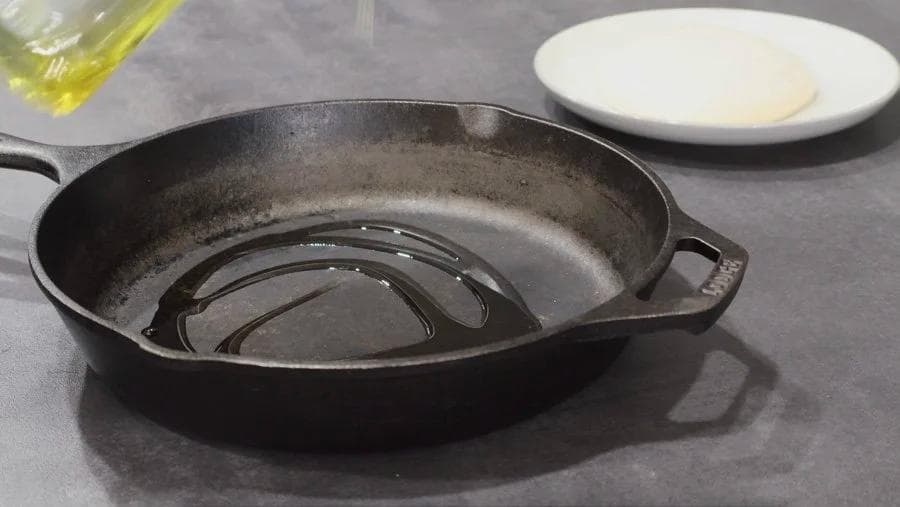
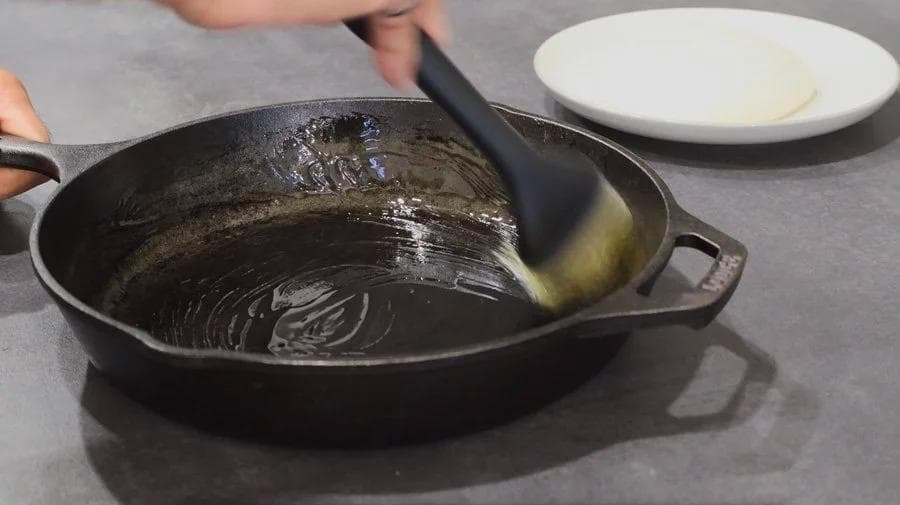
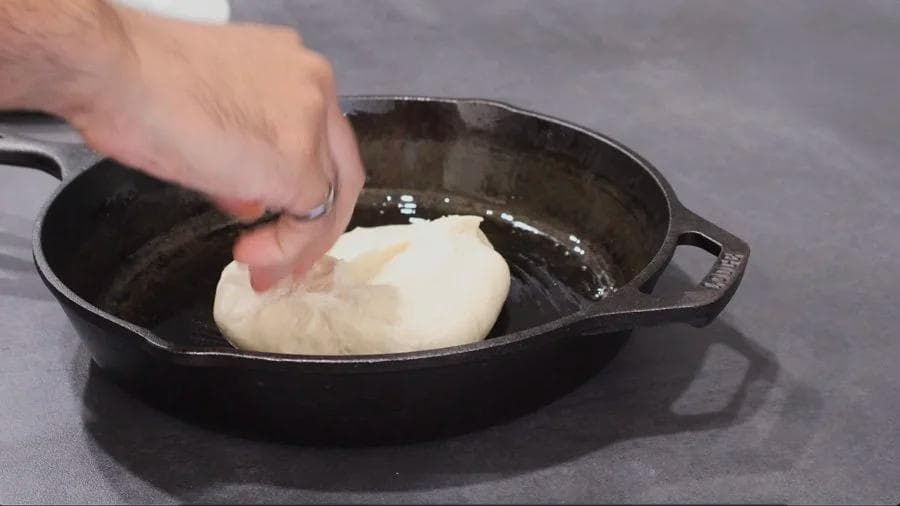
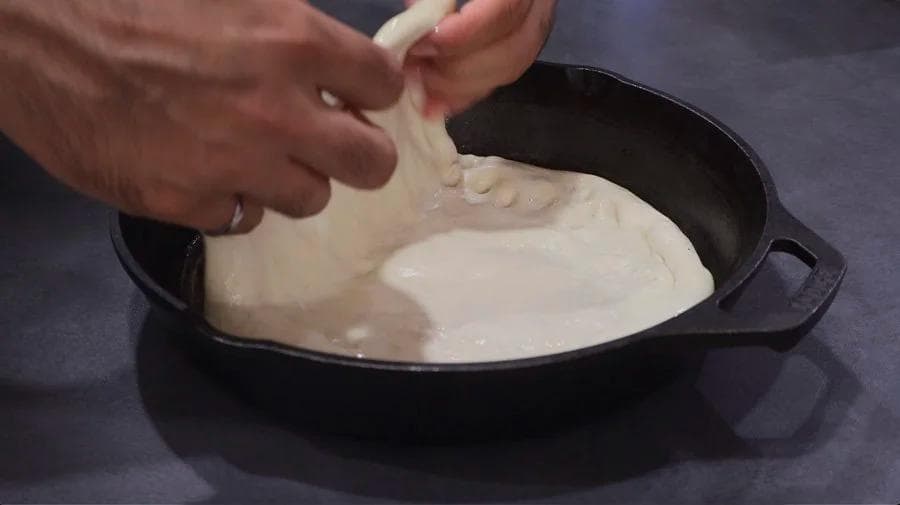
Prepare a 12-inch cast iron pan by coating the bottom and sides with olive oil. Carefully transfer one portion of the proofed dough into the pan, turning it to coat both sides with oil.
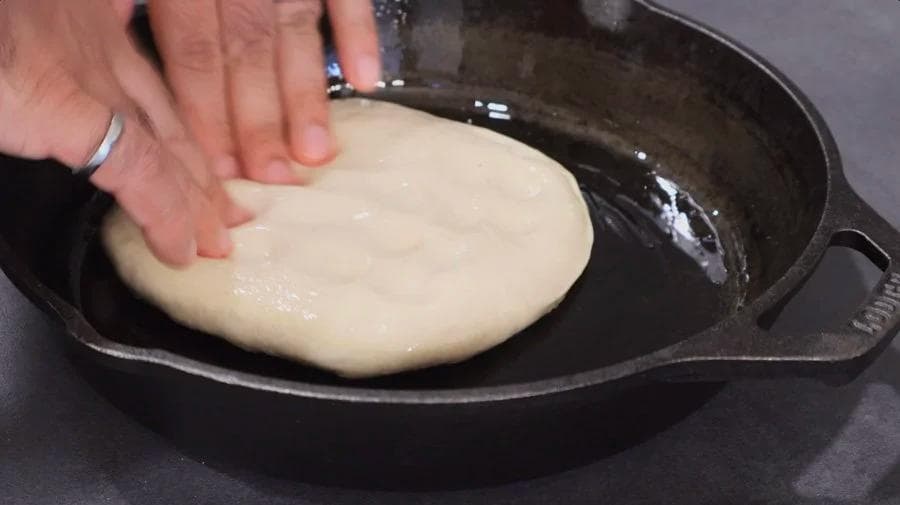
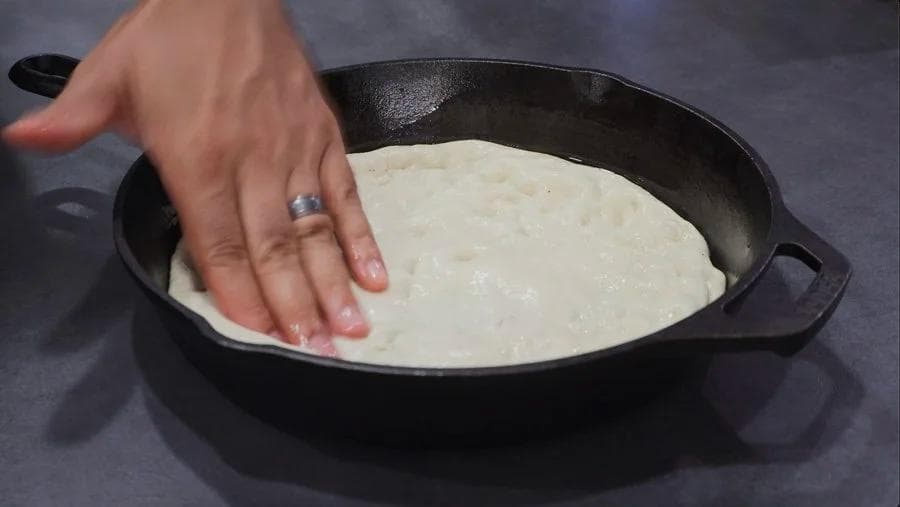
Using your fingertips, press and dimple the dough to help spread it across the pan. It may not reach the edges at this stage — that’s fine. Cover the pan with plastic wrap and let the dough proof for 1–2 hours.
About 1 1/2 hours before baking, preheat your oven to 500°F (260°C).
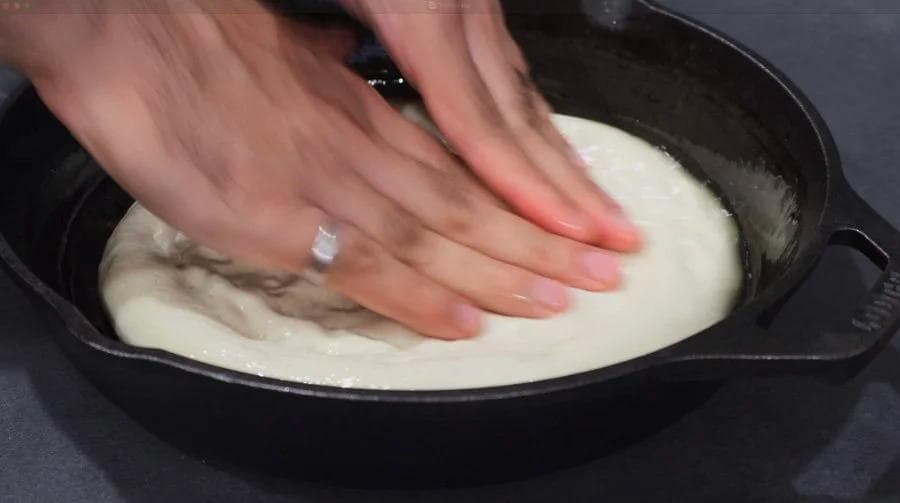
Once the oven is ready, remove the plastic wrap and gently stretch the dough again — it should now be relaxed enough to reach the edges of the pan.
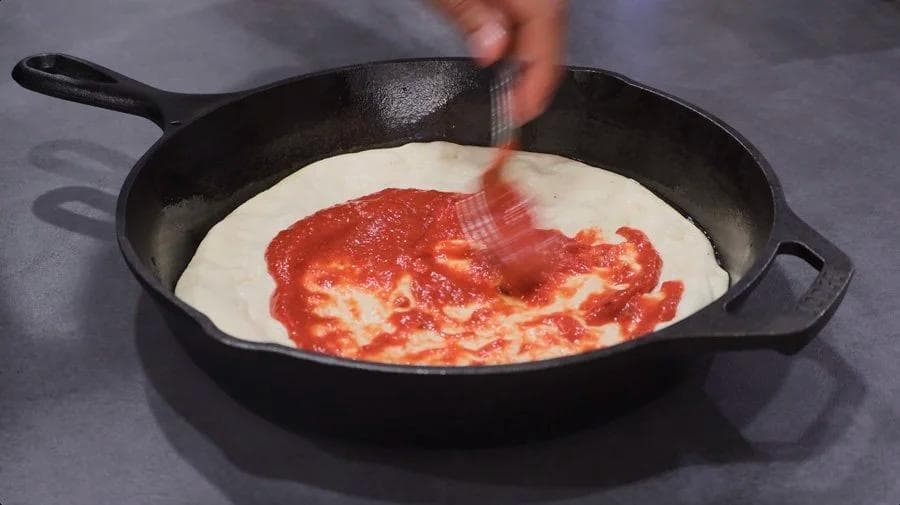
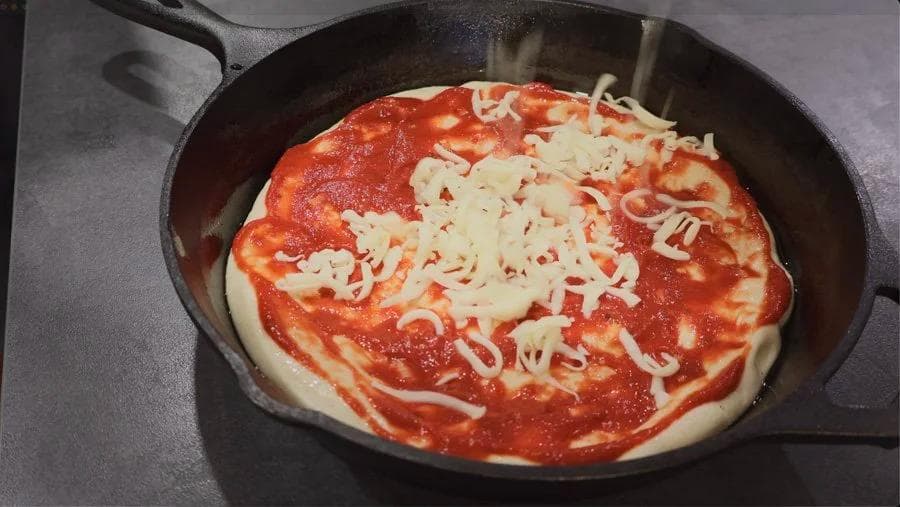
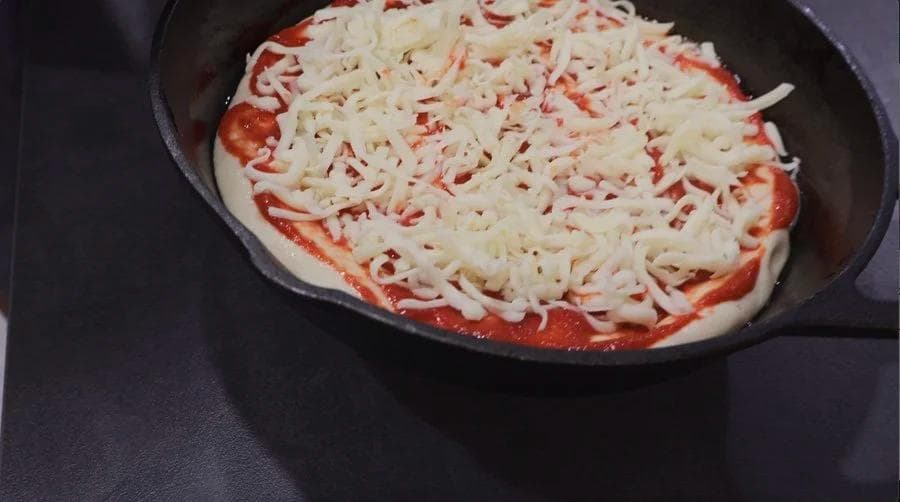
Spread pizza sauce evenly over the dough, then add cheese and any toppings of your choice.
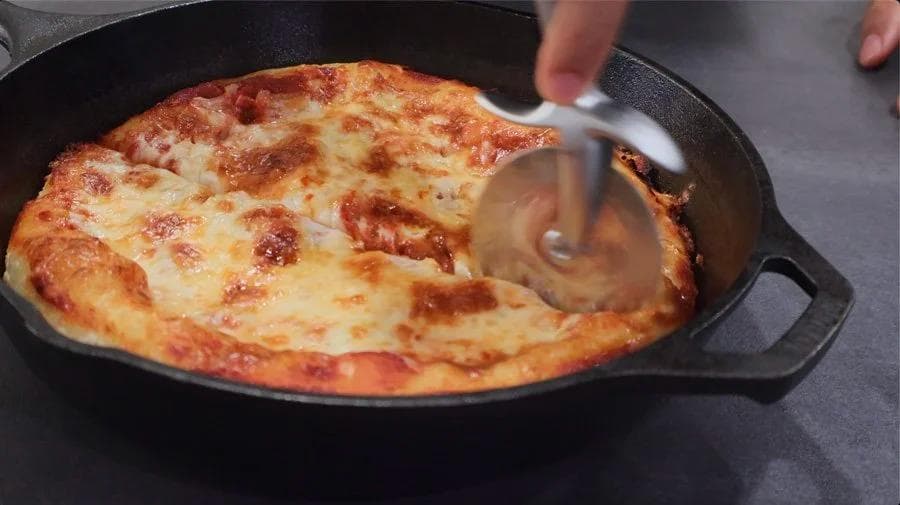
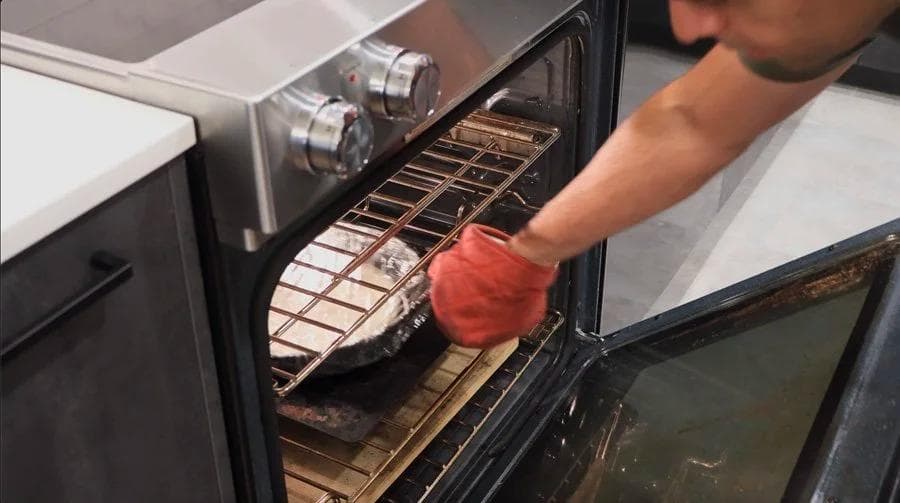
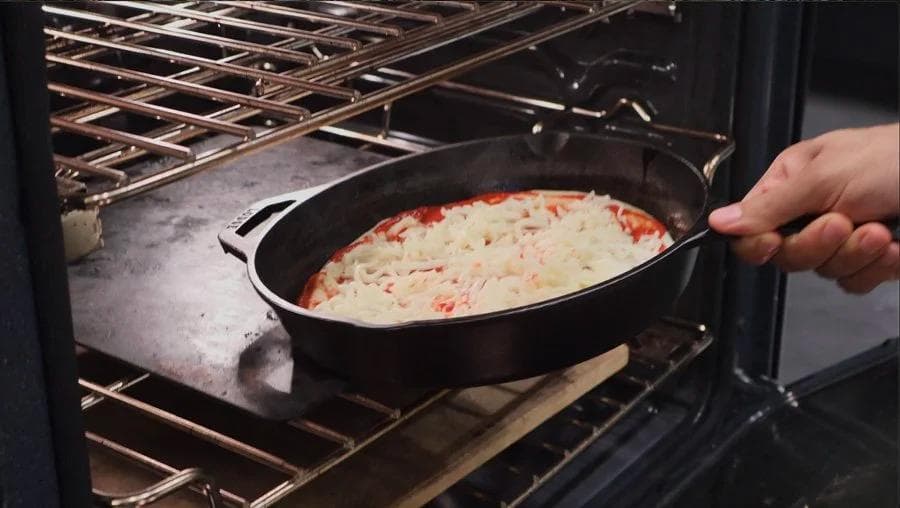
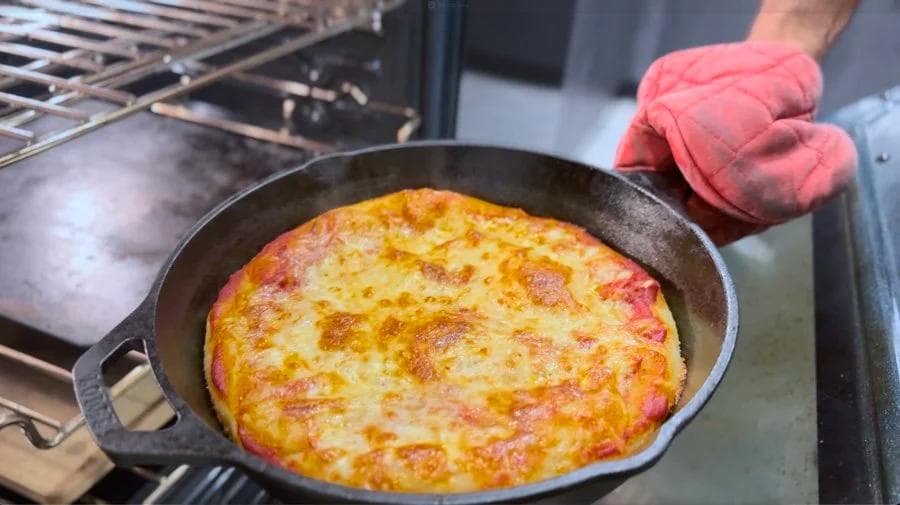
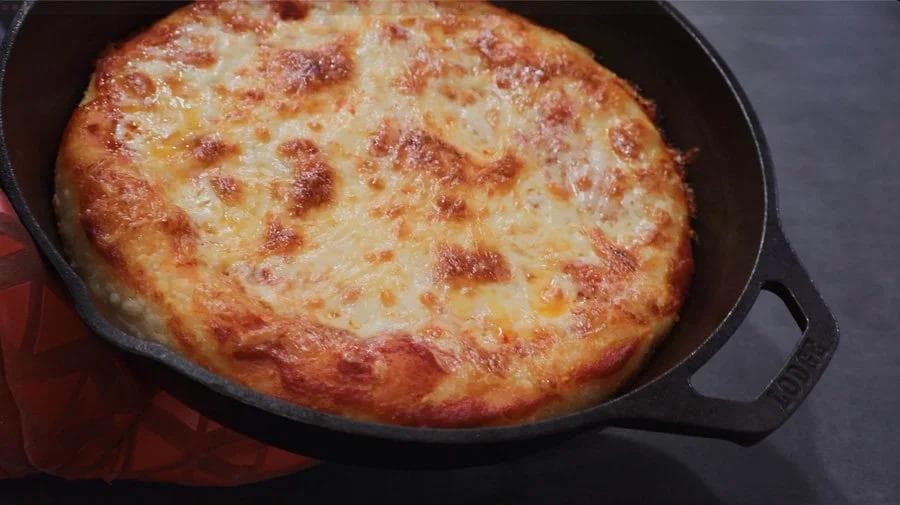
Place the pan on the middle rack of the oven and bake for 12–16 minutes, rotating the pan 180° halfway through. The pizza is ready when the crust is golden brown and the cheese is bubbling with light browning.
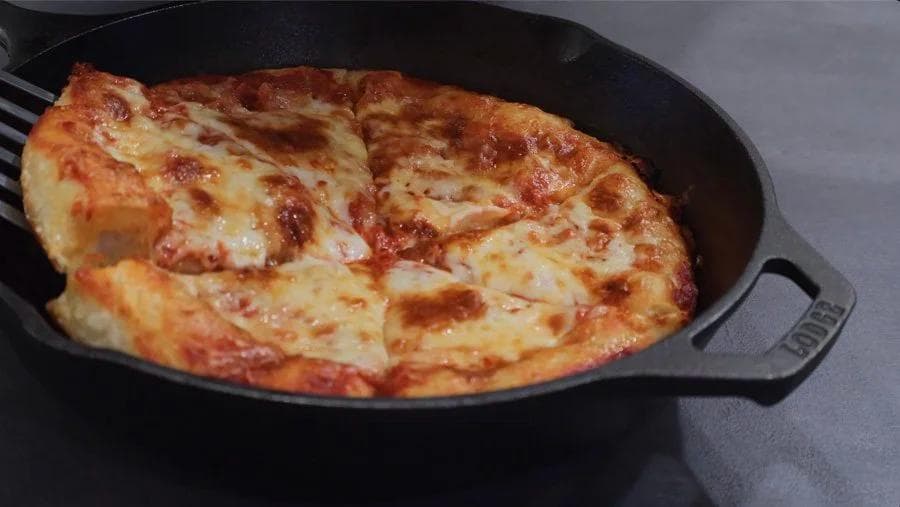
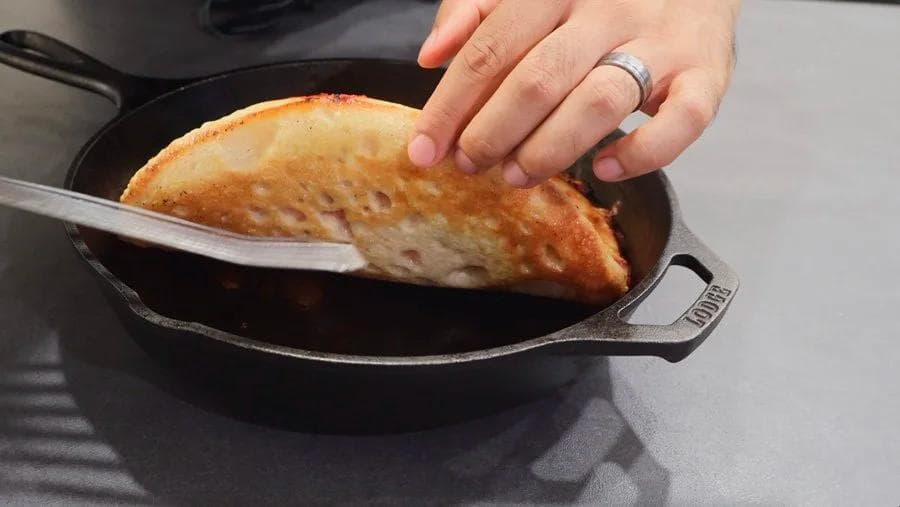
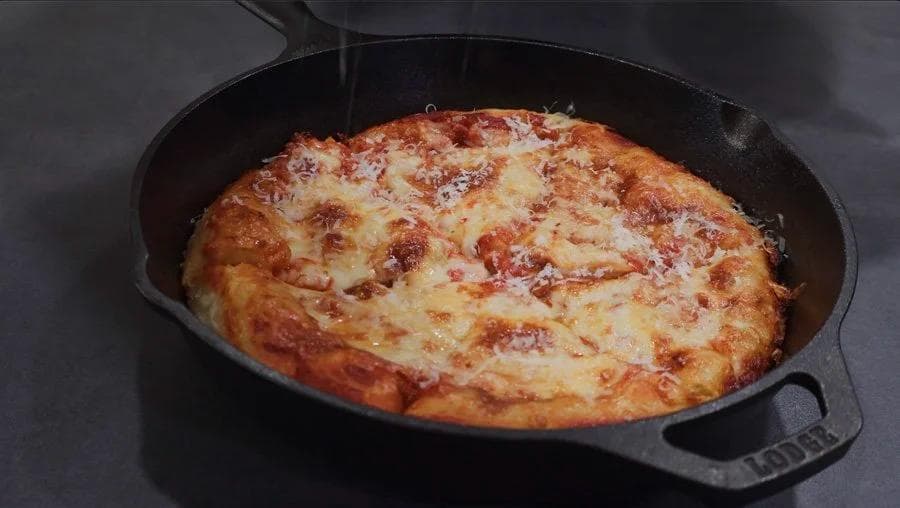
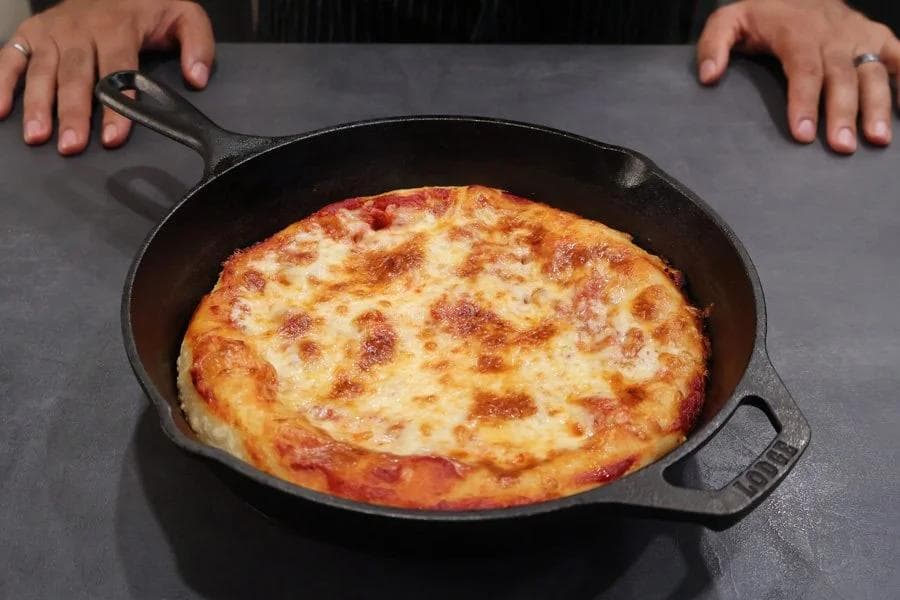
Remove the pan from the oven, top with a dusting of Parmesan, and let the pizza rest for about 5 minutes before slicing and serving.
Topping Ideas
For demonstration purposes, I kept this pan pizza recipe nice and simple with cheese. However, I actually do really love toppings on my pizza! You can really top your pizza however you would like. Here are some staple ideas:
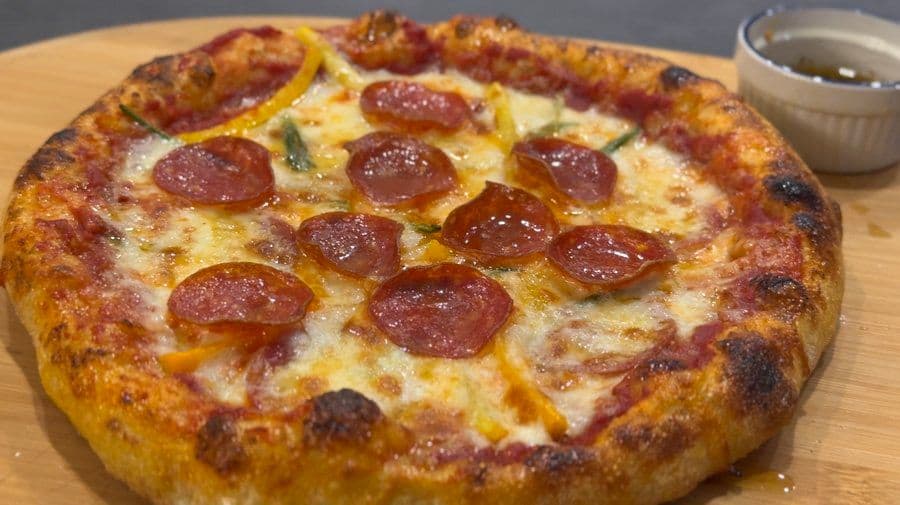
Pepperoni
Ham
Canadian bacon
Crispy chicken: Buffalo chicken pizza would be absolutely amazing! Check out how to make the perfect buffalo chicken for your pizza here.
Meatballs: See how to make the juiciest meatballs ever here!
Chorizo
Greens: Arugula, spinach to be added when the pizza has finished baking.
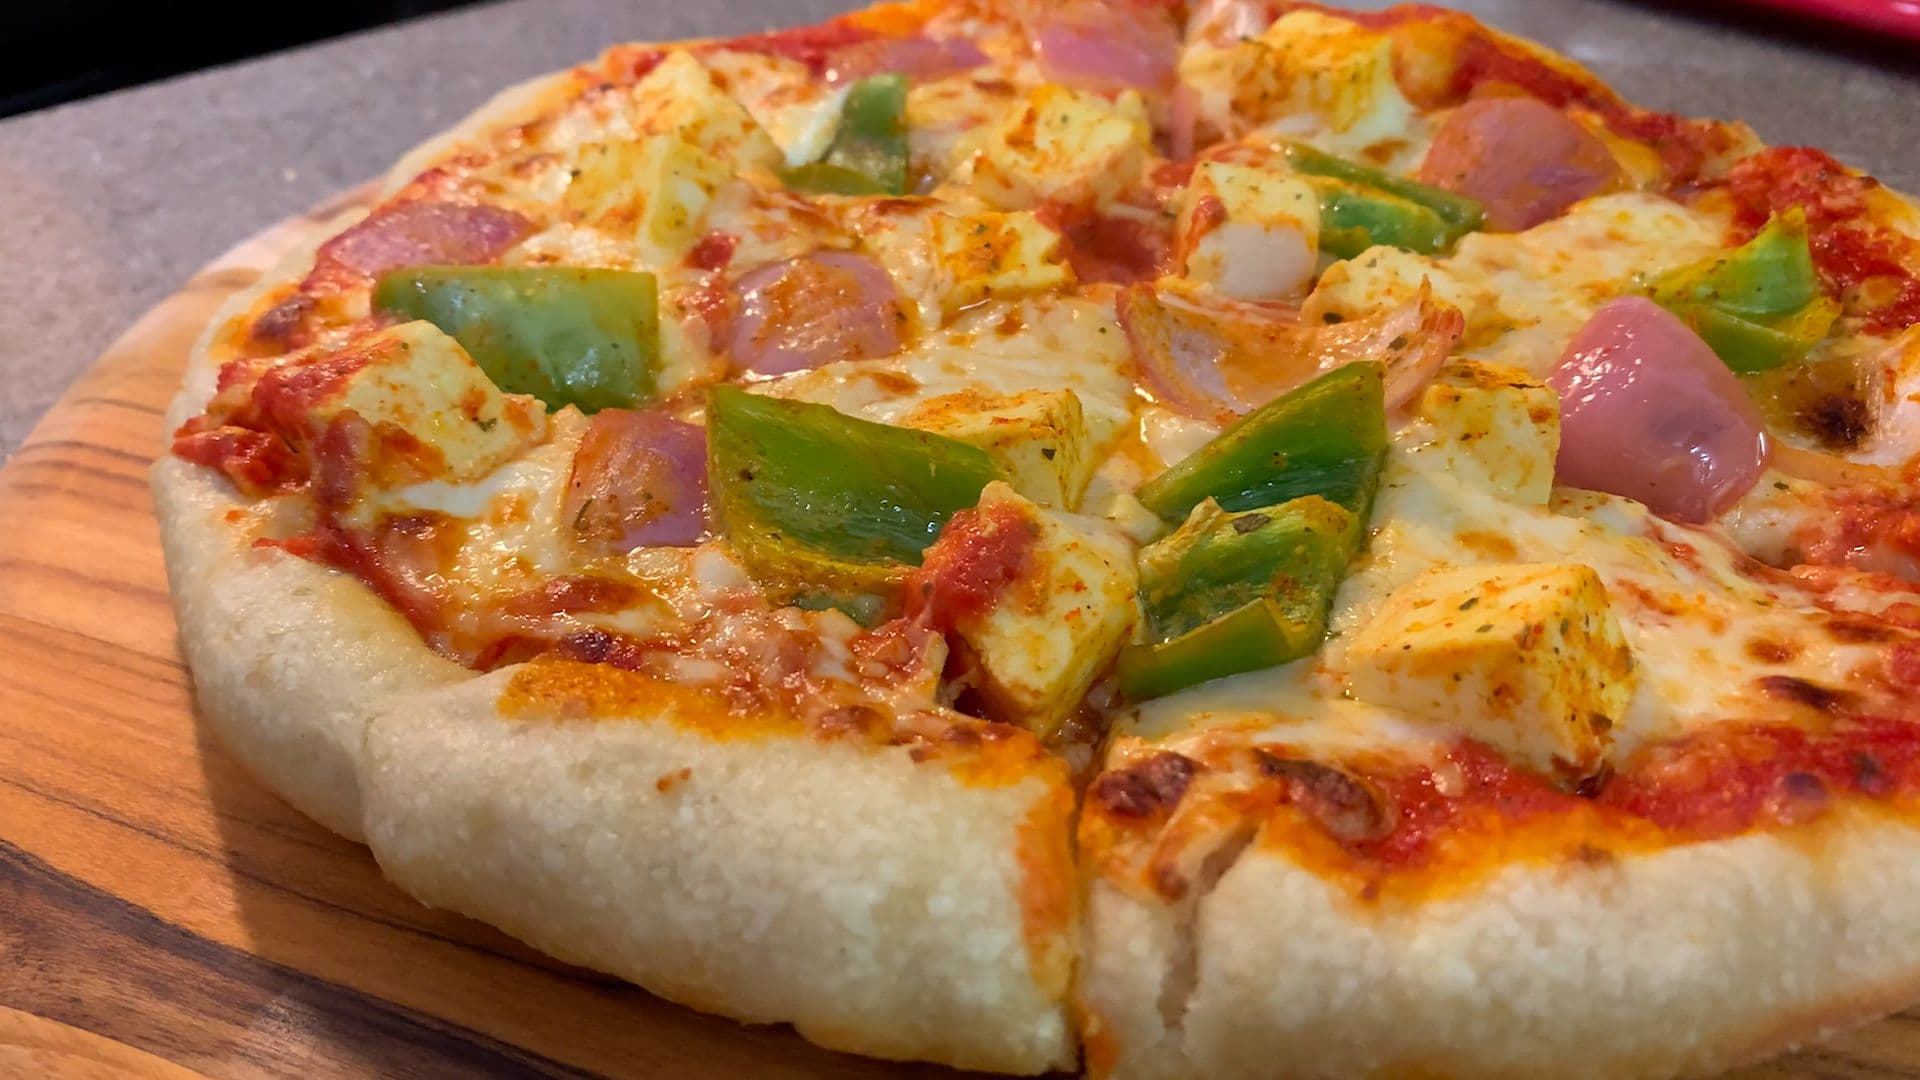
Chicken tikka: One of my favorites from Pizza Hut India! You can make authentic chicken tikka in your oven or in your air fryer. You could also top the pizza with Makhani Sauce for a truly Indian-fusion experience!
Paneer tikka: The vegetarian version of the above. See how to easily make paneer tikka in the air fryer here!
4 cheese: You could do fresh mozzarella, provolone, Parmesan, and goat’s cheese.
Basil: Freshly chopped basil leaves for garnish.
Oil: You could brush your crust simply with olive oil or chili garlic oil.
Tips for Making the Ultimate Pan Pizza Recipe
If the yeast doesn’t dissolve after mixing, the yeast is likely dead. As a result, it’s best to start over.
Avoid degassing the dough too much as you are folding the individual portions onto itself. If you over-work the dough, it will start to resist as you start to stretch the dough for the pizza.
My recommendation for the pizza sauce is to use passata strained tomatoes because it’s the quickest way of preparing the tastiest raw tomato sauce for pizza.
You want to preheat your oven to its highest temperature for at least one hour before baking the pizza. This will help heat the cast iron pan really well to develop the crispy crust and bake the pizza evenly.
Don’t forget toppings temperature. Take cheese, sauce, and any cold toppings out of the fridge 30 minutes before baking. This helps the pizza cook evenly.
What to Have with Cast Iron Pan Pizza
Want to make this a true pizza party right from home? Here are some sides that you can enjoy with your pizza to have an unforgettable party!
It is probably unlikely that there will be any leftover pan pizza, but if there are, then don’t worry! I recommend you individually wrap leftover slices in plastic wrap and store them in the fridge. The best way to reheat your pizza slices is in the air fryer. Place the slices in the air fryer at 350 F on the Reheat setting for 4 to 5 minutes. If you don’t have an air fryer, the next best way to reheat the pizza is to use the microwave to heat the cheese for about 45 seconds. Then, finish reheating by transferring the slices onto a hot skillet on medium heat to get the crust nice and crispy. Reheating in the microwave alone always leads to a soggy crust, so I strongly urge you to avoid it unless you really don’t mind!
Let me know what you think of this recipe in the comments! If you’ve tried this recipe, be sure to post it on social media and tag it with #cookingwithanadi and mention me @cooking.with.anadi. Thank you!
Recipe by Anadi Misra
The Most Amazing Cast Iron Pan Pizza Recipe
Make the most amazing cast iron pan pizza at home with a perfectly crispy crust and bubbly cheese. Easy to follow and better than delivery, this recipe will become your new favorite.
Add yeast and ¼ cup of lukewarm water to a bowl and whisk until water is bubbly. Mix until you see no granules of yeast floating on the water. If the yeast doesn't dissolve, the yeast is likely dead and you will have to start over with fresh yeast.
Add yeast and ¼ cup of lukewarm water to a bowl and whisk until water is bubbly. Mix until you see no granules of yeast floating on the water. If the yeast doesn't dissolve, the yeast is likely dead and you will have to start over with fresh yeast.
2
Add flour to the bowl of your kitchen aid mixer and add all of the yeast-water mixture. Then, slowly add most of the cold water while continuing to knead with the dough hook. Add the remaining cold water back into the bowl and swirl and add to the dough.
Add flour to the bowl of your kitchen aid mixer and add all of the yeast-water mixture. Then, slowly add most of the cold water while continuing to knead with the dough hook. Add the remaining cold water back into the bowl and swirl and add to the dough.
3
Knead until the dough comes together and you have a soft, pliable dough which is not sticky to touch. Add more flour/water as required to reach this consistency.
Knead until the dough comes together and you have a soft, pliable dough which is not sticky to touch. Add more flour/water as required to reach this consistency.
4
Stop the mixer and add the salt. Knead on low speed for 1 minute.
Stop the mixer and add the salt. Knead on low speed for 1 minute.
5
Stop the mixer, add the olive oil and knead on low speed for 1 minute. After 1 minute, remove the dough from the dough hook, place in the bowl of the mixer and knead for 30 seconds to a minute.
Stop the mixer, add the olive oil and knead on low speed for 1 minute. After 1 minute, remove the dough from the dough hook, place in the bowl of the mixer and knead for 30 seconds to a minute.
6
Then, transfer the dough to your countertop and continue kneading, stretch and fold the dough for 1-2 minutes.
Then, transfer the dough to your countertop and continue kneading, stretch and fold the dough for 1-2 minutes.
7
Form the dough into a ball and set aside on the countertop/bowl. Cover with a damp kitchen towel and let rest for 20 minutes.
Form the dough into a ball and set aside on the countertop/bowl. Cover with a damp kitchen towel and let rest for 20 minutes.
8
Then, portion the dough into 2 equal parts and for each portion fold the dough onto itself to create a tight surface tension as you seal/pinch the folds. Be careful not to de-gas the dough too much. The portions should resemble a ball of fresh mozzarella. This is a great time to freeze any dough you are not planning to use right away.
Then, portion the dough into 2 equal parts and for each portion fold the dough onto itself to create a tight surface tension as you seal/pinch the folds. Be careful not to de-gas the dough too much. The portions should resemble a ball of fresh mozzarella. This is a great time to freeze any dough you are not planning to use right away.
9
Transfer the dough portions to a baking sheet or plate and cover with 2 layers of plastic wrap. Let the dough rise for at least 24-72 hours in the refrigerator.
Transfer the dough portions to a baking sheet or plate and cover with 2 layers of plastic wrap. Let the dough rise for at least 24-72 hours in the refrigerator.
For the pizza sauce
1
In a bowl, combine all the ingredients for the sauce and mix well. Adjust with salt for seasoning.
In a bowl, combine all the ingredients for the sauce and mix well. Adjust with salt for seasoning.
For the pizzas
1
Prepare a 10.25 inch cast iron pan by coating the bottom and sides with olive oil. Carefully transfer one portion of the proofed dough into the pan, turning it to coat both sides with oil.
Prepare a 10.25 inch cast iron pan by coating the bottom and sides with olive oil. Carefully transfer one portion of the proofed dough into the pan, turning it to coat both sides with oil.
2
Using your fingertips, press and dimple the dough to help spread it across the pan. It may not reach the edges at this stage — that’s fine. Cover the pan with plastic wrap and let the dough proof for 1–2 hours.
Using your fingertips, press and dimple the dough to help spread it across the pan. It may not reach the edges at this stage — that’s fine. Cover the pan with plastic wrap and let the dough proof for 1–2 hours.
3
About 1 1/2 hours before baking, preheat your oven to 500°F (260°C).
About 1 1/2 hours before baking, preheat your oven to 500°F (260°C).
4
Once the oven is ready, remove the plastic wrap and gently stretch the dough again — it should now be relaxed enough to reach the edges of the pan.
Once the oven is ready, remove the plastic wrap and gently stretch the dough again — it should now be relaxed enough to reach the edges of the pan.
5
Spread pizza sauce evenly over the dough, then add cheese and any toppings of your choice.
Spread pizza sauce evenly over the dough, then add cheese and any toppings of your choice.
6
Place the pan on the middle rack of the oven and bake for 12–16 minutes, rotating the pan 180° halfway through. The pizza is ready when the crust is golden brown and the cheese is bubbling with light browning.
Place the pan on the middle rack of the oven and bake for 12–16 minutes, rotating the pan 180° halfway through. The pizza is ready when the crust is golden brown and the cheese is bubbling with light browning.
7
Remove the pan from the oven, top with a dusting of Parmesan, and let the pizza rest for about 5 minutes before slicing and serving.
Remove the pan from the oven, top with a dusting of Parmesan, and let the pizza rest for about 5 minutes before slicing and serving.
Nutrition per serving
959
Calories
36g
Protein
134g
Carbs
31g
Fat
7g
Fiber
8g
Sugar
2398mg
Sodium
Share This Recipe
Did you make this recipe? Tag @cooking.with.anadi on Instagram and hashtag it #cookingwithanadi
Tested & written in Anadi’s kitchen
Free weekly newsletter
Like this recipe? Get more every week.
New recipes, cooking tips, and behind-the-scenes from Anadi's kitchen.
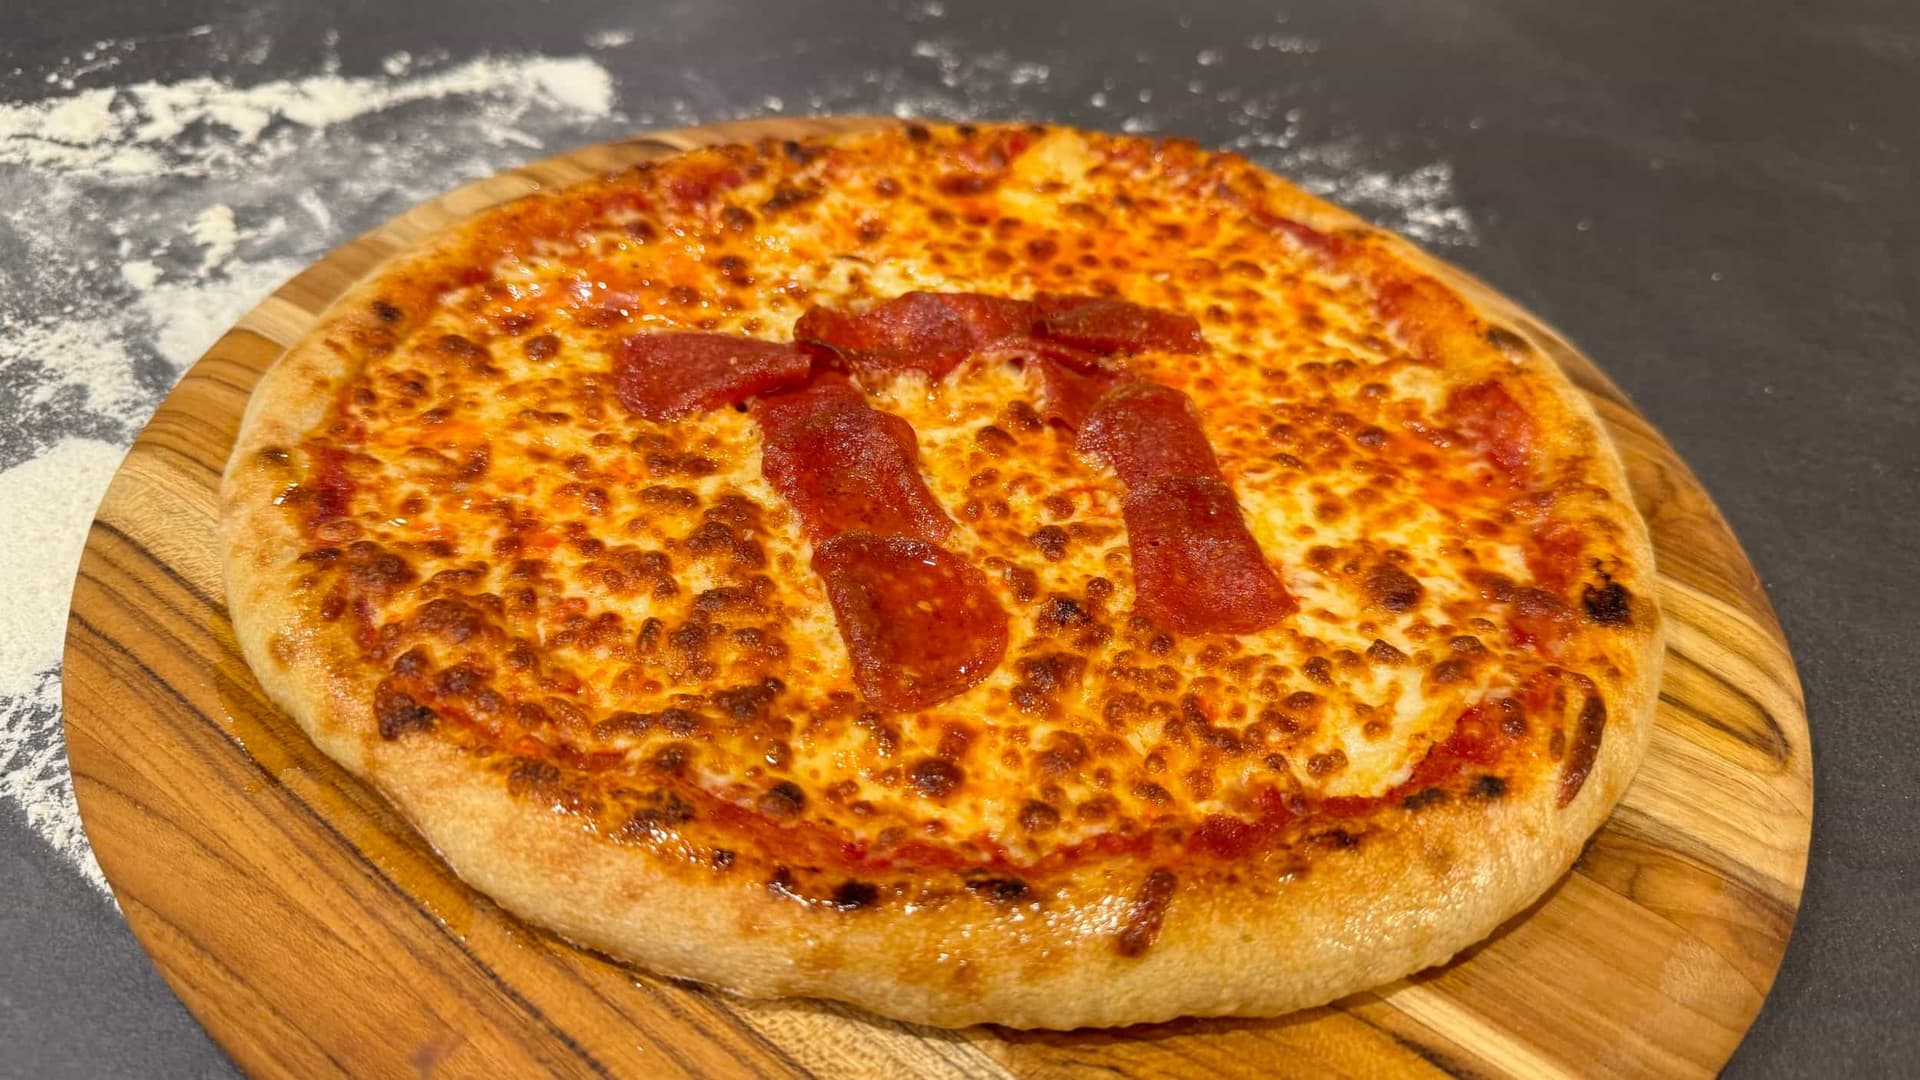
Celebrate Pi Day with a homemade pizza recipe that is easy, fun, and delicious. Perfect for a Pi Day pizza party, this crowd-pleasing pie is simple enough for anyone to make at home.
34 minHard3 pizzas
Recipe history
April 16, 2026 — Reworked and refreshed for the 2026 relaunch — new photography, restructured and standardized ingredients & instructions.
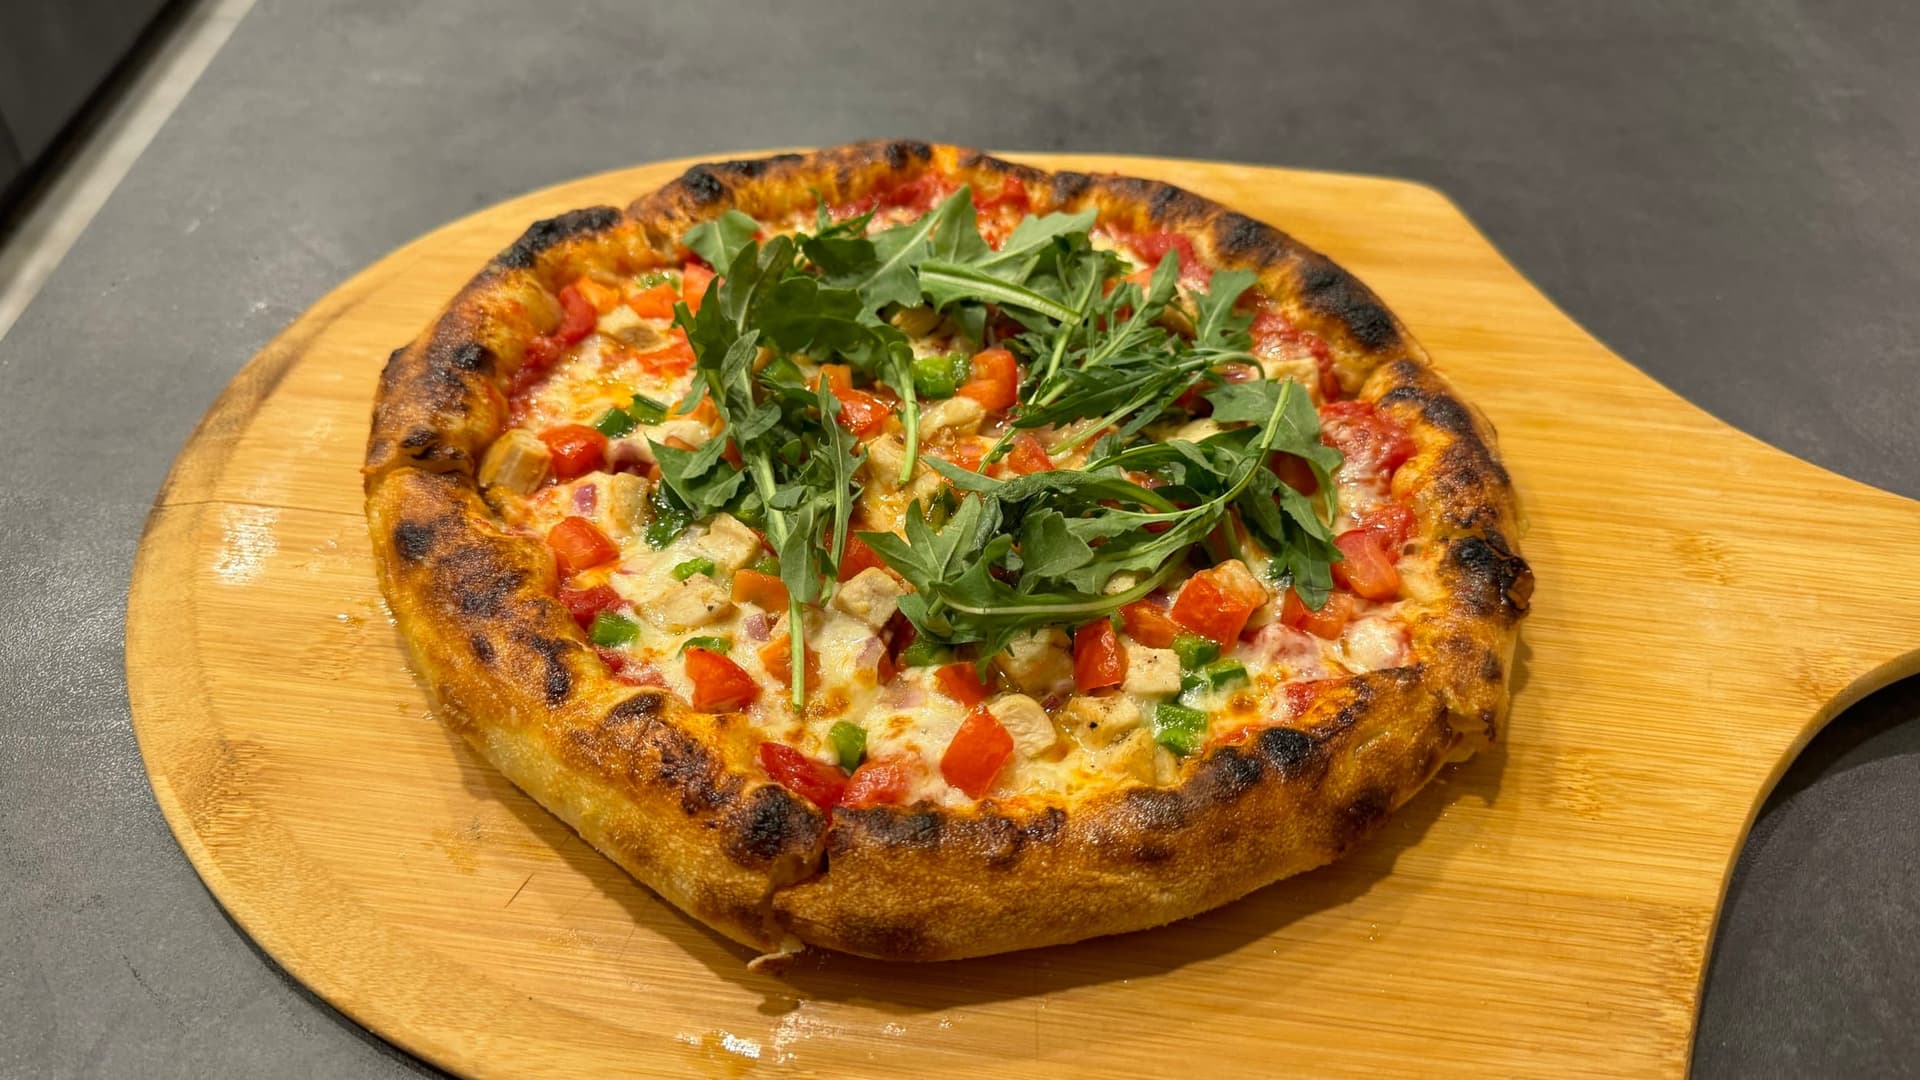
Craving pizza without the guilt? This heart-healthy pizza recipe delivers all the cheesy, crispy satisfaction you love with better-for-you ingredients. Make it at home tonight!
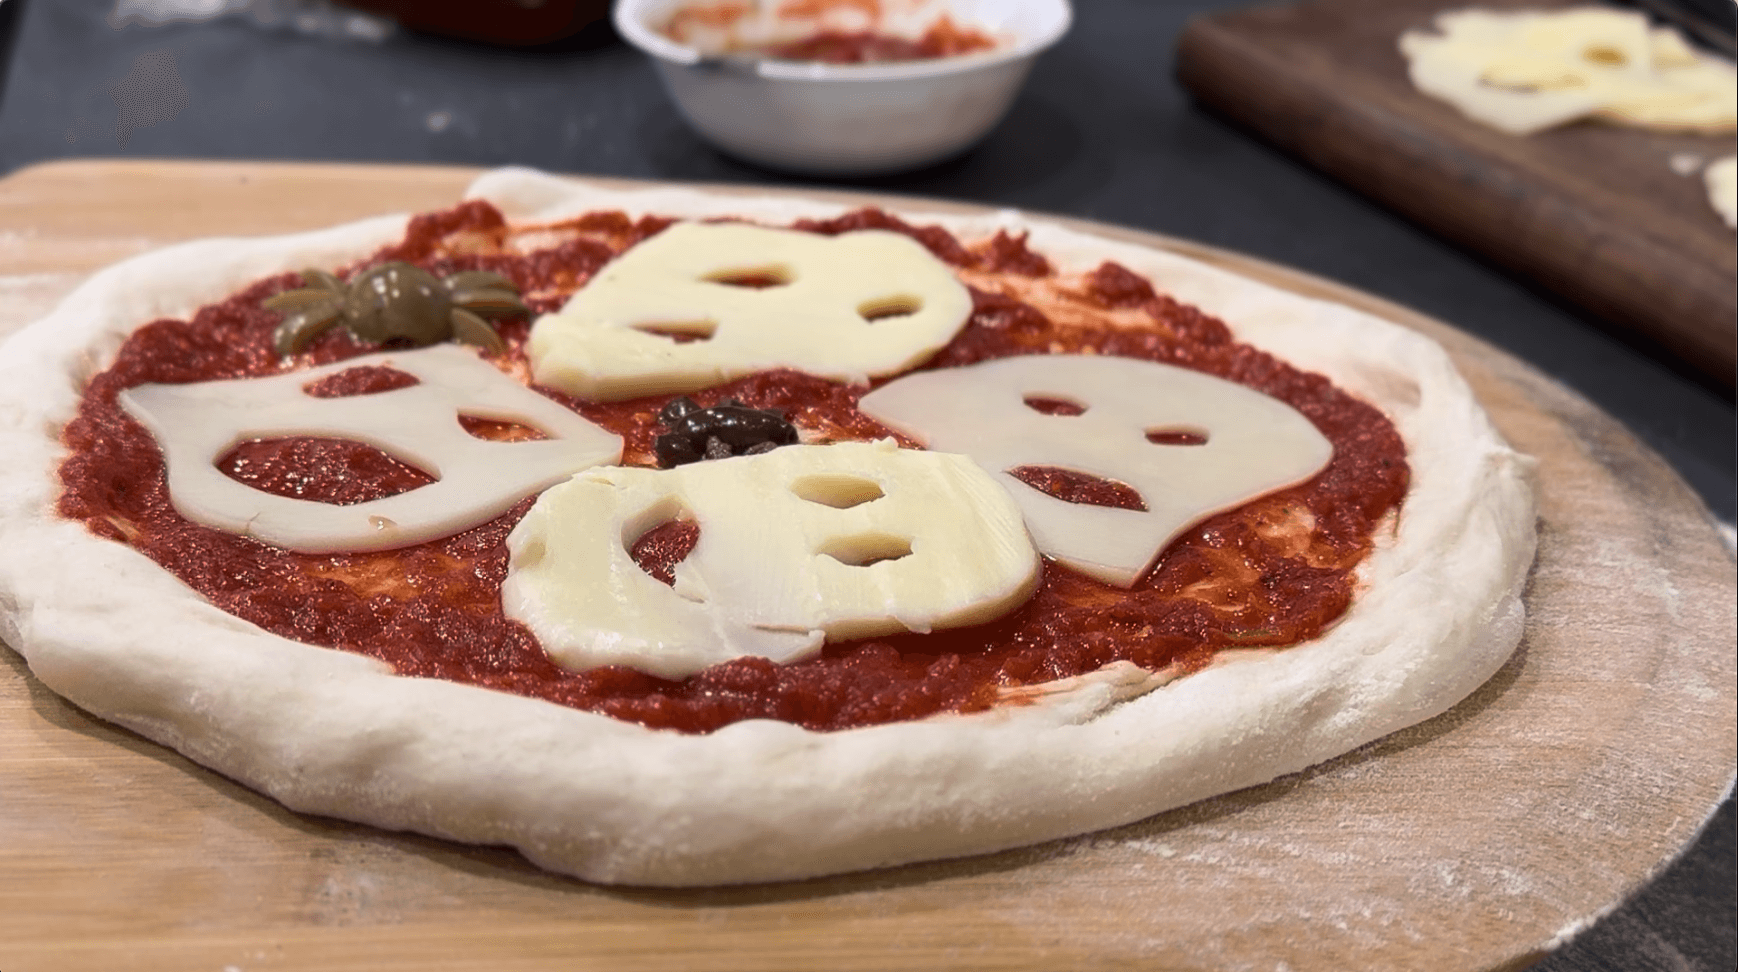
Make spooky Halloween pizza at home with this fun, easy recipe! Perfect for families and kids, it delivers crispy, creative results that turn pizza night into an unforgettable holiday tradition.
Make paneer tikka pan pizza at home without an oven! This Indian fusion recipe combines crispy crust with creamy, spiced paneer for a quick and flavorful vegetarian meal the whole family will love.
Cheesy, bold, and loaded with 5 peppers — this Napoletana Pizza recipe brings serious flavor to your kitchen. Perfect for pepper lovers who want an easy, impressive homemade pizza night.
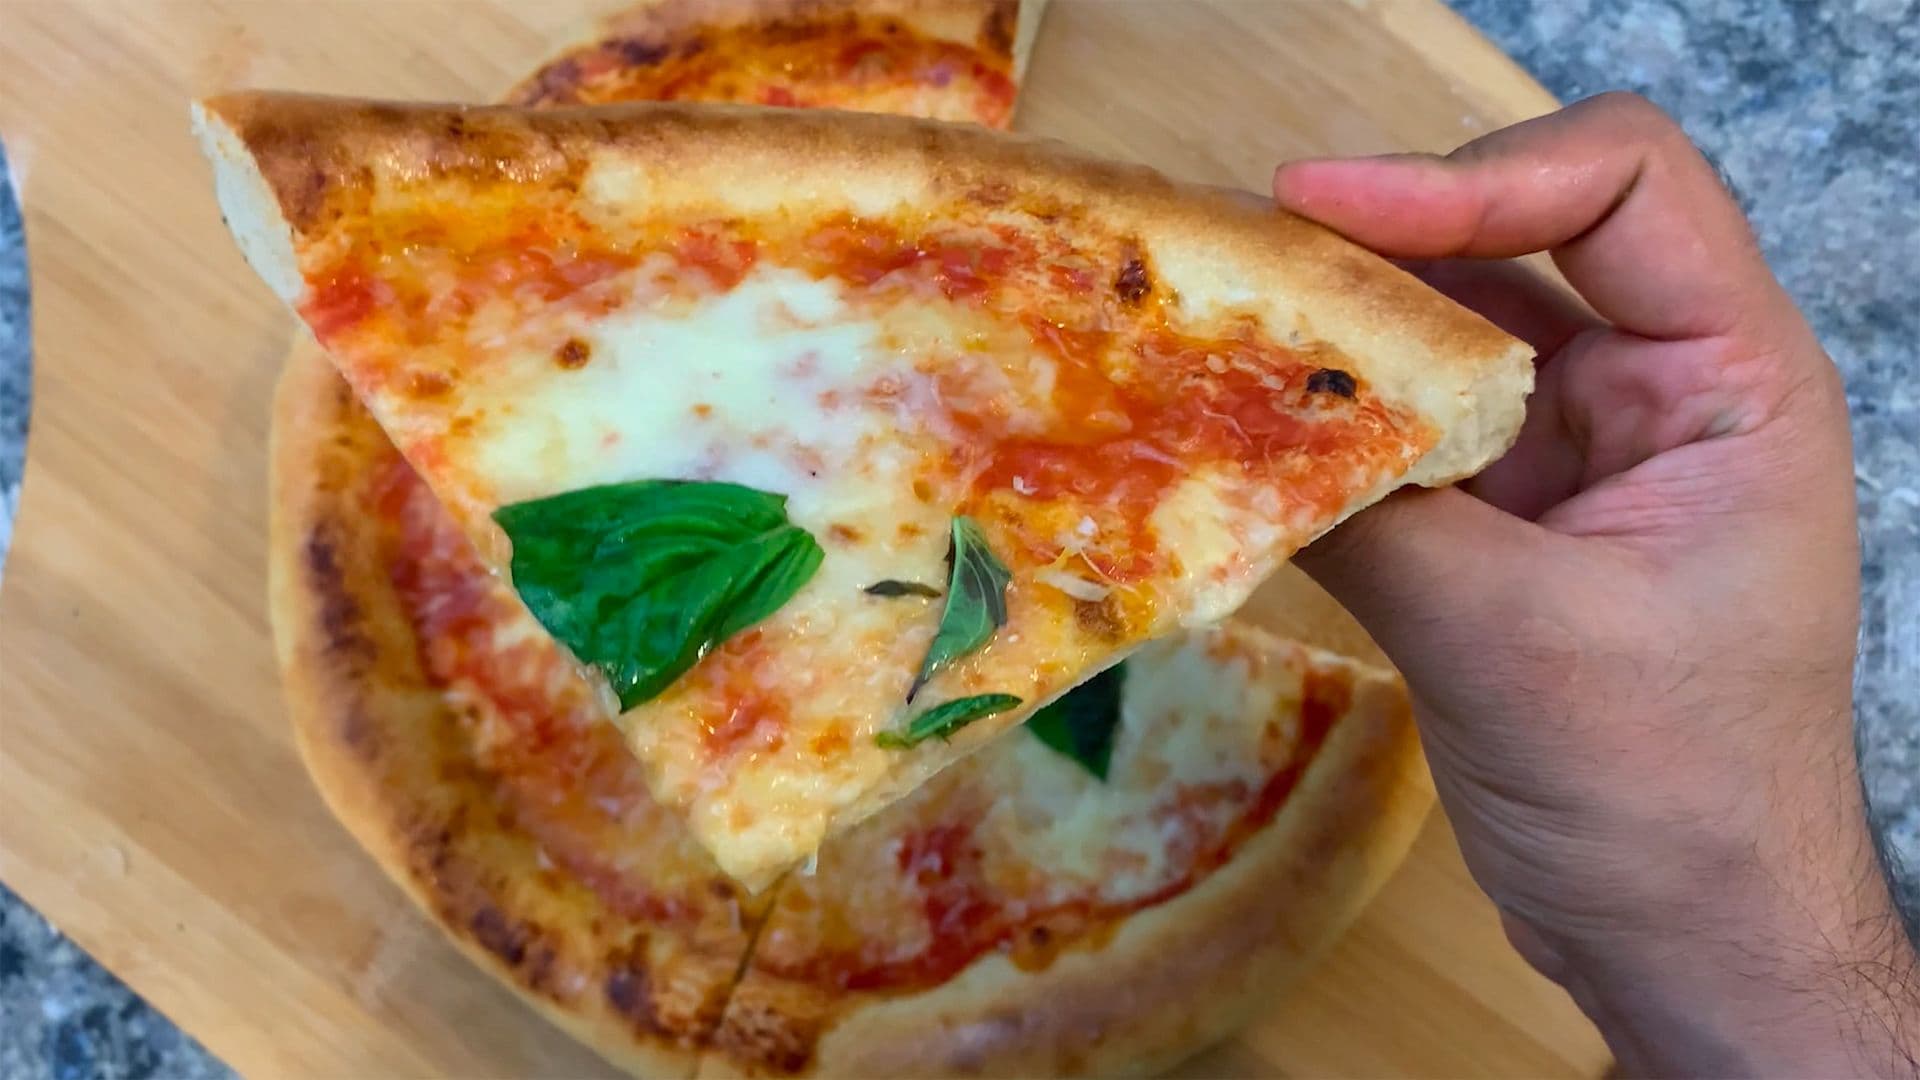
Make authentic Margherita pizza at home with a crispy crust, fresh basil, and rich tomato sauce. Simple steps, real Neapolitan flavor — no fancy equipment needed.
8 minHard3 pizzas
Prepworks from Progressive International HG-925 Deluxe Stainless Steel Grater


Comments
No comments yet — be the first to share your thoughts!
Leave a review
Be the first to share how it went — your note helps other cooks (and earns the recipe its stars).