Make authentic Oshizushi at home with this easy Osaka-style pressed sushi recipe. Beautiful layers of seasoned rice and fresh toppings, perfectly shaped every time.
If you never thought you could have restaurant-quality sushi in your own home, then think again! Sushi may be intimidating, but once you practice, it’s second nature! I know it may seem unbelievable for me to say that, and not fair since I used to be a sushi chef, but I really believe that anyone can do it! As I describe in my free motivational guide to explore your potential in the kitchen, Make Cooking Fun!, going out to eat can inspire you to try new creations. I had gone out for sushi the night before making this pressed sushi recipe to share with you today, and it got me super excited! I went many years without making pressed sushi since I quit my line cook job, but the method came back right away. I’m so happy to be back into it, and I made pressed sushi 3 more times this week because it’s that easy and delicious! If you’ve never had pressed sushi before, you’re going to fall absolutely in love with it!
Is Japanese cuisine a destination unseen for you? It no longer has to be by preparing this Osaka style pressed sushi for a memorable dinner as part of your Live to Cook one-month challenge! Sign up to my free email newsletter to get started today, plus you’ll get all of my latest recipes sent directly to your inbox so there’s always new inspiration in the kitchen!
This Osaka pressed sushi recipe is quite technical and requires precision, so I strongly recommend that you follow along with the video to guarantee success making this sushi. If you’re not already, I would really appreciate it if you could please subscribe to my YouTube channel, and don’t forget to press the bell button so you’re notified when all of my latest recipe videos are live! Let’s get pressing!
What is Oshizushi?▼
Oshizushi, also called “pressed sushi,” is a type of sushi that originated from Osaka. This type of sushi is made by layering fish and seasoned sushi rice into a wooden mold, then pressing this firmly to form a rectangular and compact block of sushi. Believe it or not, this sushi type is very ancient - over 400 years old, to be exact! This sushi variety is the easiest to make because you have lots of guidance thanks to the indents of the pressed sushi mold.
Why This Pressed Sushi Recipe Works!
Professional recipe: Yes, I’m tooting my own here by calling this recipe 100% professional. I used to get paid to make so many of these per night! It’s been a number of years since my daily routine no longer consisted of making these rolls, but even with such a long break I still had the technique memorized, just as we did it.
Easy to follow: I also used to teach the new sushi cooks how to make this roll. This would be the starter roll for new cooks. After teaching how to make this rice to new sushi cooks on numerous occasions, I know how to break this recipe down to guarantee cooks of all levels success making these!
Impressive: When I’ve been making these at home, it’s so satisfying! The final result looks just as the pressed sushi looked when I made it at restaurants, so I guarantee top quality results by following this method!
Customizable: While you do need to follow the procedure to get the authentic (and aesthetic!) outcome, you can mix and match the toppings. Ideas will be listed later on in this post!
What Rice Do I Use For Pressed Sushi?▼
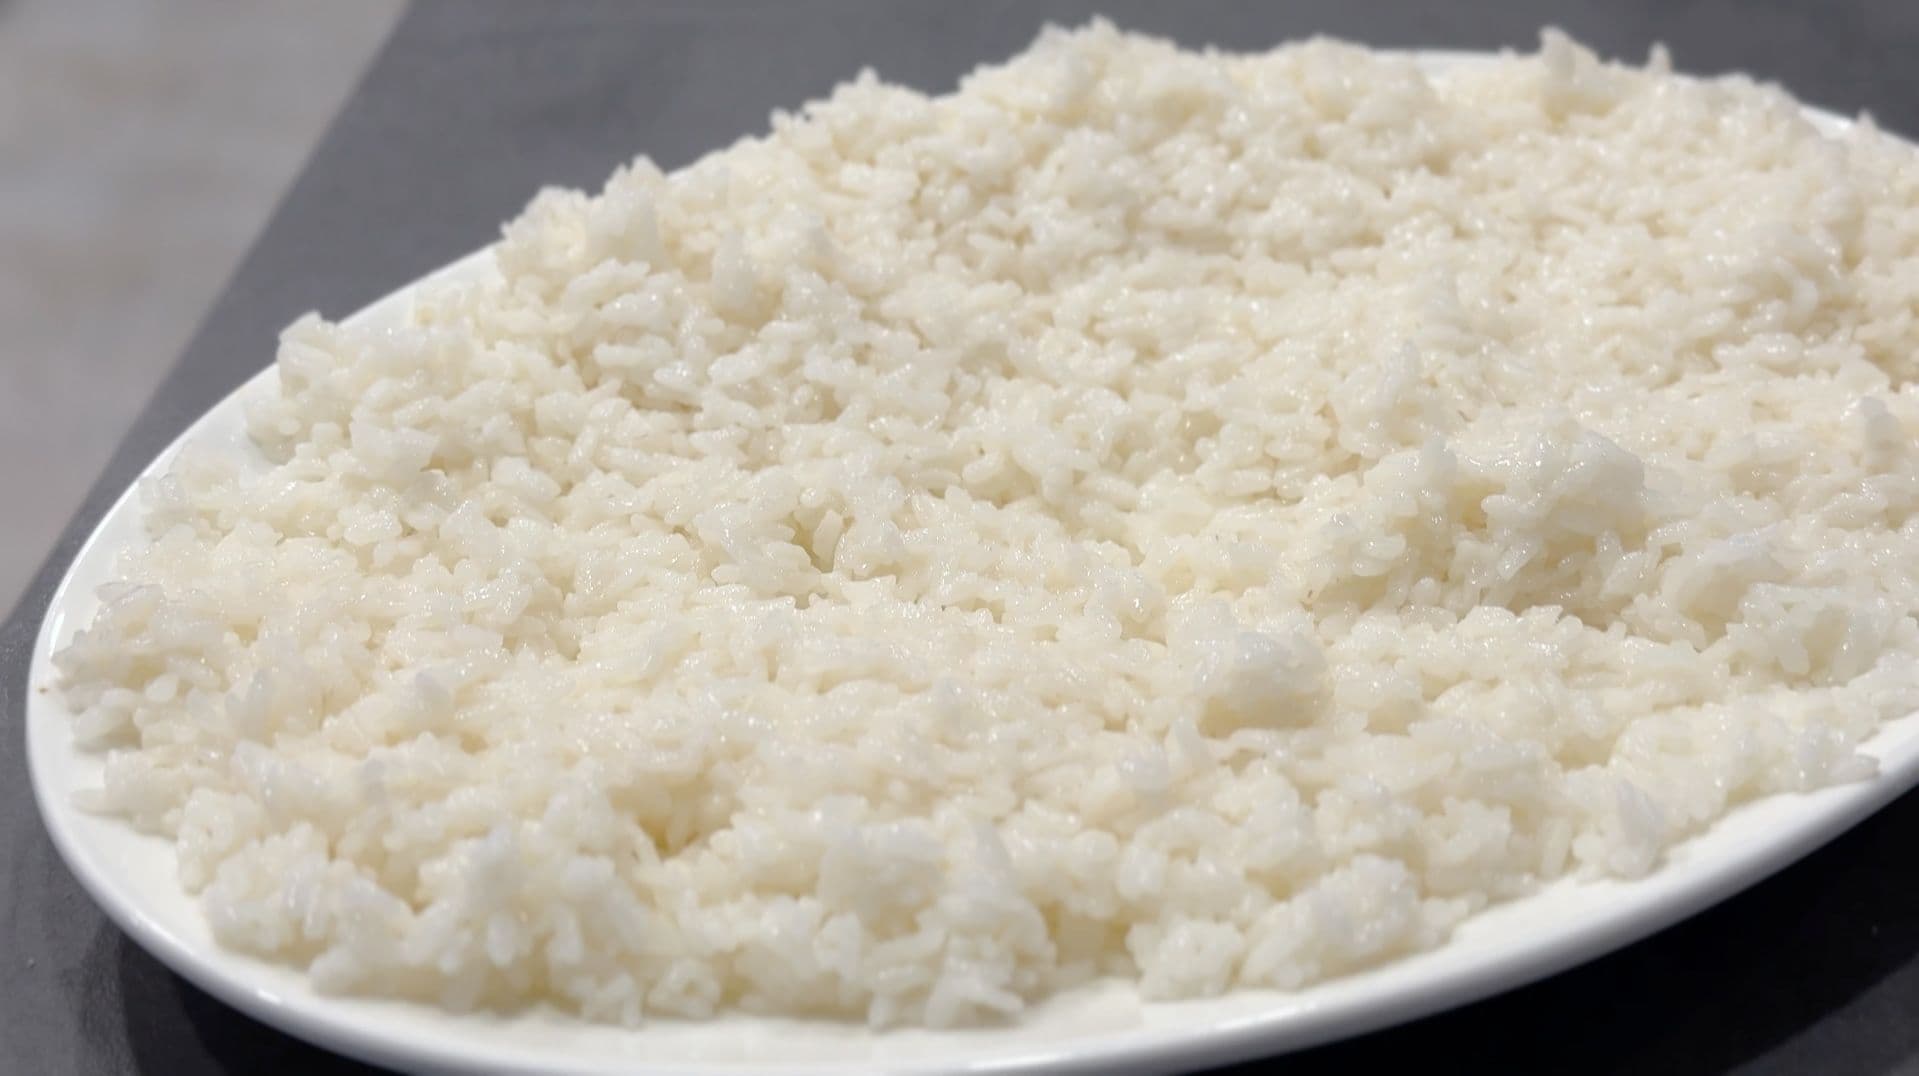
Sushi rice will be used to make this pressed sushi recipe. To be honest with you, “sushi rice” is not really a type of rice. Instead, you want to look for short-grain white rice that will be starchy. Here are the typical types of rice that are used for sushi:
Hatsushimo
Sasanishiki
Koshihikari
The starchiness of this rice helps keep the fish into place and make sure your sushi doesn’t fall apart! I strongly urge you to steer clear of rice that is not “sushi rice.” However, the caveat to that piece of advice is that you can use calrose rice, which is a medium-grain rice. While this may not appear to be a traditional option, I actually used calrose rice at all the restaurants I worked at to make sushi. It’s much easier to find in North America (perhaps in other parts of the world, too!), and it’s budget-friendly - I paid $13 CAD for a 4kg package.
How Do I Cook Rice for Pressed Sushi?▼
Follow the package directions to cook the rice using appropriate water to rice ratios, and then season the rice. I suggest you check out my Making Sushi Rice Over the Stoveto see what types of rice to use for sushi and how to prepare the most flavourful rice seasoning, so be sure to read that before coming here!
How Do You Eat Pressed Sushi?▼
With your mouth, of course! Just kidding! Pressed sushi can be either severed as a starter or a main, depending on what kind of meal you’re looking for.
You can also serve with a variety of condiments and dipping sauces. Here are some options:
Wasabi: Alternatively, you could Wasabi paste mixed with water, but it’s not the tastiest option in my opinion and I would suggest you find something better quality if possible!
Lime wedge: You can squeeze some lime juice on top of your sushi rolls.
Equipment to Make Pressed Sushi
The exact tools you’ll need will depend on which hand rolls you want to make. If you want to make them all, well, you’ll need everything!
Pressed sushi mold: This is absolutely essential for pressed sushi. This is the vessel to assemble and shape our pressed sushi. The Japanese word for this is “oshizushihako”, which literally translates to pressed sushi box.
Blowtorch: This will be needed to torch the spicy umami sauce on top.
Kitchen scale: It’ll be helpful to weigh out your salmon pieces so you’ve got consistent slices throughout the sushi.
Mixing bowl: To mix together the spicy umami sauce, and another bowl to prepare the sushi rice. For the sushi rice, make sure it’s not ceramic, or that will react with the vinegar.
Squeeze bottle: To store the spicy umami sauce and to apply it onto the salmon.
Wire rack: Place the prepared pressed sushi on a wire rack over a baking sheet to apply the teriyaki glaze and umami sauce, in addition to torching that sauce!
Make sure to keep the fish refrigerated until you are ready to prepare the pressed sushi.
Use high-quality sashimi-grade salmon. This is torched for flavor, not cooked through — quality makes the difference.
Sushi rice should be room temperature and kept covered until you’re ready to use it. Dry rice = cracked, messy cuts.
Getting the right amount of sushi rice for the roll is critical to ensure the ingredients all compliment each other. Make sure to not use too much or too little rice.
Press firmly when molding. Tight structure gives you clean, defined layers.
It is KEY to assemble and serve the pressed sushi fresh.
Your spicy umami sauce must be cold before torching. If it’s warm, it’ll melt and slide instead of caramelize.
Wipe your knife between every cut. Sharp, clean slices are what make pressed sushi look professional.
Plate with intention. Clean rims, balanced garnish, and visible layers elevate the entire dish.
Be careful and patient during every step of the assembly. Unlike when I was doing this for work as a sushi chef, you have no timer to abide by - even your growling stomach!
Ingredients for Osaka Style Pressed Sushi
To see the ingredient quantities for all the five sushi hand rolls recipes I’ll be sharing today and to save them for later, be sure to scroll down to the bottom of this post for the FULL PRINTABLE RECIPE CARD or press the “Jump to Recipe” button. You’ll be able to scale the recipes based on how many sushi rolls you want to make - no estimating required so that you have perfectly stuffed and delicious cones - whichever ones you make!
For the Umami Sauce
Mayonnaise: You can use store-bought mayo, but for ultimate impact, you could make your own! Japanese mayo, also known as kewpie, would be the best store-bought choice if you have it as I find it’s got a lighter texture than regular mayo.
Teriyaki reduction: This is thickened teriyaki sauce, and we’ll see how to make this.
Cooked sushi rice: Check out the full recipe to see the perfect rice to water ratios and cook time. I season my sushi rice with rice vinegar, sugar, and salt.
Salmon: You’ll need sushi grade salmon. If you live in an area where you can cut fresh salmon, then lucky you! However, most of us aren’t in this position, so look for high quality salmon that you can safely eat raw.
Green onions: Use just the green parts, and
Teriyaki reduction: Glaze this on top of the salmon to add some sweetness.
Spicy Umami sauce: This will add tons of flavour and creaminess. We’ll be blowtorching over the sauce!
Jalapeños: Thinly sliced. You can also use Serrano peppers if you have access to them.
Pickled ginger/gari: While it’s definitely going to be the most delicious to make your own, sometimes you’re pressed for time, so going for pre-made is totally fine! I found a pretty good one to serve with my pressed sushi. Typically, I find homemade tastier and less salty, but the one I’m linking is quite good!
How to Make Pressed Sushi at Home
For the Teriyaki Reduction
Add teriyaki sauce to a small saucepan over medium-low heat.
Bring to a gentle simmer and cook 6–10 minutes, stirring occasionally. Do not boil aggressively.
Reduce until thickened by about half and the sauce coats the back of a spoon. It should leave a line when dragged through and slowly settle back.
Remove from heat and cool completely. The glaze will thicken further as it cools.
For the Spicy Umami Sauce
Add all the ingredients in a bowl and mix well.
Place sauce into a squeeze bottle. Cover, label and refrigerate for at least 20 minutes before using.
To Cut the Salmon for Pressed Sushi
Keep the salmon refrigerated and slightly frozen. Cutting is much easier when the centre is still firm.
Pat the salmon completely dry with paper towel. Moisture will cause slipping and uneven slices.
Remove the skin using a long slicing knife. Start at one corner, grip the skin firmly, and slide the blade flat between the flesh and skin in a smooth sawing motion.
Trim off any dark bloodline meat. It has a stronger flavour and affects presentation.
Use the indent guides inside your mold to determine the exact width needed. The salmon should fully cover the mold edge to edge without overlapping.
Slice the salmon sashimi-style using a long, sharp knife. Cut in one clean pull toward you without sawing. Aim for a thickness just shy of ¼ inch.
Each rectangular slice should weigh 16–18 g. Cut enough pieces to fully line the base of the mold, usually three slices.
Use the remaining salmon to cut the centre strips. Each strip should be ⅓–½ inch thick, the full length of the mold, and weigh 10–12 g.
To Assemble the Pressed Sushi
Line the mold with plastic wrap, leaving overhang on all sides.
Line the base fully with rectangular salmon slices (about 50–60 g total), covering edge to edge without overlapping.
Add 120 g rice and press flat. Create a shallow indent down the centre.
Place a salmon strip (10–12 g, ⅓–½ inch thick and the length of the mold) into the indent.
Add the remaining 75 g rice to completely fill the mold.
Fold the plastic wrap over the top to fully enclose the sushi.
Place the pressing insert on top and press down firmly using steady body weight to compact tightly.
Using the pre-cut guide on the mold, cut through the sushi while it is still wrapped in plastic. Use a sharp knife and make clean, straight cuts all the way through.
Remove the insert, invert onto your work surface, and carefully lift off the mold. Peel away the plastic wrap.
Run your knife through the cuts once more to cleanly separate the pieces, then gently push them back together so the block holds its shape.
Wrap the assembled pressed sushi in plastic wrap while you assemble additional rolls.
To Finish the Pressed Sushi
Place the assembled pressed sushi on a rack over a sheet pan.
Brush 3 g teriyaki reduction evenly over the salmon only.
Pipe or spread 16 g cold spicy umami sauce across the top.
Torch in steady back-and-forth motions until deep golden with light charring.
Re-cut cleanly, wiping the knife between cuts.
Plate angled so the salmon tops are visible.
Finish with black pepper, green onions, and a thin jalapeño slice on each piece.
Can I Use Other Toppings?▼
Yes, you can! For protein options instead of the salmon, you could use tuna. I did that the next time making pressed sushi and it was super delicious! You could also do smoked salmon, unagi (freshwater eel), or imitation crab (bonus points if you can get real crab!).
If you want to add avocado and/or cucumber to the pressed sushi, I suggest you add these in the middle as you are assembling the pressed sushi and not on top. This is because you’ll be torching the top with spicy umami sauce, and that char will slightly heat the additional toppings. You don’t want to eat cooked avocado or cucumber!
Other delicious toppings to add over the spicy umami sauce include tempura bits. For this, all you need to do is make tempura batter, and then fry it in oil. Once it crisps up, strain it and pour it into a squeeze bottle with a pointy nib. Add over the torched spicy umami sauce! In addition, you can add sweet potato chips on top, where you would peel sweet potatoes, spiralize them, and then deep fry. Comment below if you want to see a sushi variation with this topping!
Can I Make Pressed Sushi in Advance?▼
You can’t make the entire sushi roll in advance because that will defeat the purpose of torching the spicy umami sauce, and that’ll get all soggy and strange on your beautiful sushi roll. We don’t want that! On the other hand, there are plenty of ways you can get set up for success before it’s time to serve your pressed sushi, which we’ll discuss next:
I strongly encourage you to make the sushi rice in advance as this takes some time to make!
You can make the teriyaki reduction and the spicy umami sauce in advance. Store the teriyaki reduction in an airtight container in the fridge, and transfer the spicy umami sauce in a squeeze bottle and keep it in the fridge.
Cut the salmon into strips and store them in the fridge until ready to use.
Prep the veggies in advance and keep them in water to maintain the crunch.
To be extra prepared, you can assemble the rolls up until the teriyaki reduction step. Wrap the rolls tightly in plastic wrap until ready to finish assembling and serving.
Let me know what you think of this recipe in the comments! If you’ve tried this recipe, be sure to post it on social media and tag it with #cookingwithanadi and mention me @cooking.with.anadi. Thank you!
Recipe by Anadi Misra
Oshizushi - Osaka Style Pressed Sushi Recipe
Make authentic Oshizushi at home with this easy Osaka-style pressed sushi recipe. Beautiful layers of seasoned rice and fresh toppings, perfectly shaped every time.
Add teriyaki sauce to a small saucepan over medium-low heat.
Add teriyaki sauce to a small saucepan over medium-low heat.
2
Bring to a gentle simmer and cook 6–10 minutes, stirring occasionally. Do not boil aggressively.
Bring to a gentle simmer and cook 6–10 minutes, stirring occasionally. Do not boil aggressively.
3
Reduce until thickened by about half and the sauce coats the back of a spoon. It should leave a line when dragged through and slowly settle back.
Reduce until thickened by about half and the sauce coats the back of a spoon. It should leave a line when dragged through and slowly settle back.
4
Remove from heat and cool completely. The glaze will thicken further as it cools.
Remove from heat and cool completely. The glaze will thicken further as it cools.
For the Spicy Umami Sauce
1
Add all the ingredients in a bowl and mix well.
Add all the ingredients in a bowl and mix well.
2
Place sauce into a squeeze bottle. Cover, label and refrigerate for at least 20 minutes before using.
Place sauce into a squeeze bottle. Cover, label and refrigerate for at least 20 minutes before using.
To Cut the Salmon for Pressed Sushi
1
Keep the salmon refrigerated and slightly frozen. Cutting is much easier when the centre is still firm.
Keep the salmon refrigerated and slightly frozen. Cutting is much easier when the centre is still firm.
2
Pat the salmon completely dry with paper towel. Moisture will cause slipping and uneven slices.
Pat the salmon completely dry with paper towel. Moisture will cause slipping and uneven slices.
3
Remove the skin using a long slicing knife. Start at one corner, grip the skin firmly, and slide the blade flat between the flesh and skin in a smooth sawing motion.
Remove the skin using a long slicing knife. Start at one corner, grip the skin firmly, and slide the blade flat between the flesh and skin in a smooth sawing motion.
4
Trim off any dark bloodline meat. It has a stronger flavor and affects presentation.
Trim off any dark bloodline meat. It has a stronger flavor and affects presentation.
5
Use the indent guides inside your mold to determine the exact width needed. The salmon should fully cover the mold edge to edge without overlapping.
Use the indent guides inside your mold to determine the exact width needed. The salmon should fully cover the mold edge to edge without overlapping.
6
Slice the salmon sashimi-style using a long, sharp knife. Cut in one clean pull toward you without sawing. Aim for a thickness just shy of ¼ inch.
Slice the salmon sashimi-style using a long, sharp knife. Cut in one clean pull toward you without sawing. Aim for a thickness just shy of ¼ inch.
7
Each rectangular slice should weigh 0.5–0.5 oz . Cut enough pieces to fully line the base of the mold, usually three slices.
Each rectangular slice should weigh 0.5–0.5 oz . Cut enough pieces to fully line the base of the mold, usually three slices.
8
Use the remaining salmon to cut the centre strips. Each strip should be ⅓–½ inch thick, the full length of the mold, and weigh 0.5–0.5 oz.
Use the remaining salmon to cut the centre strips. Each strip should be ⅓–½ inch thick, the full length of the mold, and weigh 0.5–0.5 oz.
To Assemble the Pressed Sushi
1
Line the mold with plastic wrap, leaving overhang on all sides.
Line the mold with plastic wrap, leaving overhang on all sides.
2
Line the base fully with rectangular salmon slices (about 2–2 oz total), covering edge to edge without overlapping.
Line the base fully with rectangular salmon slices (about 2–2 oz total), covering edge to edge without overlapping.
3
Add 4 oz rice and press flat. Create a shallow indent down the centre.
Add 4 oz rice and press flat. Create a shallow indent down the centre.
4
Place a salmon strip ( 0.5–0.5 oz , ⅓–½ inch thick and the length of the mold) into the indent.
Place a salmon strip ( 0.5–0.5 oz , ⅓–½ inch thick and the length of the mold) into the indent.
5
Add the remaining 2.5 oz rice to completely fill the mold.
Add the remaining 2.5 oz rice to completely fill the mold.
6
Fold the plastic wrap over the top to fully enclose the sushi.
Fold the plastic wrap over the top to fully enclose the sushi.
7
Place the pressing insert on top and press down firmly using steady body weight to compact tightly.
Place the pressing insert on top and press down firmly using steady body weight to compact tightly.
8
Using the pre-cut guide on the mold, cut through the sushi while it is still wrapped in plastic. Use a sharp knife and make clean, straight cuts all the way through.
Using the pre-cut guide on the mold, cut through the sushi while it is still wrapped in plastic. Use a sharp knife and make clean, straight cuts all the way through.
9
Remove the insert, invert onto your work surface, and carefully lift off the mold. Peel away the plastic wrap.
Remove the insert, invert onto your work surface, and carefully lift off the mold. Peel away the plastic wrap.
10
Run your knife through the cuts once more to cleanly separate the pieces, then gently push them back together so the block holds its shape.
Run your knife through the cuts once more to cleanly separate the pieces, then gently push them back together so the block holds its shape.
11
Wrap the assembled pressed sushi in plastic wrap while you assemble additional rolls.
Wrap the assembled pressed sushi in plastic wrap while you assemble additional rolls.
To Finish the Pressed Sushi
1
Place the assembled pressed sushi on a rack over a sheet pan.
Place the assembled pressed sushi on a rack over a sheet pan.
2
Brush 0 oz teriyaki reduction evenly over the salmon only.
Brush 0 oz teriyaki reduction evenly over the salmon only.
3
Pipe or spread 0.5 oz cold spicy umami sauce across the top.
Pipe or spread 0.5 oz cold spicy umami sauce across the top.
4
Torch in steady back-and-forth motions until deep golden with light charring.
Torch in steady back-and-forth motions until deep golden with light charring.
5
Re-cut cleanly, wiping the knife between cuts.
Re-cut cleanly, wiping the knife between cuts.
6
Plate angled so the salmon tops are visible.
Plate angled so the salmon tops are visible.
7
Finish with black pepper, green onions, and a thin jalapeño slice on each piece.
Finish with black pepper, green onions, and a thin jalapeño slice on each piece.
Nutrition per serving
1277
Calories
39g
Protein
207g
Carbs
32g
Fat
18g
Fiber
31g
Sugar
2319mg
Sodium
Share This Recipe
Did you make this recipe? Tag @cooking.with.anadi on Instagram and hashtag it #cookingwithanadi
Tested & written in Anadi’s kitchen
Free weekly newsletter
Like this recipe? Get more every week.
New recipes, cooking tips, and behind-the-scenes from Anadi's kitchen.
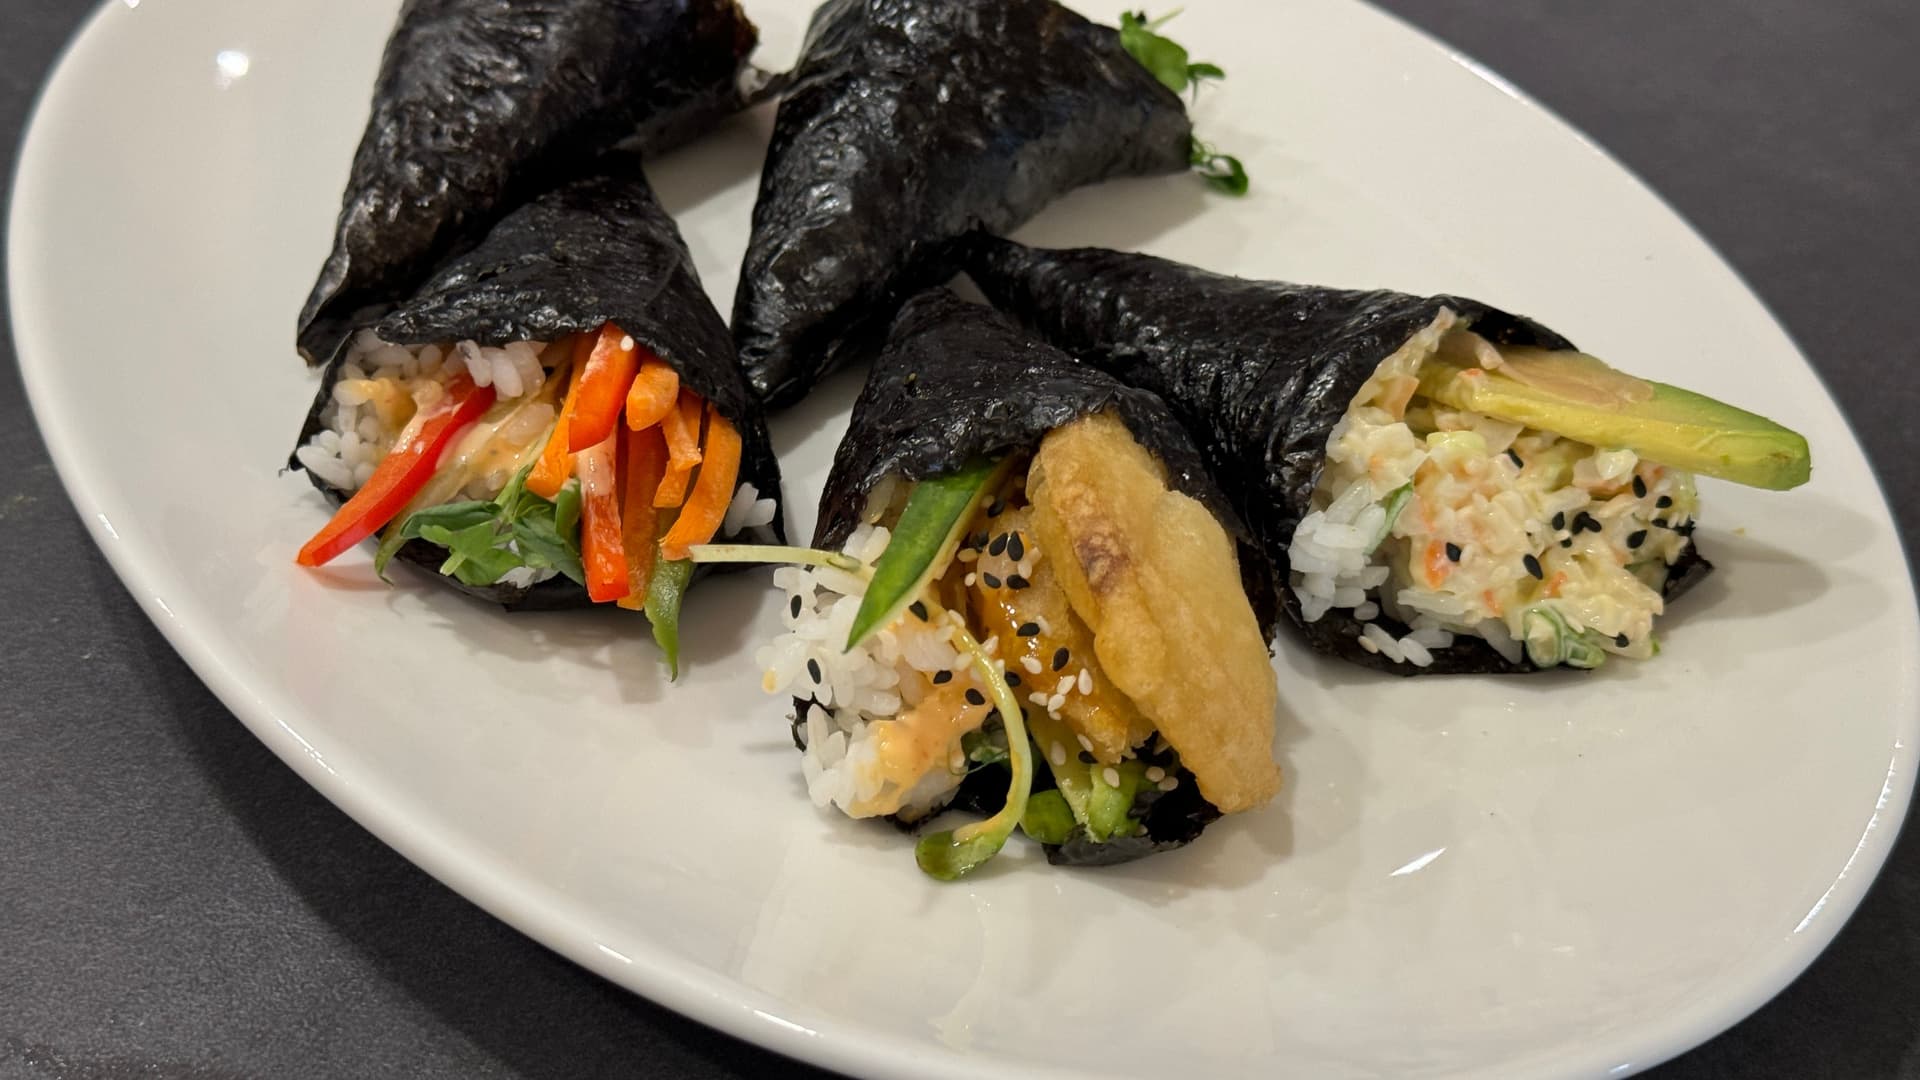
Make restaurant-quality temaki sushi at home with 5 delicious hand roll variations including spicy salmon and crab. Fresh, fun, and surprisingly easy to master.
30 minHard5 cones
Recipe history
April 16, 2026 — Reworked and refreshed for the 2026 relaunch — new photography, restructured and standardized ingredients & instructions.
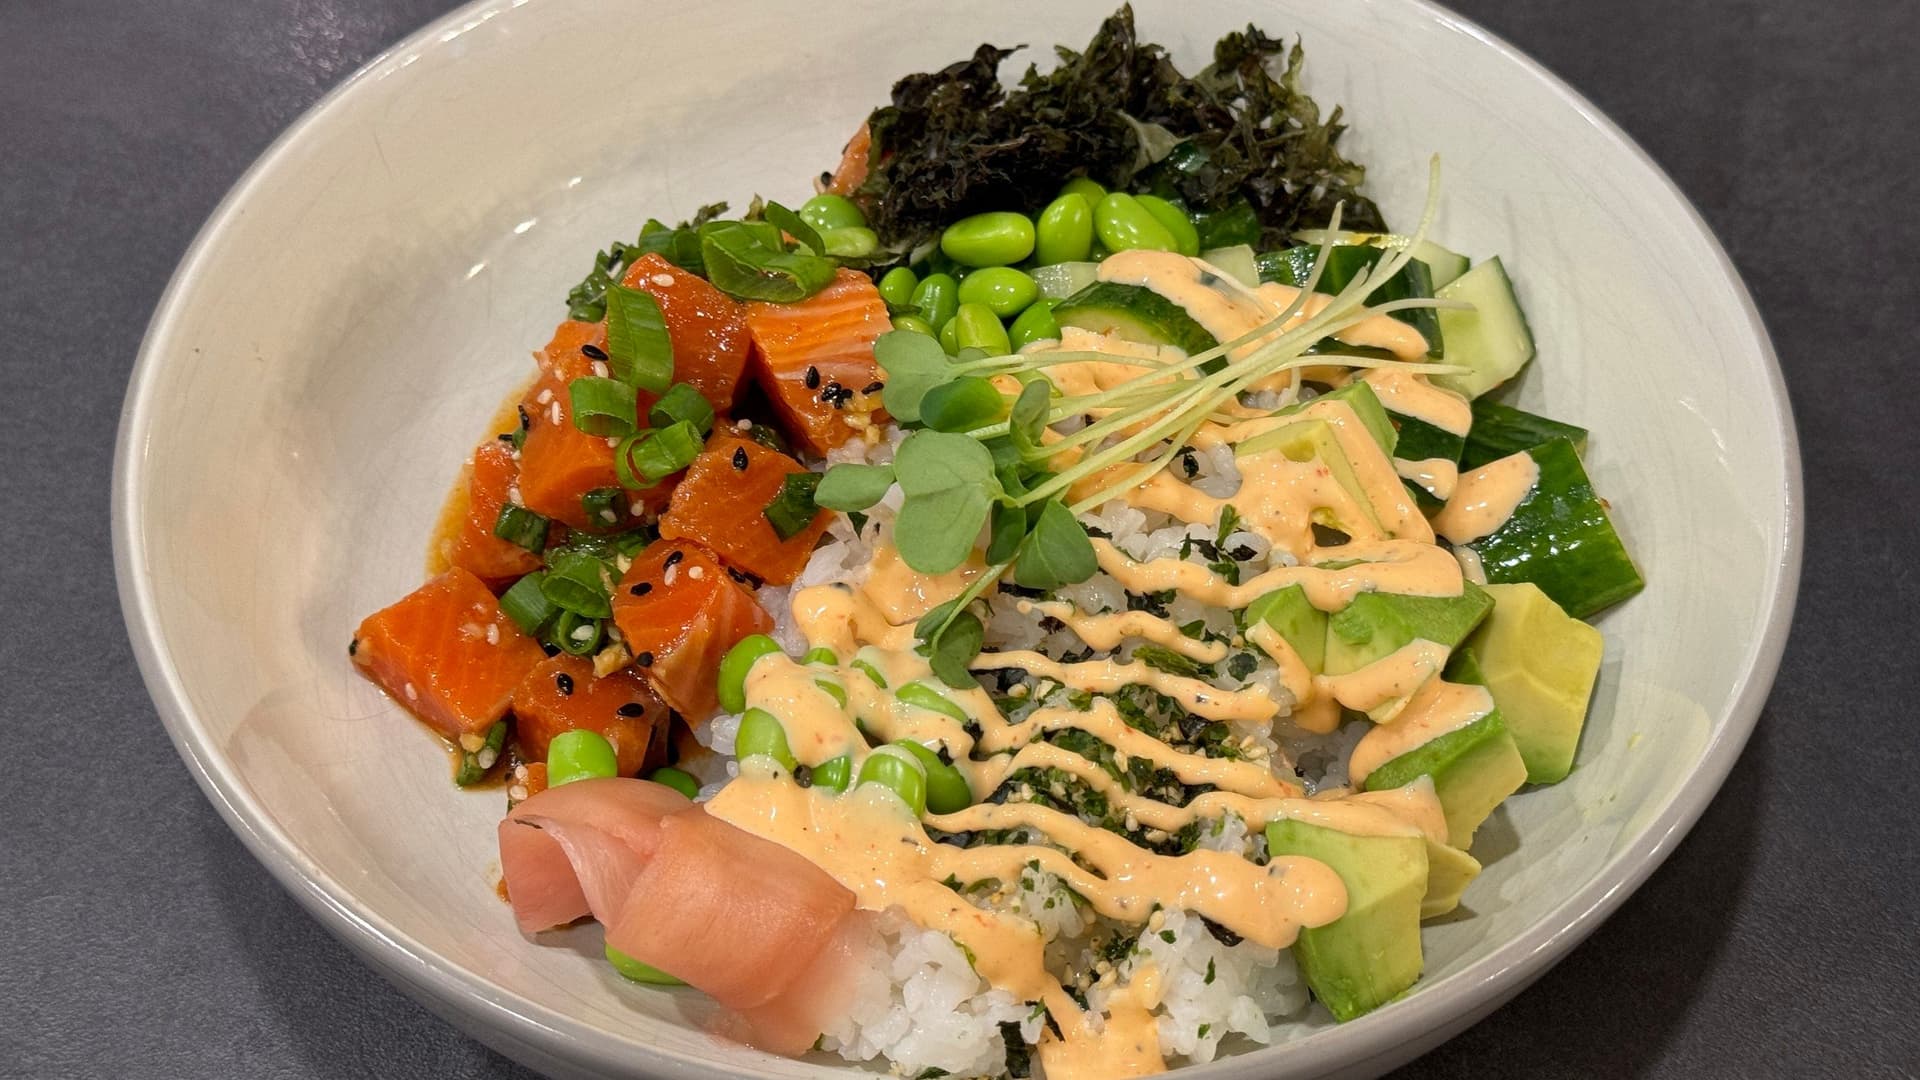
Make a fresh salmon poke bowl at home with ease. Packed with healthy ingredients and bold flavors, this simple recipe is perfect for lunch or dinner any night of the week.
Juicy teriyaki shrimp, colorful veggies, and chewy udon noodles come together in this easy beginner stir fry. Bold flavors, one pan, and dinner on the table fast.
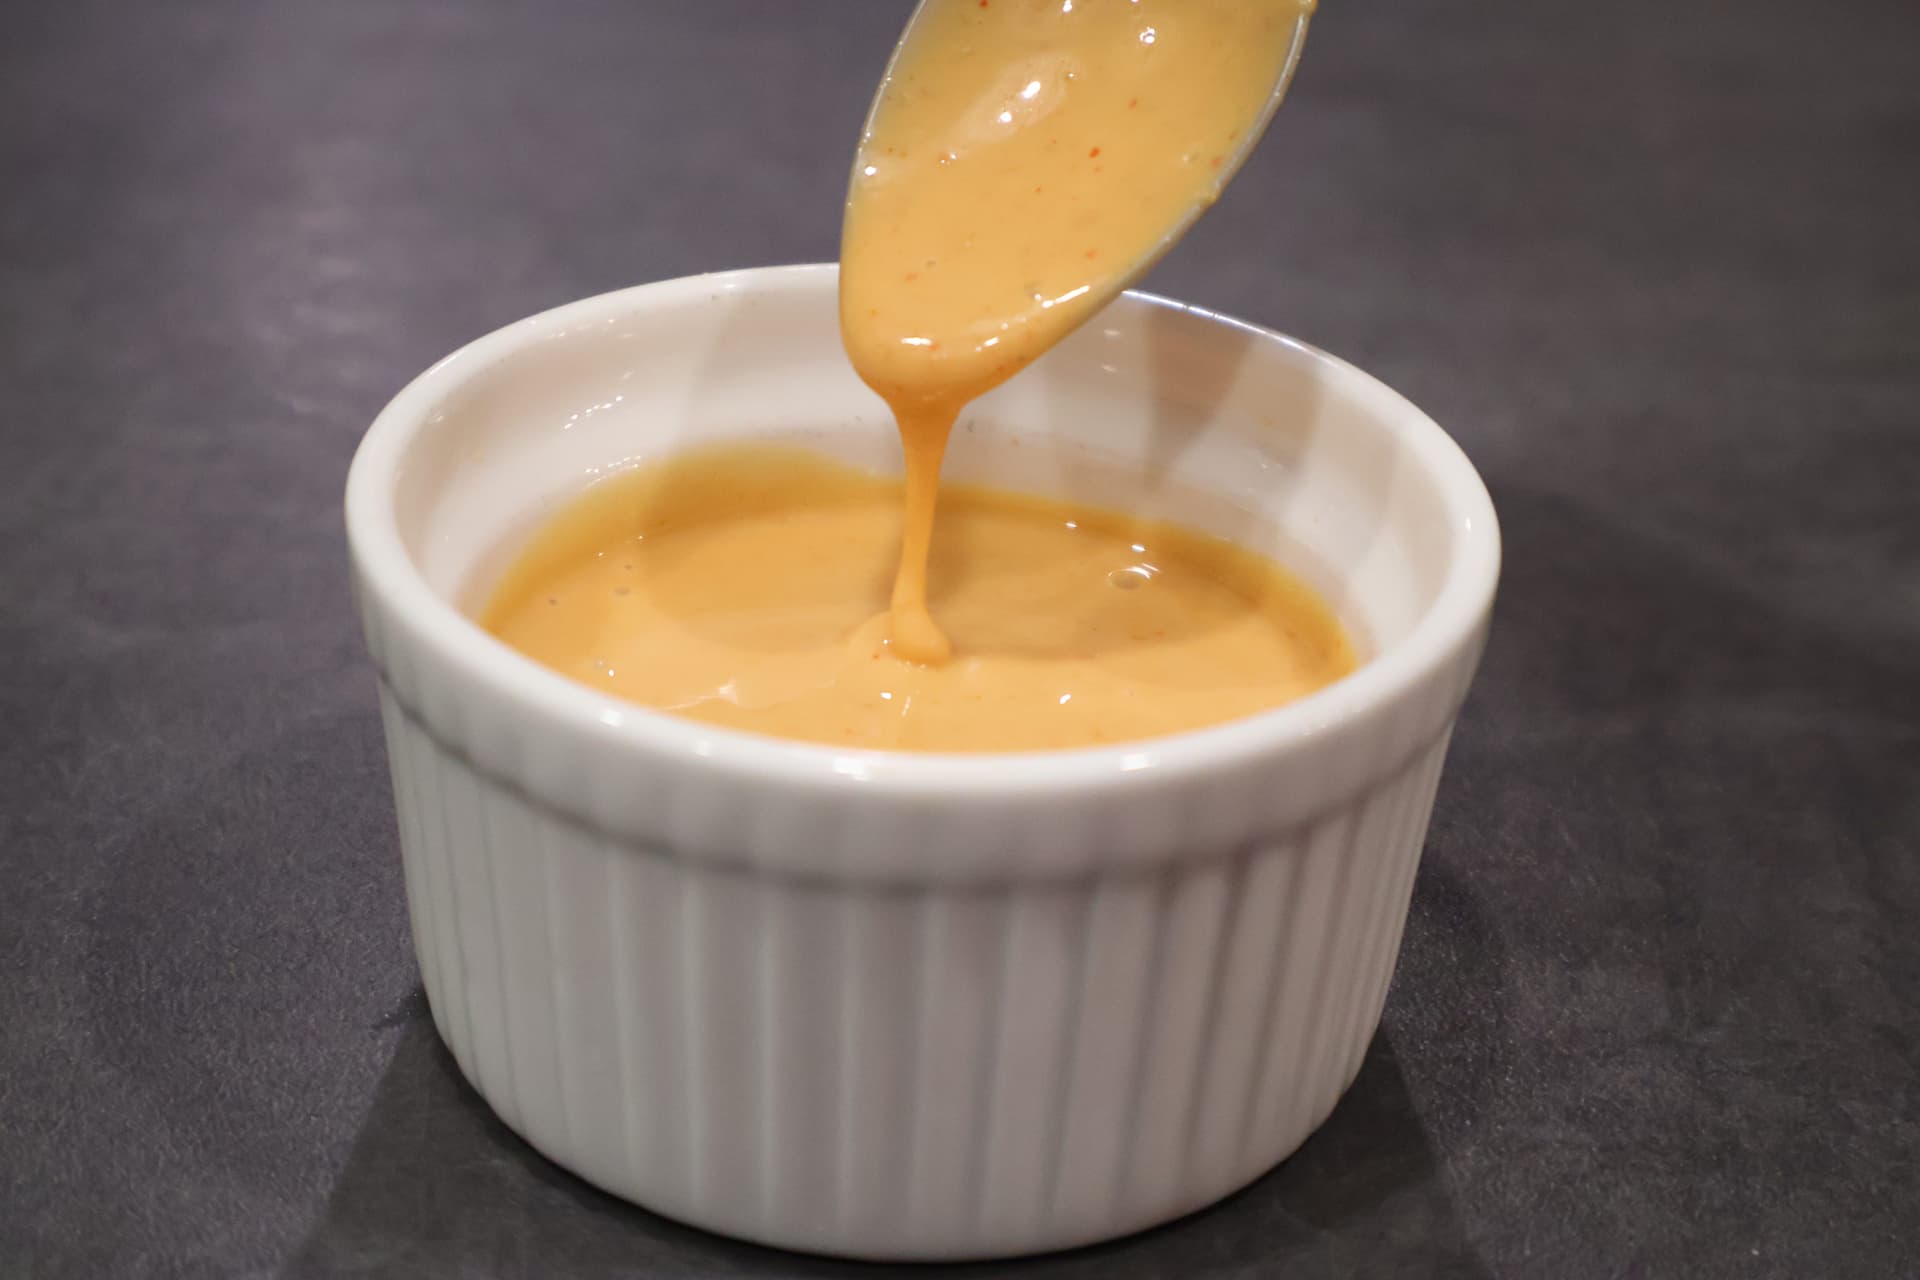
Osaka Spicy Umami Sauce is bold, quick to make, and packed with deep flavor. Elevate your sushi night with this easy sauce recipe that transforms every bite into something unforgettable.
Make perfect sushi rice on the stove every time with this easy, foolproof guide. Seasoned with rice vinegar and ready in one pot, it is the ideal base for all your favorite sushi creations.


Comments
No comments yet — be the first to share your thoughts!
Leave a review
Be the first to share how it went — your note helps other cooks (and earns the recipe its stars).