
This post may contain affiliate links. Read our disclosure policy
Watch the recipe
I don’t go out to sushi that often, but I did spend a number of years preparing it, so I do know quite a bit about it!
I find that the pickled ginger that sushi places serve on the side to cleanse your palate so nice and refreshing! My favorite part is the sweet and salty. Honestly, I could just munch on a ton of the stuff plain!
If you’re also a ginger lover, then this guide on How to Make Sushi Ginger at Home is definitely for you! I recently bought store-bought pickled ginger and when I compared the packaged one to mine, I really found mine a lot better! I made mine a little sweeter and this was certainly much less salty than the store-bought one.
One key point I’ll drive home in this tutorial on how to make your own pickled ginger is that the amazing part of making your own pickled ginger is that once you try it out, you’ll see what flavor ratios are perfect for you! As I describe in my free motivational guide to explore your potential in the kitchen Making Cooking Fun!, going out to eat can inspire you to try new creations in the kitchen! Pickled Ginger is only one part of the piece to an excellent Japanese meal, but once you have it ready, it will open so many doors! I’ll give you so many serving suggestions later on in this post to help get you inspired! If you’re new to Japanese cooking, I definitely recommend you make Japan no longer a destination unseen by starting out with Pickled Ginger as part of your Live to Cook one-month challenge! You can get started for free today by signing up to my email newsletter, plus all of my latest recipes will be sent straight to your inbox!
For all the details and to follow along with me as I prepare this easy Japanese pickled ginger recipe, be sure to watch the video! It would mean a lot to me if you would please subscribe to my YouTube channel if you’re not already, and don’t forget to press the bell button so you’re notified when all of my video recipes are live! Let’s get pickling!

What is Pickled Ginger?▼
Gari in Japanese is “pickled ginger,” also known as “sushi ginger.” Typically, as the name suggests, this ginger is served with sushi or sashimi. The sweetness that comes from the pickling solution and ginger’s natural spice make this an excellent palette cleanser for when you’re eating different types of sushi rolls and different types of fish. However, as we’ll see later on in this post, you don’t have to limit your serving to just sushi! Keep on reading.
What is Young Ginger versus Mature Ginger?▼
Young ginger is distinguished from mature ginger because it has a thin skin and it has pink tips at the end. On the other hand, mature ginger is the “regular” ginger that is easily accessible at your grocery store.
You’ll see lots of pickled ginger recipes that use young ginger, and some even claim that you must use young ginger, too bad if you have regular! Well, unfortunately where I live I’ve never seen young ginger available at any grocery store or even Asian grocers (I did go out and check right before recording this recipe and no luck for me!). I’m not going to let this discourage you from making pickled ginger!
The reason why young ginger is the ideal choice to make this is because it is indeed easier to peel and to cut into very thin slices. However, I’ll be using mature ginger here and show you that the results will be perfectly fine and you’ll have extremely delicious sushi ginger when you use mature ginger!

Why Is Some Pickled Ginger Red or Pinkish in Color?▼
Don’t be fooled since not all pickled ginger or gari you see are naturally pinkish or red in color. A lot of this is achieved by food coloring.
Natural pink pigments can also occur however, especially when using young ginger which are much more tender and fresher than commonly found ginger root. These varieties of ginger contain natural pigments called anthocyanins which after reacting with acidic rice vinegar can turn the ginger pink.
Red Shiso leaves are also used in traditional recipes for gari in the pickling solution. which helps dye the ginger pink in color.
What Is the Best Way to Peel Ginger?▼
The unbeaten way to peel ginger without wasting a lot of it is with a spoon. Yes, a spoon and not a vegetable peeler as you would think. See, the thing is ginger peel is very thin, and the skin tends to be softer than the actual ginger inside. So a spoon is great to peel off that tender skin and maximize ginger in your recipe.
Why Make This Sushi Ginger Recipe
- Healthy: Ginger itself is excellent for your health! Have you ever seen advertisements and promotions for ginger supplements and recipes that will promote overall health? Well, there’s a reason why! Ginger contains gingerol, the natural component of ginger. This powerhouse can assist with digestion - in particular, bloating, gas and constipation; ginger can treat nausea; it can promote the reduction of cholesterol levels; and it may reduce the risk of cancer. Check out more details on the health benefits of ginger here.
- Long-lasting: Gari or pickled ginger can last essentially indefinitely. So there’s no need to worry about it spoiling - it’ll last however long you need it to, unless you’ve eaten it all up quickly!
- Versatile: While it’s iconically served as a palette cleanser for sushi, there are other ways to enjoy your pickled ginger. Check out serving suggestions later on in this post!
- Delicious: There’s nothing like sweet, spicy and slightly chewy ginger. It’s refreshing and truly showcases why the Japanese use gari between sushi.
Tools Needed to Pickle Ginger
Ingredients for Pickled Ginger
For all ingredients and their quantities and to save the recipe for later, scroll to the bottom of this post for the FULL PRINTABLE RECIPE CARD or press the “Jump to Recipe” button. You will also be able to scale the recipe based on how much pickled ginger you want to make without having to do mental math!

- Ginger: You can use mature ginger or young ginger. Young ginger is preferable, but if you don’t have it, then don’t worry about it! I’ll demonstrate how to use mature ginger with ease!
- Rice vinegar: Our main pickling agent. Mine was seasoned, so I’ve reduced the amount of salt and sugar. If you’re using unseasoned rice vinegar, then I’ve provided alternative ratios for your sugar to salt.
- Sugar: White table sugar is cheap and accessible to everyone, so the perfect choice of sweetener here! We need it to balance out the salt in our seasoning.
- Water: To boil the ginger prior to pickling so that the bitter flavor of the ginger is removed.
- Salt: Crucial to bring out all the flavors in our rice seasoning!
How to Pickle Ginger for Sushi
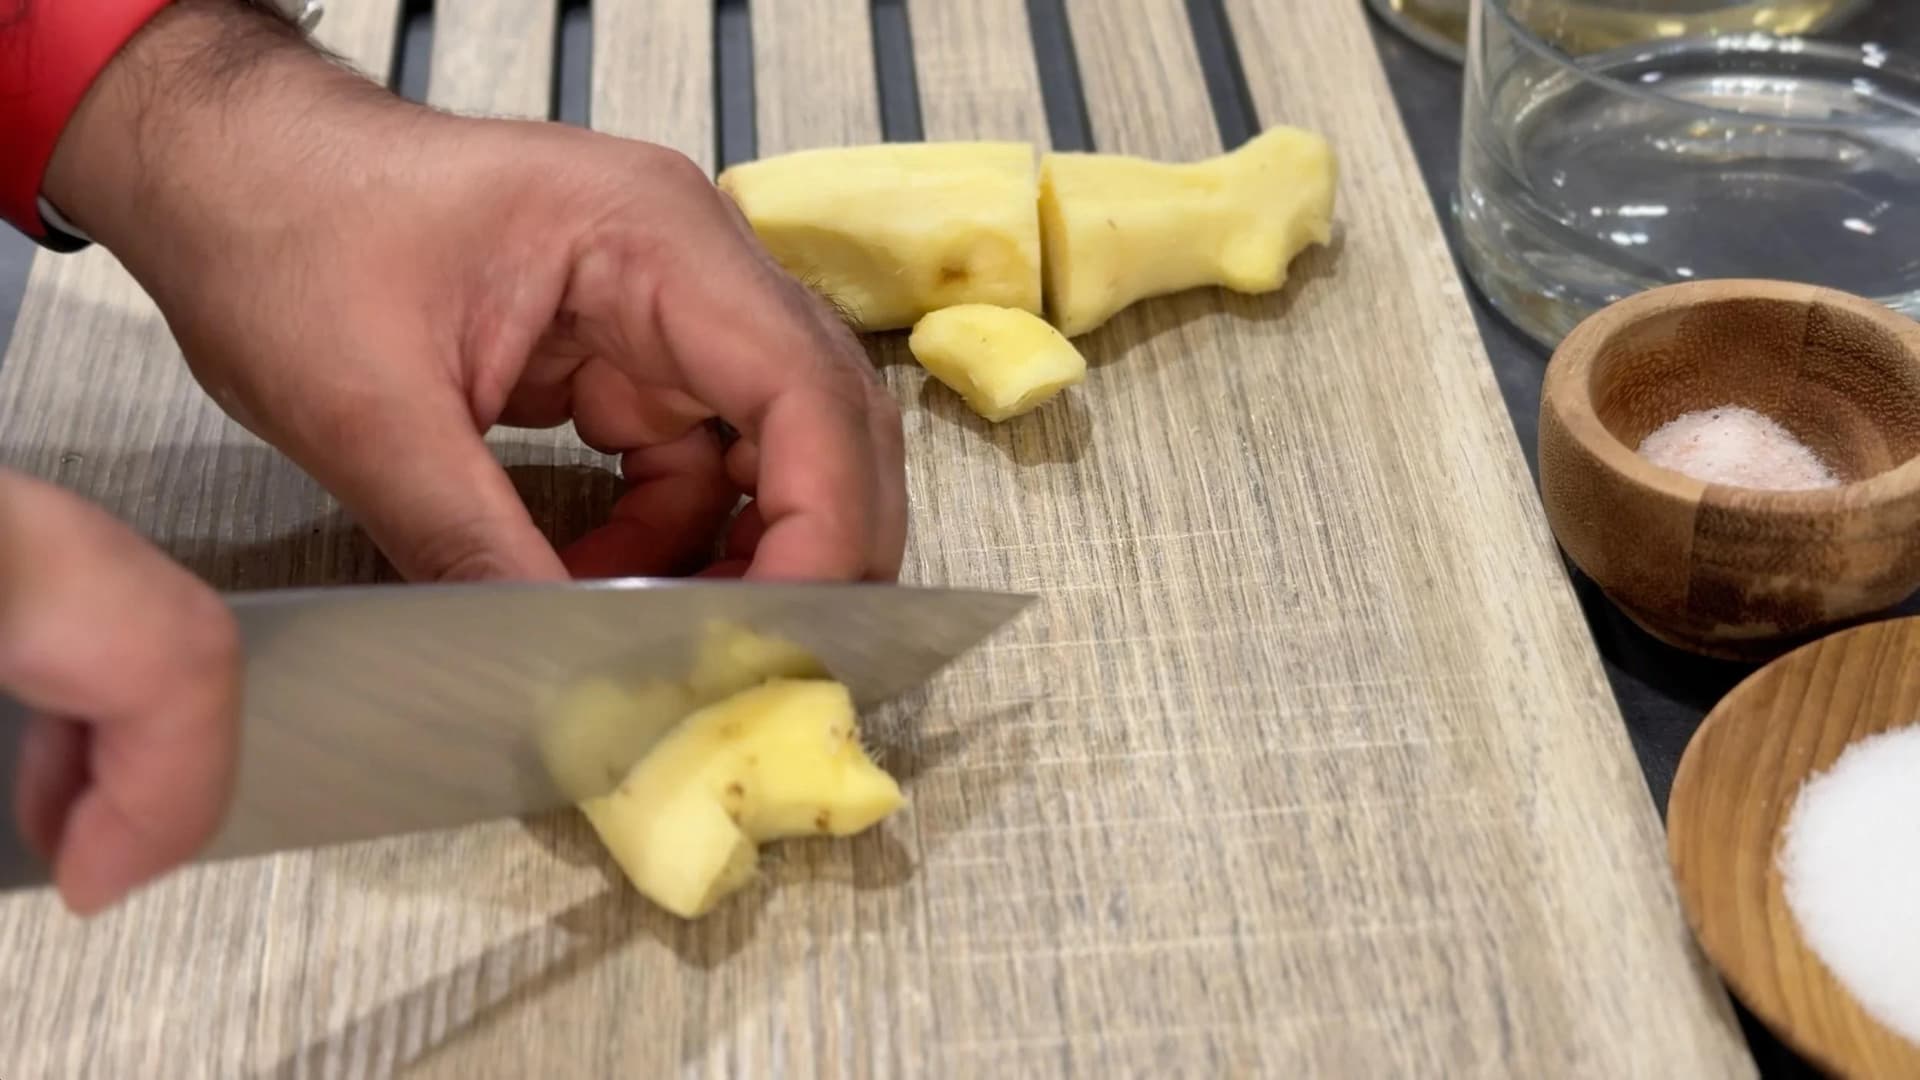
Peel the ginger using a spoon or a vegetable peeler.

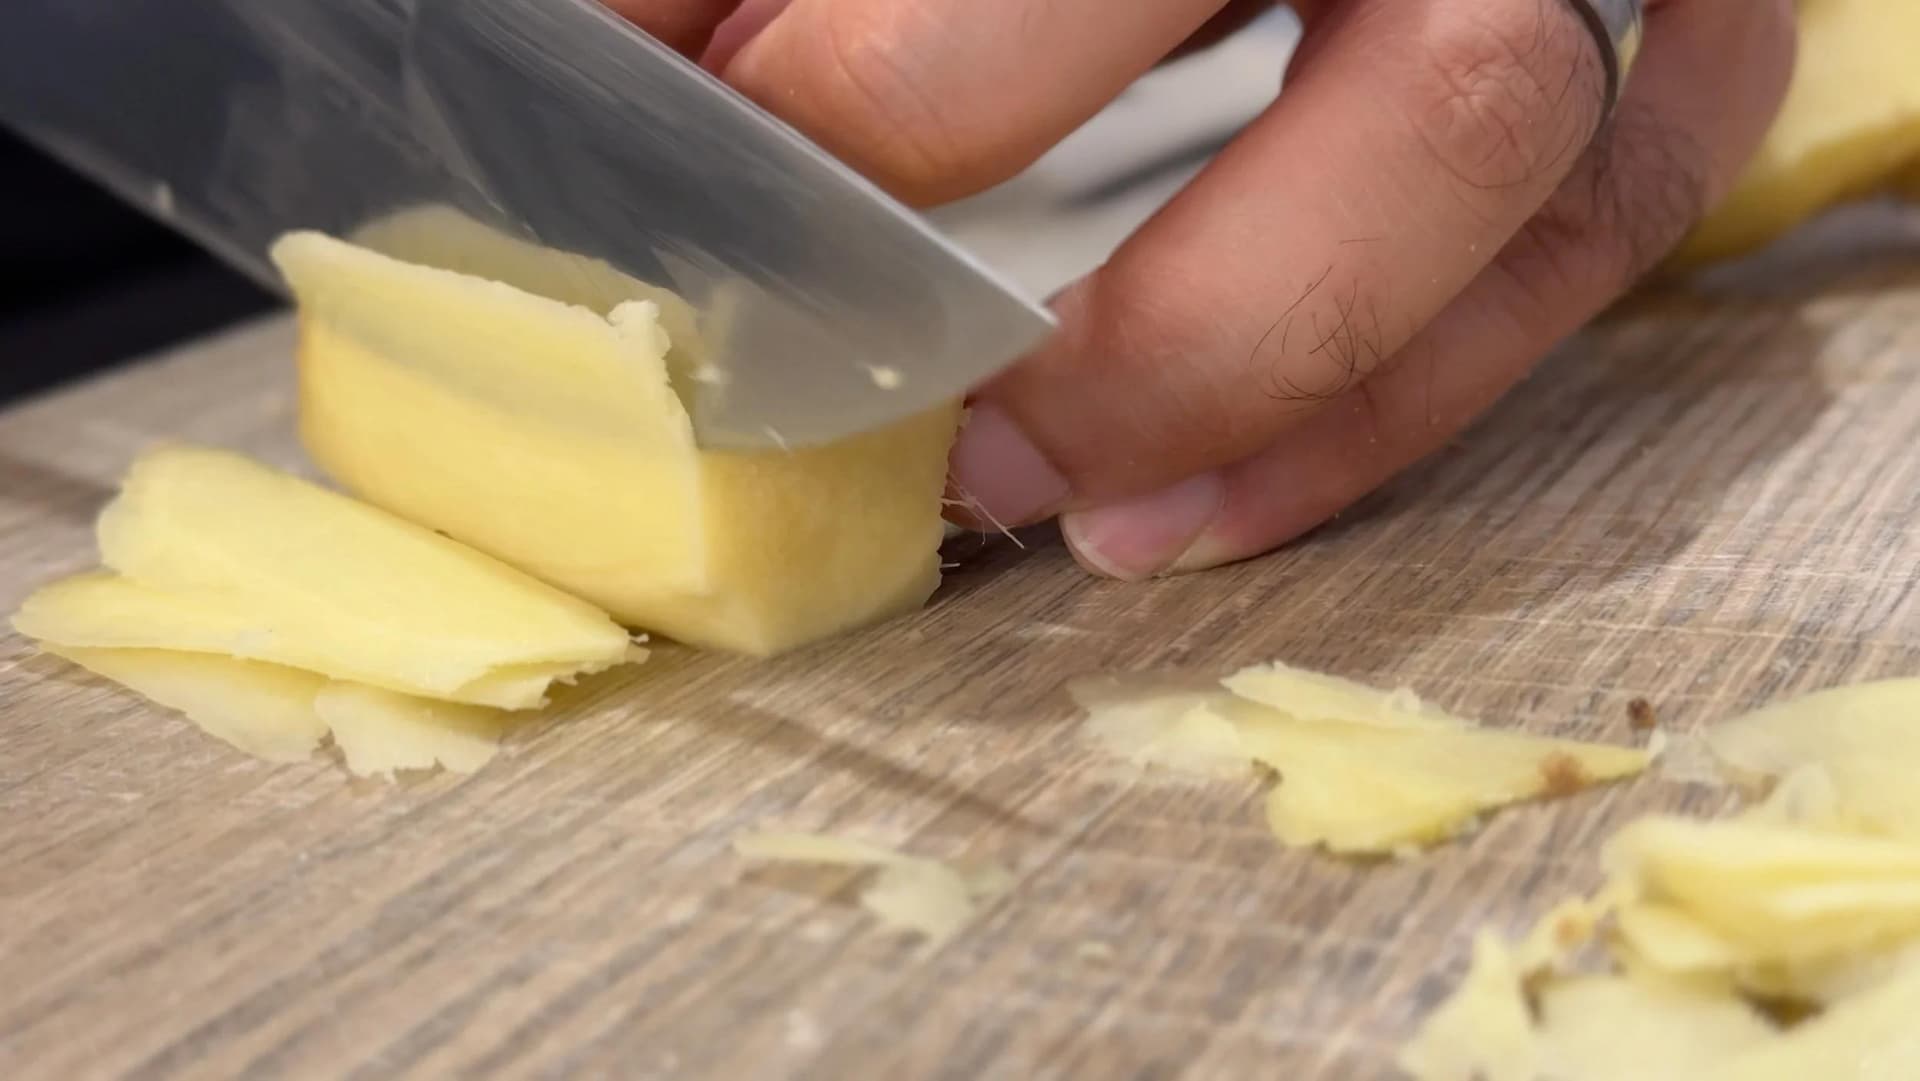
Then, using a sharp knife or a mandoline, slice the ginger into super-thin slices.


Bring a pot of water to a boil and add the sliced ginger pieces. Boil for 2-3 minutes and then drain, set aside for now.


Return the pot to the heat and add the rice vinegar, water, sugar and salt. Once the water has come up to a simmer, whisk well to dissolve the sugar and salt.


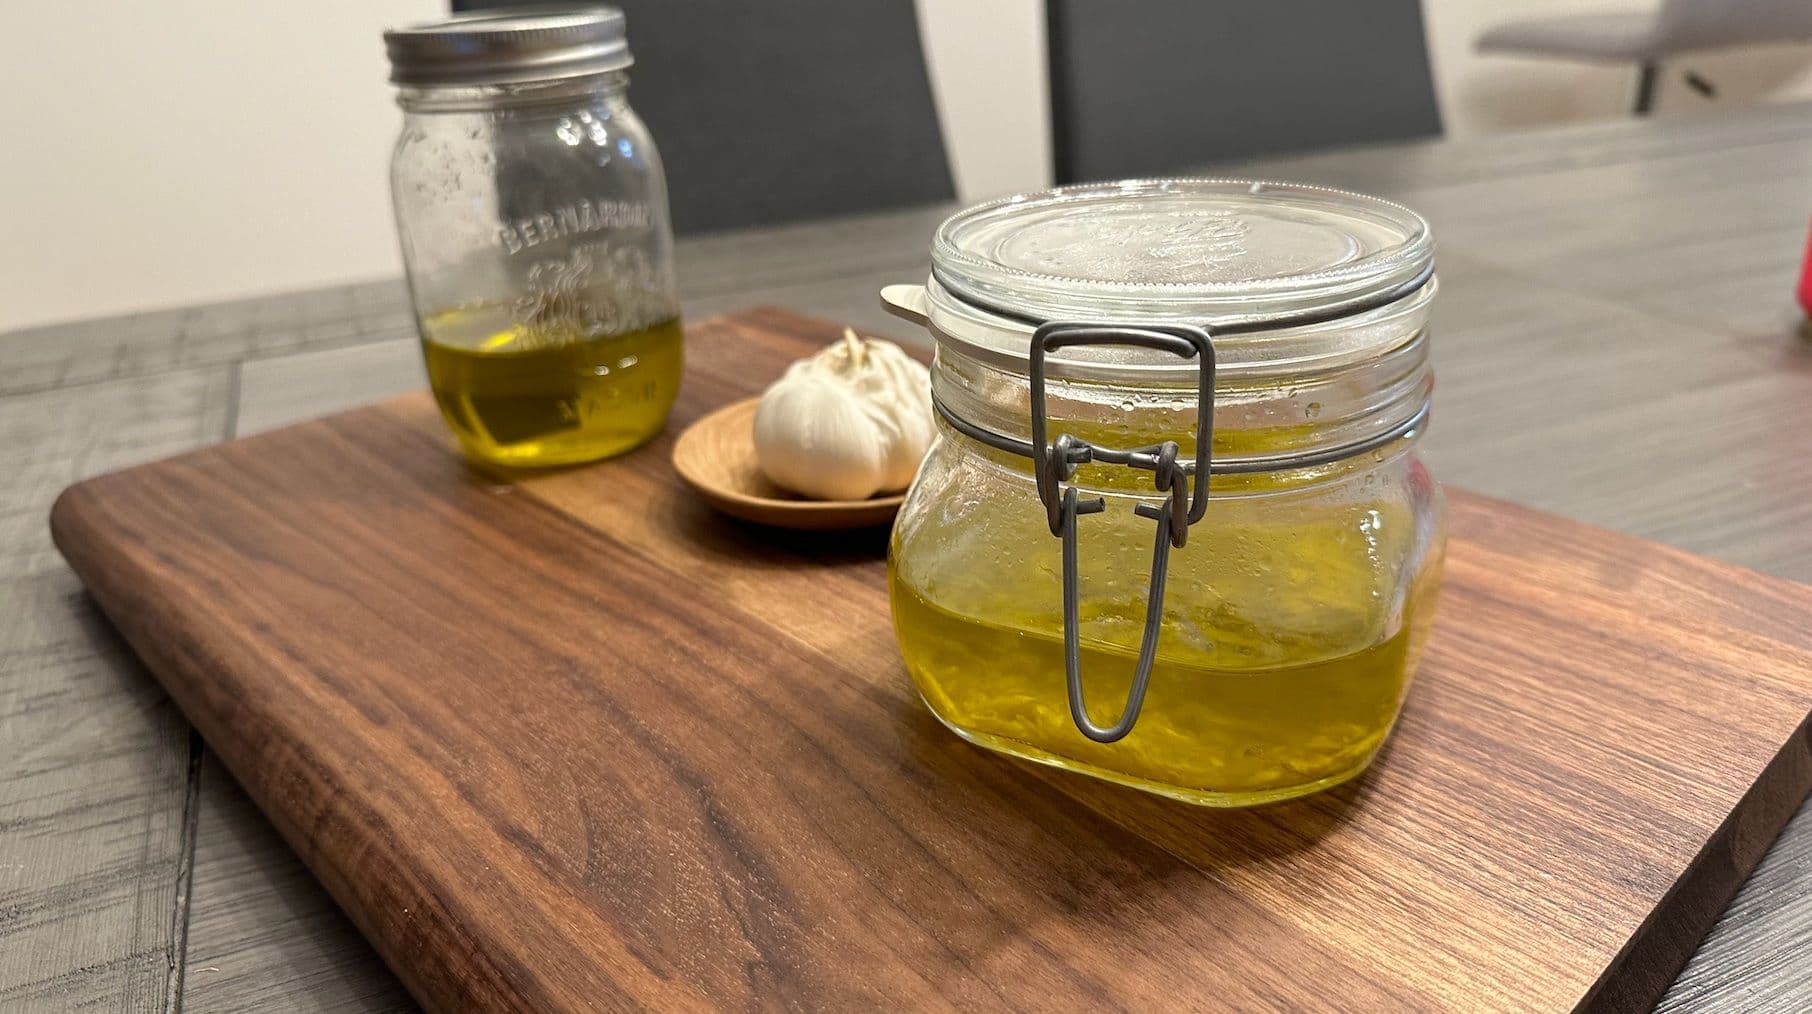
Add the ginger pieces to a sterile jar and pour the hot pickling solution into the jar. Allow the pickling solution to come to cool down for 15-20 minutes and then close the lid. Refrigerate for at least 24 hours.


Enjoy!

Tips for Great Pickled Ginger
- Make sure to use a freshly sharpened knife or a mandolin to slice the ginger paper thin. This is key to achieving the correct texture for gari.
- If using young ginger, there is no need to use water to prepare the pickling solution. The water in this recipe is used to help tenderize the ginger and make the flavor of the regular ginger root milder.
- Use sterile containers and utensils while preparing this recipe to ensure you do not introduce any contaminants. This will maximize the shelf life.
Can I Use Less Sugar?▼
You can, but keep in mind how this will affect the gari. Of course, the most obvious effect would be the flavor would be overall less sweet, which can have an impact on expectation versus reality when it comes to the true flavor of gari - sweet, salty and slightly spicy ginger flavor.
However, behind the scenes, sugar, along with the salt helps create a hypertonic environment for the ginger by drawing out moisture from the ginger, making it softer in texture. Reduced sugar can mean tougher ginger.
The preservation will be least affected by reduced sugar since the rice vinegar is the primary preserving agent. The sugar also helps with the preservation, but reducing the amount will likely have a negligible effect.
How do I Use Pickled Ginger?▼
As mentioned earlier, typically Pickled Ginger is served on the side with sushi rolls or sushi cones to cleanse your palette so you’re ready to enjoy a different roll or different kind of fish! However, if you’ve made lots of pickled ginger, then there’s no need to restrict yourself to sushi! For starters, a key dish that really shines with pickled ginger is a Salmon Poke Bowl with Spicy Mayo! Unfortunately, I hadn’t made my pickled ginger yet when I made the Poke Bowl, so I used a store-bought one, but now I’ve got some excellent pickled ginger ready to go if I wanted another Poke Bowl!
If you’re looking for more ideas, then how about in a wrap with rice paper? You can add in your pickled ginger with some other Pickled Vegetables, such as carrots and cucumbers, avocados, lettuce, and Spicy Mayo for a delicious wrap! You could even use pickled ginger in burgers! Add it as a topping for an Asian-style burger with minced chicken or beef or pork. Furthermore, you could incorporate your pickled ginger into a Coleslaw and have it on the side with your burgers or inside!
Other ways to enjoy pickled ginger could be in Asian stir fries, to use for salad dressings, or even to add some tang to cocktails!
How to Store Gari?▼
Ideally, you would store your Sushi Ginger in a mason jar. However, no worries if you don’t have a mason jar! Alternatively, you can simply use an airtight container. Be sure to keep your pickled ginger in the fridge, of course!
How Long Does Japanese Pickled Ginger Last?▼
Shelf life for homemade pickled ginger or Gari truly lies with 3 major factors:
Vinegar Concentration
Some recipes do not include water to prepare the pickling solution. The advantage of which is a higher vinegar concentration and more acidic pickling solution to help preserve the ginger for much longer, up to 6 months when refrigerated and handled properly. The addition of water in my recipe reduces the acidity of the pickling solution which, as a result reduces the shelf life of the ginger to anywhere between 1-3 months.
But, the addition of water has a couple advantages of its own:
The water helps dilute the rice vinegar, giving the pickled ginger a more balanced level of acidity, especially since the water to vinegar ratio is almost 1:1.Ginger can become rubbery or tough in acidic pickling solutions, dilution from the water can help the ginger have a softer texture. The dilution ensures the ginger does not dehydrate too quickly, and helps maintain a desirable texture in the ginger.
Refrigeration
Make sure to store the pickled ginger in the solution, in an airtight container refrigerated below 40 °F or 4°C. This slows down the metabolic rate of microbes and enzyme activity that cause spoilage in food.
Hygiene Practices
Use clean, sterile containers and utensils while preparing the pickled ginger. This reduces the risk of contamination and any potential acceleration of microbes/bacteria/enzyme activity that can ruin the gari’s shelf life.
Since water is used in the pickling solution, bringing the pickling solution to a boil is essential to ensure most of the bacteria that might be present is killed before pickling the ginger.


Comments
No comments yet — be the first to share your thoughts!
Leave a review
Be the first to share how it went — your note helps other cooks (and earns the recipe its stars).