


This post may contain affiliate links. Read our disclosure policy
Watch the recipe

I’ve been using my Cosori air fryer non-stop, and if you’re on the fence about getting an air fryer, then I recommend you check out this video for my first impressions! It hasn’t even been a month since I purchased it, but the way I make food is so different! Something that I just absolutely had to try out in my air fryer was one of my all-time favorites… chicken tikka! I was skeptical about how the air fryer would do, but let me tell you that my life has officially changed now that I’ve cooked my chicken tikka in the air fryer, and I know yours will be too!
If you’ve always had making your own chicken tikka on your bucket list, now is the time to check it off as part of your Live to Cook one-month challenge! Get started for free today by signing up to my email newsletter, plus all of my latest recipes will be delivered straight to your email inbox.
Don’t forget to watch the video to follow along with all the steps on how to make authentic chicken tikka at home! It would mean a lot to me if you could please subscribe to my YouTube channel, and be sure to hit the bell button to be notified when all my latest video recipes go live! Let’s get air frying!
Why This Air Fryer Chicken Tikka Recipe Works
- Authentic Indian recipe brought home: I always order chicken tikka at Indian restaurants, and I can attest that this homemade recipe tastes just like from the restaurants! Yes, no tandoor is required - just your air fryer which I feel most modern kitchens have these days!
- Perfect char: As mentioned before, chicken tikkas are a highlight at Indian restaurants. Their key characteristic is the incredible smokiness on the pieces of meat. The air fryer will be able to do this with ease!
- Easier and less messy than the oven: I’ve been making chicken tikkas in the oven for over the past decade I’ve been in Canada. The broiler method has been my closest way to achieve restaurant-style chicken tikkas at home ever since, but now that I have an air fryer, this is going to change. The problem with making the tikkas in the oven is that the baking tray and the wire rack get really dirty after each use, and it’s always a pain in the butt to clean up, especially if you don’t have a dishwasher! Plus, you really have to be extra attentive when the chicken tikkas are broiling in the oven. On the other hand, you just need to throw your chicken tikkas in the air fryer and there is much less supervision required!
- Quick cook time: I also observed that it is so much faster to cook the tikkas in the air fryer versus the oven! The cook time was quite honestly cut down by half!
- Versatile servings: You can have your tikkas as a starter or use them later on in famous curry recipes. I’ll outline all the ways you can enjoy your authentic chicken tikkas made in the air fryer later on in this post!

Questions You May Have!
What is Chicken Tikka?▼
Chicken tikka is one of India’s most famous chicken appetizers in restaurants. For a formal definition, the Oxford Dictionary defines a tikka as: “an Indian dish of small pieces of meat or vegetables marinated in a spice mixture.” With that being said, chicken tikkas are small chunks of chicken that are marinated and cooked. You can also have paneer tikka for the vegetarian alternative. See how to make Air Fryer Paneer Tikka if you’re hungry for that!
What’s The Difference between Chicken Tikka and Tandoori Chicken?▼
While both can appear identical due to the color and similar ingredients in the marinade, they are not the same at all! As we mentioned earlier, tikka means chunk. The key difference between chicken tikka and tandoori chicken is how the chicken is presented. For tandoori chicken, we typically go for bone-in chicken, and this can be chicken breast, wing, or leg. Because of the small pieces of chicken tikka, those are usually served as an appetizer, and a main dish would be the large pieces of tandoori chicken. Check out my Air Fryer Tandoori Chicken recipe if you’re interested in trying it!
How Do You Get a Smoky Flavor Without a Tandoor Oven?▼
You can add some olive oil or mustard oil directly in the marinade or spray one of those oils on top of the chicken pieces as they are cooking. These oils will assist the chicken to have the iconic char we know and love as it cooks!
What Cut of Chicken Should I use for Air Fryer Chicken Tikka?▼
My first choice for the perfect cut of chicken to make chicken tikka is chicken thighs. They are much more tender and the high fat content really makes the chicken so juicy, practically they “self-baste,” in contrast to chicken breast.
However, if you do want a cut of chicken that’s higher in protein and cooks a bit faster, then chicken breast can certainly work. For example, I use chicken breast for my Deconstructed Tikka Masala Lunch Bowl.
Another option that I like to do sometimes is to use a combination of both chicken breast and chicken thighs. If you decide to do this, be sure to keep in mind that chicken breast and thighs have varying cooking times.

How Long Does the Chicken Tikka Take to Cook?▼
This chicken tikka recipe will take about 7 to 10 minutes to cook, depending on how thick your chicken pieces are and the model of your air fryer.
What If I Don’t Have an Air Fryer?▼
That’s totally fine! You can follow my Oven-Broiled Chicken Tikka method, which I’ve been following for over a decade. However, if you don’t have an oven or forgot to preheat it and you want to eat right away, then you could also pan-sear the chicken tikkas on a cast iron pan. This can certainly be a life saver when you’re hangry! Pan-searing the chicken will result in the chicken cooking much faster, but you do need to be careful because there is a higher chance of the chicken becoming dry.
Can I Make Air Fryer Chicken Tikka in Advance?▼
Yes, you can definitely do a lot of the heavy lifting by marinating the chicken pieces and leaving the marinated chicken in the fridge for up to two days. While you could also cook the chicken tikka and enjoy it later in sandwiches & wraps or in curries, the chicken tikka will be the juiciest and tastiest if cooked and enjoyed fresh!

Mistakes You Might Be Making When Making Air Fryer Chicken Tikka
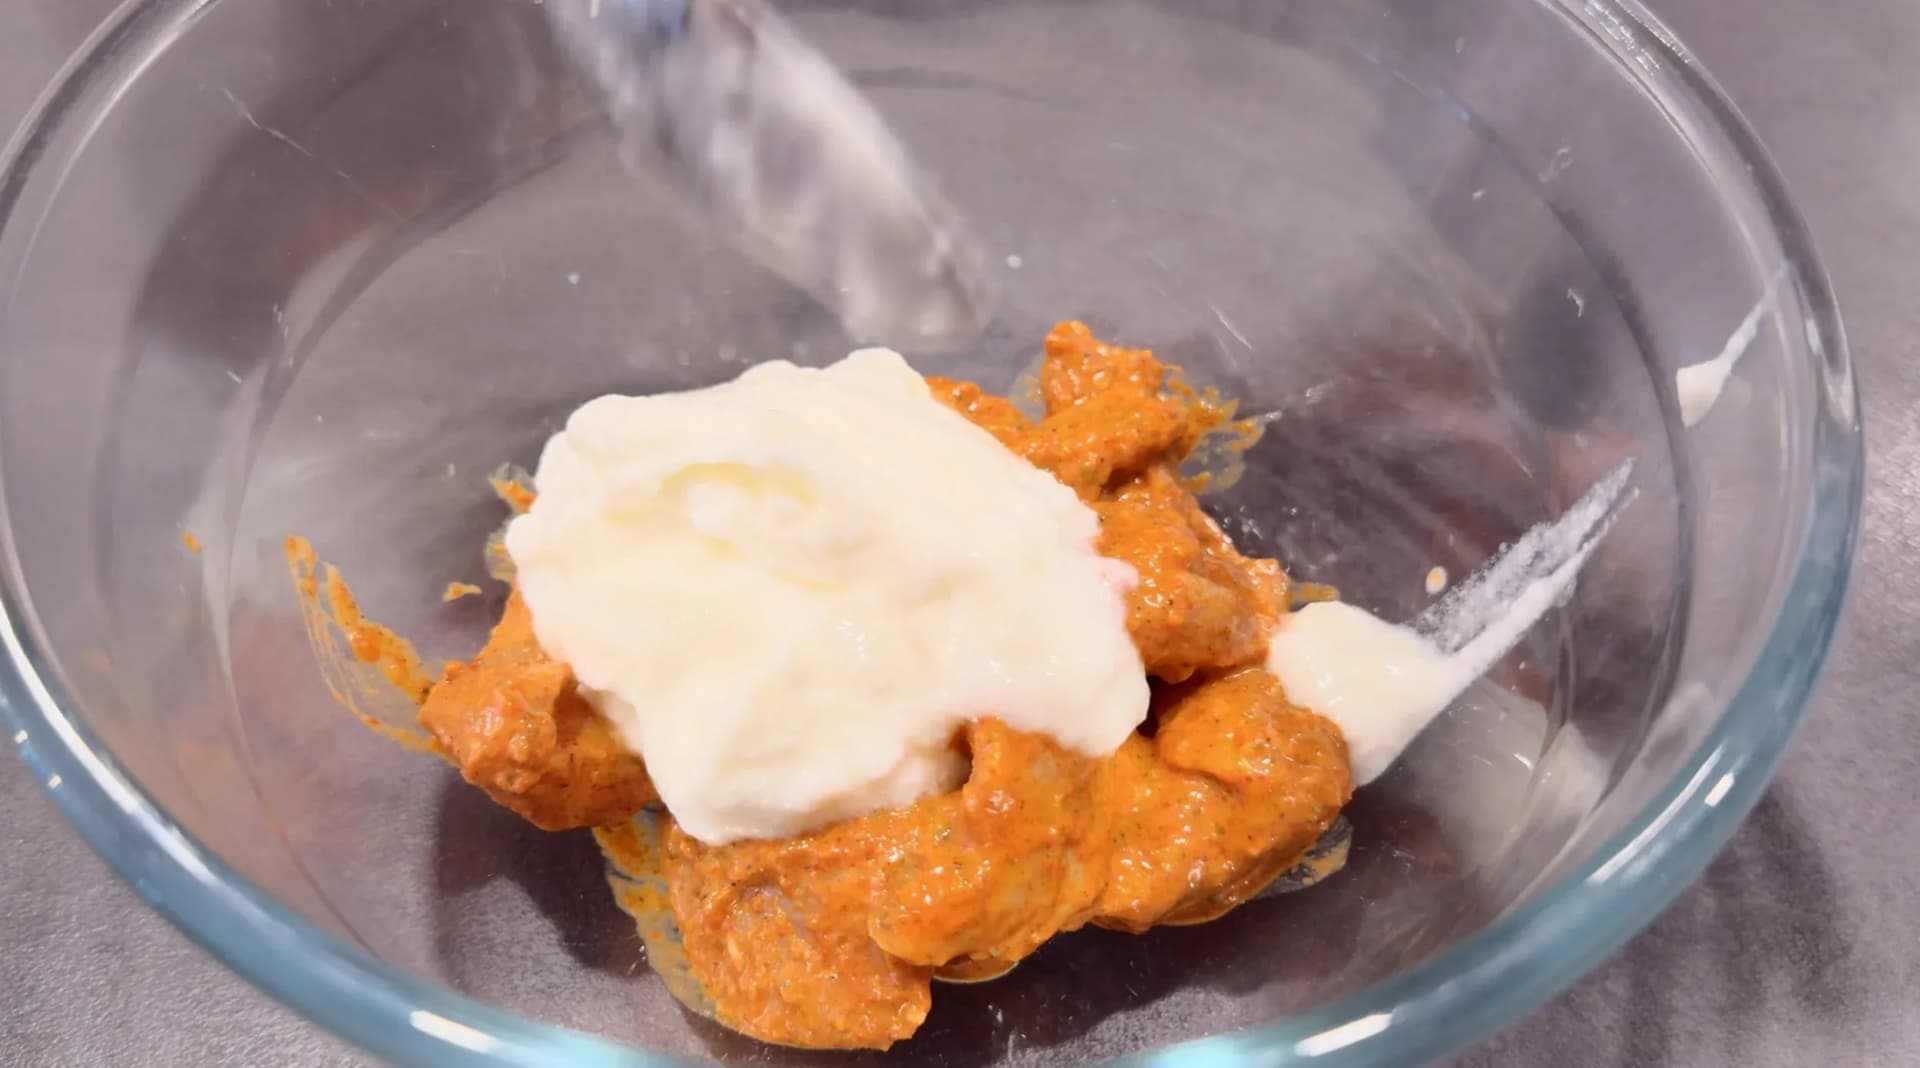
Too much moisture in the marinade: Moisture really is the enemy when it comes to air frying! You need to ensure to remove as much excess as possible so that the air fryer can begin cooking the food as soon as possible, instead of spending time removing the excess. If you’ve got too much moisture, you’re going to end up steaming your food instead of air frying it, and this can impact the texture and char we want to get out of this recipe. See the images below when I sabotage some pieces of chicken tikka on purpose by adding extra yogurt that is right from the tub to my marinade!

Not using the right spice in the marinade: We are using Kashmiri mirch for this recipe. This spice blend is not too spicy but it will give you the bright red color. I never use food coloring!
Not preheating the air fryer: Cooking your chicken from a cold basket is pointless, and this can result in inconsistent cook times. Preheat the air fryer so that it’s fully warmed through, and that when you add the food it will start to cook immediately.
Overcrowding the basket: Having the pieces of chicken touch each other is a huge no-no. We need that hot and dry air in the air fryer to circulate properly on all sides of the chicken so that it’s properly cooked and charred. Otherwise, you’ll end up with pale spots on the parts of chicken that are touching each other, and then a burnt char on the other sides since those sides were exposed to the hot air for too long. See what happens below when we overcrowd our chicken tikka pieces in the air fryer with our marinade that has too much moisture!
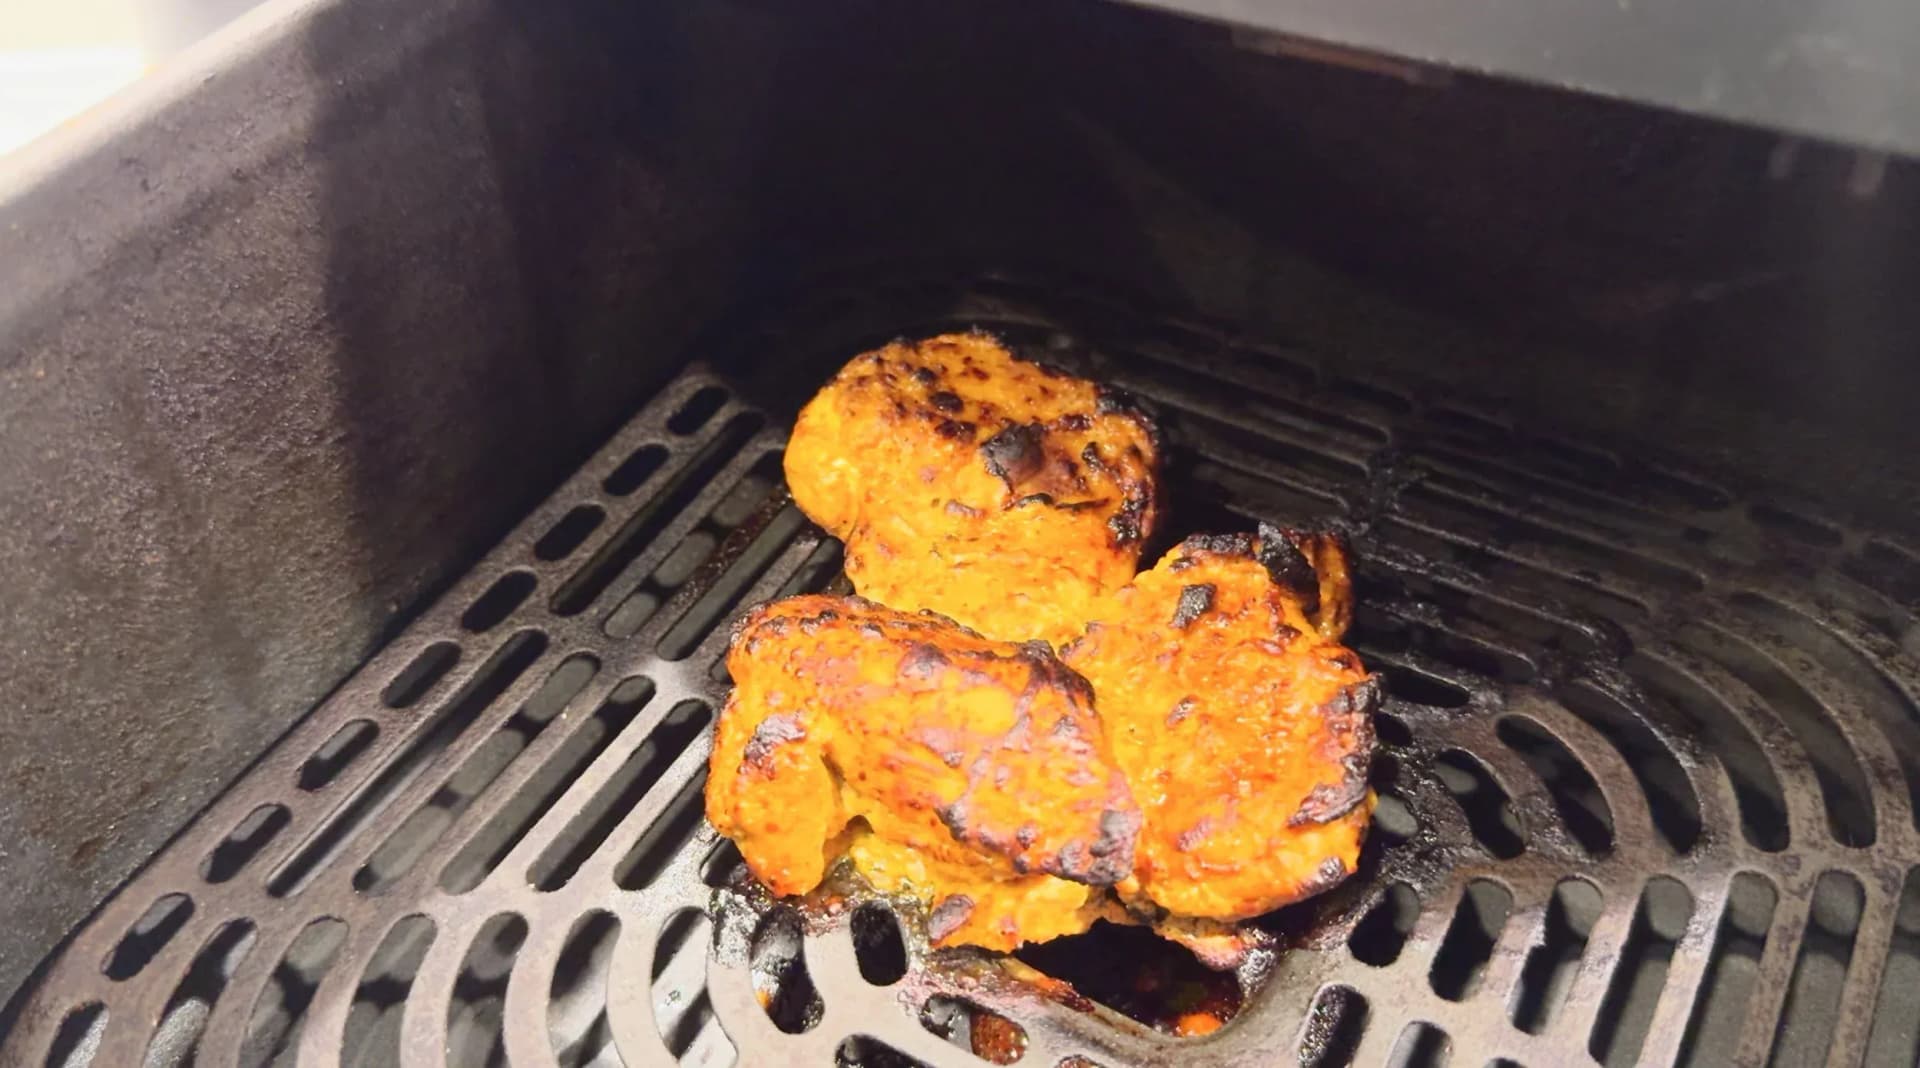
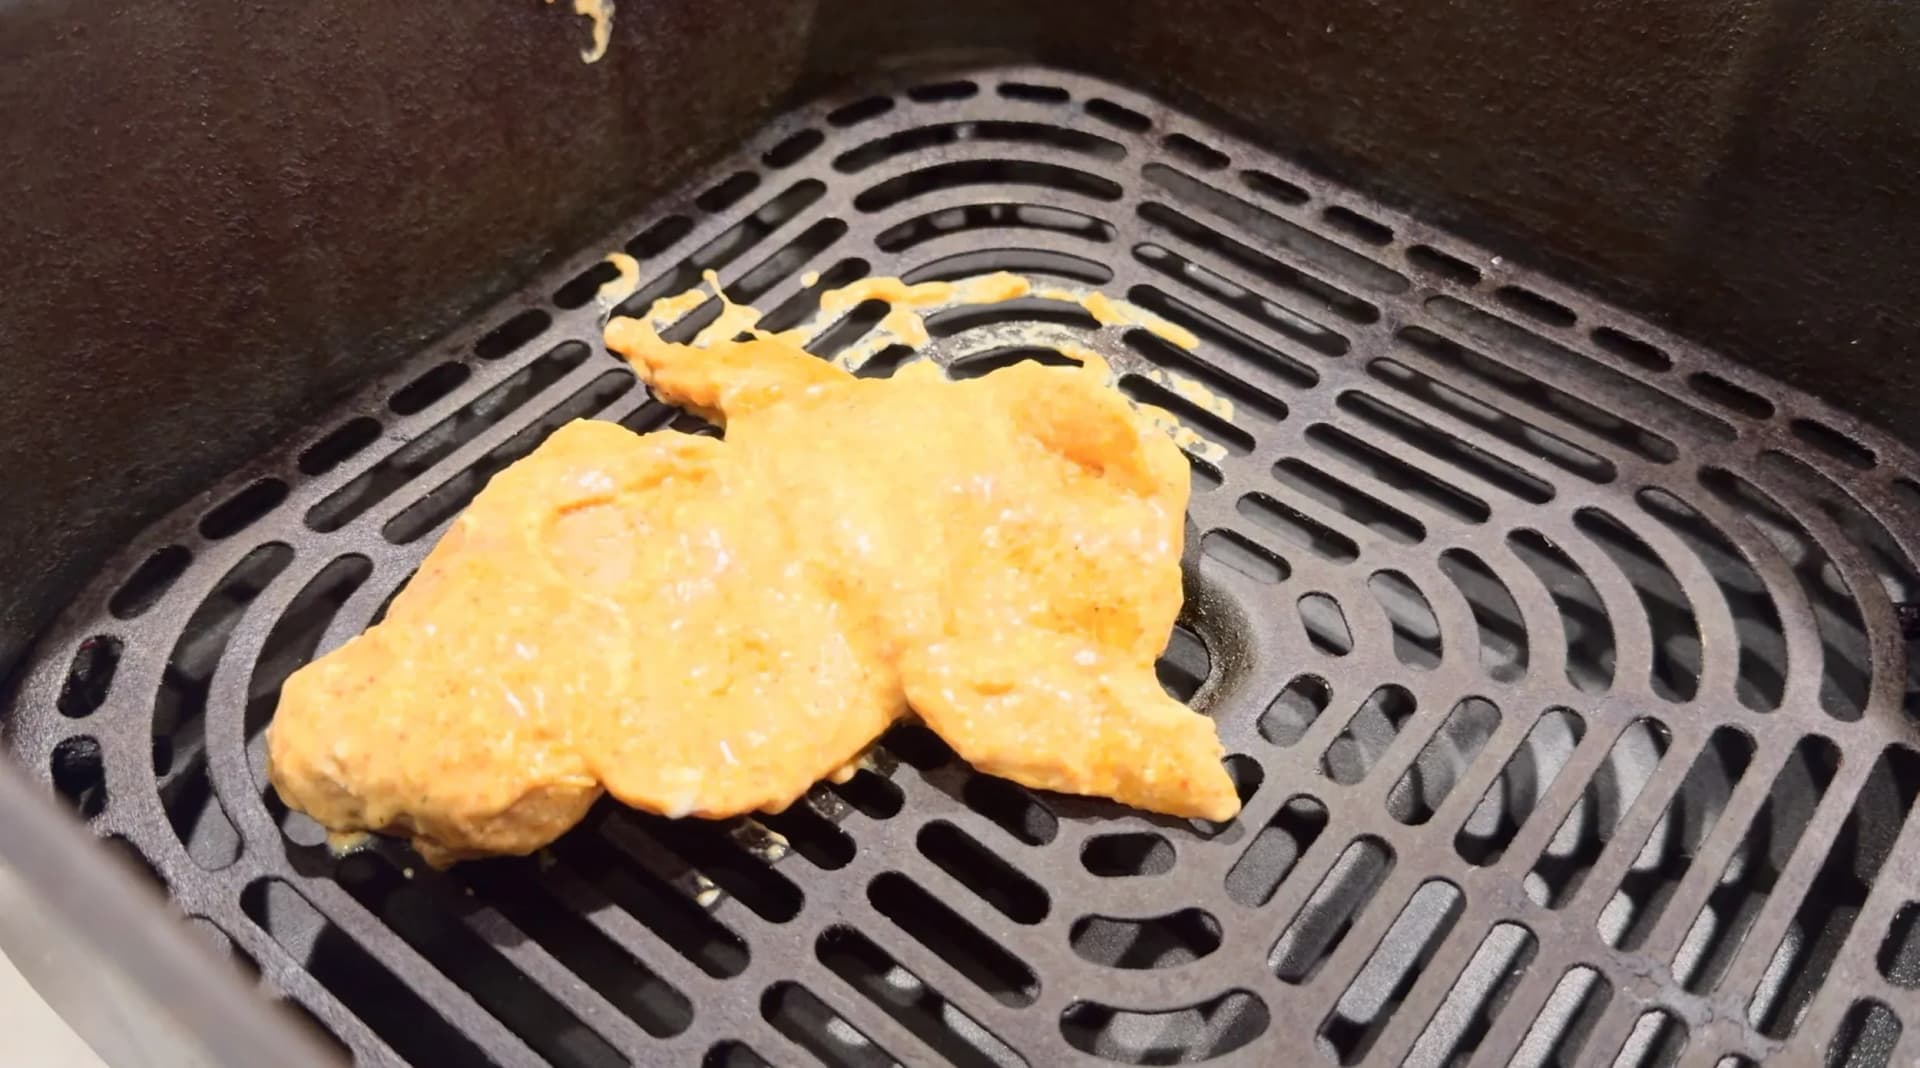
Not doing the two-cook method: I am guilty that my previous recipe used to do this! I would just straight cook the chicken at 440 F, which is a very high temperature. I found that now if I start the chicken at 375 F to tenderize and cook the chicken through, then blast the heat at 400 for just a couple of minutes I’ll get so much more flavor and juiciness and an even better char! See what happens below with our overcrowded and overly moist marinade without preheating the air fryer and cooking the thighs at an arbitrary time and temperature. These thighs looked decent, but I found that there was no cohesion in the chicken tikkas, and the spices were burnt and separate from the char. Not good at all!


Tools Needed to Make Chicken Tikka in the Air Fryer
- Cutting board
- Salt crock
- Air fryer
- Air fryer liners
- Measuring cups
- Measuring spoons
- Chef’s knife
- Mixing bowl
- Tongs
- Basting brush
- Ramekin
Ingredients for Indian Chicken Tikka
You can find the FULL PRINTABLE RECIPE CARD by scrolling to the bottom of this post to save the recipe for later and to see all ingredients and their quantities. By default, this recipe is for 8 chicken thighs, which will yield about 16 tikkas.

For the First Marinade
- Lemon juice: You can also use lime juice, which I’m using here.
- Kashmiri mirchGives a lovely red color without too much heat. Paprika can be a decent substitute if you don’t have Kashmiri mirch. As I outline in my free motivational guide to explore your potential in the kitchen, Making Cooking Fun!!, using a suitable substitute when appropriate can save you an unnecessary trip to the grocery store if this is going to be a niche ingredient for you in the future. However, if possible, I do suggest you get the real deal! Check your local South Asian grocery store or Amazon.
- Salt: Key seasoning to taste.
For the Second Marinade
- Chicken: I’m using boneless, skinless chicken thighs. If you’re using skin-on and bone-in, you’ll want to remove the bone and de-skin the thighs.
- Yogurt: For best results, I suggest you follow my Hung Curd recipe. This little extra step goes a long way! What hanging the yogurt does is remove the excess moisture from the chicken so that you get perfect results without the air fryer having to cook off extra moisture from the marinade. You just need some plain yogurt for hung curd. Full fat or lower fat won’t matter. I used to add the yogurt directly from the tub into the marinade, but hanging my yogurt has made a significant difference.
- Ginger-garlic paste: I always recommend you make your own. It is just ginger, garlic, and some water in a blender! Be sure to check out my complete recipe - it comes together in just 15 minutes and you can make a large batch of it!
- Garam masala: An iconic Indian spice that adds a great aroma, completing the marination.
- Lemon: Ideally freshly squeezed lemon juice, but bottled lemon juice will work fine too (ensure it’s not from concentrate!).
- Turmeric: A small amount to brighten the color of the marinade.
- Liquid smoke: This extra touch has really been a game changer! It helps to create the signature char of an authentic chicken tikka. If you’re making these on the barbecue, you won’t need this step.
- Mustard oil: My top recommendation to get a fantastic smoky char on the chicken. If you don’t have it (like I didn’t today!), then vegetable oil or any neutral oil will work fine too.
- Kashmiri chili powder: To further develop the bright red color of the chicken tikka and to add more flavor.
- Corn starch: This helps tenderize the chicken and ensure that the marinade doesn’t get stuck to the chicken pieces.
- Salt
How to Make Air Fried Chicken Tikka
For the First Marinade
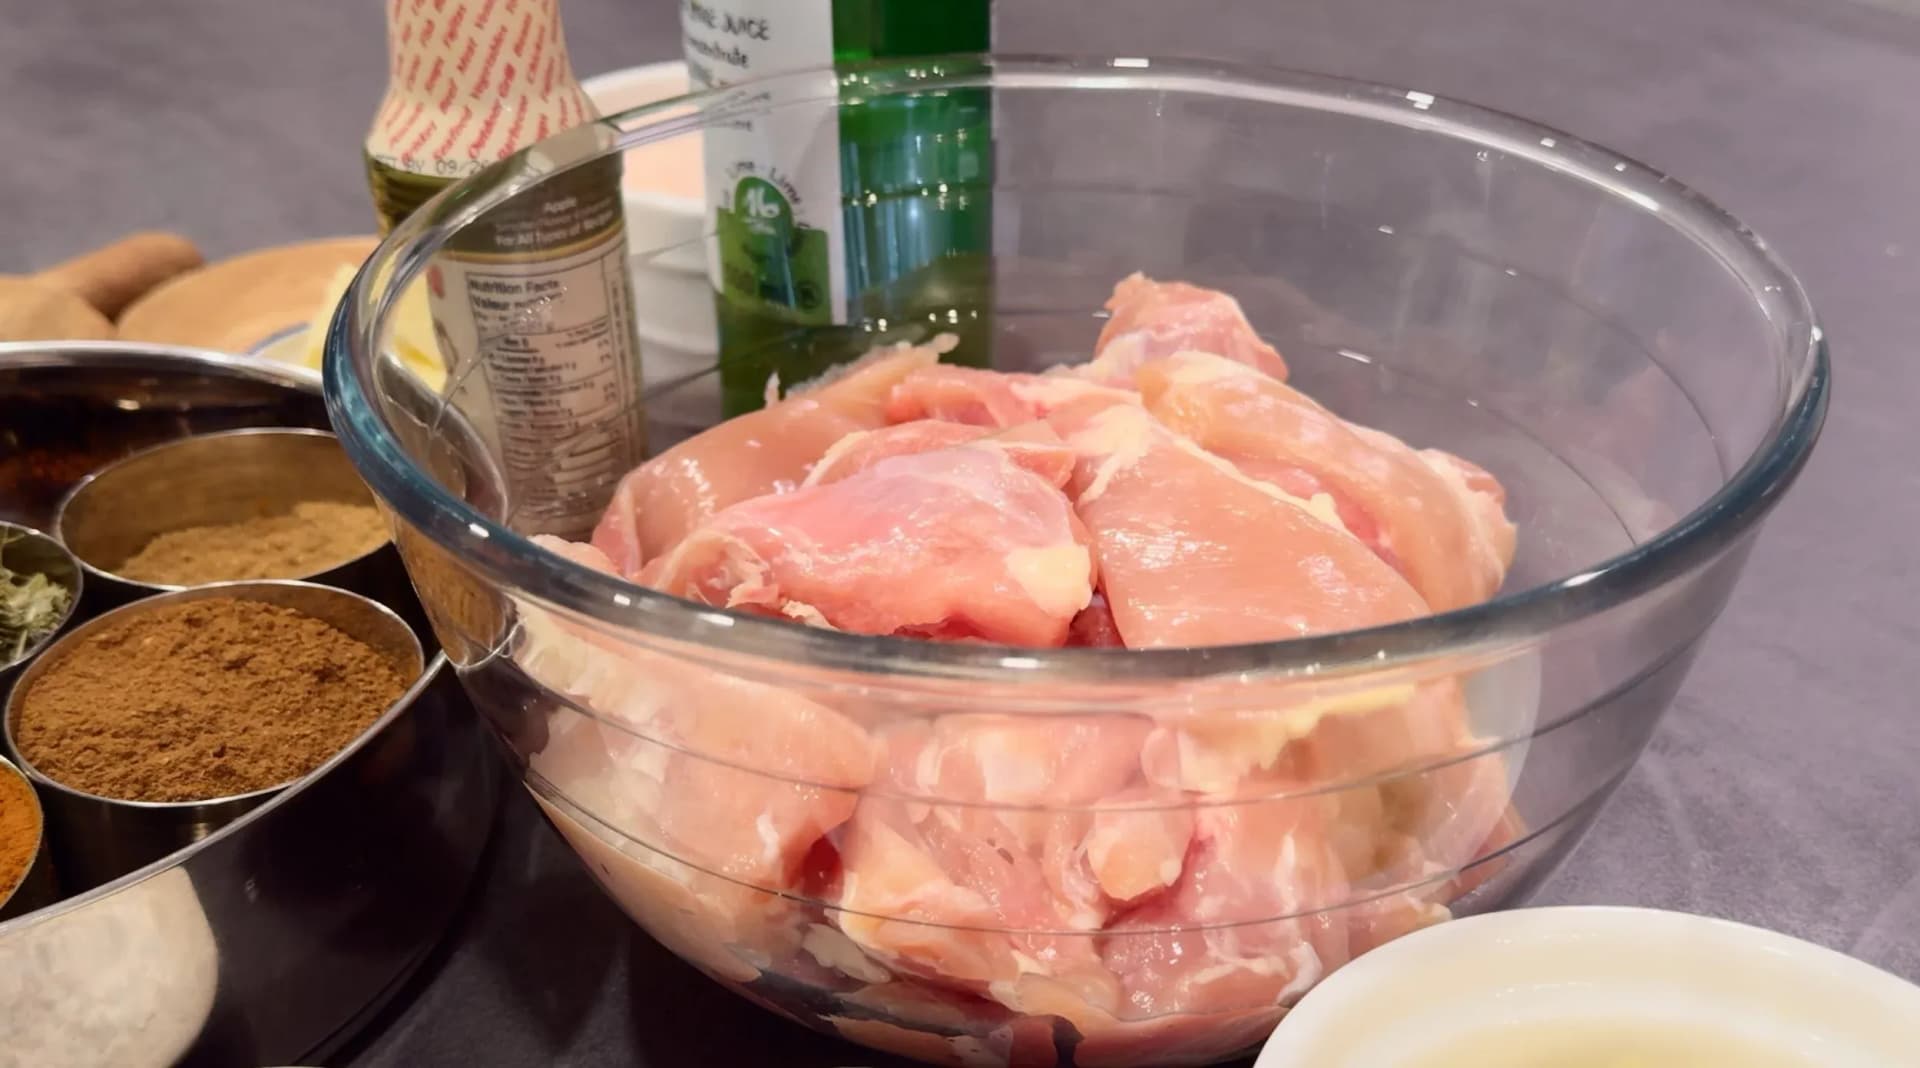
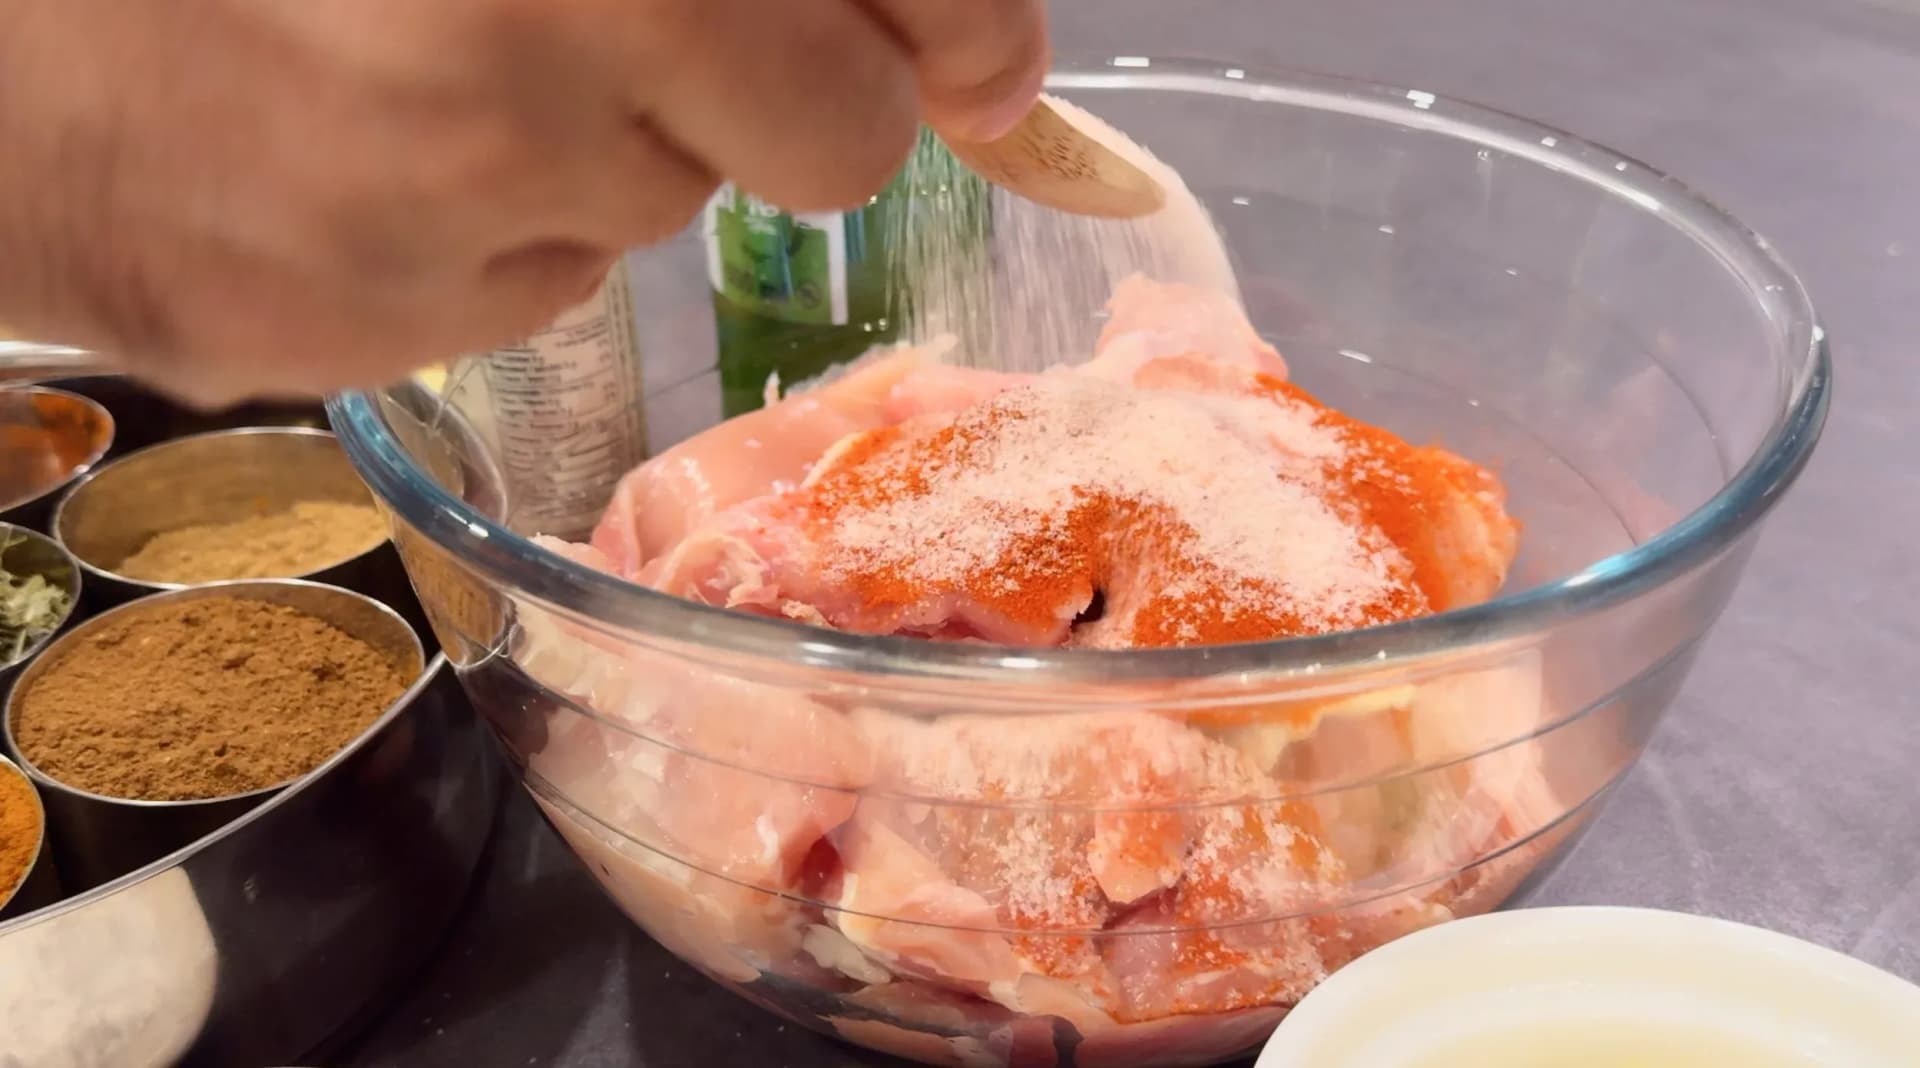
In a medium bowl, combine the chicken thighs with lemon juice, Kashmiri mirch, and salt. Mix well and marinate for 20–30 minutes.




For the Second Marinade
To the same bowl, add all the ingredients for the second marinade. Mix well until the chicken is evenly coated. Marinate for at least 2 hours, or preferably overnight.


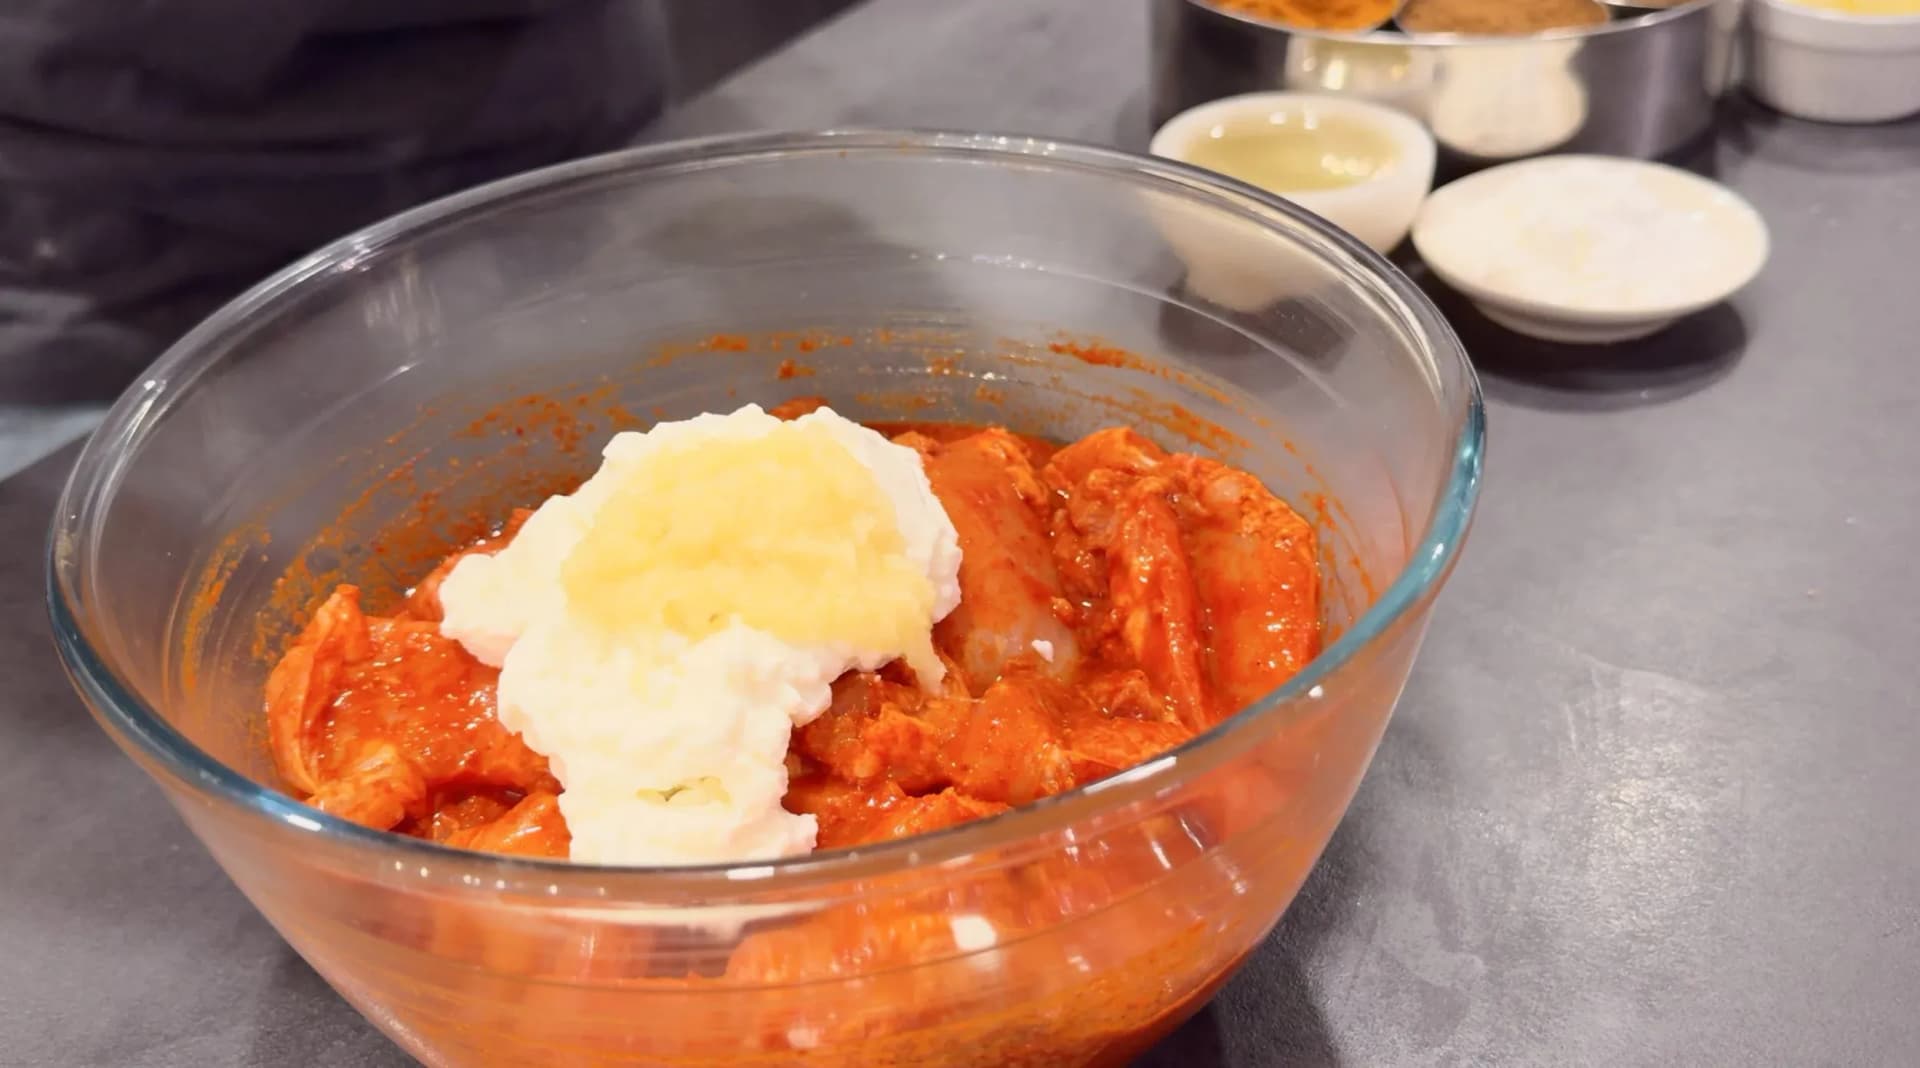

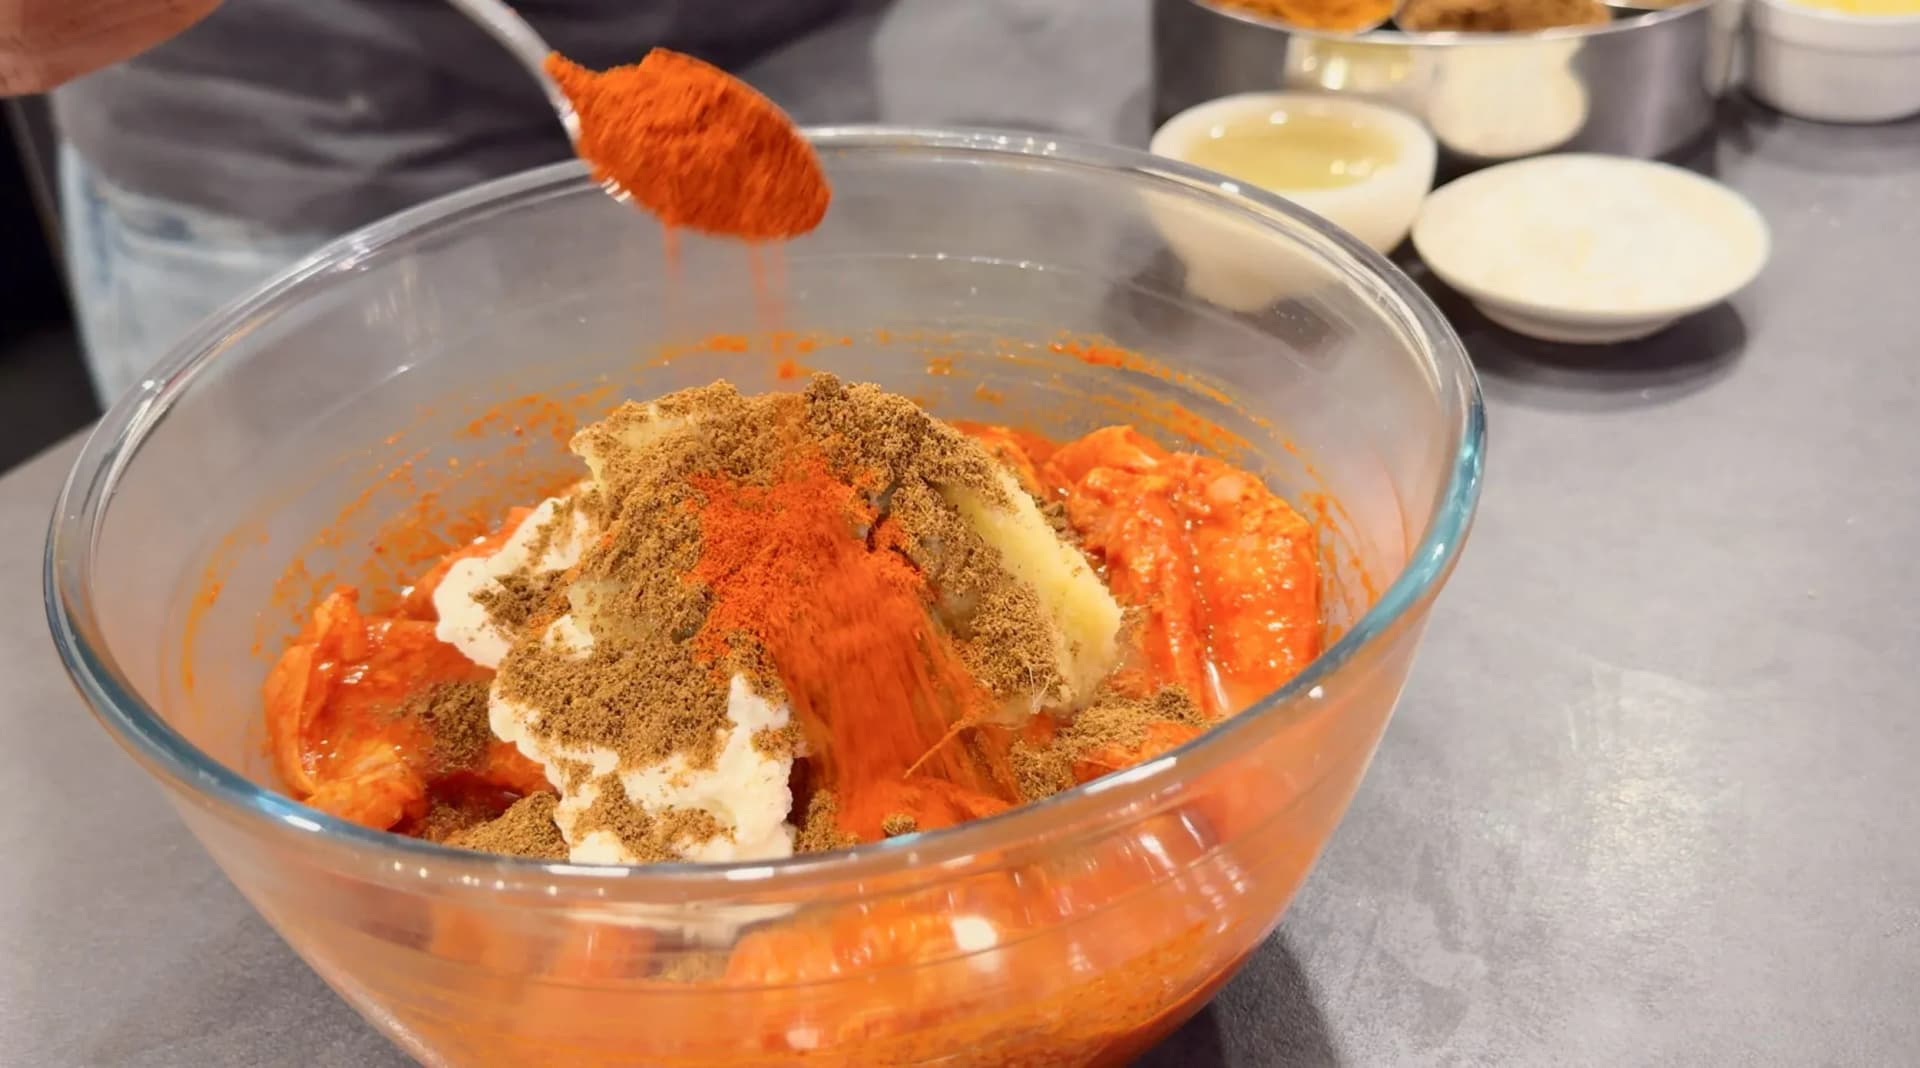


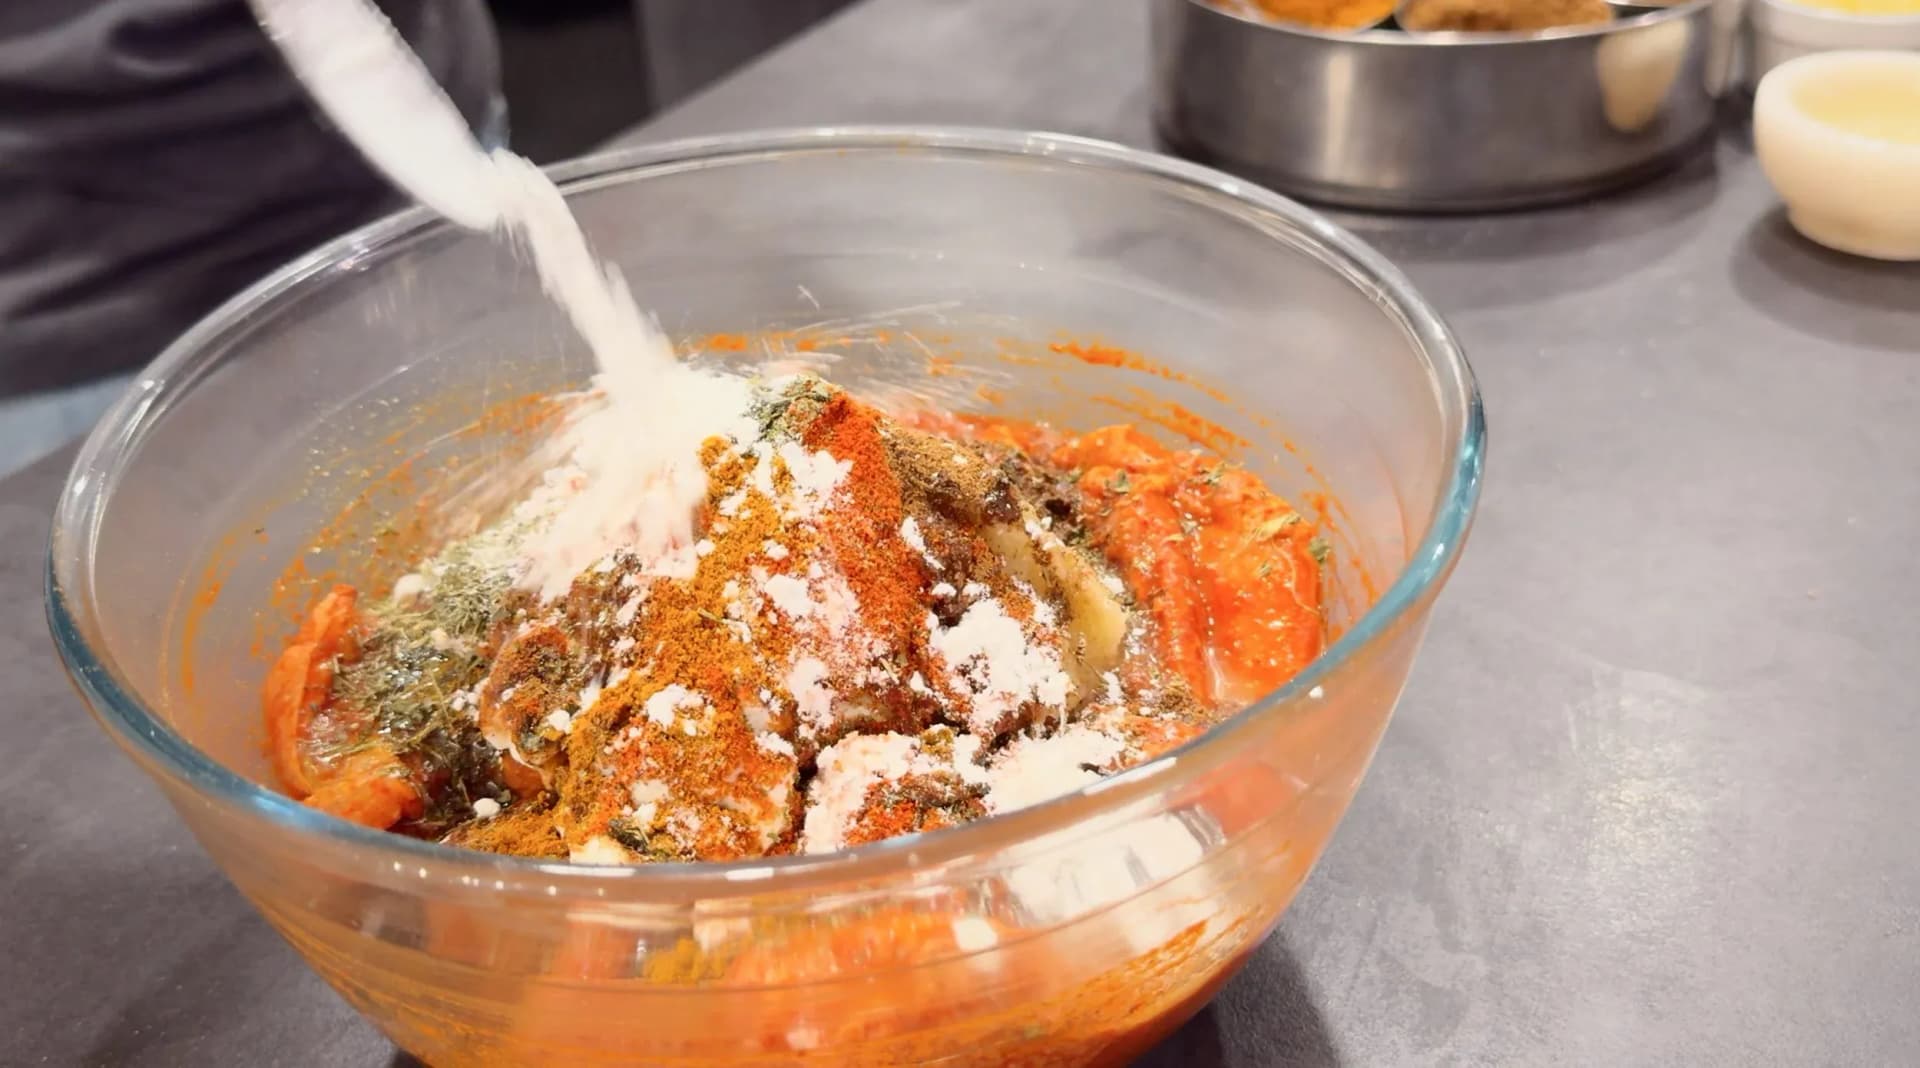
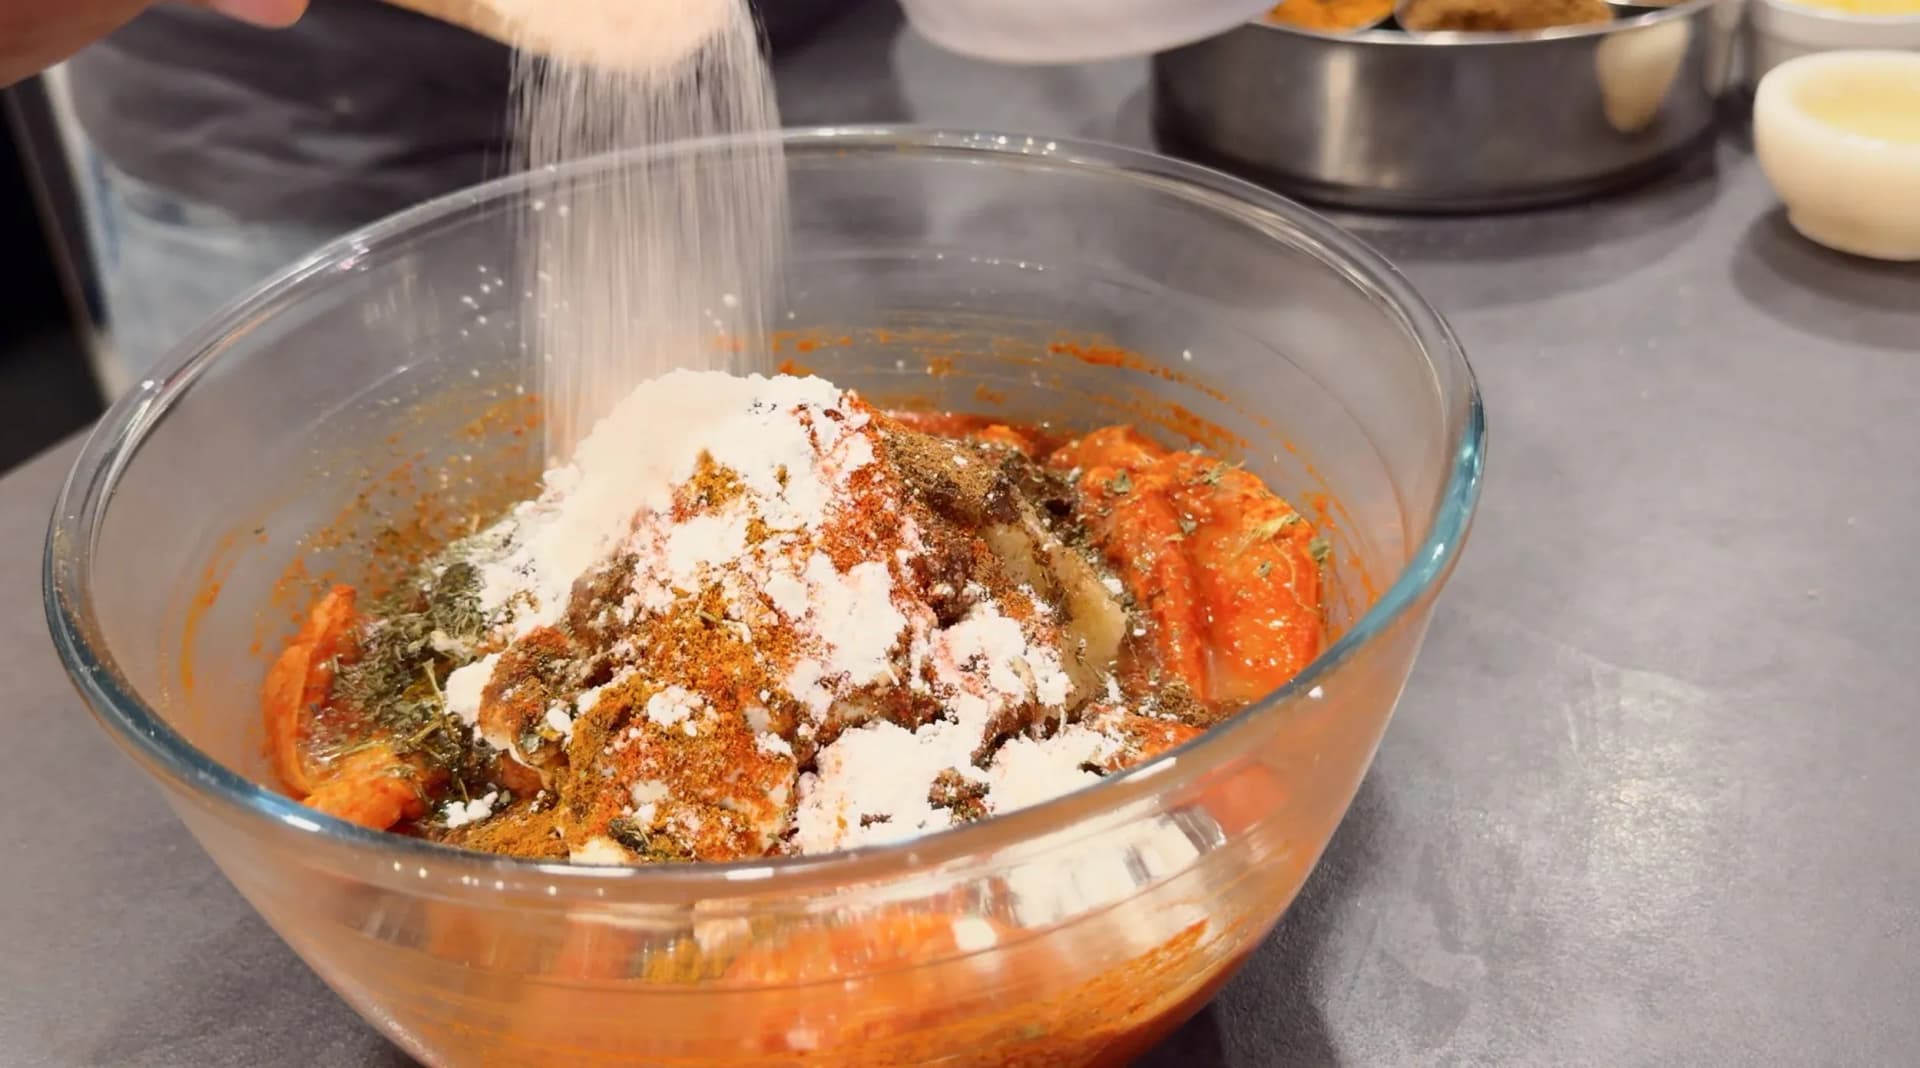

Mix well, cover and let marinate for at least 2 hours or preferably overnight.

To Air Fry and Serve
Preheat the air fryer to 375°F.

Place the rack inside the air fryer basket and arrange the chicken pieces in a single layer, leaving space between each piece.

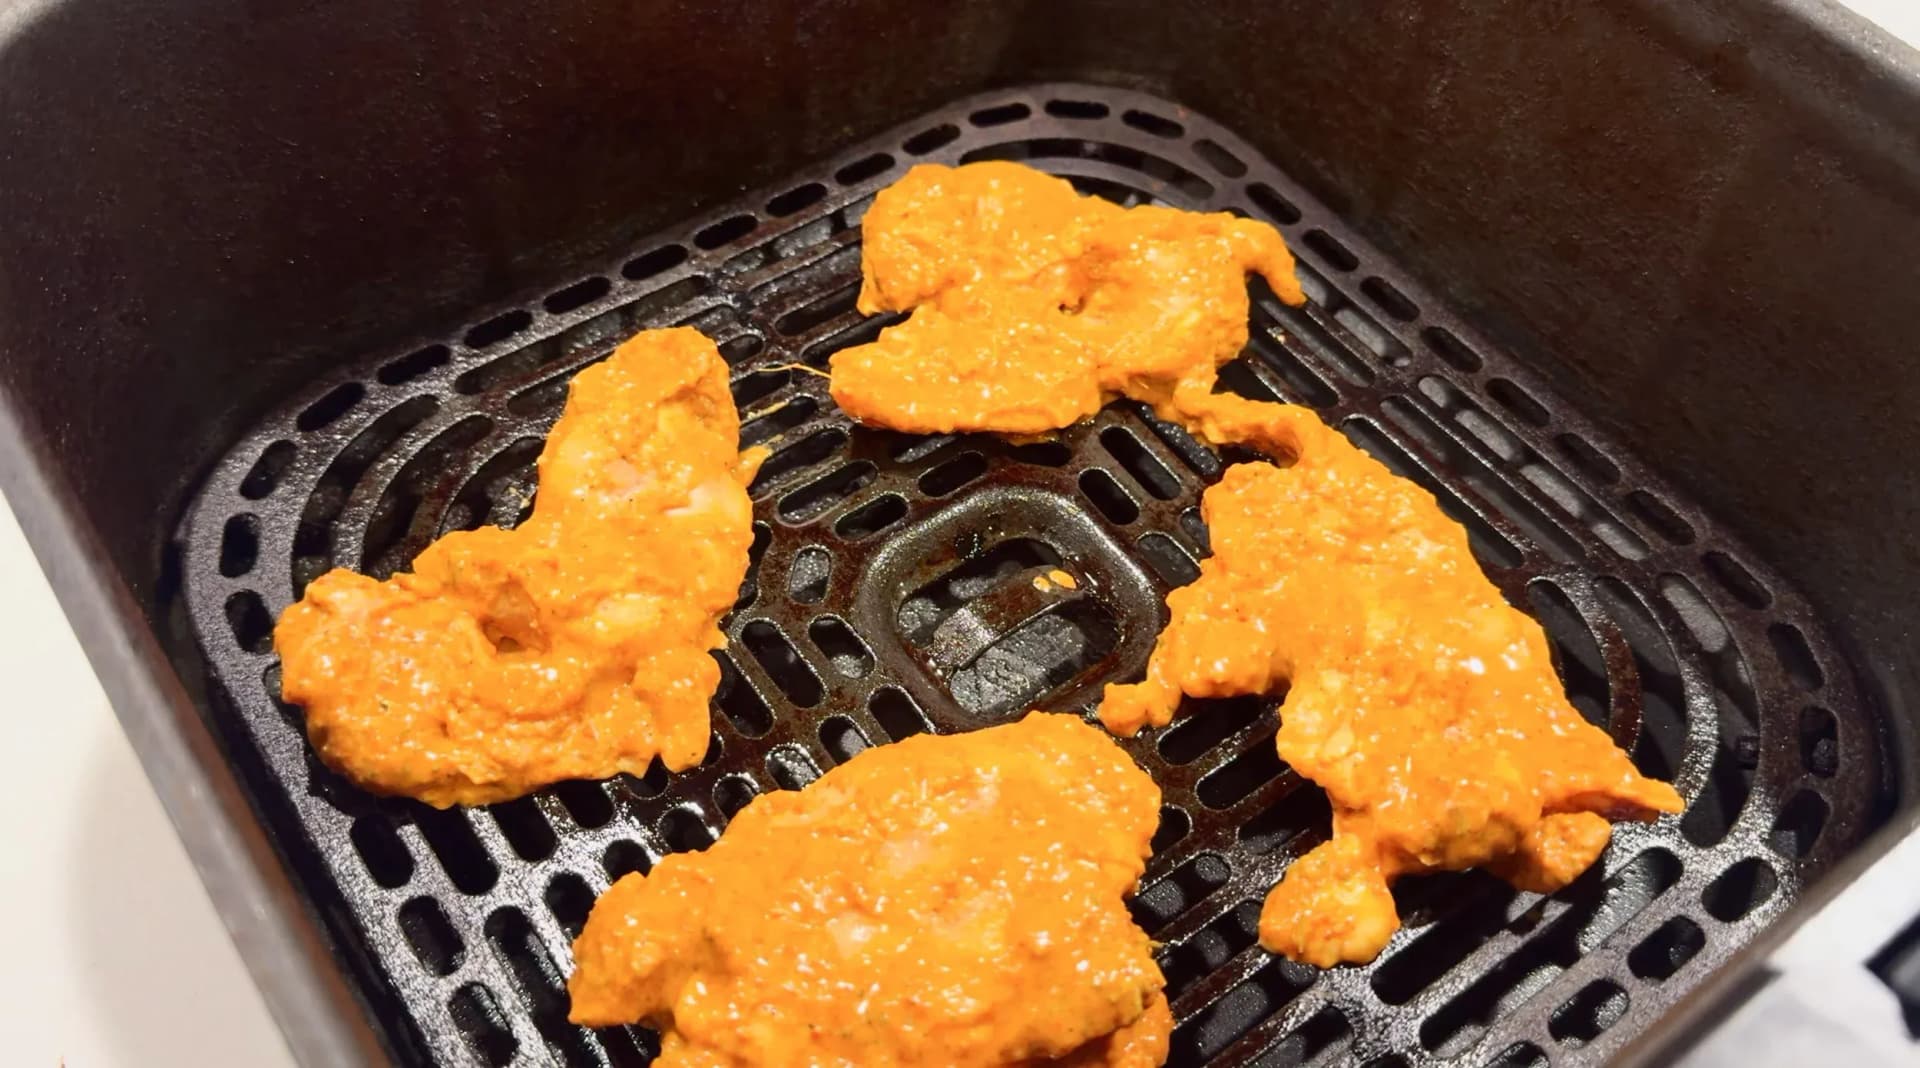
Air fry at 375°F for 10 minutes. At the 5-minute mark, flip the chicken pieces and baste both sides with melted butter.


Increase the temperature to 400°F and cook for another 5–7 minutes, basting with more butter as needed, until lightly charred and cooked through.


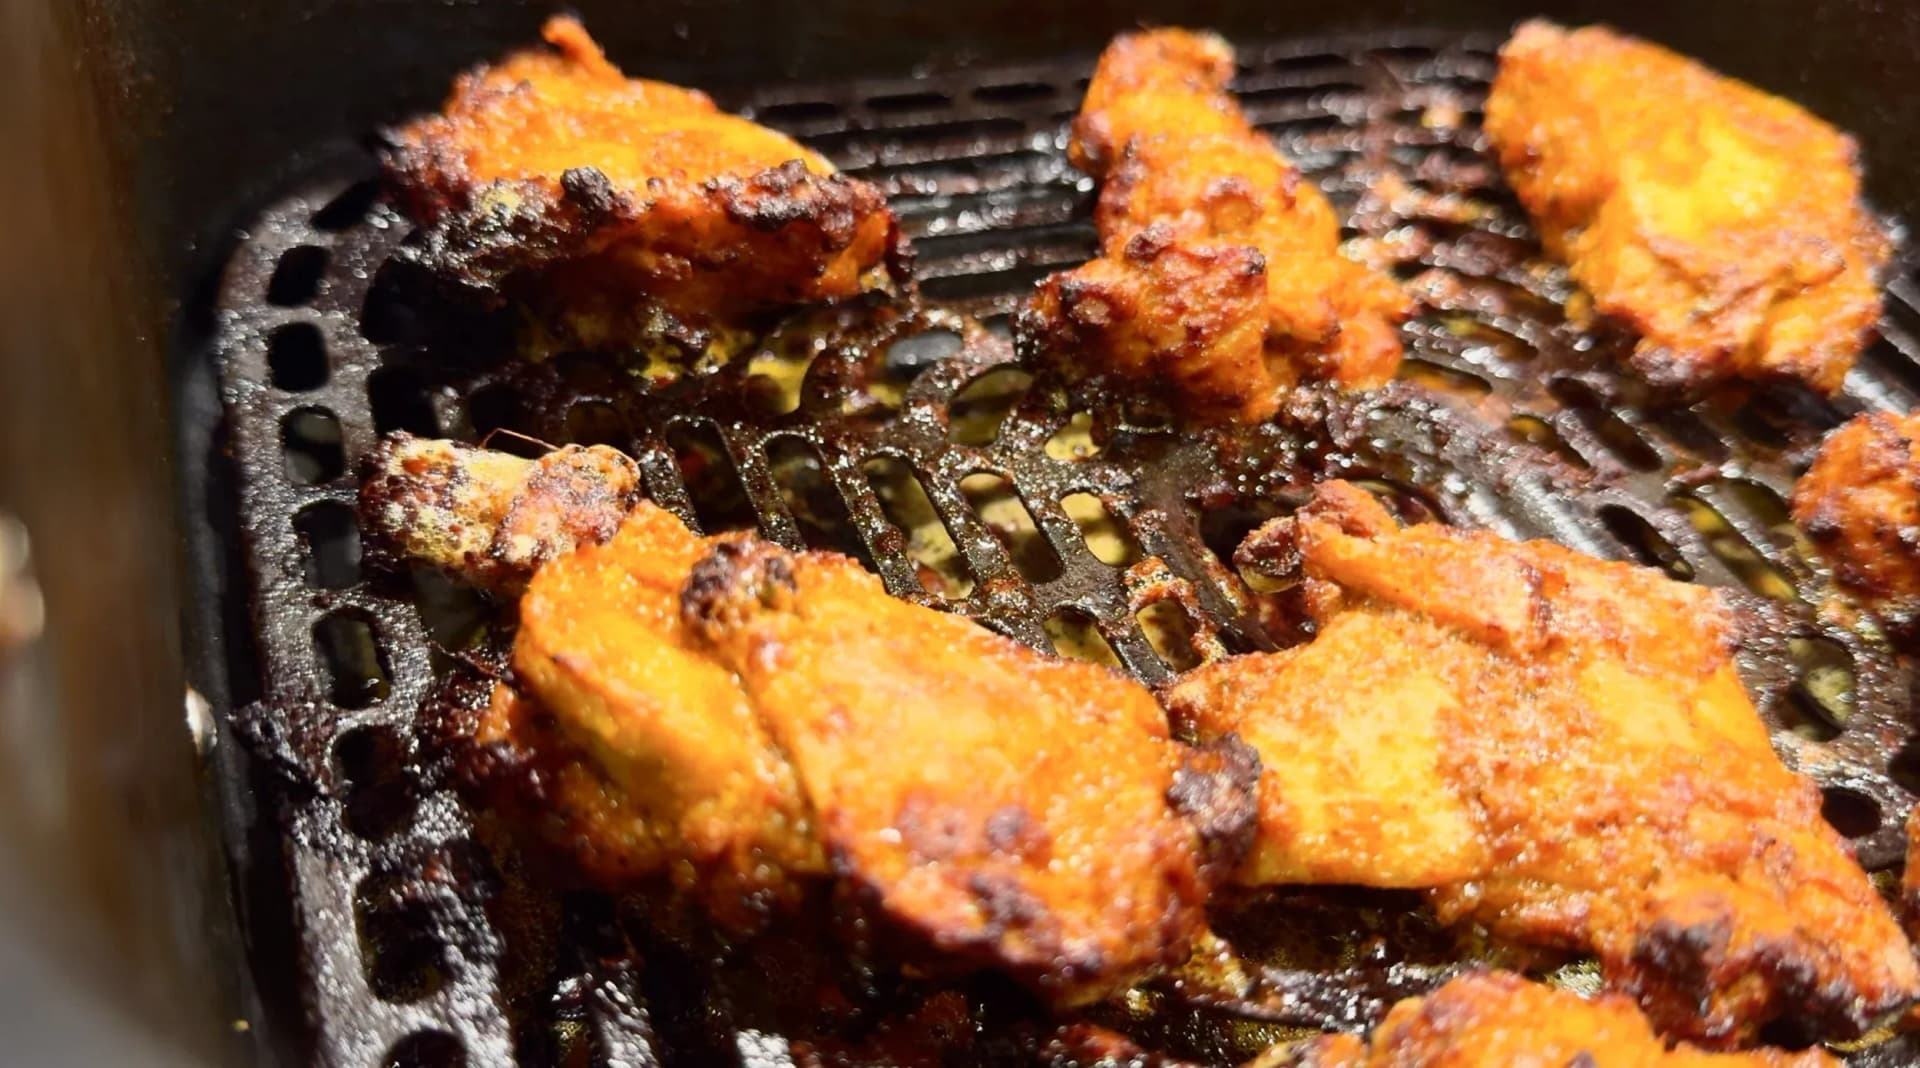

Serve hot with cilantro mint chutney, lemon wedges, melted butter, and a sprinkle of chaat masala if desired.


Enjoy!

Tips for Restaurant-Quality Chicken Tikka Made in the Air Fryer
- The longer your marinate the chicken, the better! If you can marinate it overnight or even for a full day, you’ll get the most flavorful results.
- Use mustard oil for the best char and flavor in your chicken tikka. This is a great choice because it has a high smoke point
- If you’re wondering how many chicken thighs to make to serve a crowd, usually a portion is 1 and a half chicken thighs to 2 per person.
- Pour some molten butter on top of your chicken tikkas if serving as an appetizer for the most incredible experience!

Serving Suggestions for Air Fried Chicken Tikka
Chicken Tikka can be served on its own as an appetizer, it appears on the menu at restaurants. Here’s how to serve these as an appetizer:
- As skewers: Place them on a bamboo skewer or metal skewer with roasted onions and peppers. You could also marinate the onions and peppers with the chicken.
- Brush on some molten butter with a basting brush as needed along with a pinch of chaat masala
- Lemon wedges to squeeze some fresh juice on top of the chicken pieces.
- Cilantro Mint Chutneyfor dipping!
You can have these with some rice, including Steamed White Rice, Jeera Rice (cumin-spiked rice), Indian-Style Cilantro-Lemon Rice, Pudina-Dhanya Pulao (Mint-Cilantro Rice), Haldi Rice (turmeric rice), or a Light and Healthy Vegetable Pulao. Bread is also delicious with tikkas, such as Tandoori Naan, Lachha Paratha, or Rumali Roti. This is also a great appetizer before other mains for lunch or dinner, such as Delhi-Style Chole, Restaurant Baignan Bharta, or Dum Aloo.
Chicken Tikkas can also be used in main dishes such as Butter Chicken or Chicken Tikka Masala! You can also check out my Instant Pot versions of Butter Chicken and Chicken Tikka Masala, if you would like. Simply don’t brush on the molten butter and chaat masala if using these in a curry.
Tandoori Masala, Cayenne and Cardamom: What Is and Is Not in This Marinade
There is no tandoori masala in this recipe, and that is deliberate. A packaged tandoori masala is a finished blend built to do everything at once; here the marinade is assembled from its parts, which is why you can taste each one. Kashmiri mirch appears in both marinades and it is doing color work as much as heat work - it is what makes restaurant tikka that improbable red. If you cannot find it, paprika is the substitute to reach for. Cayenne is not: it is far hotter and carries almost none of the same color, so swapping it in at the same quantity turns a mild, fragrant tikka into something that just burns. Garam masala rounds the marinade out, and whatever blend you use it is the cardamom-and-clove end of the spice cabinet rather than the chili end - which is exactly why it can go in alongside that much Kashmiri mirch without the two fighting.
The recipe is written in grams rather than spoons because a tikka marinade is really a set of ratios, and grams are the only honest way to hold those ratios when you scale the chicken up or down. If you would rather work in cups and a tbsp at a time, the hung yogurt is roughly two thirds of a cup and the ginger-garlic paste roughly two tablespoons - but weigh it if you can. Fresh lemon juice is worth the squeeze in the first marinade, though bottled works as long as it is not from concentrate.
Air Fryer Tray, Batches and the Two-Stage Cook
Two things ruin air fryer tikka and both happen before any heat is involved. The first is a wet marinade - shake the excess off each piece, because moisture steams the chicken instead of charring it. The second is crowding. The pieces must not touch, which for 800 g of thighs usually means cooking in batches rather than trying to fit it all on the air fryer tray at once. Use the rack that came with your basket if you have one; it lifts the chicken so hot air moves underneath as well as over. A large mixing bowl helps here too - the card calls for a medium bowl, and at this quantity you will find it easier to coat everything evenly in something roomier.
The cook itself runs in two stages, and it takes about 15 mins of actual oven time. Preheat first, always: starting from a cold basket makes the timings meaningless. Ten minutes at 375°F does the cooking, with a flip and a first basting of melted butter at the five-minute mark. Then the temperature goes up for a final five to seven minutes with more butter, and that hotter second stage is the one doing the charring. Watch it rather than trusting the clock, since thickness and air fryer model both move the finish line. If you have no air fryer at all, the oven broiler method works, and a cast iron pan will get you there in a hurry; an indoor grill is another route, though it browns rather than chars.
Serving Chicken Tikka: Skewers, Salad, Raita and Wraps
As an appetizer, the presentation does a lot of the work. Thread the pieces onto chicken skewers - bamboo or metal - with onion and pepper between them, brush on more melted butter, and finish with a pinch of chaat masala and lemon wedges to squeeze at the table. Cilantro mint chutney is the dip, and if you know cilantro as coriander, it is the same leaf. A quick salad alongside costs nothing: sliced red onion, tomatoes, a squeeze of lemon and a little salt. A bowl of raita cools the whole plate down and is the traditional partner to any tikka or kebabs coming off a skewer.
Beyond the plate, these are one of the most useful things to have cooked. Stir the pieces through a butter chicken or a tikka masala, pile them into a wrap with onion and chutney, or lay them over rice. You can marinate ahead and keep the raw chicken in the refrigerator for up to two days, which is where most of the work is anyway. Cooked leftovers keep in an airtight container in the fridge, though tikka really is at its best straight from the basket - and whatever you do, do not reheat them in the microwave, which softens the char you worked for and leaves the chicken steamed instead of crisp at the edges.
Let me know what you think of this recipe in the comments! If you’ve tried this recipe, be sure to post it on social media and tag it with #cookingwithanadi and mention me @cooking.with.anadi. Thank you!
Recipe by Anadi Misra
Make restaurant-style Chicken Tikka at home using your air fryer! Juicy, smoky, and perfectly spiced, this Indian classic is easy to prepare and perfect as a starter or side dish.
Air fryer
5.0 · 3 ratings
15 min
Prep
17 min
Cook
2 hr 30 min
Rest
3 hr 2 min
Total
16
tikkas
medium
Level
Ingredients
Ingredients
Tap any quantity to scale
- (800 g) boneless skinless chicken thighs(sliced in half)
For the second marinade
If serving as a side (not in a curry)
- melted butter(as needed)
- chaat masalaShop →
- lemon wedges
- Cilantro Mint Chutney · make your own
Instructions
For the first marinade
- 1
In a medium bowl, combine the chicken thighs with lemon juice, Kashmiri mirch, and salt. Mix well and marinate for 20–30 minutes.
In a medium bowl, combine the chicken thighs with lemon juice, Kashmiri mirch, and salt. Mix well and marinate for 20–30 minutes.
For the second marinade
- 1
To the same bowl, add all the ingredients for the second marinade. Mix well until the chicken is evenly coated. Marinate for at least 2 hours, or preferably overnight.
To the same bowl, add all the ingredients for the second marinade. Mix well until the chicken is evenly coated. Marinate for at least 2 hours, or preferably overnight.
Learn the technique
To cook and serve
- 1
Preheat the air fryer to 375°F.
Preheat the air fryer to 375°F (191°C).
- 2
Place the rack inside the air fryer basket and arrange the chicken pieces in a single layer, leaving space between each piece.
Place the rack inside the air fryer basket and arrange the chicken pieces in a single layer, leaving space between each piece.
- 3
Air fry at 375°F for 10 minutes. At the 5-minute mark, flip the chicken pieces and baste both sides with melted butter.
Air fry at 375°F (191°C) for 10 minutes. At the 5-minute mark, flip the chicken pieces and baste both sides with melted butter.
- 4
Increase the temperature to 425°F and cook for another 5–7 minutes, basting with more butter as needed, until lightly charred and cooked through.
Increase the temperature to 425°F (218°C) and cook for another 5–7 minutes, basting with more butter as needed, until lightly charred and cooked through.
- 5
Serve hot with cilantro mint chutney, lemon wedges, melted butter, and a sprinkle of chaat masala if desired.
Serve hot with cilantro mint chutney, lemon wedges, melted butter, and a sprinkle of chaat masala if desired.
Notes
- •Plain yogurt tends to work better with this dish than Greek yogurt since Greek yogurt introduces its own flavour to the marinade. Other alternatives can be Balkan style thick yogurt
Nutrition per tikka
130
Calories
11g
Protein
3g
Carbs
8g
Fat
1g
Fiber
1g
Sugar
497mg
Sodium
Did you make this recipe? Tag @cooking.with.anadi on Instagram and hashtag it #cookingwithanadi

Tested & written in Anadi’s kitchen
Recipe history
- May 23, 2026 — Increased chicken quantity from ~200g (3 thighs) to 800g (~8 thighs) and updated the yield to show number of tikka pieces rather than servings. The original yield made it hard to plan for a crowd.
- May 23, 2026 — Reformulated both marinades: swapped deggi mirch for Kashmiri mirch throughout for a brighter colour and milder heat; adjusted yogurt and chili quantities; added kasoori methi, mustard oil, turmeric, corn starch, and liquid smoke to the second marinade for deeper flavour and better char.
- May 23, 2026 — Introduced a two-stage air fryer method for better char and even cooking: cook at 375°F for 10 min, then increase to 425°F for 5–7 min with butter basting from the 5-min mark. Previous method was 400°F for 10 min with an olive oil spray — the new method gives a noticeably better result.
You might also like
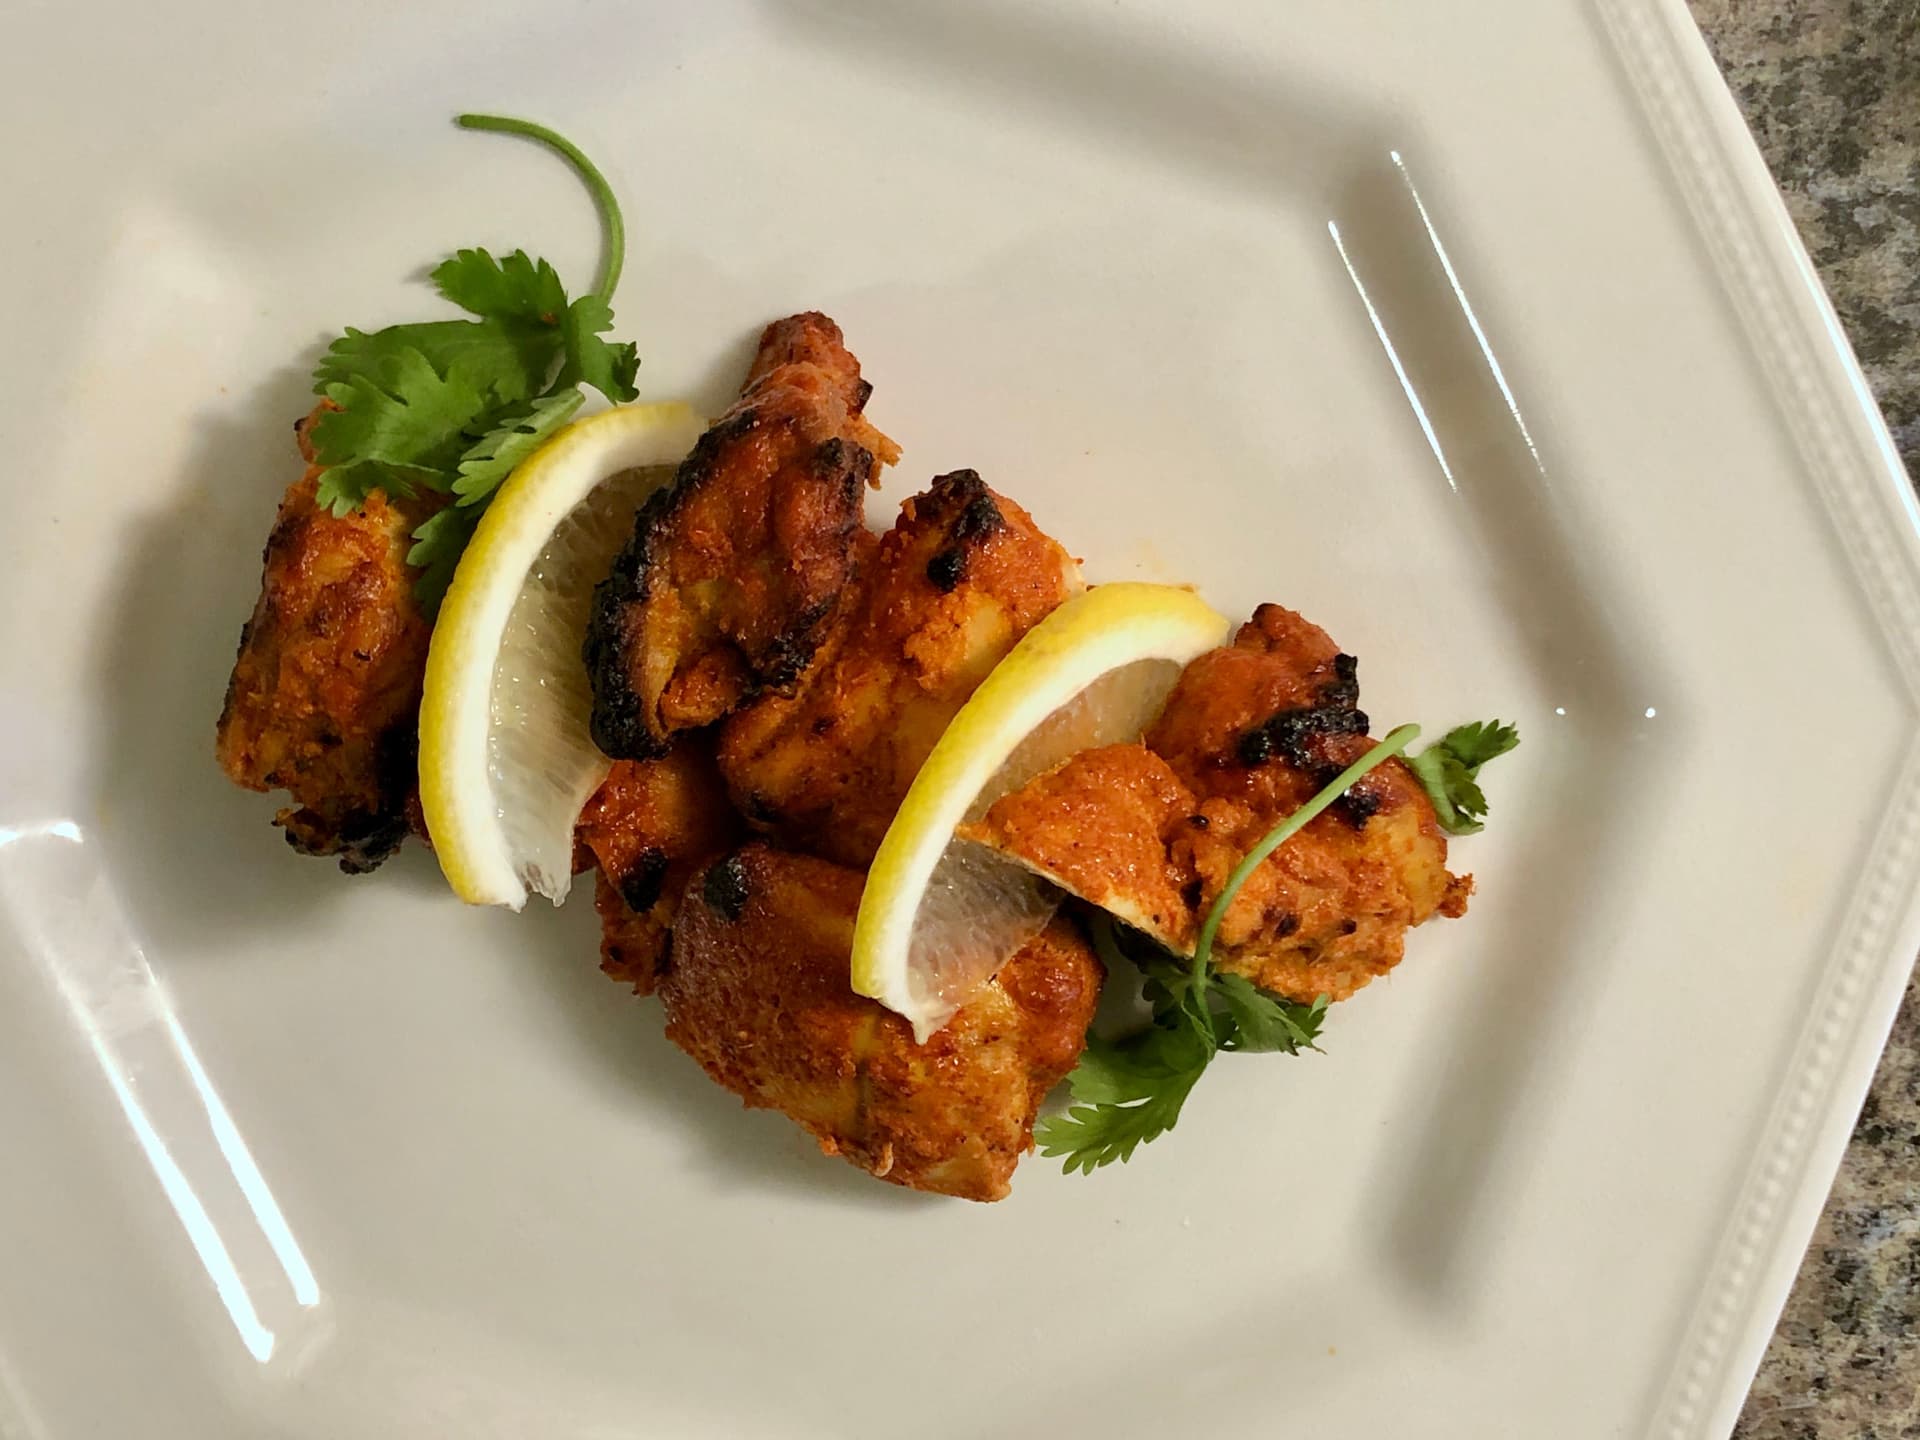
Impress Your Guests with Homemade Baked Chicken Tikka
Make restaurant-quality chicken tikka at home in your oven or broiler. Smoky, tender, and perfectly spiced, this recipe also doubles as the base for an incredible butter chicken.
Super Tender Air Fryer Paneer Tikka Recipe
Make restaurant-quality Paneer Tikka at home in your air fryer. Tender, smoky, and perfectly charred, this easy Indian vegetarian starter is ready in minutes with bold tikka flavors.

Air Fryer Keema Samosas - A Spicy Delight in Every Bite
Crispy, golden Air Fryer Keema Samosas packed with spiced minced meat filling. Make these authentic homemade samosas from scratch with less oil and all the flavor you love.
Air Fryer Tandoori Chicken Recipe With Authentic Flavors
Make authentic tandoori chicken in your air fryer with bold spices and smoky flavor. Juicy, charred, and ready faster than traditional methods — no clay oven needed.
Indo-Chinese Chicken Lollipop Drumsticks: Drums of Heaven
Crispy, saucy Indo-Chinese Chicken Lollipop Drumsticks — the ultimate party starter. Bold flavors, irresistible crunch. Your new favorite appetizer awaits.
Crispy Chicken Pakoras: Crunchy, Hot, and Delicious!
Crispy Chicken Pakoras are the ultimate Indian street food snack — golden, crunchy, and packed with bold spices. Make this easy recipe at home for a perfect starter everyone will love.


Comments
No comments yet — be the first to share your thoughts!
Leave a review
Be the first to share how it went — your note helps other cooks (and earns the recipe its stars).