


This post may contain affiliate links. Read our disclosure policy.
Watch the recipe

Cooking With Anadi
12K subscribers · soft, pillowy bread with charred blisters from the tandoor
Everybody from Asia, Europe and North America, know and love naan! It is one of the most popular Indian breads and is associated with quality North Indian cuisine.
It is rather disappointing that growing up, my sister and I never got to try homemade naan. This is especially shocking since now I know how easy it is to make and how tasty it can be! Naan was always saved for our few and far between restaurant extravaganzas.
This Homemade Tandoori Naan recipe is amazingly simple! You will need all-purpose flour, milk, yeast, sugar, salt, and some olive oil for greasing. I recommend that you use yeast, since this helps create the softest naan. This Homemade Tandoori Naan recipe uses your home oven to bake the perfect naan. I will be using a baking steel to really replicate the hot tandoori clay oven temperatures in a home oven.

What if I Don’t Have a Pizza Steel?▼
Consider investing in one! They are cheap, about $40 CAD and they are so versatile. I use them to make all of my pizzas, breads and loaves. I love this one.
An alternative to a pizza steel would be a pizza stone, but I prefer the steel since they are much easier to maintain and don’t have a risk of breaking.
Otherwise, there are two other techniques you may use. I will discuss both here:
Bake Homemade Tandoori Naan on a Baking Sheet
Place the rolled out naan dough on a baking sheet and bake in the oven for 3-4 minutes.
In case your naan is turning out crispier than you like, you can preheat the baking sheet for a few minutes in the oven and then place the naan on the sheet. This will start cooking the naan quicker, since the pan would not have to heat up with the naan.
Cook Homemade Tandoori Naan on a Tawa Pan on the Stove-top
This tawa variation will work great if you don’t have a home oven.
Anyone can enjoy naans!


How Do I know the Dough Balls are Ready to Cook?▼
Visually, the dough will have roughly doubled in size. When you pick up the dough, you should notice that it feels much lighter than it appears. The dough should spring back if lightly pressed on.
What Makes This Homemade Tandoori Naan Recipe So Great?
- Simply mix all of the dry ingredients together and add milk to knead to a soft and tacky dough.
- No need to wait for the yeast to activate.
- Naan always turns out soft and fluffy.
The entire process will help you realize how easy it is to turn flour into delicious naan bread. Here’s the process in a nutshell:
1. Mix all of the dry ingredients together and add milk to knead to a smooth, soft and tacky dough.


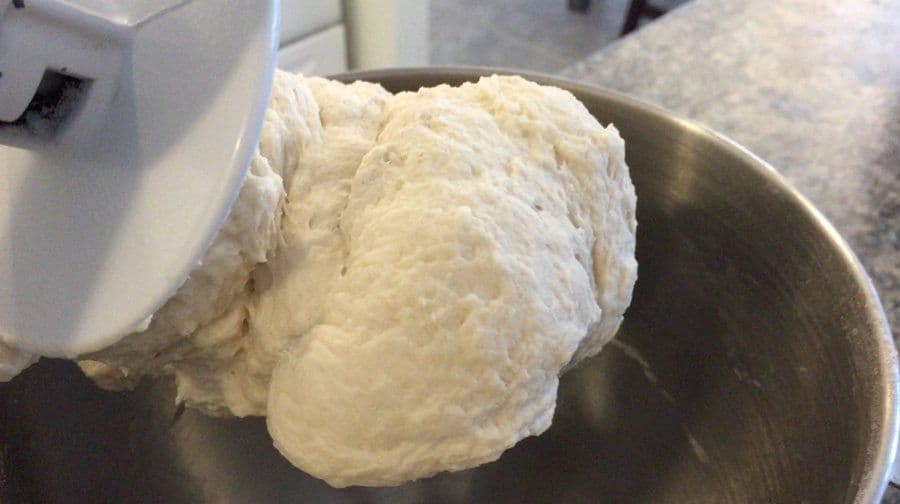
2. Lightly grease a large bowl. Add the dough, cover with plastic wrap and let it rest for 2 hours in a warm place.
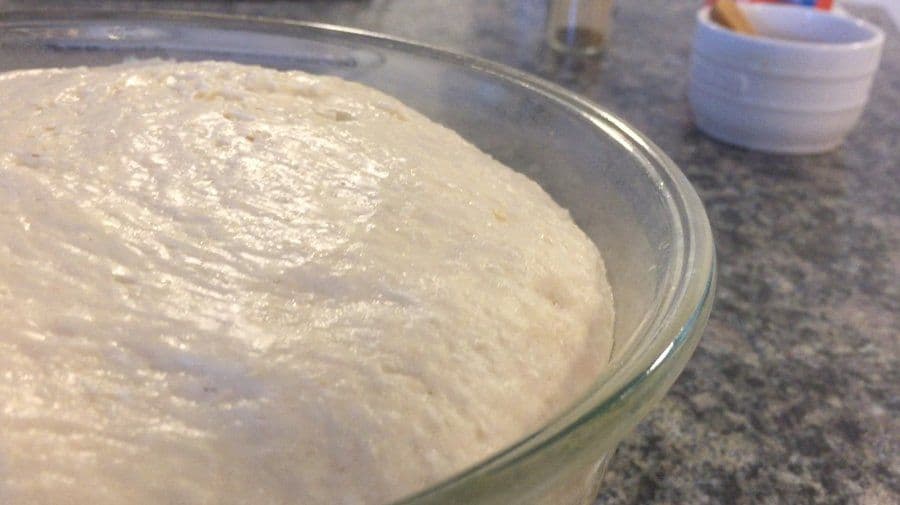
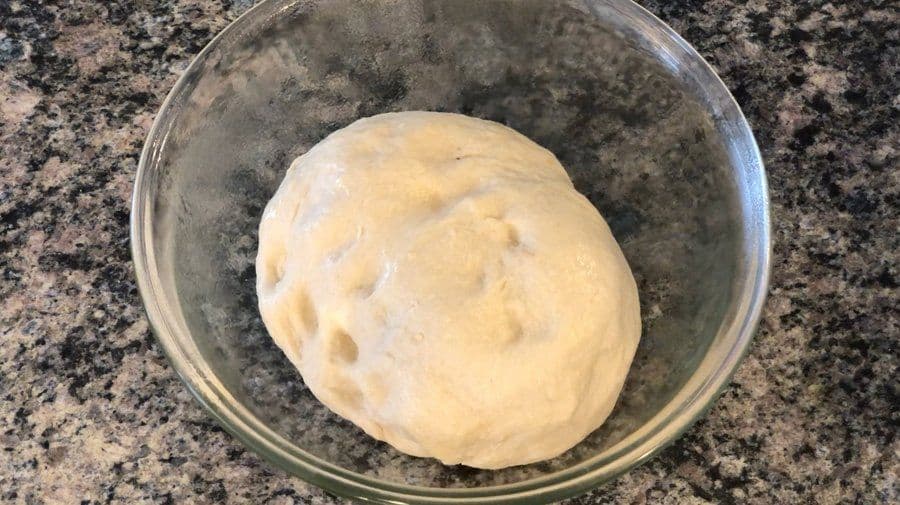
3. Divide dough into 8-10 equal portions, form the portions into boules by cupping your hands and rolling against the countertop.
4. Lightly grease the dough balls and lightly cover with plastic wrap and let them rest for another 2 hours.


5. 30 minutes before baking, preheat the oven to 500 F with the baking steel at the second to highest oven rack.
6. Turn on the broiler.
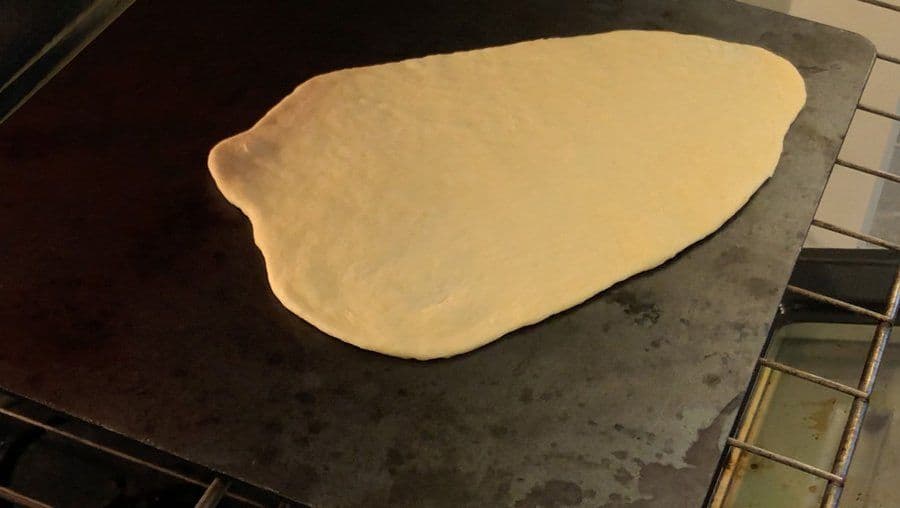
7. Roll out or stretch the dough into an oblong shape and carefully place the naan on the baking steel.

- If using a baking sheet, place naan on a baking sheet placed on the oven rack.
- If using tawa pan, preheat until just smoking and add naan to hot tawa.


8. Cook until light brown spots appear. Take the naan out right away using tongs. If cooking on a tawa pan, flip the naan once and cook other side.
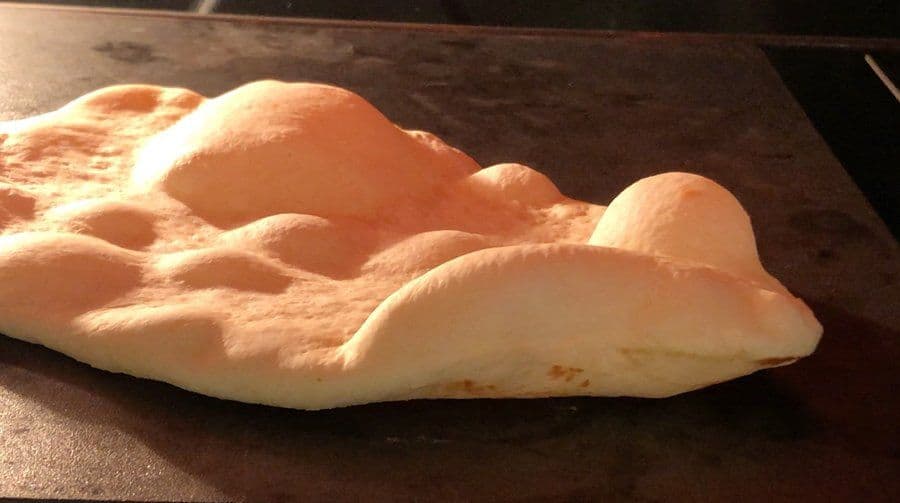
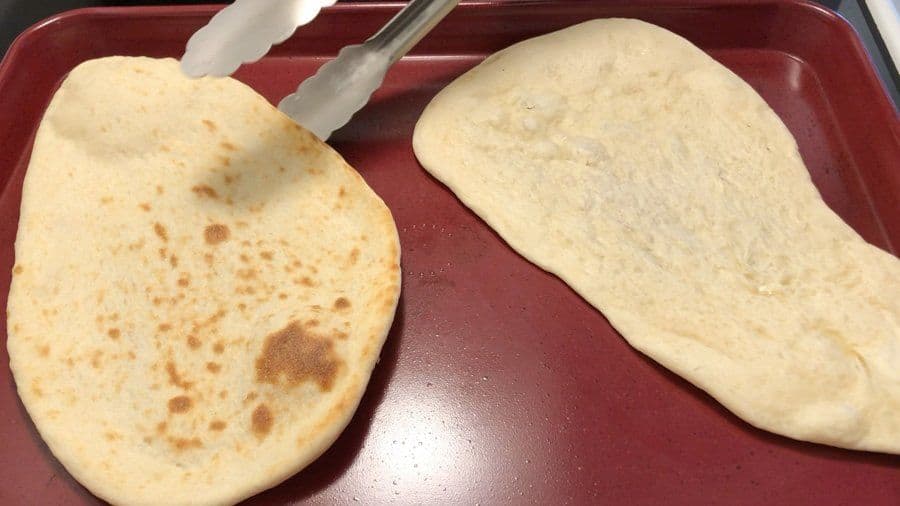

9. Brush with molten butter and serve immediately. Enjoy!
Easy Naan Variations and Toppings
Once you have the basic dough down, this naan is easy to make your own:
- Garlic naan: stir a little minced garlic and some chopped cilantro into the molten butter you brush on at the end — the recipe already finishes each naan with butter, so this is a simple upgrade.
- Sprinkle nigella (kalonji) seeds or sesame seeds onto the rolled-out dough before it bakes for a restaurant-style finish.
- Brush with ghee instead of butter for a nuttier, more traditional flavor.
- Short on active dry yeast? Use ¾ teaspoon of instant yeast and skip the proofing wait, or 17g of fresh yeast — both are swaps built into the recipe.
Storing and Reheating Homemade Naan
Naan is best fresh off the heat and brushed with butter, but it keeps well:
- Let the naan cool completely, then store it in an airtight bag or container at room temperature for a day, or in the fridge for up to 3 days.
- To reheat, warm it on a hot tawa or in a 350°F oven wrapped in foil, or microwave it for a few seconds under a damp paper towel so it stays soft — brush with a little extra butter to freshen it up.
- To freeze, stack the cooled naan with parchment between each piece and seal it in a freezer bag for up to 2 months; reheat straight from frozen on a hot tawa or in the oven.
This naan is perfect for mopping up a rich curry like my Punjabi lobia.
What Goes Into This Naan Dough, and Why
The ingredient list here is short enough to memorize, and every item is doing a specific job. Four cups of all-purpose flour, one packet of active dry yeast, 2 1/2 teaspoons salt, 2 tablespoons sugar, 1 3/4 cup milk, a little olive oil for greasing and butter for brushing at the end. That is the whole thing.
All-purpose flour is standing in for maida, the finely milled refined wheat flour that Indian kitchens use for naan. Maida is milled softer and whiter than most North American all-purpose flour, but all-purpose gets you close enough that you would struggle to tell the difference once the naan has charred and been brushed with butter. Bread flour will also work if that is what is in the cupboard, though the extra gluten makes the dough chewier and a little harder to stretch thin.
The yeast is what makes this a yeasted dough rather than a quick flatbread, and it is the reason the naan puffs the way it does. One packet of active dry yeast goes straight in with the dry ingredients, so there is no separate proofing step to wait on. If you only have instant yeast, use 3/4 teaspoon and carry on as written. If you have fresh yeast, use 17g and proof it in warm water first before it joins the mixture.
Milk is the liquid rather than water, and it is doing more than hydrating the flour. The fat and the milk sugars give the crumb a softer, richer texture and help the surface brown faster under the broiler. Worth saying plainly: this recipe uses no yogurt and no egg. A lot of naan recipes lean on yogurt for tang and tenderness, and some add an egg for richness. This one does not, which makes it eggless and a good deal simpler to shop for. There is also no baking soda and no baking powder in this dough. The yeast is the only leavening, which is why the two rests matter as much as they do.
The sugar has a double job. Two tablespoons feeds the yeast and pushes the browning along, so those dark blistered spots arrive faster. The 2 1/2 teaspoons of salt look like a lot on paper, but it is spread across eight to ten naans and it is the difference between bread that tastes like bread and bread that tastes like flour.
Kneading and Resting the Naan Dough
Mix all of the dry ingredients together first, then add the milk and knead to a smooth, soft and tacky dough. Tacky is the word to hold onto. The dough should stick very slightly to your fingers and then let go. If it is genuinely gluey, add flour a spoonful at a time; if it is tearing rather than stretching, it wants a splash more milk.
You do not need any special equipment for this. A wooden spoon is plenty to bring the mixture together in the bowl before you tip it out and knead by hand on a lightly floured surface. If you would rather not knead, a stand mixer fitted with a dough hook does the same job in about the same time. Neither is required by the recipe as written, and hands work perfectly well.
Then it rests. Lightly grease a large bowl, add the dough, cover it with plastic wrap and leave it somewhere warm for 2 hours. Divide the risen dough into 8 to 10 equal portions and form each one into a boule by cupping your hand over it and rolling it against the counter until the surface tightens into a smooth ball. Lightly grease the dough balls, cover them again, and give them another 2 hours.
Those two rests are why the recipe card puts prep at 260 mins and total time at 270 mins. Almost all of that is the dough sitting on its own doing nothing you have to supervise. The active work is maybe twenty minutes. Plan the timing backwards from when you want to eat rather than starting when you are already hungry, because this is the one part of homemade naan you genuinely cannot rush.
Getting Restaurant-Style Char in a Home Oven
A tandoor runs far hotter than any home oven and slaps the dough directly against a searing clay wall. That is where the blistered, uneven char on naan from Indian restaurants comes from. You cannot reproduce a tandoor at home, but you can get remarkably close by giving the dough a very hot surface and very high heat from above at the same time.
That is the whole logic of the baking steel method. Put the steel on the second-to-highest oven rack and preheat to 500 F for 30 minutes before you bake anything, so the steel is fully saturated with heat rather than just hot on the surface. Then turn on the broiler. The steel cooks the underside while the broiler works the top, which is as close to two-sided tandoor heat as a domestic oven gets.
Roll or stretch the dough into an oblong and lay it carefully onto the steel. Watch it rather than timing it. Within a minute or so the dough starts throwing up bubbles, the underside sets, and light brown spots appear across the surface. That is your cue. Take the naan out right away with tongs, because the window between beautifully blistered and dry is short.
No steel? A preheated baking sheet works, and so does the stovetop. Heat a tawa until it is just beginning to smoke and lay the naan straight onto it, then flip it once and cook the other side. A cast iron skillet is a fine substitute for a tawa if you do not have one, since what matters is a heavy pan that holds high heat without dropping temperature the moment cold dough touches it.
Finish every naan with melted butter brushed over the top while it is still hot, which is what turns a good flatbread into a fluffy butter naan. Stack them under a clean kitchen towel as they come off the heat so the steam keeps them soft while you cook the rest.
What to Serve With Naan, and What Is In It
Naan exists to be torn and used as a utensil, so it belongs next to anything with sauce. A rich curry is the obvious partner, and my Punjabi lobia is a good place to start. Dal, butter chicken, chole and any gravy-heavy sabzi all work. If you are serving something dry rather than saucy, a raita or a sharp chopped salad of cucumber, tomato and onion gives you the moisture and acidity the meal would otherwise be missing.
On nutrition, it is worth being straight about what naan is. It is a bread made from refined flour, so the bulk of what it gives you is carbohydrates, with a moderate amount of protein from the flour and the milk. Because it uses maida rather than a whole grain flour, it is not a meaningful source of fiber. The 2 1/2 teaspoons of salt spread across the batch means sodium is worth keeping in mind if you are watching it, particularly since restaurant naan is usually saltier still. There is no vitamin C or potassium to speak of in the naan itself; those come from the vegetables, lentils and dairy you serve alongside it, which is exactly how the bread is meant to be eaten anyway.
Tools Needed
Let me know which variation you tried! Oven-Broiled, Baking Sheet or Pan-Seared? If you’ve tried this recipe, be sure to post it on social media and tag it with #cookingwithanadi and mention me @cooking.with.anadi. Thank you!
Recipe by Anadi Misra
Make restaurant-style tandoori naan at home with this easy, authentic recipe. Soft, pillowy, and perfectly charred — just like your favorite Indian restaurant bread.
Stovetop
5.0 · 3 ratings
4 hr 20 min
Prep
10 min
Cook
4 hr 30 min
Total
8
pieces
medium
Level
Ingredients
Ingredients
Tap any quantity to scale
Instructions
- 1
Mix all of the dry ingredients together and add milk to knead to a smooth, soft and tacky dough.
Mix all of the dry ingredients together and add milk to knead to a smooth, soft and tacky dough.
- 2
Lightly grease a large bowl, add dough, cover with plastic wrap and let it rest for 2 hours
Lightly grease a large bowl, add dough, cover with plastic wrap and let it rest for 2 hours
- 3
Divide dough into 8-10 equal portions, form the portions into boules by cupping your hands and rolling against the countertop.
Divide dough into 8-10 equal portions, form the portions into boules by cupping your hands and rolling against the countertop.
- 4
Lightly grease the dough balls and lightly cover with plastic wrap and let rest for another 2 hours.
Lightly grease the dough balls and lightly cover with plastic wrap and let rest for another 2 hours.
- 5
30 minutes before baking, preheat oven to 500 F with the baking steel at the second to highest oven rack. Skip steps 8-9 if using baking steel method.
30 minutes before baking, preheat oven to 500°F (260°C) with the baking steel at the second to highest oven rack. Skip steps 8-9 if using baking steel method.
- 6
Turn on the broiler.
Turn on the broiler.
- 7
Roll out or stretch the dough into an oblong shape and, carefully, place naan on the baking steel.
Roll out or stretch the dough into an oblong shape and, carefully, place naan on the baking steel.
- 8
If using a baking sheet, place naan on a baking sheet and place on the oven rack.
If using a baking sheet, place naan on a baking sheet and place on the oven rack.
- 9
If using tawa pan, preheat until just smoking and add naan to hot tawa.
If using tawa pan, preheat until just smoking and add naan to hot tawa.
- 10
Cook until light brown spots appear, then take naan out right away using tongs. If cooking on tawa pan, flip naan once and cook other side.
Cook until light brown spots appear, then take naan out right away using tongs. If cooking on tawa pan, flip naan once and cook other side.
- 11
Brush with molten butter and serve right away.
Brush with molten butter and serve right away.
Nutrition per piece
409
Calories
13g
Protein
59g
Carbs
14g
Fat
5g
Fiber
7g
Sugar
696mg
Sodium
Did you make this recipe? Tag @cooking.with.anadi on Instagram and hashtag it #cookingwithanadi

Tested & written in Anadi’s kitchen
Recipe history
- April 16, 2026 — Reworked and refreshed for the 2026 relaunch — new photography, restructured and standardized ingredients & instructions.
Filed under
You might also like

Quick Cast Iron Naan: Easy Homemade Recipe in Just One Hour!
Make soft, pillowy homemade naan bread in just one hour using a cast iron skillet. This easy recipe delivers authentic restaurant-style results right from your own kitchen.
Fried to Perfection: Ultimate Puffy Poori Bread Recipe
Master the art of perfectly puffed poori with this authentic Indian bread recipe. Crispy, light, and golden every time — your go-to guide for foolproof homemade poori from scratch.

How to Make The Best Punjabi Lachha Paratha
Crispy, flaky, and buttery Punjabi Lachha Paratha made right at home. Master this beloved Indian bread with simple steps and pantry staples for perfect layers every time.
Rumali Roti Recipe - Soft and Thin "Handkerchief" Roti
Make soft, paper-thin Rumali Roti at home with this easy recipe. These delicate handkerchief flatbreads are perfectly pliable and ideal for scooping up your favorite curries.

Classic Layered Paratha | Triangular Paratha Recipe
Make perfectly flaky, layered triangular paratha at home with this easy whole wheat Indian bread recipe. Soft, crispy, and delicious — ideal for any meal of the day.

The Ultimate Puffy Delhi-Style Bhature Recipe
Make perfectly puffy Delhi-style bhatura at home without yeast or baking powder! This easy bhatura recipe uses baking soda for soft, crispy results every time.


Comments
No comments yet — be the first to share your thoughts!
Leave a review
Be the first to share how it went — your note helps other cooks (and earns the recipe its stars).