


This post may contain affiliate links. Read our disclosure policy
Watch the recipe

Cooking With Anadi
12K subscribers · soft like a handkerchief, pliable enough to scoop curry
Some of you may already know, but growing up, restaurant trips were few but special, and each trip our menu was set. Paneer Makhani, Dal Makhani and Butter Naan… if I got those items, then I was a happy camper. Unfortunately, this did not give me the chance to fully appreciate these breads to their full extent.
My mom, however, loves these soft rotis and she introduced me to this fabulous bread at the restaurant one day! To describe the texture and flavor in one word… it is splendid! These breads are so uniquely pliable, yet there is a bite to it, which tastes wonderful when lathered in your favorite curry sauce.

Traditionally, in restaurants these breads are made of all purpose flour, and I will be using all-purpose flour in this recipe. The most popular technique to prepare this bread is to cook it over an inverted, convex surface. Usually, I use my wok to prepare this, but you can also use an inverted tawa pan. This technique brings this restaurant delicacy to your home kitchen, and you can easily make this!
These rotis can be served with any North Indian style curry or dal/lentil soup. My favorite curries to pair include:
- Murgh Makhani - Restaurant Style Butter Chicken
- Restaurant Style Dal Makhani - Instant Pot Recipe
- Creamy Chicken Tikka Masala
- Mughlai Style Paneer Makhani
Tools Needed
How to Make Indian Handkerchief Bread
- Add all the flour in a large mixing bowl. Add oil and slowly start adding milk and begin kneading. Knead until the dough is soft and smooth, but not sticky.
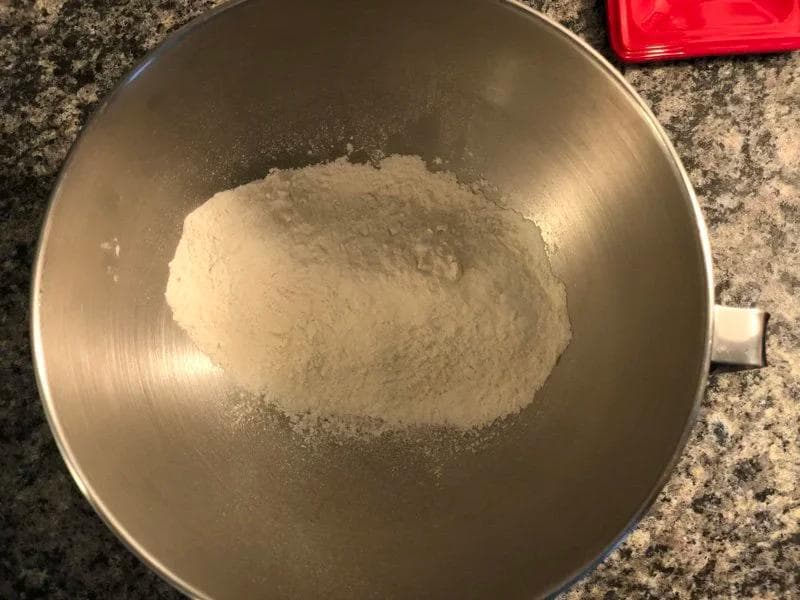


Cover with a damp cloth and let the dough rest at room temperature for 20 minutes.

Divide the dough into 6 equal parts. Using extra flour to prevent sticking, begin rolling out the dough using a rolling pin. Roll into a circle until it is almost translucent. Constantly dusting with extra flour will prevent dough from tearing or sticking.


In the meanwhile, heat a wok or tawa pan on medium-high heat until hot. Once the pan is hot, invert it upside down and heat for 2 more minutes.
Gently pick up a thinly rolled out flatbread and place on the back of the wok/pan. Using a clean kitchen towel, pat the dough to help with cooking and browning. Alternatively, you can roll the flatbread loosely onto the rolling pin and roll it out onto the pan/wok.


Using tongs, check if your bread has brown spots. If so, flip it and repeat pat down on the other side. Using tongs, fold the bread into a half circle and fold it over itself to neatly fold the roti.
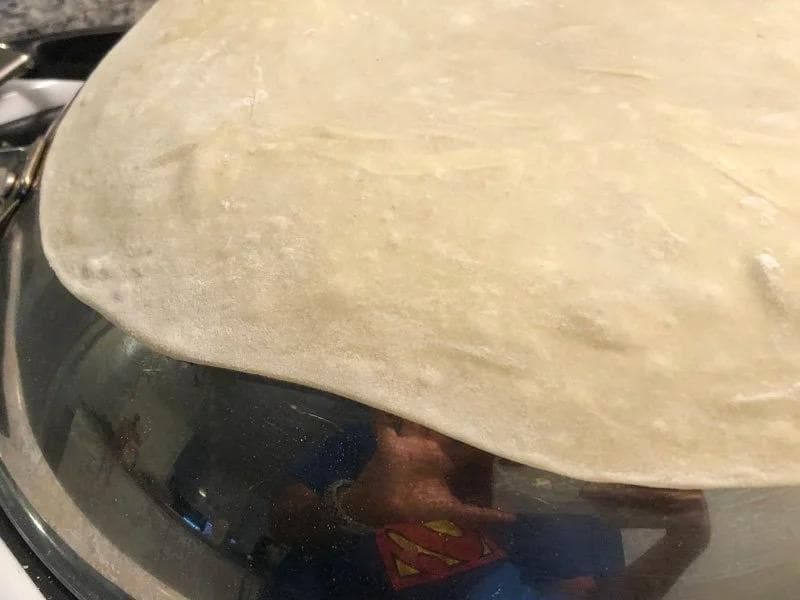


Repeat steps 5-6 for remaining dough.
Brush with desi ghee/butter, serve hot, and enjoy!

Tips for Making the Best Rumali Roti Recipe
- Ensure to warm up the milk slightly before kneading it into the flour. The temperature will help knead a soft, pliable dough which will help you to easily roll the dough paper thin.
- Once the dough has formed, let it rest for at least 20 minutes before portioning them out. Resting the dough will help relax the dough which will further help with rolling it out.
- Go as thin as you dare. The dinner these handkerchief roti’s are, the softer they become. If you think you have rolled it thin enough, go further! The dough should practically be translucent.
- This bread needs to be cooked on indirect heat, from an inverted round bottom wok. The convex of a round wok helps slowly cook the thin dough without making it too crispy. I have linked the wok that I use below, however feel free to use any wok.
- To warm up the breads if reheating, wrap the breads in a damp kitchen towel and microwave for 30 seconds to a minute. This will help them to remain soft as ever.
It pairs beautifully with a curry like my Punjabi lobia.
What Is Rumali Roti?
Rumal is the Hindi word for handkerchief, and that is exactly what the bread is named for. It is rolled so thin it goes nearly translucent, then folded into soft squares that sit on the plate looking like a pressed handkerchief. You will see it written as rumali roti, roomali rotis, rumal roti or manda roti depending on who you ask and which part of North India they are from. It is a chefs' bread by tradition: in Mughlai and North Indian restaurants, cooks stretch and spin the dough in the air the way a pizzaiolo does, then drape it over an inverted kadai set over the flame. That theatre is why most of us only ever meet rumali roti at a restaurant. You do not need the spinning at home. A rolling pin, a little patience and a hot inverted wok will get you the same paper-thin bread.
Flour, Salt and the Small Choices That Matter
Restaurants use maida, the finely milled Indian white flour, and that is why rumali roti comes out pale and stretchy rather than sturdy. The 2 cups of all-purpose flour in this recipe do the same job. You can swap in whole wheat flour if you would rather, but be honest with yourself about the trade: the bran gets in the way of the gluten, so a whole wheat version rolls out darker and thicker and will never go properly translucent. A half-and-half mix is the fair compromise if you want some of the nuttiness without losing the texture. There is no salt in my dough, because this bread is a vehicle for the curry and the curry brings the seasoning. If you prefer a seasoned bread, work a teaspoon salt into the flour before the warm milk goes in. And it is the milk, not water, that makes these soft instead of chewy, so do not substitute it out.
How to Tell When the Roti Is Done
Once the dough has rested for 20 minutes and you have divided it into six, roll every dough ball out before you start cooking, because the cooking itself goes fast. On the back of a hot inverted kadai or wok, a paper-thin roti needs well under a minute a side, and the whole batch of six is roughly ten minutes of cooking time. Watch the surface rather than the clock: small bubbles will start lifting across the dough almost immediately, and when you pat it down with a clean kitchen towel those bubbles set into the light brown spots you are looking for. Lift an edge with tongs, check for the spots, flip, pat again, and fold it straight off the heat. A roti left on too long turns brittle instead of pliable, which is the one mistake that cannot be fixed. Serve them hot, brushed with desi ghee, alongside something rich like shahi paneer or a dal.
Frequently Asked Questions
What is rumali roti?▼
Rumali roti is an ultra-thin, soft ‘handkerchief’ roti — traditionally cooked draped over an inverted wok until it’s tissue-thin and pliable.
How do you cook rumali roti without it tearing?▼
Roll it very thin with plenty of dusting flour, then cook it over the back of a hot inverted wok or tawa, patting gently. The thin dough cooks in seconds, so keep a close eye on it.
Why is milk used in the dough?▼
Warm milk makes the dough extra soft and supple, which is what lets you roll it paper-thin without it cracking.
What do you serve with rumali roti?▼
Brush it with ghee and serve it hot alongside rich curries, dals, or kebabs.
Let me know what you think of this recipe in the comments! If you’ve tried this recipe, be sure to post it on social media and tag it with #cookingwithanadi and mention me @cooking.with.anadi. Thank you!
Recipe by Anadi Misra
Make soft, paper-thin Rumali Roti at home with this easy recipe. These delicate handkerchief flatbreads are perfectly pliable and ideal for scooping up your favorite curries.
Stovetop
Rate this recipe ✦
30 min
Prep
10 min
Cook
40 min
Total
6
rotis
medium
Level
Ingredients
Ingredients
Tap any quantity to scale
- (250 g) all-purpose flour(plus extra for dusting)Shop →
- (160 ml) warm milk
- (10 ml) olive oilShop →
- ghee (to serve) · make your ownShop →
Instructions
- 1
Add all the flour in a large mixing bowl, add oil and slowly start adding milk and begin kneading. Knead until the dough is soft and smooth, but not sticky.
Add all the flour in a large mixing bowl, add oil and slowly start adding milk and begin kneading. Knead until the dough is soft and smooth, but not sticky.
- 2
Cover with a damp cloth and let the dough rest at room temperature for 20 minutes.
Cover with a damp cloth and let the dough rest at room temperature for 20 minutes.
- 3
Divide the dough into 6 equal parts. Using extra flour to prevent sticking, begin rolling out the dough using a rolling pin. Roll into a circle until it is almost translucent. Constantly dusting with extra flour will prevent dough from tearing or sticking.
Divide the dough into 6 equal parts. Using extra flour to prevent sticking, begin rolling out the dough using a rolling pin. Roll into a circle until it is almost translucent. Constantly dusting with extra flour will prevent dough from tearing or sticking.
- 4
In the meantime, heat a wok or tawa pan on medium-high heat until hot. Once the pan is hot, invert it upside down and heat for 2 more minutes.
In the meantime, heat a wok or tawa pan on medium-high heat until hot. Once the pan is hot, invert it upside down and heat for 2 more minutes.
- 5
Gently pick up a thinly rolled out flatbread and place on the back of the wok/pan. Using a clean kitchen towel, pat the dough to help with cooking and browning. Alternatively, you can roll the flatbread loosely onto the rolling pin and roll it out onto the pan/wok.
Gently pick up a thinly rolled out flatbread and place on the back of the wok/pan. Using a clean kitchen towel, pat the dough to help with cooking and browning. Alternatively, you can roll the flatbread loosely onto the rolling pin and roll it out onto the pan/wok.
- 6
Using tongs, check if your bread has brown spots. If so, flip it and repeat pat down on the other side. Using tongs, fold the bread into a half circle and fold it over itself to neatly fold the roti.
Using tongs, check if your bread has brown spots. If so, flip it and repeat pat down on the other side. Using tongs, fold the bread into a half circle and fold it over itself to neatly fold the roti.
- 7
Repeat steps 5-6 for remaining dough.
Repeat steps 5-6 for remaining dough.
- 8
Brush with desi ghee/butter, serve hot, and enjoy!
Brush with desi ghee/butter, serve hot, and enjoy!
Did you make this recipe? Tag @cooking.with.anadi on Instagram and hashtag it #cookingwithanadi

Tested & written in Anadi’s kitchen
Recipe history
- April 16, 2026 — Reworked and refreshed for the 2026 relaunch — new photography, restructured and standardized ingredients & instructions.
Filed under
You might also like
Fried to Perfection: Ultimate Puffy Poori Bread Recipe
Master the art of perfectly puffed poori with this authentic Indian bread recipe. Crispy, light, and golden every time — your go-to guide for foolproof homemade poori from scratch.

Classic Layered Paratha | Triangular Paratha Recipe
Make perfectly flaky, layered triangular paratha at home with this easy whole wheat Indian bread recipe. Soft, crispy, and delicious — ideal for any meal of the day.

Authentic and Soft Homestyle Roti Recipe
Make soft, authentic homestyle roti from scratch with simple ingredients. This easy Indian bread recipe delivers perfectly tender results every time. Your family will love it.

Healthy Palak Paratha Recipe: Easy Spinach Layered Flatbread
Make flaky, layered Palak Paratha at home with this easy spinach flatbread recipe. Soft, nutritious, and packed with flavor — perfect for any meal.

Quick Cast Iron Naan: Easy Homemade Recipe in Just One Hour!
Make soft, pillowy homemade naan bread in just one hour using a cast iron skillet. This easy recipe delivers authentic restaurant-style results right from your own kitchen.

How to Make The Best Punjabi Lachha Paratha
Crispy, flaky, and buttery Punjabi Lachha Paratha made right at home. Master this beloved Indian bread with simple steps and pantry staples for perfect layers every time.


Comments
No comments yet — be the first to share your thoughts!
Leave a review
Be the first to share how it went — your note helps other cooks (and earns the recipe its stars).