This post may contain affiliate links. Read our disclosure policy
Watch the recipe
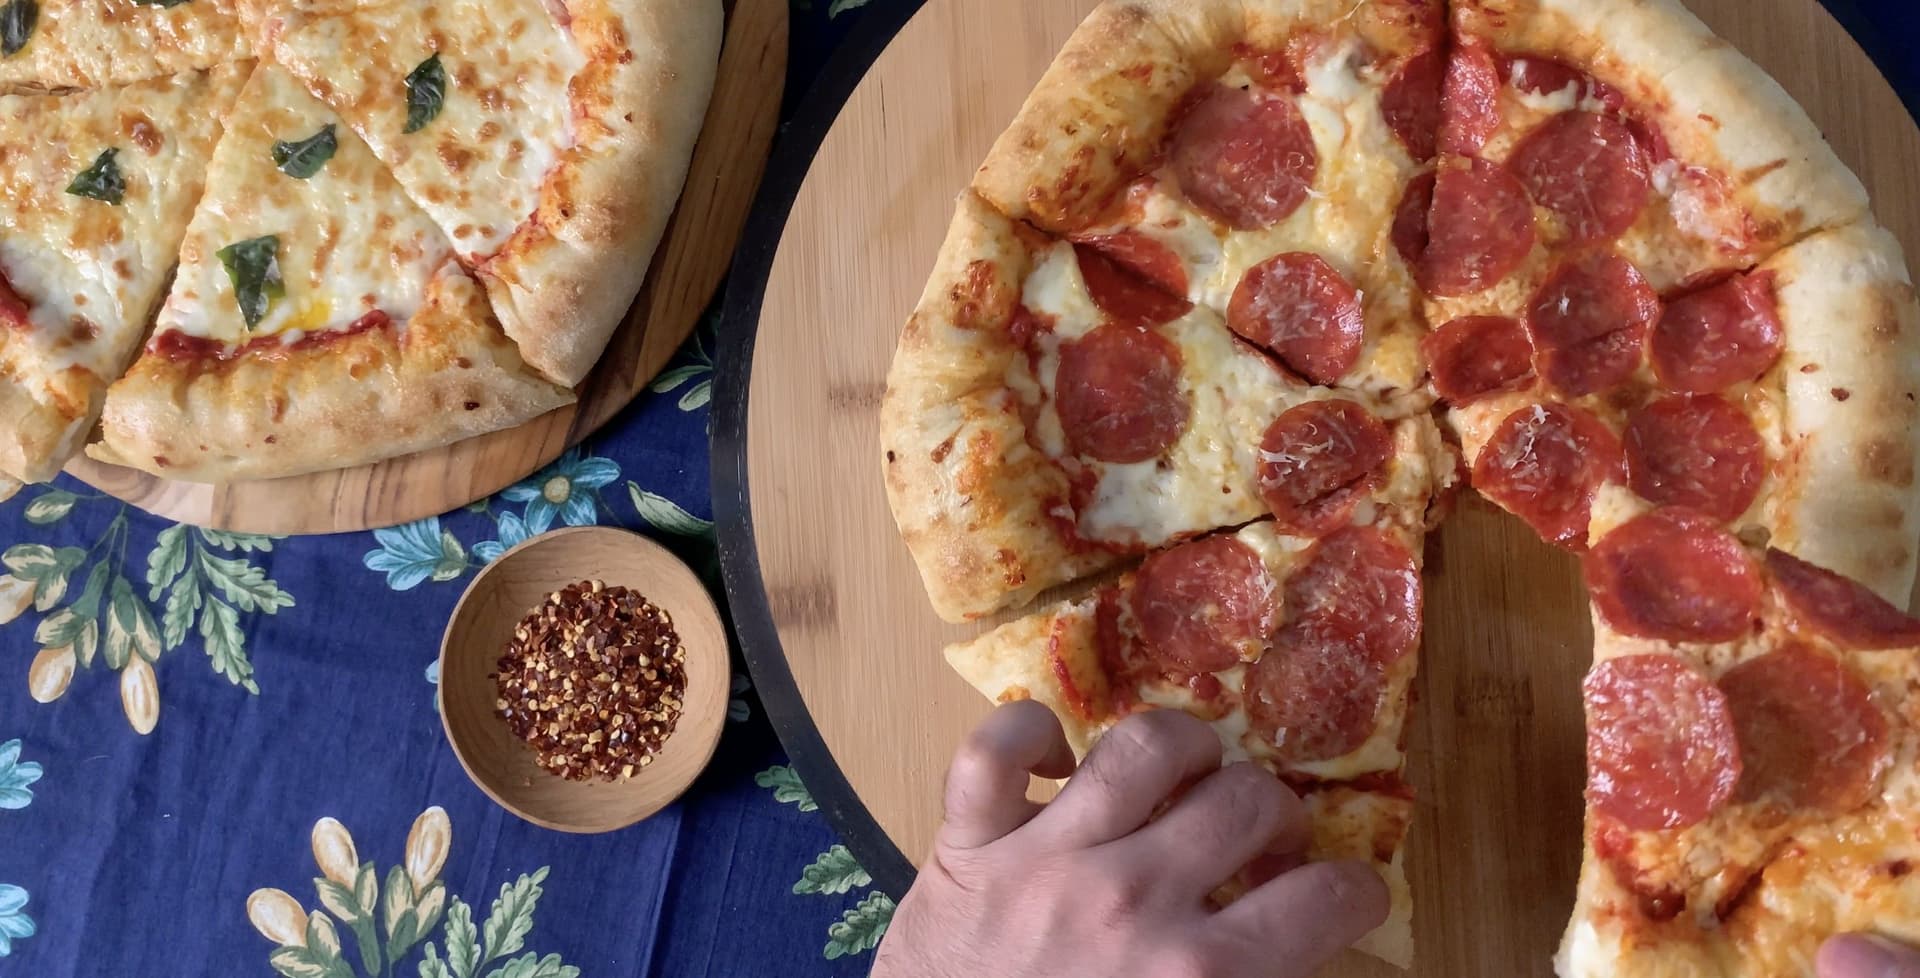
Ultra Cheesy Stuffed Crust Pizza Recipe
Who loves the Pizza Hut stuffed crust?
I know I do, but to be honest there are some things I don’t enjoy about it! Pizza Hut is my favourite pizza place, but I’ve been disappointed with their stuffed crust. The concept is awesome, but I’ve got a couple of critiques:
- The cheese is not really gooey inside
- There’s not much cheese in the stuffed crust
- The crust overpowers the pizza, so there’s not that much actual pizza surface area!
My goal with this recipe is to improve the Pizza Hut stuffed crust and to fix all of those little flaws! My idea of the perfect stuffed crust is to have a crust that’s loaded with cheese that gets molten and stays warm. However, we also don’t want the cheese to ooze or burst out of our crust! We want the crust to fully seal the cheese so the crust is a speciality in itself, not leaking into our toppings! We don’t want our crust to be too crusty so that there’s still lots of pizza goodness!
Believe it or not, this recipe has been years in the making! If you follow me on Instagram, you saw me test this stuffed crust about a month ago at the time of writing it. I first made a stuffed crust back when I didn’t even have a stand mixer and I was with roommates. It was all right but wasn’t the way I wanted it. I don’t know why but I just didn’t have the ambition to try it again until recently. I’m so glad I felt the urge to make this, though, because trust me, this is out of this world! It’ll change the way you see pizzas forever!
The video will give you a full picture and visual demonstration of how to make the ultimate cheesy crust pizza at home! If you’re not already, please subscribe to me on YouTube so you always know when the corresponding video to all of my recipes go live! Especially with a recipe that’s as hands-on as a pizza, I find a video will truly assist you in nailing the recipe and will guarantee you success in making this pizza! Let’s get cooking!

What kind of pizza dough are we making?▼
For this pizza, I’ll be making a Napoletana-style dough! The crust won’t be too thick but it also won’t be a thin-crust pizza. I chose to make a Napoletana dough since those have become my favourite kind of pizzas, and I love how quick they cook! More details about how to make the pizza dough will be in the recipe instructions!
What Cheese should I use to stuff the Crust?▼
I use string cheese to stuff the crust. You can use any type of string cheese you want, but to mimic the stuffed crust from Pizza Hut, I’ve chosen to use mozzarella string cheese. However, when I’ve tested this recipe out, I used marble string cheese just for fun! It was super delicious and I totally recommend it!
If you can’t find string cheese for some reason or you don’t feel like getting it, then you could use a block of mozzarella cheese (or any semi-hard cheese of your choice) and cut it into sticks.

EQUIPMENT for HOMEMADE Cheese Filled Crust Pizza
In my opinion, there are a couple of tools I recommend you invest in to make the ultimate pizzas at home. They won’t be handy not only for this pizza with cheese in the crust, but for any pizza your heart desires! It may seem like a large cost if you’re purchasing these all in one shot, but if you get the best quality tools, they should last you a lifetime, and that’ll give you a reason to make plenty of pizzas!
I first recommend you purchase a baking steel and/or a baking stone. These allow you to achieve the best crispy crust. By using the baking steels and stones to preheat at the highest setting your oven can go to, the stones and steel retain heat and radiate it back into your pizza.
To make the actual pizza dough, I recommend a KitchenAid mixer. This will help tremendously kneading your dough! Back in the days before having a stand mixer, I would knead by hand. I know this is authentic, but it’s quite a workout! Plus, I like the convenience of having a stand mixer because I can make a large amount of dough and have extra pizzas to freeze for later, so I can just defrost a pizza and pop it in the oven when I feel like it! No need to purchase store-bought dough when you’ve got a craving!
Next essential item is a pizza peel. You’ll see in the photos and the video that I use both a wooden pizza peel and a metal peel. The wooden peel is great to form the pizza and then transfer the pizza to the hot baking steel or stone. If you are following the baking steel/stone method, this is something you need, to ensure the safety of yourself and your pizza.
A bench scraper is extremely useful to efficiently portion your dough and even to clean your workspace after you’ve got lots of sticky dough and flour on the counter!
My final recommendation is a pizza wheel cutter to cut your pizza into perfect slices! I also find it so much fun to use! This is a more common tool, but I find it mentioning if you don’t have one already! Cutting pizza with a knife simply won’t yield the same results, and it’ll be hard to maneuver compared to the pizza wheel.
What temperature should The Oven Be?▼
I would recommend you preheat your oven to 500 F or the highest temperature your oven can go to. Then, when it’s time to cook the pizza, you’ll want to change your oven to the Broil setting.
Can I Make This Pizza Ahead of Time?▼
You could, but I’m sure you’d rather have your pizza hot and fresh, right! If you want to be efficient in the kitchen and in the pizza-making process, I recommend having your dough out at room temperature, the oven on, and your sauce prepped. Furthermore, you can have all your toppings ready to go and your cheese grated in advance. Store your grated cheese in an airtight container or cover a plate or bowl with plastic wrap so it won’t dry out. When it’s go-time, then you won’t be scrambling, and you just gotta roll out the pizza dough, top and cook!

Ingredients
Time to see the ingredients that we’ll need to make this awesome pizza! We’ll see what’s needed for the pizza dough, the pizza sauce, and for the actual pizza ! For all measurements with the full ingredient list, make sure to scroll to the bottom of this post for the FULL PRINTABLE RECIPE CARD! You can save this recipe for later, and the recipe card is awesome because you can scale the recipe based on how many pizzas you want to make. The card does all the calculations for you, so you don’t need to guess any adjustments and be prone to some calculation errors!
For the Pizza Dough
- 00 flour or bread flour. Ideally, you would use 00 flour for pizzas, but if you can’t find it as I couldn’t since all the grocery stores were sold out of it for some reason at the time of making it, then feel free to substitute with bread flour.
- Instant Yeast
- Salt
- Lukewarm water (60-70F) + ~200 mL lukewarm water (60-70F)
- Extra virgin olive oil
For the Sauce
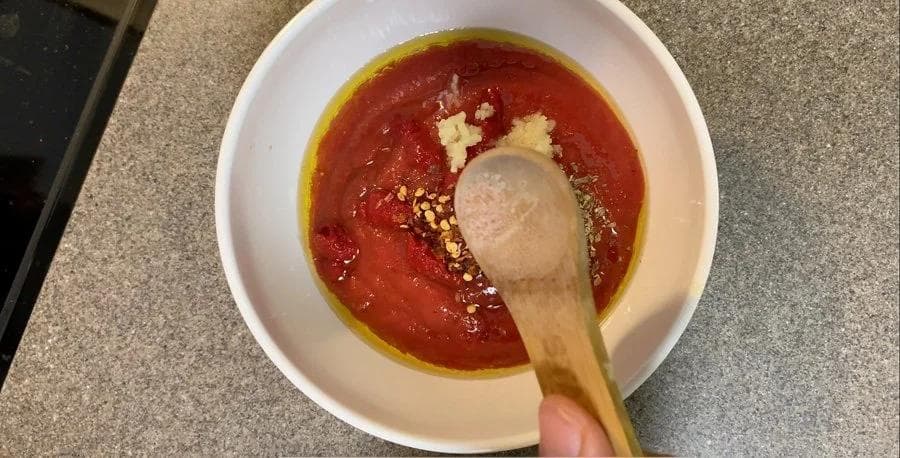
- Extra virgin olive oil
- Passata or tomato puree
- Garlic, minced
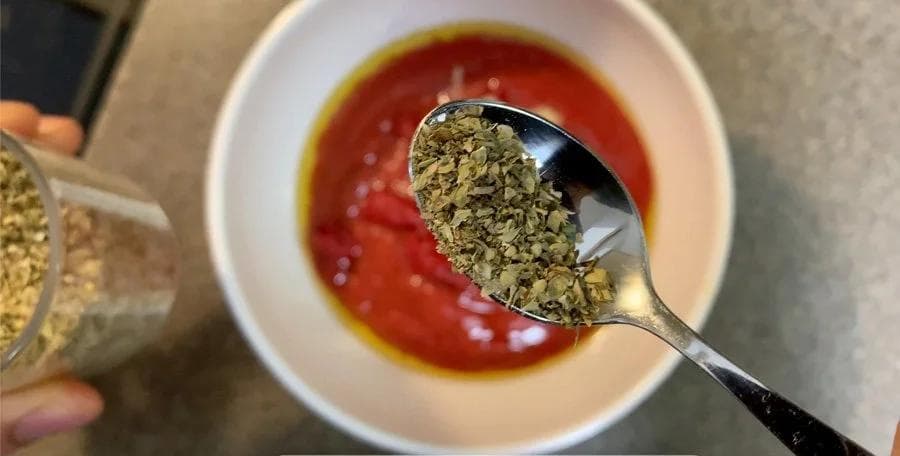
- Dried oregano
- Tomato paste
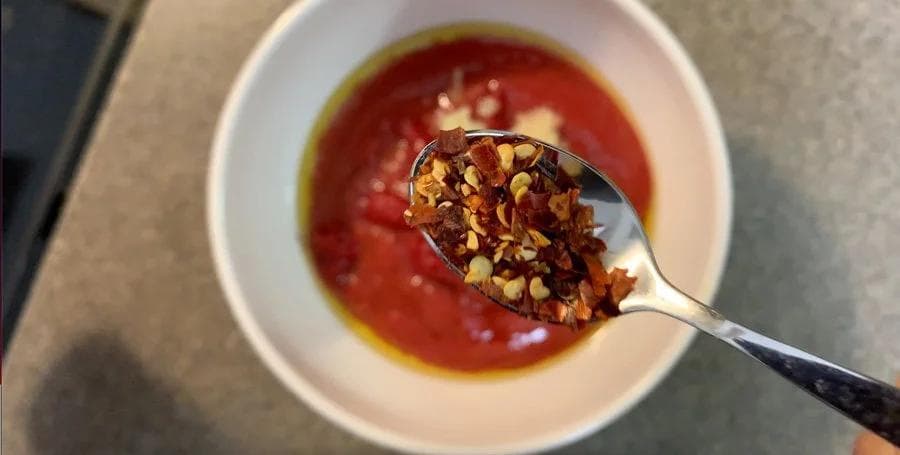
- Chilli flakes
- Salt to taste
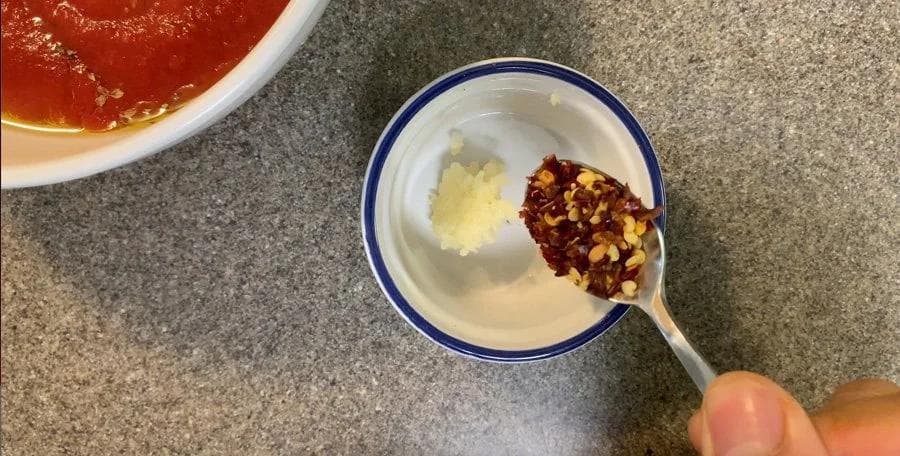
For the Chilli Oil
- Olive oil
- Garlic, minced
- Chilli flakes
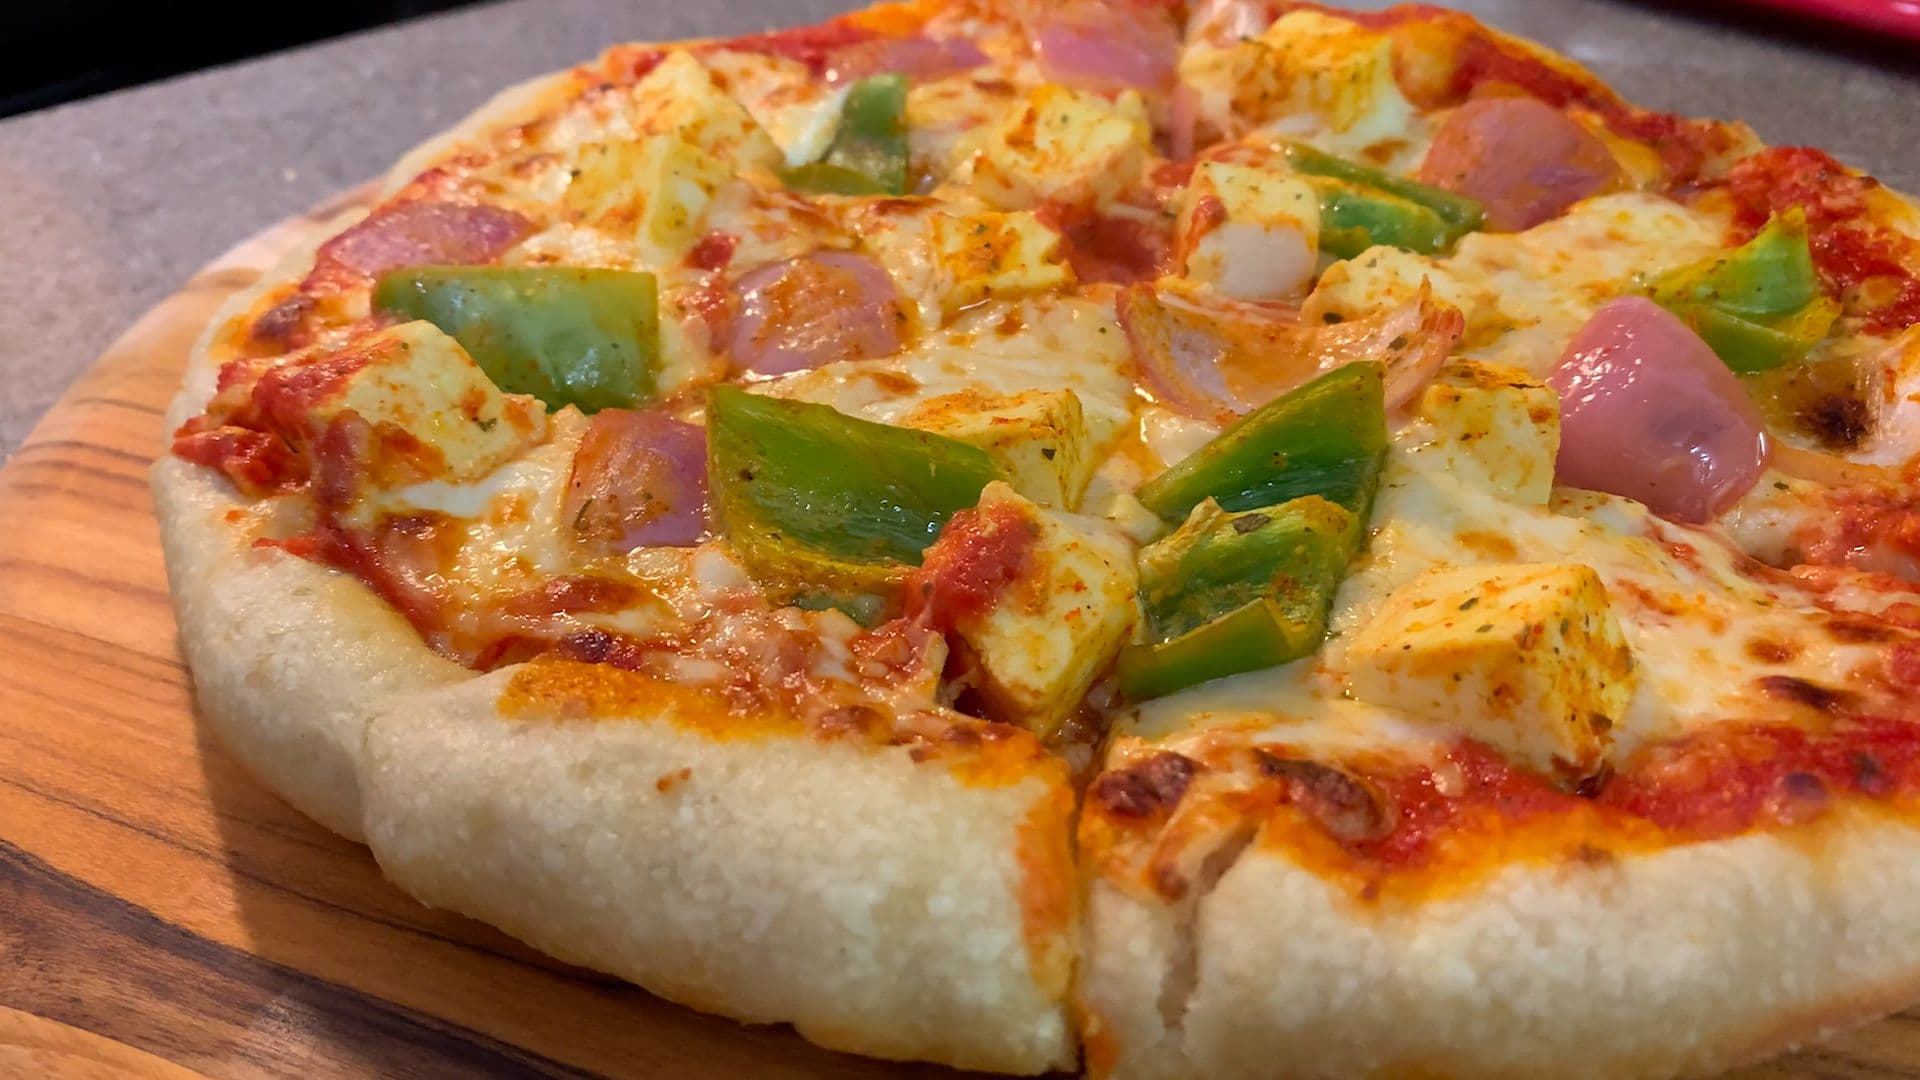
For the Cheese Lovers Pizza
- String cheese
- Mozzarella cheese
- Smoked applewood cheddar
- Provolone cheese
- Basil
- Parmesan cheese
For the Pepperoni Pizza
- String cheese
- Pepperoni
- Mozzarella cheese
- Provolone cheese
Topping Variations
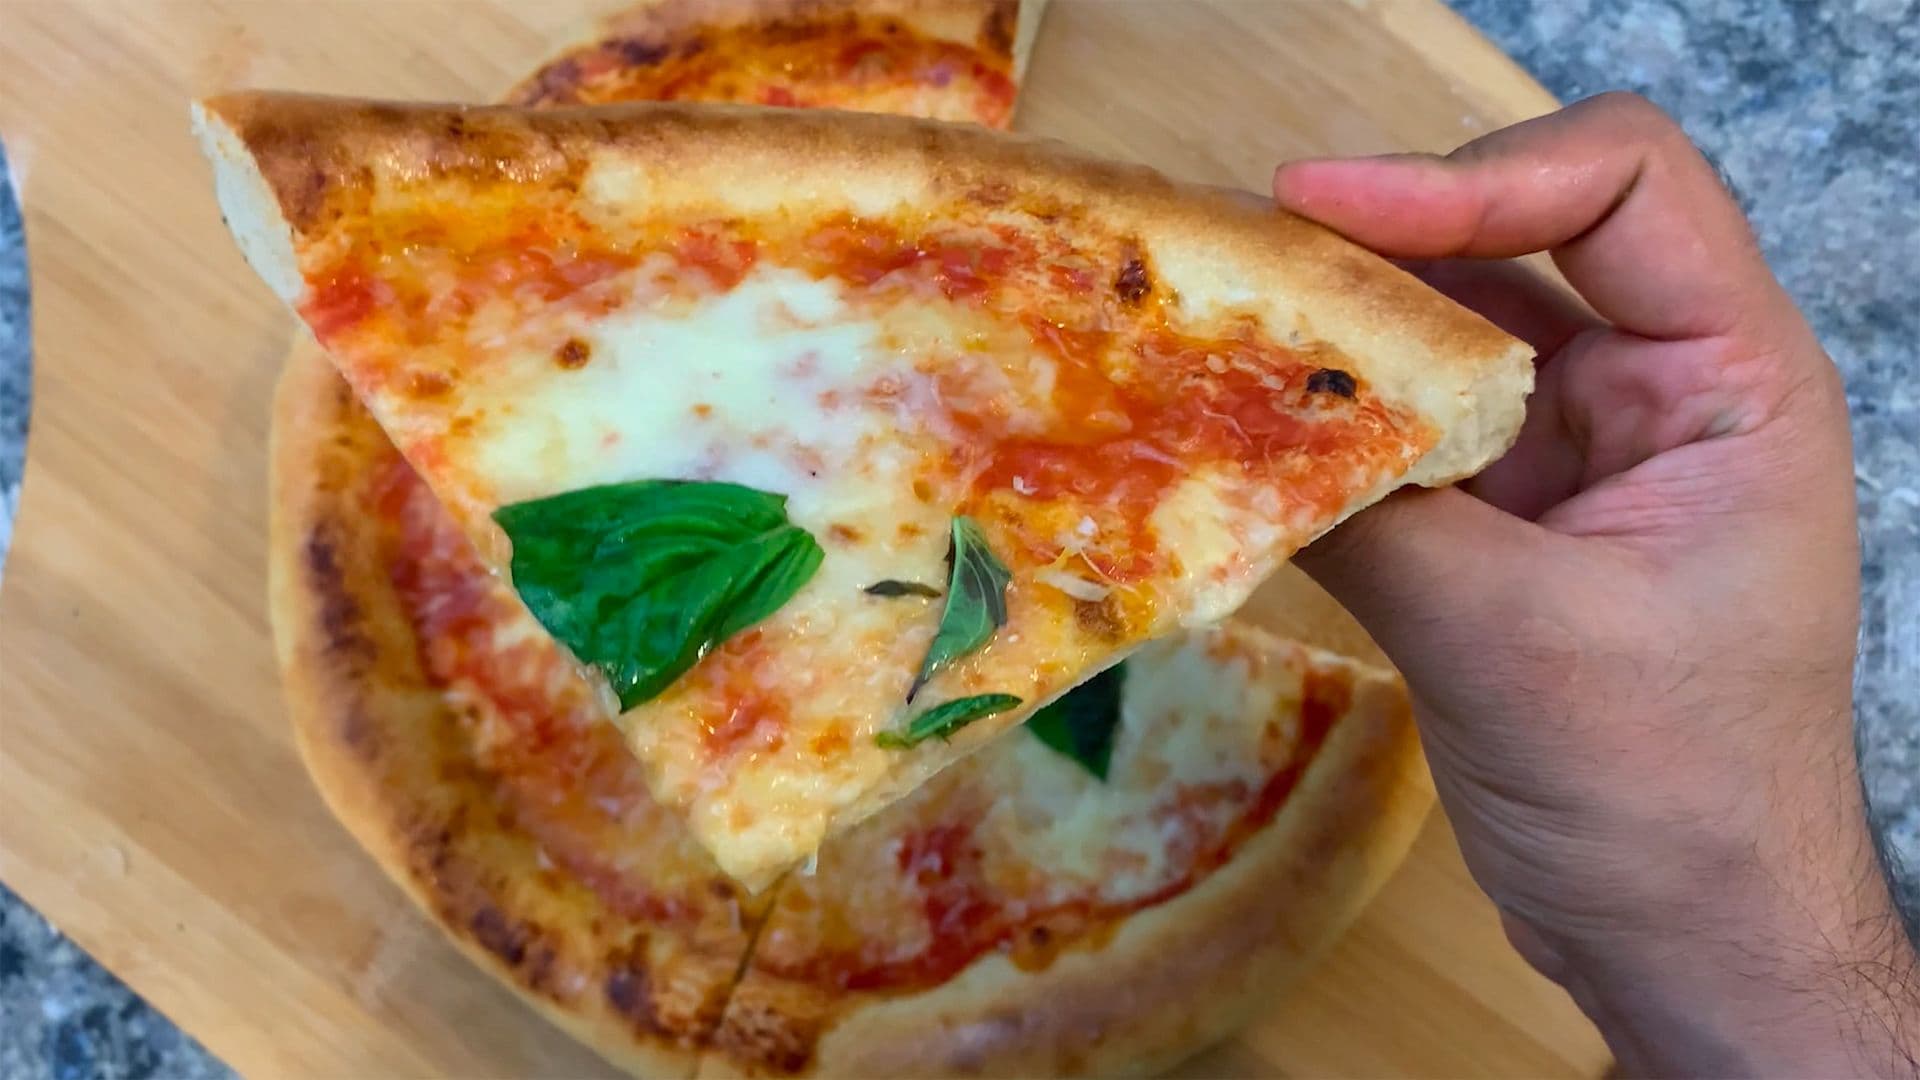
As you’ll see in the video, I’ve made two different pizzas: a classic pepperoni pizza and a cheese lover’s pizza topped with basil! You can modify the cheese lover’s pizza by swapping the smoked applewood cheddar with any semi-hard cheese, other recommendations I have include Swiss cheese, Monterey Jack, white cheddar, or Havarti!
Of course, you can top your pizza however you’d like! Here are some ideas:
- Veggie delight: Clean out your fridge and make a rainbow out of your pizza! I recommend corn, peppers, mushrooms, onions, jalapeños and green chilies!
- Meat lovers: I would add chorizo sausage, pork or chicken sausage, bacon, grilled chicken and pepperoni!
- BBQ chicken: Use some leftover rotisserie chicken or poach some chicken and toss in your favourite BBQ sauce!
- Chicken tikka: This is my favourite from Pizza Hut India! Follow my Oven-Broiled Chicken Tikka recipe and toss them on your pizza!
How to Make Stuffed Crust Pizza
For the Pizza Dough
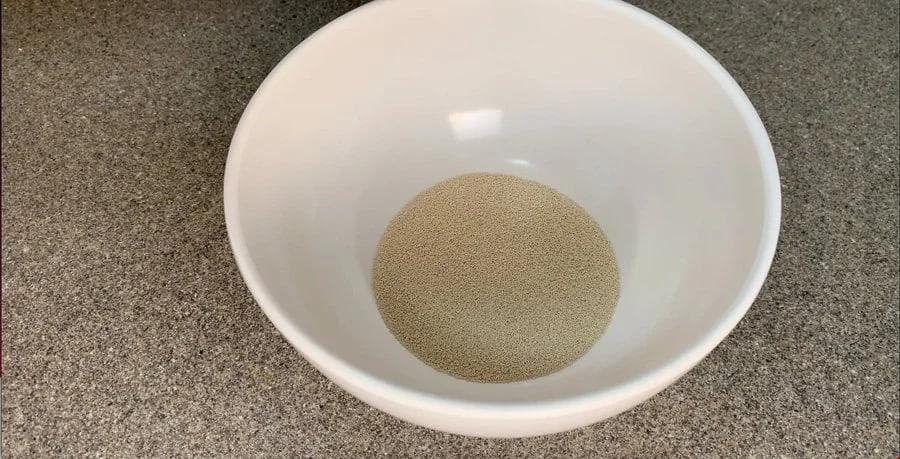
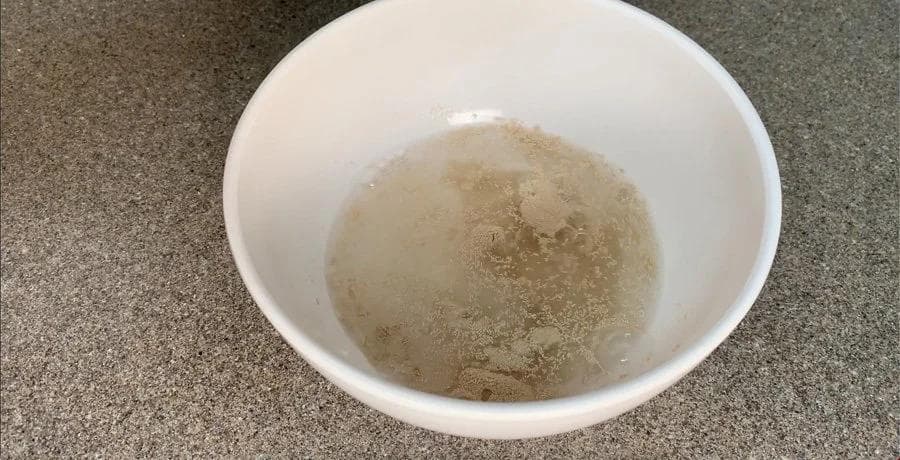
Add yeast and 1/4 Cup of lukewarm water to a bowl and whisk until water is bubbly. Mix until you see no granules of yeast floating on the water. If the yeast doesn't dissolve, the yeast is likely dead and you will have to start over with fresh yeast.

Add flour to the bowl of your kitchen aid mixer and add all of the yeast-water mixture. Then, slowly add most of the cold water while continuing to knead with the dough hook. Add the remaining cold water back to the bowl and swirl and add to the dough.


Knead until the dough comes together and you have a soft, pliable dough which is not sticky to touch. Add more flour/water as required to reach this consistency.

Stop the mixer and add the salt. Knead on low speed for 1 minute.
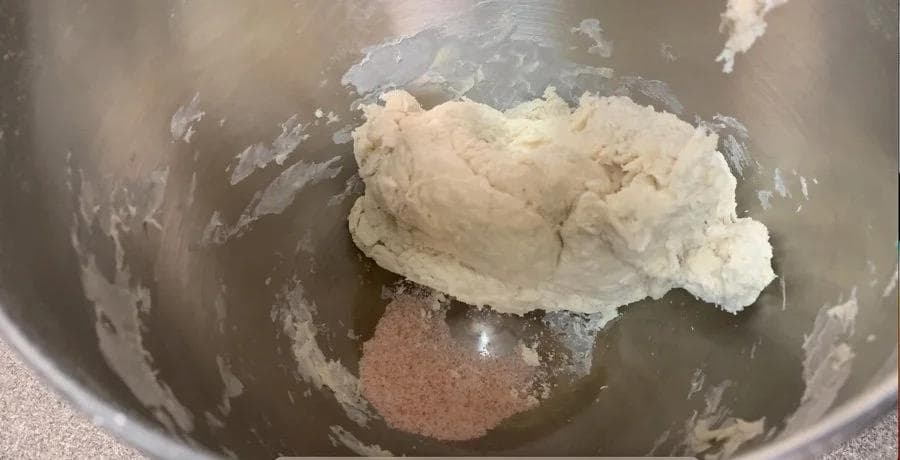

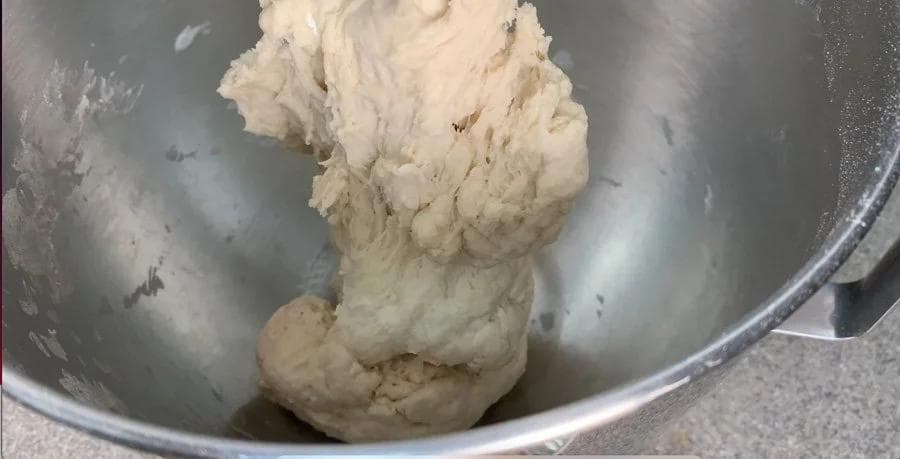
Stop the mixer, add the olive oil and knead on low speed for 1 minute. After 1 minute, remove the dough from the dough hook, place in the bowl of the mixer and knead for 30 seconds to a minute.


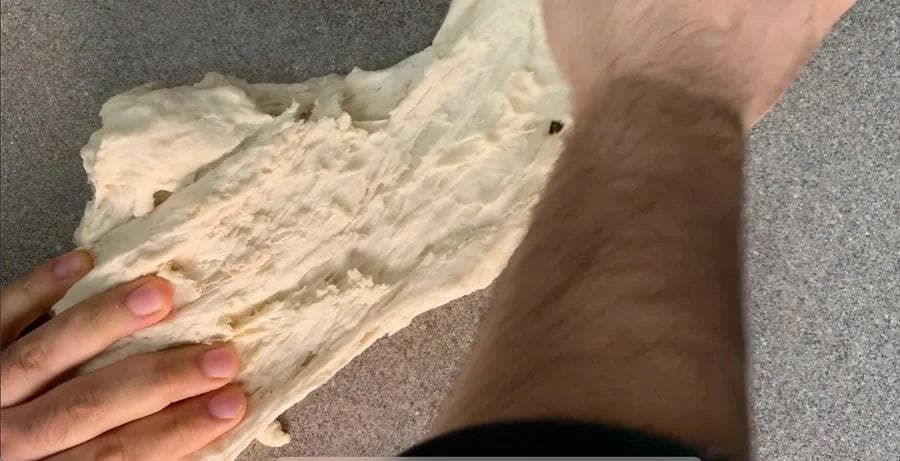
Then, transfer the dough to your countertop and continue kneading, stretch and fold the dough for 1-2 minutes.

Then, portion the dough into 2 equal parts and for each portion fold the dough onto itself to create a tight surface tension as you seal/pinch the folds. Be careful not to de-gas the dough too much. The portions should resemble a ball of fresh mozzarella. This is a great time to freeze any dough you are not planning to use right away.


Transfer the dough portions to a baking sheet or plate and cover with 2 layers of plastic wrap. Let the dough rise for at least 24 hours in the refrigerator.


For the Sauce
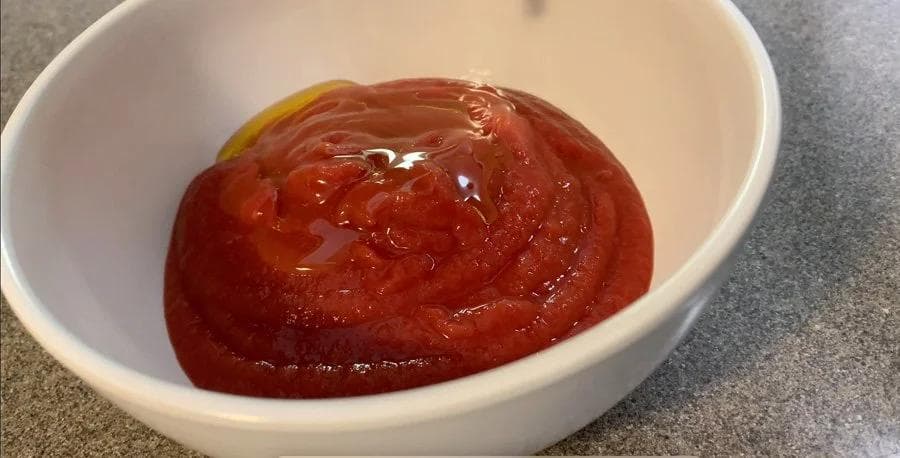
In a bowl, combine all the ingredients for the sauce and mix well. Adjust with salt for seasoning.


For the Chilli Oil
In a bowl, combine all the ingredients for the chilli oil and mix well.


For the Pizza
Place one baking steel/stone on the second highest rack of the oven and another one at the bottom most rack. Preheat oven at 500 F for 1 hour.
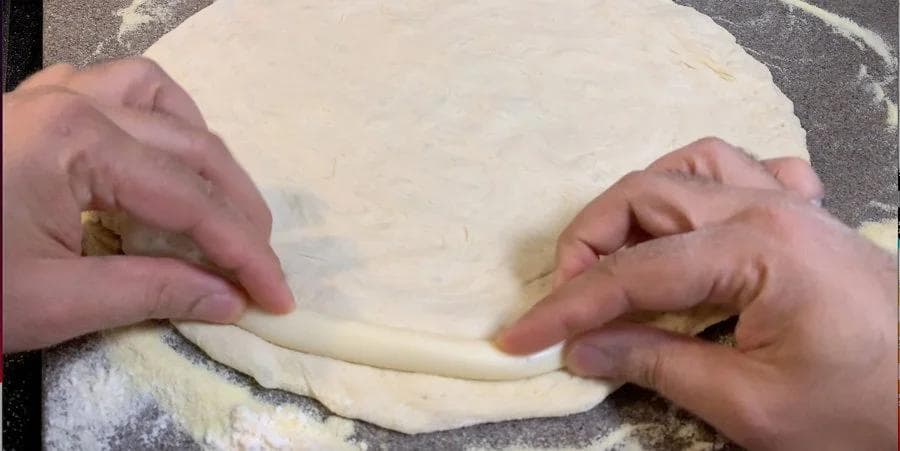
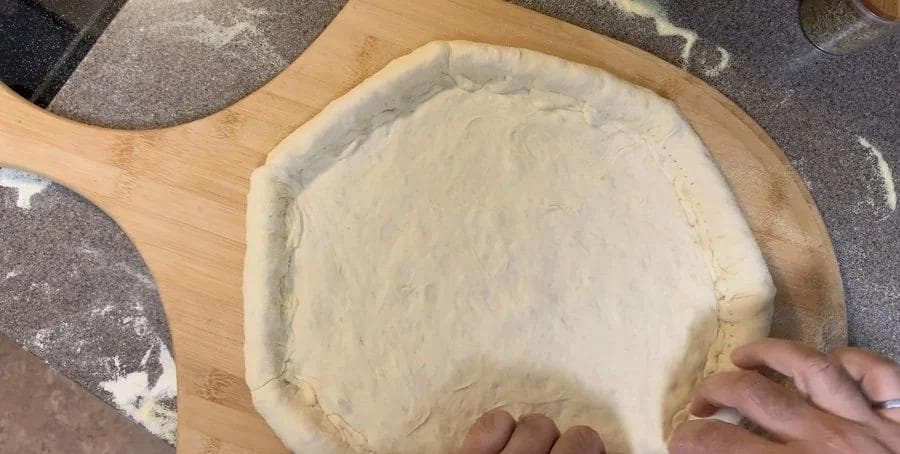
Dust your countertop with flour and starting with one portion of dough at a time, add the dough ball over the flour. Starting from the centre of the dough, press down on the dough and create a rim around the side.
Continue pressing down the centre to stretch the dough. Then, hold the dough from the rim and rotate to let gravity stretch it further. You can also use knuckles to stretch the dough, until the diameter is about 10 inches.


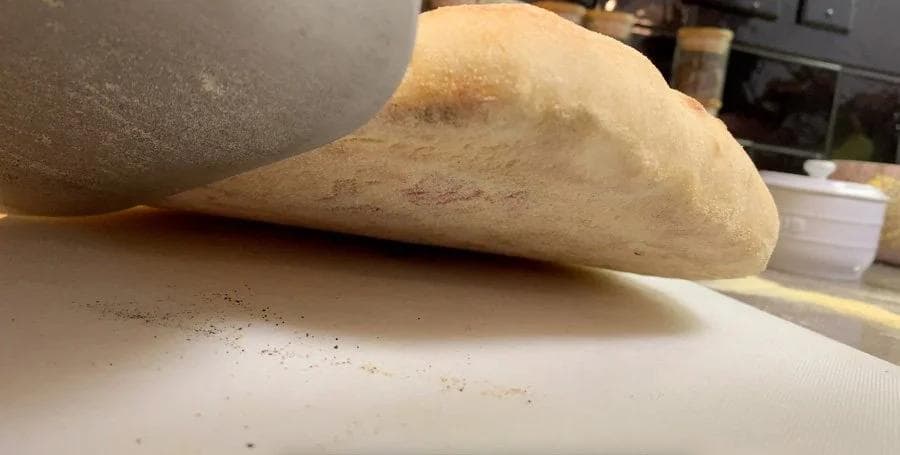
Press down to flatten the rim with your fingers and then prick the ends with a fork all around the circumference of the dough. Place the mozzarella cheese strings around the circumference of the dough and then fold the dough to cover the cheese.
To create a permanent seal, use a fork and prick the seams of the fold. Then brush some water across the pricks and press lightly to seal.


Set oven to Broil mode, let top steel/stone heat for 8-10 minutes.
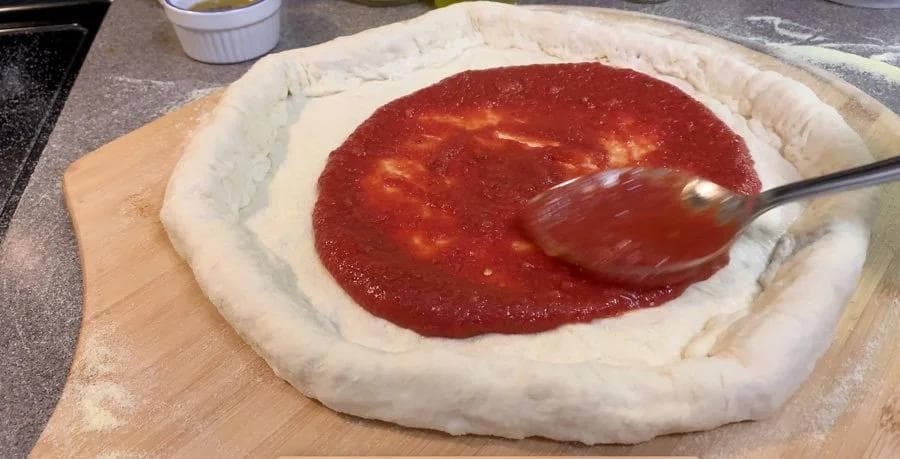
Dust a wooden pizza peel with semolina and place the stretched dough on the peel.
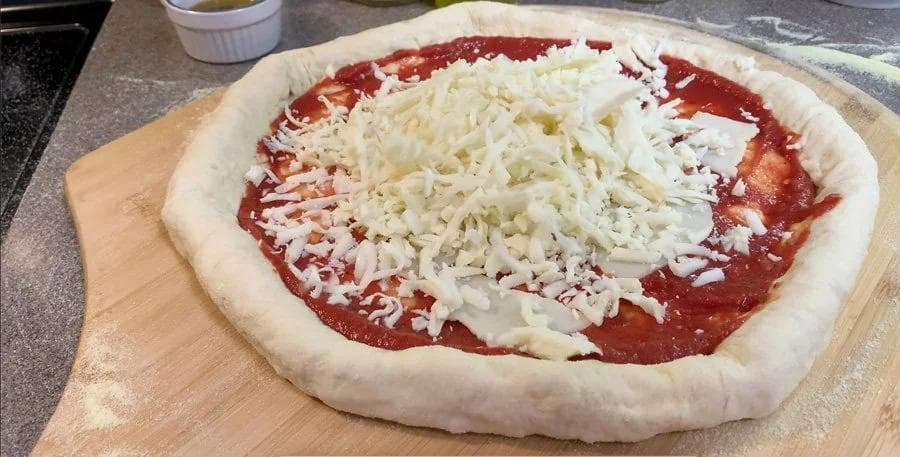
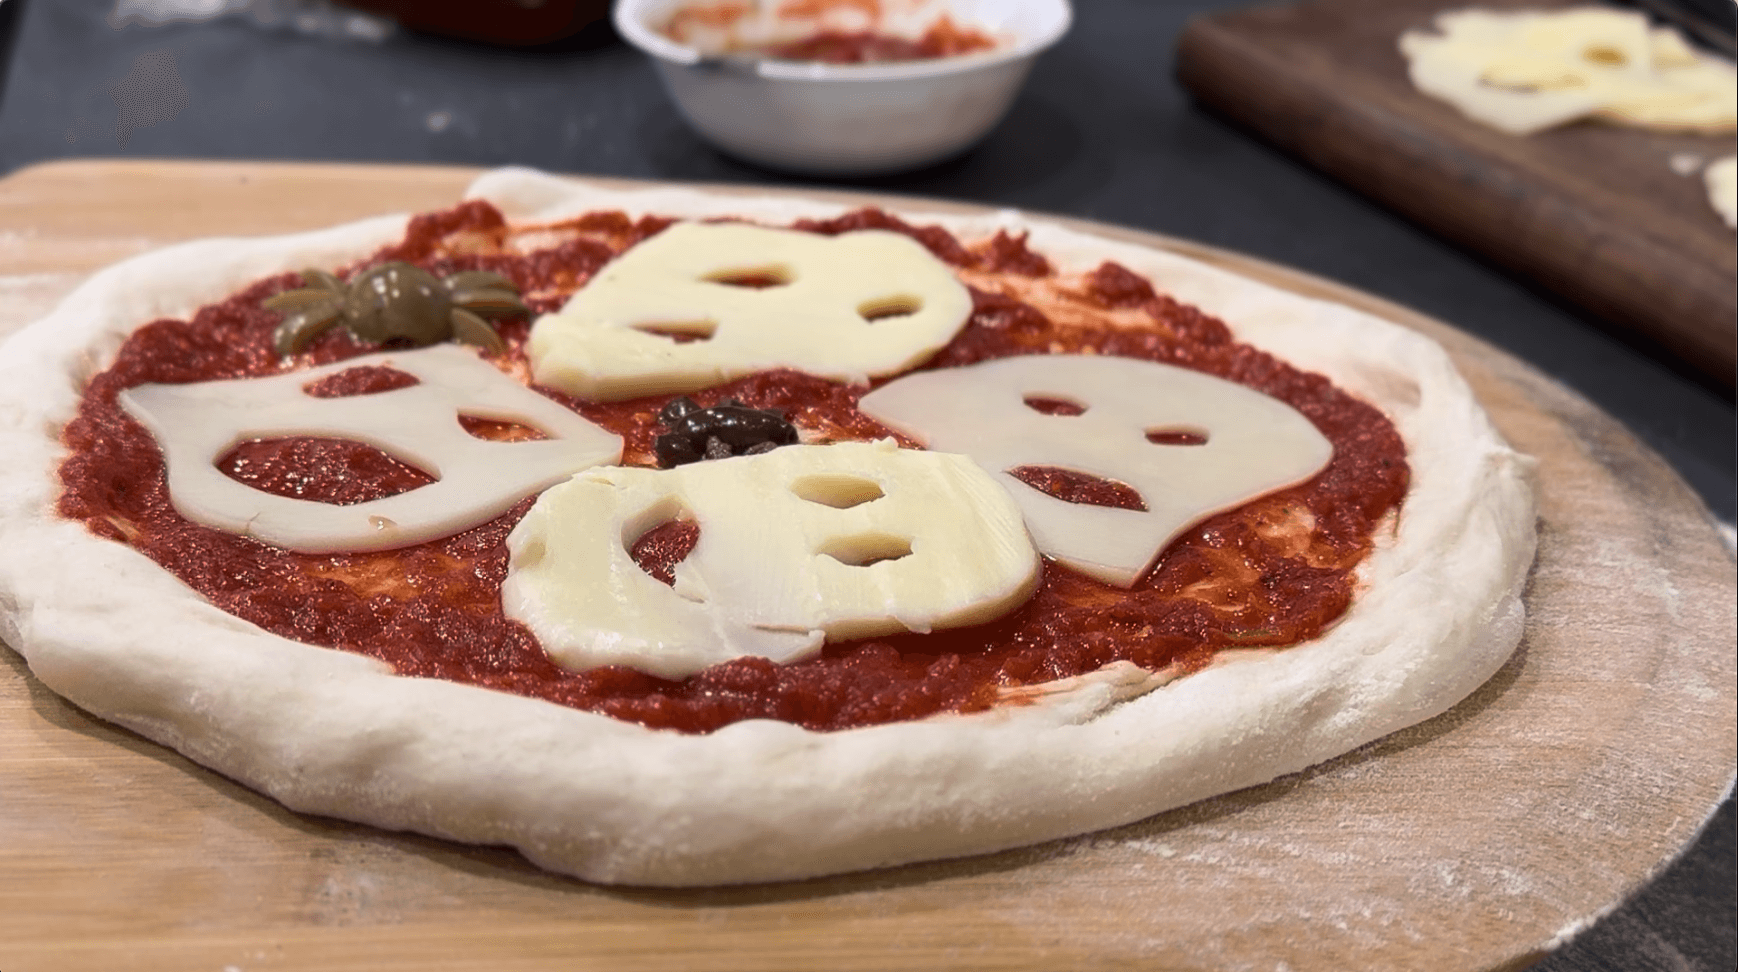
Add half of the tomato sauce and spread until the edge of the pizza. Tear layers of the provolone and dot 2-3 slices around the pizza, followed by mozzarella
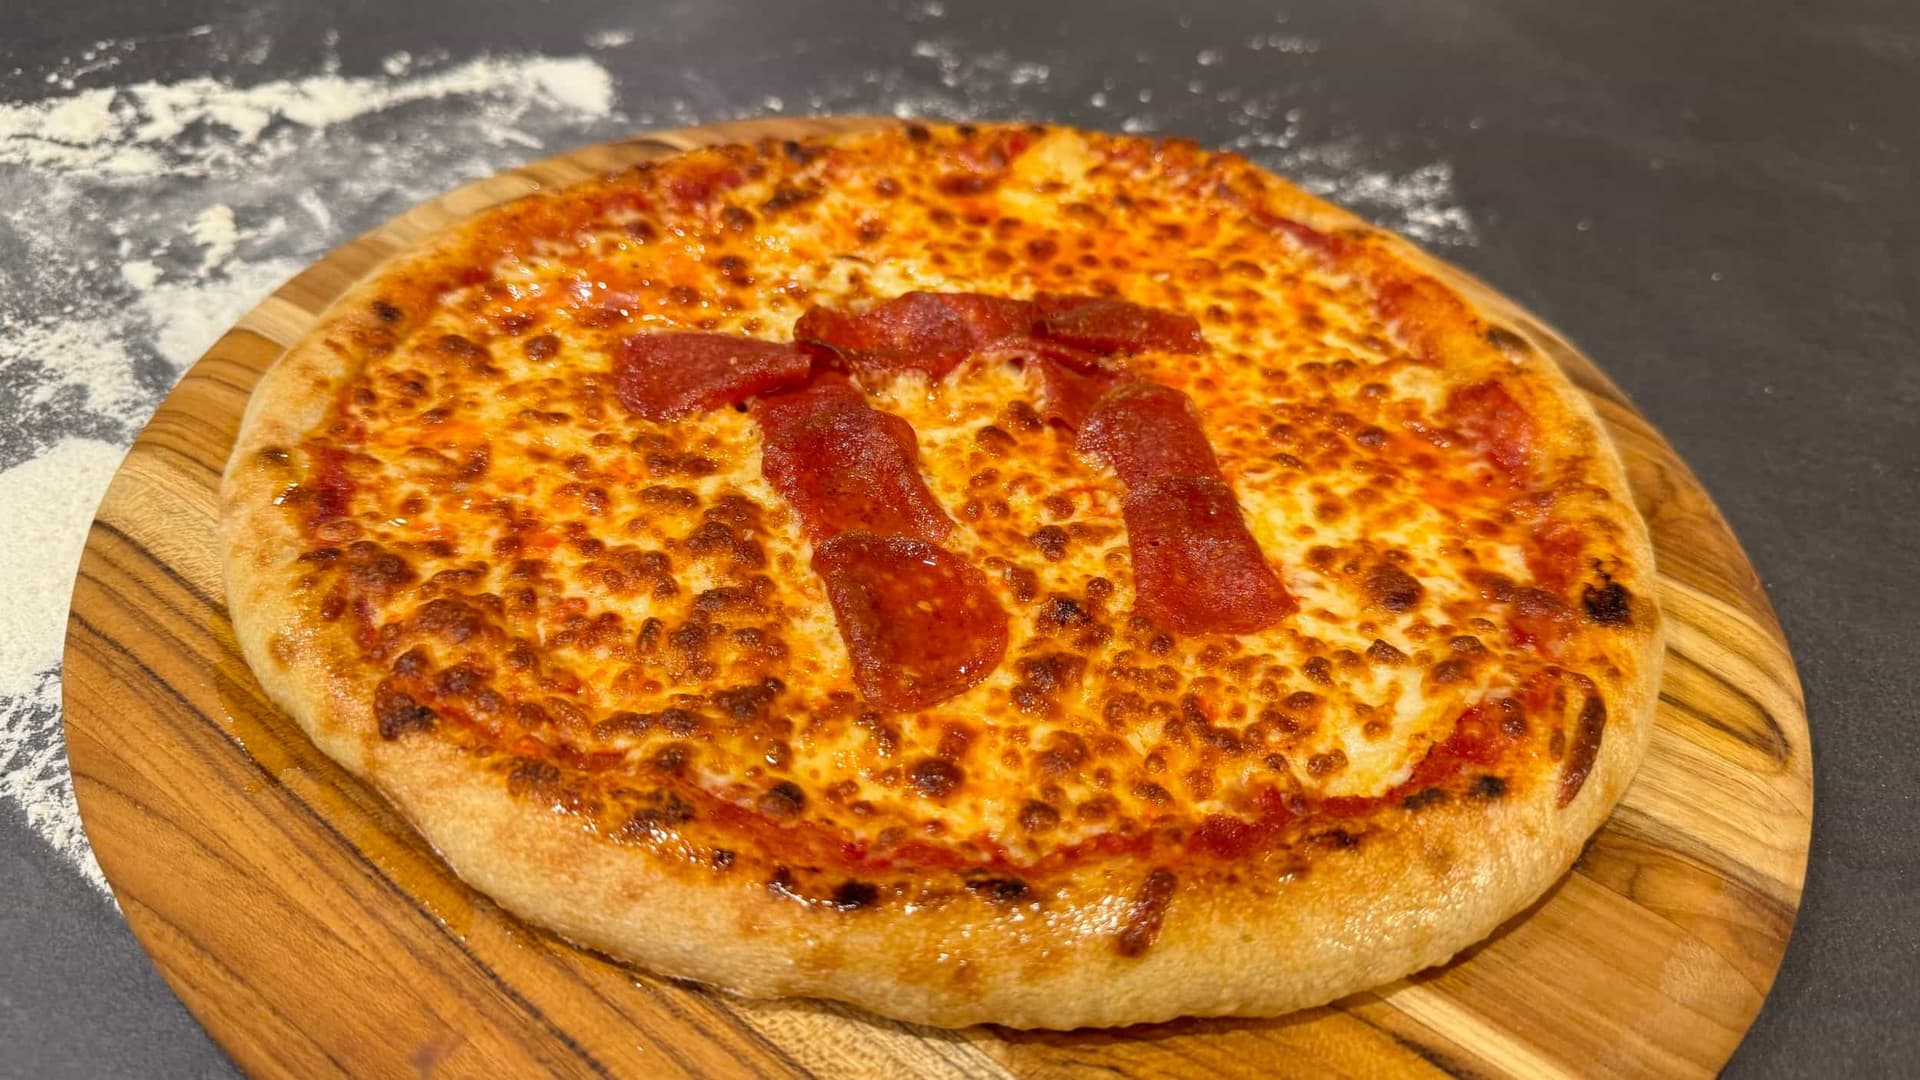
For the pepperoni pizza, top with pepperoni slices. For the cheese pizza, top with the smoked applewood cheddar.
In a swift push and pull motion, place the pizza on the top baking steel/stone.
Bake for 1 1/2 - 2 minutes or until the crust has some char or brown spots and the cheese has molten.
Then transfer the pizza to the bottom steel/stone to finish off the crust of the pizza, about 30 seconds to 1 minute.


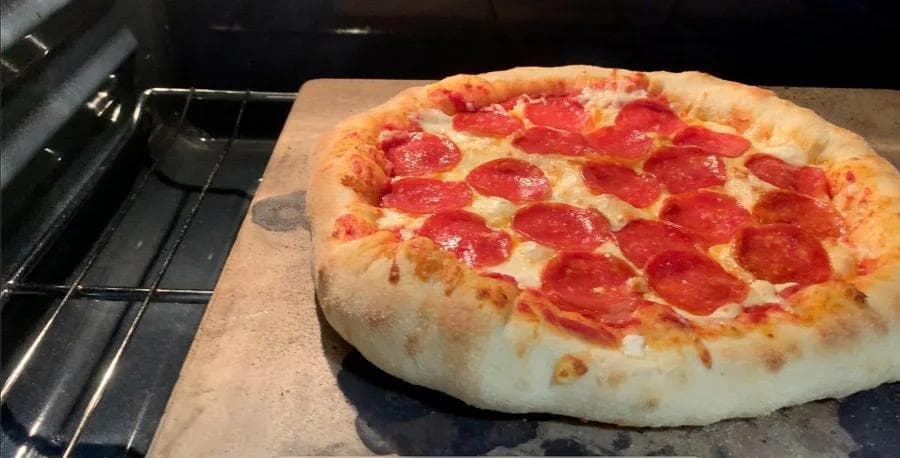
Remove the pizza from the oven, top with parmesan cheese and brush the crust with the garlic chili oil. Garnish with basil.


Serve hot and enjoy!

Tips for a Perfect Cheesy Crust Pizza
- If the yeast doesn’t dissolve after mixing, the yeast is likely dead. You might need to start-over with fresh dough.
- Be careful not to degas the dough too much as you are folding the individual portions onto itself. If you work the dough too much, it will start to resist as you start to stretch the dough for the pizza.
- I recommend passata strained tomatoes for the pizza sauce because the tomatoes will cook as you cook the pizza
- Invest in a baking steel or baking stone. They are cheap, and an essential tool if you are serious about your pizza.
- Make sure to preheat the oven at the highest temperature your oven can reach for at least 1 hour.
- Use a pair of baking steels/stones if possible, setting up one of them towards the top rack of the oven and the second one at the bottom.
- 10 minutes before baking the pizza, set the oven to broil mode to make the top steel/stone scorching hot. This will help rapidly cook the crispy crust.
- To finish up the crust, transfer the pizza to the bottom stone/steel to finish up the crust.


Comments
No comments yet — be the first to share your thoughts!
Leave a comment