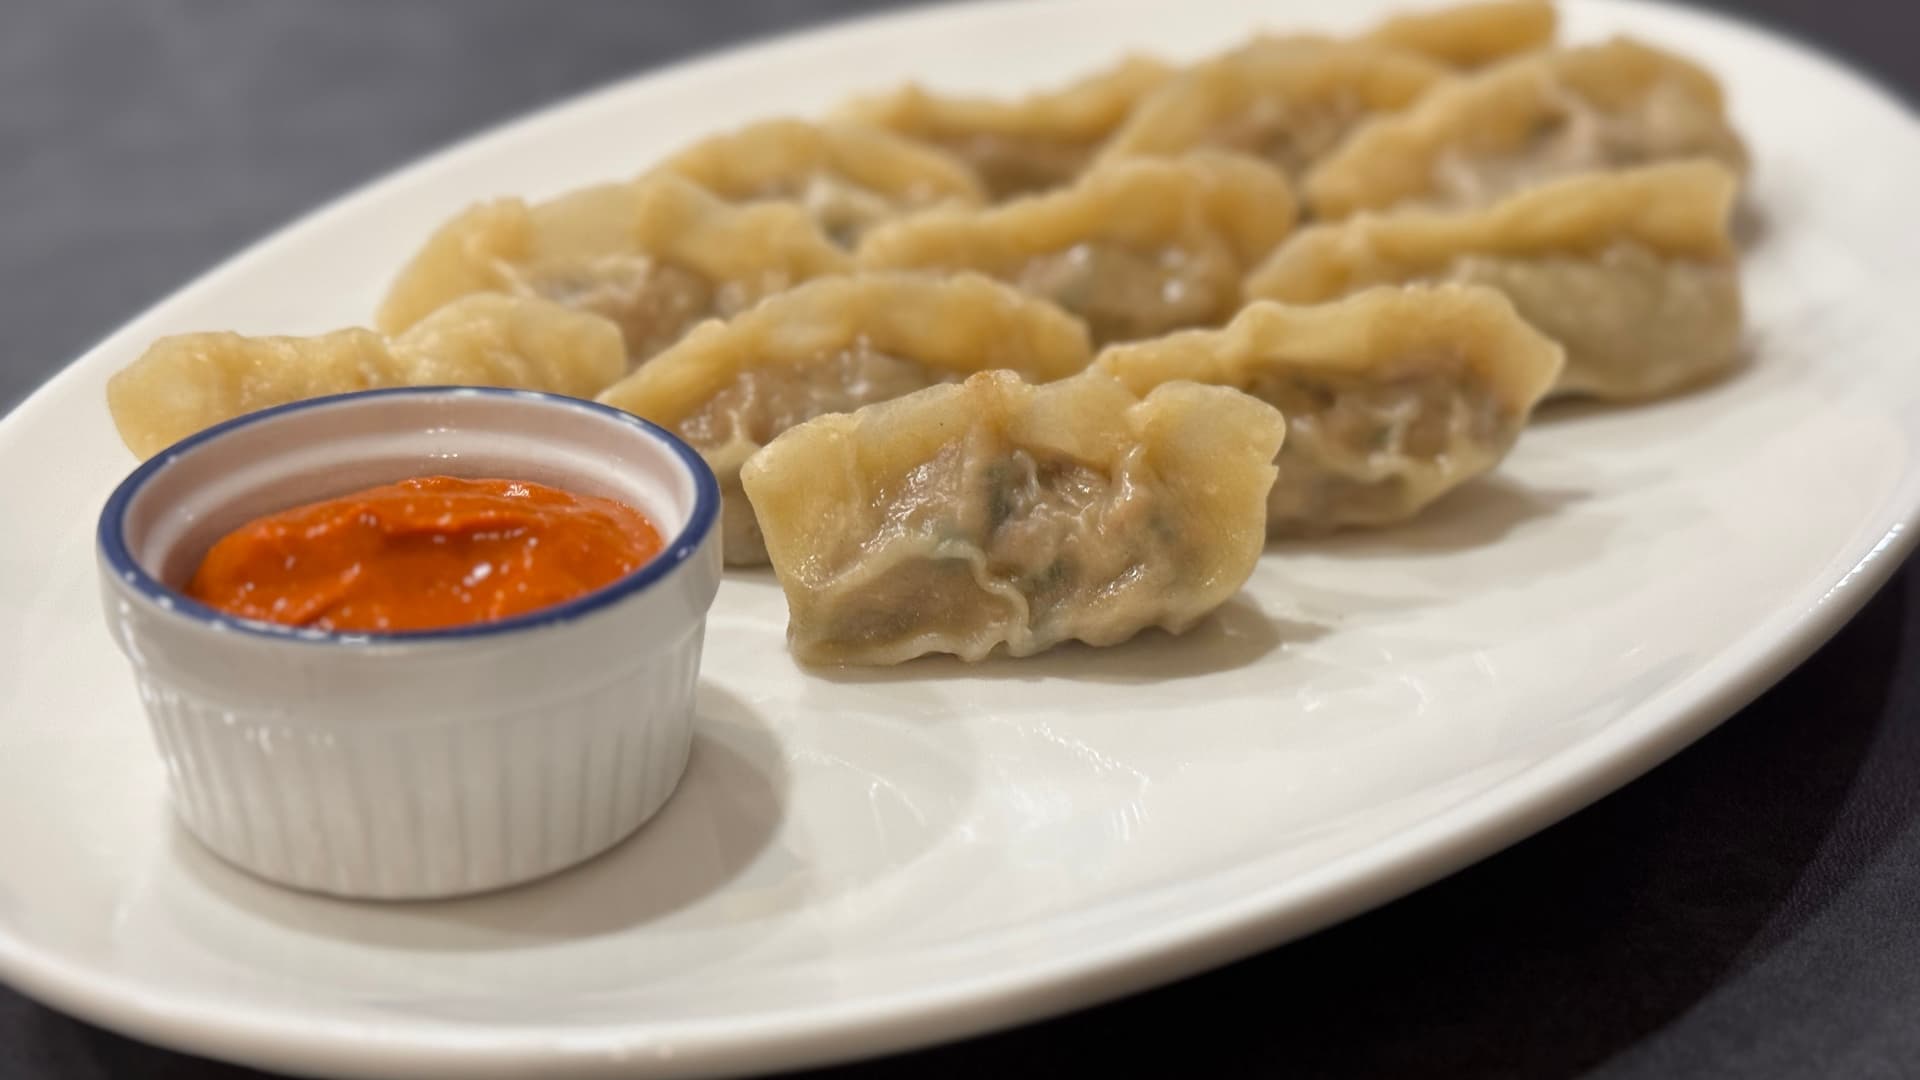
Tender, juicy Steamed Chicken Momos packed with bold Indian-fusion flavors. These soft dumplings make the perfect starter or side dish — easy to make and impossible to resist.
Growing up, momos were one of my favourite snacks. Momos originated in Nepal, and they made their way into India as an Indo-Chinese fusion recipe, adopting the technique and principle of the Nepali momo, but adding Indian flavors to the fillings. Momos resemble dumplings, prepared with a dough wrapper that is stuffed with either a meat or vegetarian filling. Momos can be steamed, pan-fried or deep fried, just like dumplings.
This recipe will focus on making a juicy chicken filling today, along with steaming our momos. This step by step recipe will walk you through all the information you need to make your very own momo wrapper and a super easy chicken filling that is packed with flavor!
If you’ve always wanted to try making your own dumplings from scratch, then you definitely need to try out this Ultimate Chicken Momo Recipe and check it off your bucket list as part of your Live to Cook one-month challenge! Get started for free today by signing up to my email newsletter, plus you’ll get the latest recipes sent straight to your inbox so you never wonder what appetizers to serve your guests for a dinner party again!
To grasp all the concepts on how to make the best chicken momos ever at home, including tips and tricks for making soft dough and for shaping the momos with ease, then be sure to watch the video! If you’re not already, please subscribe to my YouTube channel, and make sure that you’ve hit the bell button so you’re notified when all of my video recipes are live! Let’s get cooking!
Let the dough rest for as long as you can be patient. This is usually the hardest part for me, after all, I want to eat and who wants to wait to eat these treats. Trust me, wait at the least 30 minutes and you will be glad. This will allow the dough to rest and be easy to stuff and shape the momos.
Roll the dough thin and even. The thinner the dough, the quicker it will cook, however be careful not to roll it too thin - or you will run a risk of it tearing during the stuffing step.
Fill the dough portions as much as possible. You want to fill the cones as much as you can so that there’s no extra air and to get a satisfying portion of the minced chicken in every bite.
Allow the water to start steaming. Before placing the steamer basket over the pan to start the cooking process, make sure the water has started to steam gently to ensure accuracy and efficiency while cooking the momos.
Spray some oil. Either directly on the steamer basket insert or over the cabbage leaves, this helps ensure the momos to stick at the bottom while cooking.
Shiny outside and cooked inside. Once the momos are cooked, about 10-12 minutes later, the dough outside appears shiny and has some translucent properties. In addition, to be sure, cut one momo portion in half at the thickest point to ensure the chicken is cooked as well.
Folding technique matters. Find the folding method that you’re most comfortable with! There are indeed plenty of ways to fold momos, but there are no rules either! The circular spiral method is the easiest, and in the photos and video you will see a slightly more advanced method that I’ll describe in more detail.
Ingredients for Chicken Keema Momos
To see all ingredients and their quantities and to save the recipe for later, be sure to scroll to the bottom of the post for the FULL PRINTABLE RECIPE CARD or press the “Jump to Recipe” button! You can also scale the recipe based on how many momos you want to make. With a pound of minced chicken, you’ll be able to make about 30 to 35 momos by default.
FOR the Momo Wrapper DOUGH
Flour: In Hindi, known as “maida.” All-purpose flour will give you a classic taste and texture, so I recommend you use that for best results.
Olive oil: You can technically use any cooking oil, but I like the flavour of olive oil.
Cabbage: For steaming the momos.
For the Chicken Momo Filling
Minced chicken: If possible, you could even grind your own minced chicken! Using minced chicken will give you the juiciest and most flavorful filling. We will be adding the raw meat to the momos, no need to cook prior to prevent the filling from drying out!
In a large bowl, add all the ingredients for the chicken mince filling and then mix really well.
For the Momo Dough
Add the flour, salt and some water in a bowl and begin kneading. Knead to a soft dough, that is not sticky. Add more flour or water as needed to reach this consistency.
Spray some oil over your work surface and the dough and start to stretch and fold the dough until you have a smooth, and pliable dough ball.
Cover with a damp kitchen towel and allow the dough ball to sit for at least 30 minutes.
TO MAKE the Chicken Momos
Divide the dough into 3-5 smaller portions and then using your hands, roll each portion out to a thin, long cylindrical portion, about 3/4 to 1 inch thick in diameter. Cut each of these portions into 1 to 1 1/2 inch portions to create the dough disks for the momos.
Roll out each of these smaller portions into a thin disk, about 3-4 inch in diameter and then place 1-2 Tbsp of the chicken mince portion in the center.
Use one of the following folding techniques to form the momos: Technique 1: Pinched Edge (Half-Moon Shape)
Place a small spoonful of filling in the center of the dough circle.
Bring the four “corners” of the circle (top, bottom, left, and right) up and over the filling to the center.
Pinch the corners together in the center to create a small “parcel” shape.
Press along the edges to make sure it’s fully sealed.
Technique 2: Square Pocket
Place a small spoonful of filling in the center of the dough circle.
Bring the four “corners” of the circle (top, bottom, left, and right) up and over the filling to the center.
Pinch the corners together in the center to create a small “parcel” shape.
Press along the edges to make sure it’s fully sealed.
Technique 3: Closed Purse (Money Bag)
Place the filling in the center of the dough.
Bring all the edges up to the center over the filling, creating a “purse” shape.
Pinch the top where the edges meet, twisting it slightly to seal tightly.
Repeat the desired technique for same for the remaining portions.
To cook the momos, get a large pan and fill with water, about 1/2 an inch up the sides of the pan. Turn the heat on to medium.
In the meanwhile, line the steamer basket with a layer of cabbage leaves and then spray with some olive oil.
Arrange the momo portions over the cabbage leaves, ensuring no portions are touching each other. Cover with the steamer basket lid.
Once the water is steaming, place the prepared steamer basket in the pan and cook for 10-12 minutes, or until the dough is shiny outside and slightly translucent. You can even slice one of the cooked momos to ensure the filling is well cooked.
Serve hot and fresh with spicy chili momo chutney.
Enjoy!
How to Serve Chicken Momos
The most traditional way to serve your chicken momos is with a Spicy Red Chili Chutney! However, you can serve momos with any chutney of your choice, really! Here are some options:
Yes, these Steamed Chicken Momos will keep well! You can make your momos and store them in the fridge or freezer, depending on how soon you want to eat them! Ideally, you would enjoy your momos fresh, but if you do have leftovers, they can be kept in the freezer. If you want to make bulk momos to have on hand, then my recommendation is to store assembled but uncooked (raw pastry and filling) momos in the freezer. Let’s go over both options.
Storing Chicken Momos
In the fridge: Transfer the momos into an airtight container. Due to the chicken and garlic and the fresh pastry, I would not keep them in the fridge for longer than 4 days.
In the freezer: Transfer assembled uncooked momos into a freezer-safe container. When ready to cook, you can take them directly from the freezer. The steaming time will take a bit longer than if you were to cook the momos at room temperature, but the process is the same!
How to Reheat chicken momos▼
The best way to reheat your Chicken Momos would be to pan-fry! This method is quick and will give delicious results! Add oil to a hot pan, and then place the momos on the oil. Allow the momos to begin sizzling, and then add a splash of water. Cover the pan with a lid
What If I have Leftover Chicken Filling?▼
If you have extra chicken filling for momos, then don’t worry! As I mention in my free motivational guide to explore your potential, Make Cooking Fun!!, if you’re stumped on recipe ideas, then use what you already have in the fridge as a source of inspiration! In this scenario, the chicken momo filling is an extremely versatile ingredient in itself, and there is so much you can do with it!
To begin, of course you can use the chicken momo filling to make more momos if you make more pastry, or use it in other recipes! For instance, you can your chicken momo stuffing it as a filling for sandwiches & wraps, as the filling for Chicken Keema Paratha, or you can enjoy it on its own as a “sabji” paired with an Indian bread, such as roti or paratha, or with rice, such as Simple Basmati Rice, Indian-Style Cilantro-Lemon Rice or a Vegetable Pulao. If you’re looking for recipe ideas that use chicken keema, then here are some ideas:
Store the extra raw chicken filling in an airtight container in the refrigerator. Ensure to cook the momo chicken filling within 4 days.
What if I have extra Momo Dough?▼
You can definitely store your extra momo dough no problem at all! You can use it to make more chicken momos or momos of your choice! All you need to do is roll out the dough, then wrap it tightly with plastic wrap. You can keep the leftover momo dough in the freezer for up to 5 months. Allow the dough to thaw overnight in the fridge before using it to make momos.
Let me know what you think of this recipe in the comments! If you’ve tried this recipe, be sure to post it on social media and tag it with #cookingwithanadi and mention me @cooking.with.anadi. Thank you!
Recipe by Anadi Misra
The Ultimate Steamed Chicken Momos Recipe
Tender, juicy Steamed Chicken Momos packed with bold Indian-fusion flavors. These soft dumplings make the perfect starter or side dish — easy to make and impossible to resist.
In a large bowl, add all the ingredients for the chicken mince filling and then mix really well. To taste and adjust for seasoning, cook a small, dime sized piece of the mince on a pan, and then taste to determine seasoning.
In a large bowl, add all the ingredients for the chicken mince filling and then mix really well. To taste and adjust for seasoning, cook a small, dime sized piece of the mince on a pan, and then taste to determine seasoning.
For the momo dough
1
Add the flour, salt and some water in a bowl and begin kneading. Knead to a soft dough, that is not sticky. Add more flour or water as needed to reach this consistency.
Add the flour, salt and some water in a bowl and begin kneading. Knead to a soft dough, that is not sticky. Add more flour or water as needed to reach this consistency.
2
Spray some oil over your work surface and the dough and start to stretch and fold the dough until you have a smooth, and pliable dough ball.
Spray some oil over your work surface and the dough and start to stretch and fold the dough until you have a smooth, and pliable dough ball.
3
Cover with a damp kitchen towel and allow the dough ball to sit for at least 30 minutes.
Cover with a damp kitchen towel and allow the dough ball to sit for at least 30 minutes.
To make the chicken momos
1
Divide the dough into 3-5 smaller portions and then using your hands, roll each portion out to a thin, long cylindrical portion, about 3/4 to 1 inch thick in diameter. Cut each of these portions into 1 to 1 1/2 inch portions to create the dough disks for the momos.
Divide the dough into 3-5 smaller portions and then using your hands, roll each portion out to a thin, long cylindrical portion, about 3/4 to 1 inch thick in diameter. Cut each of these portions into 1 to 1 1/2 inch portions to create the dough disks for the momos.
2
Roll out each of these smaller portions into a thin disk, about 3-4 inch in diameter and then place 1–2 tbsp of the chicken mince portion in the center.
Roll out each of these smaller portions into a thin disk, about 3-4 inch in diameter and then place 1–2 tbsp of the chicken mince portion in the center.
3
Use one of the folding techniques to form the momos highlighted in the next section . Repeat the same for the remaining portions.
Use one of the folding techniques to form the momos highlighted in the next section . Repeat the same for the remaining portions.
4
To cook the momos, get a large pan and fill with water, about 1/2 an inch up the sides of the pan. Turn the heat on to medium.
To cook the momos, get a large pan and fill with water, about 1/2 an inch up the sides of the pan. Turn the heat on to medium.
5
In the meanwhile, line the steamer basket with a layer of cabbage leaves and then spray with some olive oil.
In the meanwhile, line the steamer basket with a layer of cabbage leaves and then spray with some olive oil.
6
Arrange the momo portions over the cabbage leaves, ensuring no portions are touching each other. Cover with the steamer basket lid.
Arrange the momo portions over the cabbage leaves, ensuring no portions are touching each other. Cover with the steamer basket lid.
7
Once the water is steaming, place the prepared steamer basket in the pan and cook for 10-12 minutes, or until the dough is shiny outside and slightly translucent. You can even slice one of the cooked momos to ensure the filling is well cooked.
Once the water is steaming, place the prepared steamer basket in the pan and cook for 10-12 minutes, or until the dough is shiny outside and slightly translucent. You can even slice one of the cooked momos to ensure the filling is well cooked.
8
Serve hot and fresh with spicy chilli momos chutney and enjoy!
Serve hot and fresh with spicy chilli momos chutney and enjoy!
Momo Folding Techniques
1
Technique 1: Pinched Edge (Half-Moon Shape)
Technique 1: Pinched Edge (Half-Moon Shape)
2
Place a small spoonful of filling in the center of the dough circle.
Place a small spoonful of filling in the center of the dough circle.
3
Bring the four “corners” of the circle (top, bottom, left, and right) up and over the filling to the center.
Bring the four “corners” of the circle (top, bottom, left, and right) up and over the filling to the center.
4
Pinch the corners together in the center to create a small “parcel” shape.
Pinch the corners together in the center to create a small “parcel” shape.
5
Press along the edges to make sure it’s fully sealed.
Press along the edges to make sure it’s fully sealed.
6
Technique 2: Square Pocket
Technique 2: Square Pocket
7
Place a small spoonful of filling in the center of the dough circle.
Place a small spoonful of filling in the center of the dough circle.
8
Bring the four “corners” of the circle (top, bottom, left, and right) up and over the filling to the center.
Bring the four “corners” of the circle (top, bottom, left, and right) up and over the filling to the center.
9
Pinch the corners together in the center to create a small “parcel” shape.
Pinch the corners together in the center to create a small “parcel” shape.
10
Press along the edges to make sure it’s fully sealed.
Press along the edges to make sure it’s fully sealed.
11
Technique 3: Closed Purse (Money Bag)
Technique 3: Closed Purse (Money Bag)
12
Place the filling in the center of the dough.
Place the filling in the center of the dough.
13
Bring all the edges up to the center over the filling, creating a “purse” shape.
Bring all the edges up to the center over the filling, creating a “purse” shape.
14
Pinch the top where the edges meet, twisting it slightly to seal tightly.
Pinch the top where the edges meet, twisting it slightly to seal tightly.
Nutrition per serving
76
Calories
4g
Protein
9g
Carbs
3g
Fat
1g
Fiber
0g
Sugar
169mg
Sodium
Share This Recipe
Did you make this recipe? Tag @cooking.with.anadi on Instagram and hashtag it #cookingwithanadi
Tested & written in Anadi’s kitchen
Free weekly newsletter
Like this recipe? Get more every week.
New recipes, cooking tips, and behind-the-scenes from Anadi's kitchen.
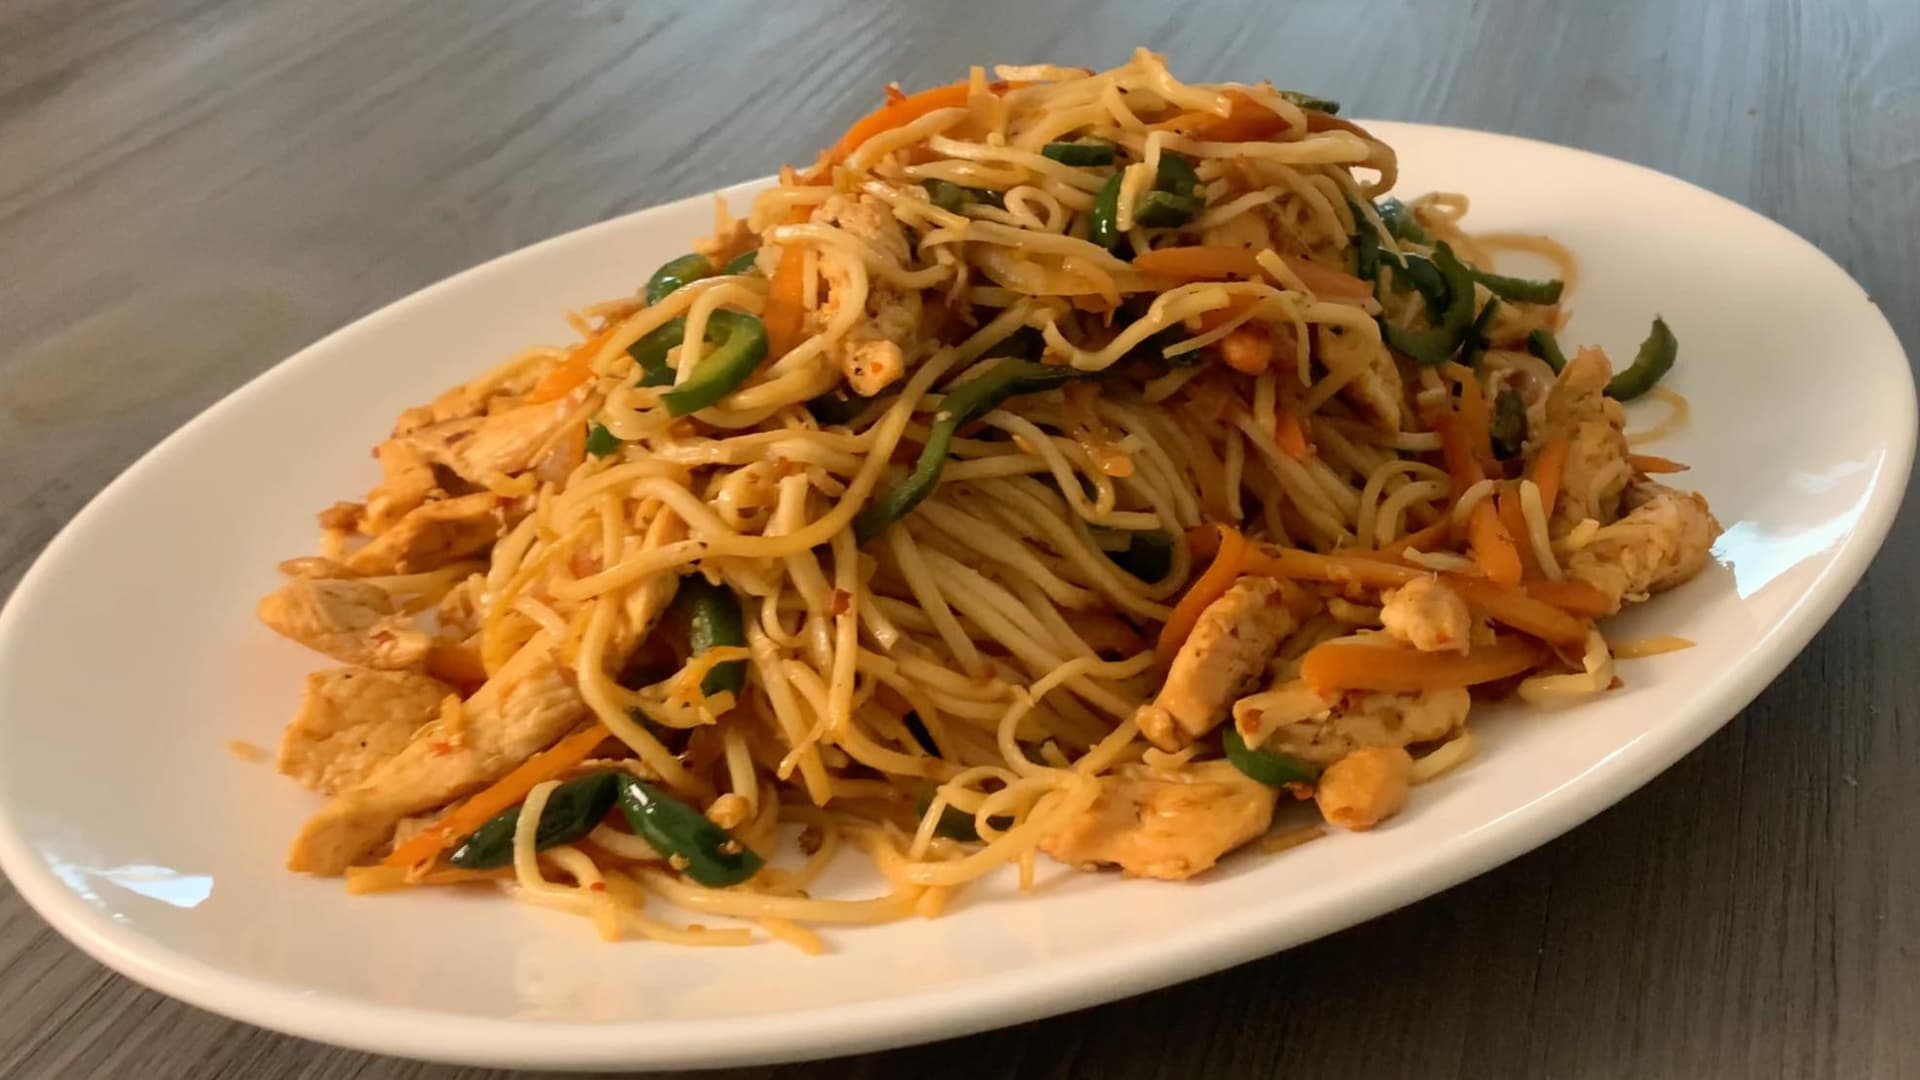
Make restaurant-style Indo-Chinese Chicken Hakka Noodles at home! Quick, bold, and packed with flavor, this easy recipe delivers smoky, saucy noodles the whole family will love.
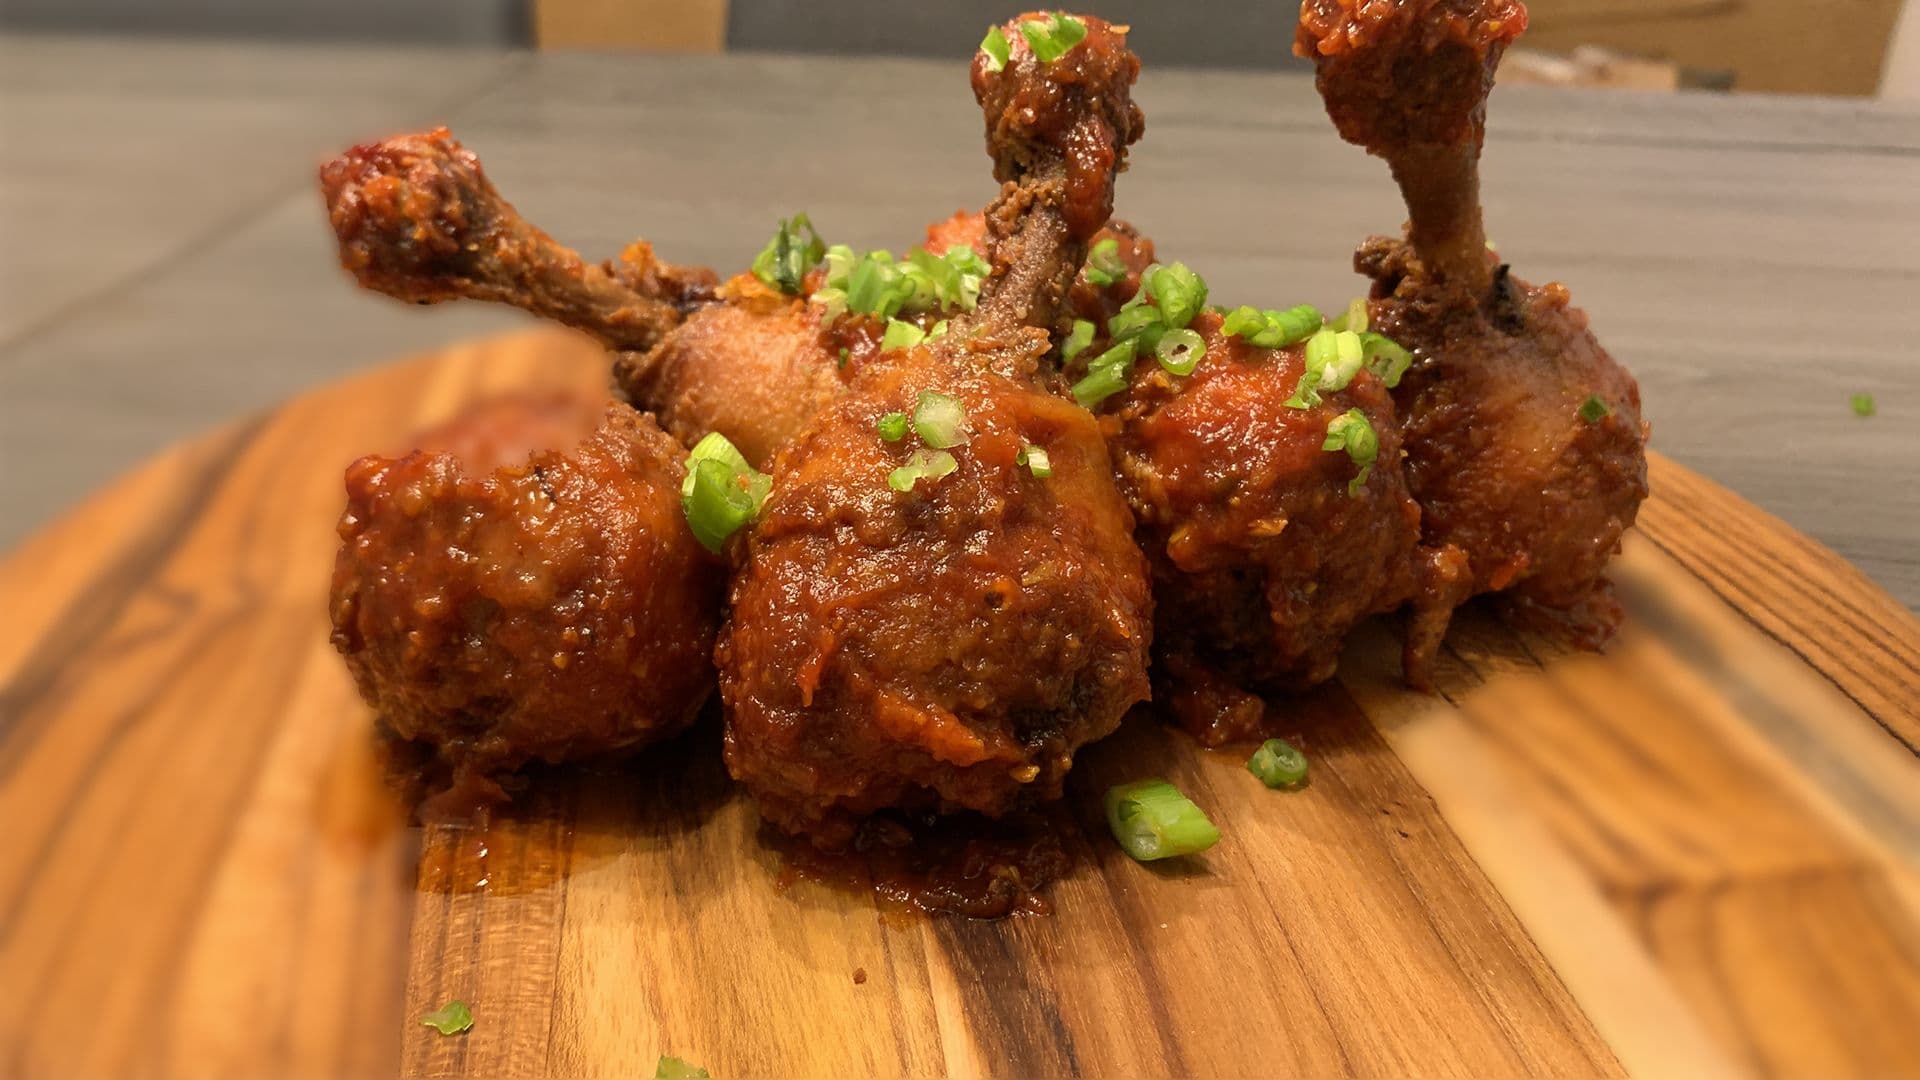
Crispy, saucy Indo-Chinese Chicken Lollipop Drumsticks — the ultimate party starter. Bold flavors, irresistible crunch. Your new favorite appetizer awaits.
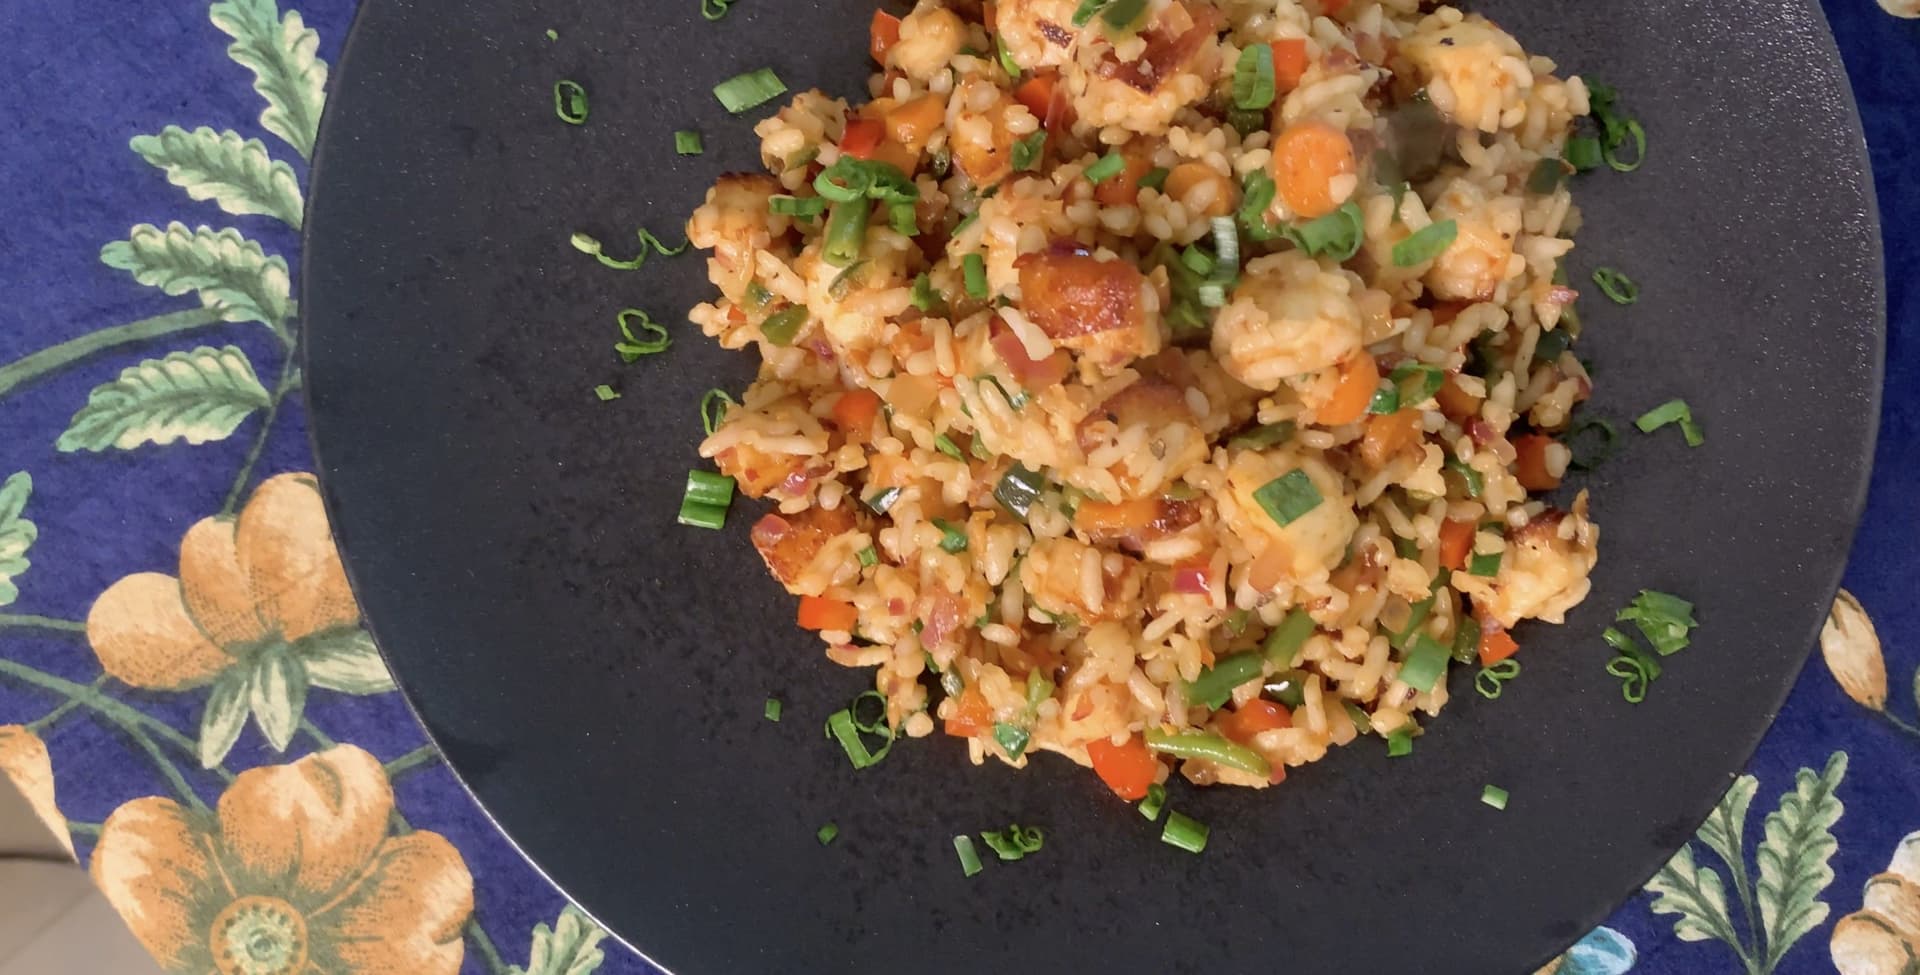
Spicy Paneer Fried Rice blends bold Indian flavors with Asian technique for a quick, satisfying vegetarian dinner. Crispy paneer meets fragrant spiced rice in one irresistible fusion dish you will love.
Make crispy, flavorful Air Fryer Chilli Paneer at home with this easy recipe. A delicious Indian starter ready in minutes — perfect for impressing guests or a tasty snack any day.
Crispy, flavorful Indian chicken cutlets made easy in the air fryer. No egg, no breading needed — just bold spices and a satisfying crunch ready in minutes.
Crispy, golden Air Fryer Keema Samosas packed with spiced minced meat filling. Make these authentic homemade samosas from scratch with less oil and all the flavor you love.
50 minHard6 samosas
Easy
7 cutlets
Comments
No comments yet — be the first to share your thoughts!
Leave a review
Be the first to share how it went — your note helps other cooks (and earns the recipe its stars).


Comments
No comments yet — be the first to share your thoughts!
Leave a review
Be the first to share how it went — your note helps other cooks (and earns the recipe its stars).