


This post may contain affiliate links. Read our disclosure policy
Watch the recipe

About Bhatura
Bhatura (bhatures in plural) is one of the most famous Indian breads! This recipe will show how to make these Indian leavened breads prepared with all-purpose flour, yogurt, salt, ghee, and baking powder and baking soda. Additionally, this recipe will provide tips and tricks on how to fry the bhatures to get them crispy, soft and huge!
Being raised in Delhi, I can confidently say that Delhi is famous for its chole bhature. This recipe will show you how to make the best breads to complement your chole, which is an Indian chickpea curry. This street-side favorite is perfect to have for lunch or dinner, or perhaps even a late Sunday breakfast!
If India is a destination unseen for you, then cooking this perfect puffy bhatura recipe will bring the Delhi streets right to your kitchen as part of your Live to Cook one-month challenge! Be sure to start your cooking journey for free today by signing up to my email newsletter, plus you’ll never miss an exciting recipe idea!
To follow along as we make our dough and fry these super puffy and soft bhature, then don’t forget to watch the video recipe! If you’re not already, please subscribe to my YouTube channel and don’t forget to press the bell button to be notified when all of my video recipes are live! Let’s get frying!

Why You’ll Love This Bhatura Recipe
- Minimal ingredients: You only need a couple of household staples that you may already have on hand, so that you don’t need to get anything from the store! You could perhaps make bhature the moment you read this!
- Easy to follow: The process of making bhature is very straightforward! All you do is prepare dough, roll, and fry! While the technique needs some mastering, by no means is this a 30-step recipe!
- Perfect soft and chewy bhature: I promise you that this bhatura recipe will give you super delicious soft and chewy bhature!
- Fun: Deep frying is always so much fun, and I look forward to my deep frying recipes! It’s super cool when you see bhature being made on the streets of Delhi, but it’ll be something truly special as you see the bhature rise in the oil right before your eyes! As I mention in my free motivational guide to explore your potential in the kitchen, Make Cooking Fun!, going out to eat can inspire you to recreate those memories at home! Perhaps you haven’t actually had chole bhature in India, but trust me, even here in Canada when I see some videos of chole bhature being made on YouTube shorts, I really crave it and want to bring those memories I had growing up in New Delhi here in Canada!

Questions You May Have About This Recipe!
What’s the Difference Between Bhatura and Poori?▼
Bhature and pooris are actually very different breads! While they are both airy and puffy crispy fried Indian breads, their similarities end there. Firstly, bhature are leavened breads prepared with all-purpose flour, yogurt, baking soda and baking powder, and some ghee. On the other hand, pooris are unleavened breads. Pooris are simply made with atta flour, which is a type of all-purpose flour, and water. Another difference is that you must use poori dough IMMEDIATELY for best results, whereas bhatura dough needs to rest for a couple of hours to allow the dough to ferment. Pooris will taste a little denser due to the all-purpose flour, whereas bhature taste lighter. Lastly, a key visual difference is that pooris are smaller and rounder, whereas bhature have more of an oblong shape!

Is Bhatura Good for Health?▼
Bhature are by definition deep-fried breads. They are made with all-purpose flour, yogurt, sugar, and oil. All-purpose flour, known as maida in Hindi, is demonized for being unhealthy. Yes, whole wheat flour has more nutritional value than all-purpose flour, but at the end of the day a little bit of an indulgence won’t hurt you! Keep in mind that the bhatura dough is fermented, which is excellent for digestion. At the end of the day, if you pair your bhature with a healthy main dish, such as chole masala (chickpea curry), then you’ve got a well-rounded meal of fiber and protein. The choice of oil you use to fry your bhature can also affect the overall health “rating” of your bhature, as certain oils are definitely better for your health compared to refined oils that are highly processed and are loaded with trans fat. Furthermore, keep in mind that proper deep frying will ensure less oil is absorbed onto the bhatura. A greasy bhatura packed with excess oil will definitely not be good for your health, but if you follow the tips outlined in this recipe, then the least amount of oil will actually get onto your bhature, guaranteed!
Can I Keep Bhatura Dough Overnight?▼
Theoretically you can, it just needs a bit more planning which I didn’t do. Refrigerating it chills the dough and you have to let the dough come back closer to room temperature before you can fry the bhaturas. I didn’t do that when I was experimenting, however once I redo the experiment, this page will be updated with the results. Without letting the chill come off the bhatura dough, the final bhatura after drying didn’t puff much at all.

What Oil are You Using to Fry the Bhature?▼
Traditionally, you would use vegetable oil to fry your bhature. However, ghee is my all-time favorite oil! It’s so delicious and does the job so well. Furthermore, ghee is super nutritious for you, as it is an excellent source of Omega-3 fatty acids which can promote heart health. Ghee is also great for you because its Vitamin A content, promoting good skin and eye health. You can check out this article for further reading on the health benefits of ghee. You can certainly stick to the vegetable oil for a traditional bhatura experience, but I really believe that the ghee enhances the bhature so much more!

Is there a Way to Make Instant Bhatura?▼
While authentic bhatura dough does take time to knead and rest, you can make an instant version by skipping the resting period. You can use baking powder and baking soda as you have in your recipe, which will help the dough puff quickly. Simply mix the ingredients and fry immediately, though the texture might differ slightly from traditional bhaturas, which benefit from a resting period to develop flavor and texture.
Do You Need Sugar In This Bhatura Recipe?▼
You may notice that some bhatura recipes use sugar in the dough. Sugar is added because some people want sweetness from the bhature to complement the spiciness of the chole. I personally didn’t want that contrast, so that’s why this bhatura dough recipe doesn’t have sugar. Feel free to add some if you would like!
Can I Make this Bhatura Recipe Be Made With Yeast?▼
Yes, you can make bhatura with yeast. To do so, replace the baking powder and baking soda with 1 to 1.5 teaspoons of active dry yeast. Let the dough rest for 1 to 1 1/2 hours in a warm place, allowing it to rise before rolling it out and frying. The yeast will give the bhatura a slightly different texture, more tanginess and the bhatura will be more airy and soft.
Why Is Yogurt Used in Bhatura?▼
Yogurt in bhatura serves several purposes. It adds a slight tangy flavor and helps in tenderizing the dough, making it soft and pliable. It also contributes to the puffiness when fried by reacting with the baking soda and baking powder, creating air pockets in the dough. This is one of the key reasons bhaturas have that fluffy, light texture.

How Come My Bhature aren’t Puffing?▼
- Dough Consistency: If the dough is too soft or too hard, it won’t puff. It should be firm but smooth.
- Oil Temperature: The oil needs to be hot enough (around 350°F or 180°C) for the bhatura to puff up immediately. If the oil is too cold, they will absorb the oil and stay flat.
- Rolling Thickness: If the dough is rolled too thin, it won’t puff. Aim for about 1/8 inch thickness.
- Resting Time: If the dough hasn’t rested or been given enough time to rise, the bhatura may not puff as expected.

Tools Needed to Make Bhature
What Are the Ingredients in Bhature?
All ingredients and their quantities can be found in the FULL PRINTABLE recipe card by scrolling to the bottom of this post. You can save the recipe for later and use the recipe card to scale the recipe based on how many bhature you want to make so that you have the right amount of flour and all other ingredients for our bhatura dough!

- Yogurt: Use plain yogurt here. I like the Astro Balkan yogurt with 6% fat.
- All-purpose flour: The main base for our bhatura dough. Bread flour can also work.
- Semolina: This adds the chewiness to the bhatura dough and to prevent excess oil from being absorbed into the bhature.
- Ghee: Amul ghee will always be my favorite ghee. There are many brands of ghee, but Amul ghee is truly the best Indian ghee. If you really want to, you can certainly make your own ghee, then I definitely encourage it!
- Leavening agents: We will be using both baking powder and baking soda to help the bhature rise.
- Salt: To add flavor to the bhature.
- Water: Warm water will help to knead the dough to make it nice and soft.
How to Make the Best Delhi-Style Bhature
Add enough ghee or oil in a large wok for deep frying and start heating it until the ghee just starts to smoke.
In the meanwhile, add flour, semolina, baking powder and salt (if using) to a large bowl and mix the dry ingredients really well. Add yogurt, mix until lumpy and gradually add water as you start kneading the dough together. Knead until you get a smooth but hard dough. (A hard dough helps the puris to puff up completely). Cover the dough with a damp kitchen towel.


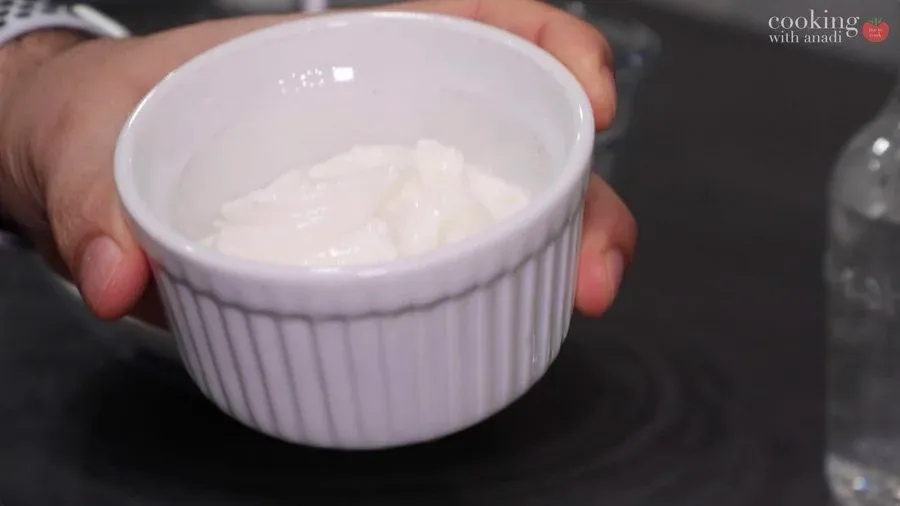


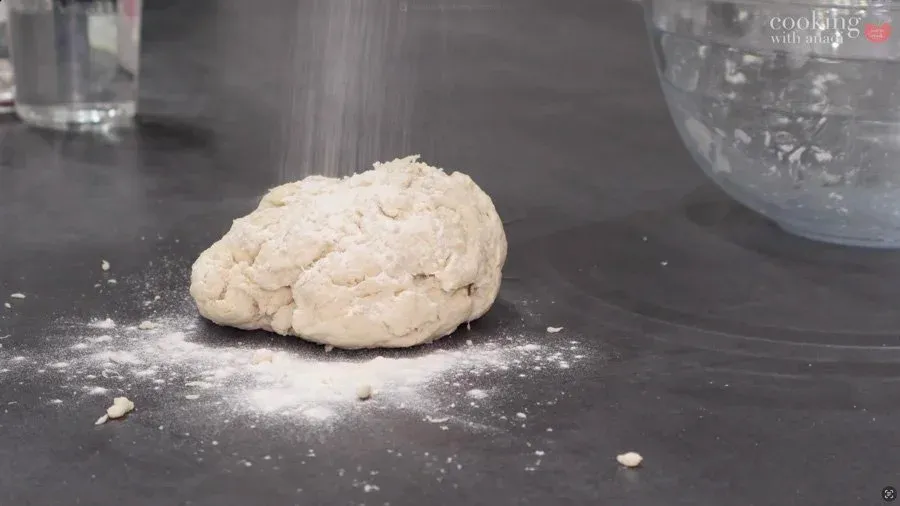


Portion out the dough to 5-6 balls and for each roll them between your hands until smooth. Then press it down on your work surface to flatten. Roll out with an even hand using a rolling pin until thin. Take care to ensure the disk isn’t too thin or too thick.

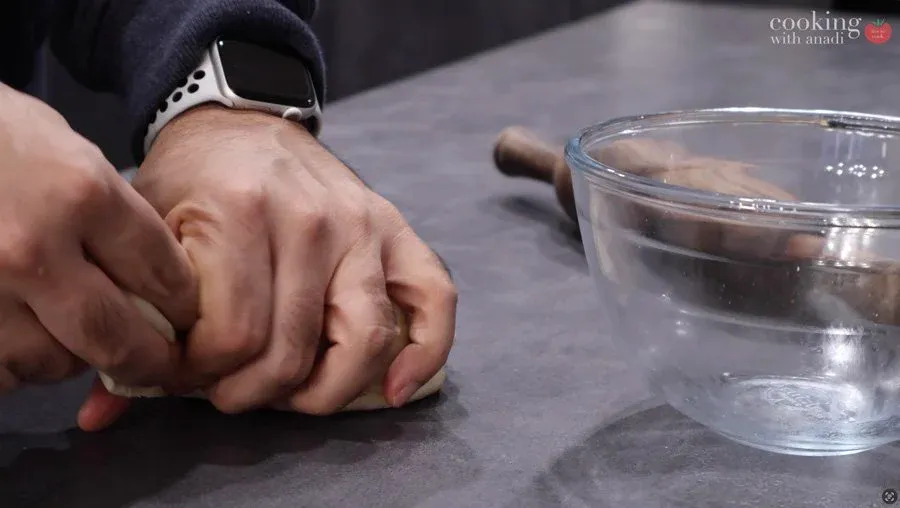


Carefully add the rolled out dough into the hot ghee and swiftly using a slotted spoon, carefully slosh and pour oil over the surface of the bhatura as you wait for it to puff. Flip, cook for 20-30 seconds on the other side and once light golden brown, strain out any excess ghee and place the bhatura on paper towels to absorb any excess ghee.


Serve hot right away and enjoy!


Tips to Master Making Delhi-Style Bhature
- Allow time to ferment – Even without yeast, letting the dough rest allows natural fermentation to enhance the flavor and texture. If using yeast, fermentation develops even deeper, more complex flavors
- Get the oil temperature just right – The oil should be moderately smoking but not profusely smoking. If your oil is too cold, then the bhature will not be able to rise. On the other hand, if the oil is too hot, then the bhature will burn before they get a chance to rise.
- Roll evenly – The thickness has to be just right. Too thick, and they’ll stay dense. Too thin, and they’ll turn crispy instead of puffy. Make sure the disc is evenly rolled, with no thin or thick patches.
- Check your dough consistency – The bhature will not puff if your dough is too hard and if it cracks. On the other hand, it will be difficult to roll out the bhatura dough and fry the bhature properly if your dough is too sticky.
- Drain excess oil – Right after frying, strain the bhature against the side of the wok to get rid of extra oil. Then place them on a paper towel to prevent greasiness.

How to store Bhature▼
You can certainly make your bhature in advance! However, remember that bhature will be most delicious hot and fresh right from the oil! That being said, if you have leftover bhature, you can keep them in an airtight container or place them in a large Ziploc bag in the fridge until ready to serve. If you want to, you can definitely have bhature cold - they taste pretty good!
If you do want to reheat your pooris, be sure to microwave them for only about 20 seconds. You could also reheat your pooris over the stove on a tava pan on a gentle heat. Since you won’t be able to get the crispiness that comes from freshly made pooris, you want to just slightly warm them and ensure that they are not too hot.
What to Serve with Bhature?▼
The most iconic way to serve Bhature is with some Delhi-Style Chole Masla. If you’ve got your chole, then you can bring a street-side feast right to your kitchen! Alternatively, my Homestyle Classic Chole Masala will also be an excellent complement with your bhature! I would also pair your meal with either a Mango Lassi or some Masala Chai for a truly immersive street-side experience at home. Be sure to have some Mint-Cilantro Chutney or Tamarind Chutney for dipping!

Why This Bhatura Dough Is Hard, Not Soft
This is the part that surprises people. Most Indian breads want a soft dough, and bhature do not. You knead this one until it is smooth but genuinely firm, because a hard dough is what forces the steam trapped inside to push the bread outward instead of escaping through a slack, stretchy surface. If your bhature come out flat and chewy, the dough was almost certainly too wet. Add the warm water gradually rather than all at once, and stop while you still have to work for it.
The dry mix goes into a large mixing bowl: 2 cups of all purpose flour, 2 tablespoons of semolina, half a teaspoon of baking powder and a pinch of salt. The semolina is the ingredient people leave out and then wonder where the crispness went. Sooji, also sold as rava, is coarser than maida and it gives the fried surface a slight bite instead of a soft, bready finish. And note the salt: this is a pinch, not a teaspoon salt. Bhature are meant to be a neutral vehicle for whatever spicy thing sits next to them.
Then a quarter cup of plain yogurt goes in, which is the curd you would use in any North Indian kitchen. Mix until the dough looks lumpy before you start adding water. Between the yogurt, half a teaspoon of baking powder and a quarter teaspoon of baking soda, this is a chemically leavened dough rather than a yeasted one, which is why it needs a rest rather than a proof. The recipe also carries 2 tablespoons of ghee in the dough itself, not tablespoons oil, and ghee is what gives fried bread that particular rich smell.
Cover the bowl with a damp kitchen towel while it rests. The whole recipe runs about 95 minutes start to finish, of which only 20 mins is hands-on prep and 15 is frying, so the rest of it really is just waiting.
Rolling and Frying: The Two Steps That Decide Whether It Puffs
Portion the dough into 5 to 6 pieces and roll each dough ball between your palms until the surface is completely smooth, with no seams or cracks. A crack is a vent, and a vented bhatura will not inflate. Press the ball flat on your rolling board and roll it out with an even hand. Too thin and it tears in the oil; too thick and the middle never gets hot enough to steam. If you want a larger bhatura, make 4 bigger portions instead of 6 and roll them to the same thickness rather than the same width.
The ghee needs to be properly hot, in a kadai or any deep, heavy wok, and the cue in this recipe is that it just starts to smoke. Slide the disc in and immediately start sloshing hot ghee over the top of it with a slotted spoon. That is the whole trick: heat hitting both faces at once sets the surface fast enough to trap the steam. Once it balloons, flip it and give it only 20 to 30 seconds on the second side, until it is a light golden brown, then lift it out and drain it on paper towels.
What to Serve With Bhature
Chole bhature is the best combo in North India and it is not close. A bowl of Punjabi chole, the slow-cooked chickpea curry, with two hot bhature is the Delhi breakfast this recipe exists for. Sliced raw onion, a green chili and a wedge of lemon on the side are traditional, and a spoon of pickle does not hurt. They are also good with any thick curry you would otherwise mop up with naan.
Eat them straight out of the pan. Bhature deflate and toughen as they cool, so the full recipe is best fried in batches while people are already at the table rather than made ahead. Each bhatura comes in at roughly 366 calories with 36 grams of carbs and 22 grams of fat, which is what deep-fried bread costs, and the recipe makes six.
Let me know what you think of this recipe in the comments! If you’ve tried this recipe, be sure to post it on social media and tag it with #cookingwithanadi and mention me @cooking.with.anadi. Thank you!
Recipe by Anadi Misra
Make perfectly puffy Delhi-style bhatura at home without yeast or baking powder! This easy bhatura recipe uses baking soda for soft, crispy results every time.
Deep-fried
Rate this recipe ✦
20 min
Prep
15 min
Cook
1 hr
Rest
1 hr 35 min
Total
6
bhature
medium
Level
Ingredients
Ingredients
Tap any quantity to scale
- (250 g) all purpose flourShop →
- (16 g) semolinaShop →
- saltShop →
- (33 g) plain yogurt
- (1 g) baking powderShop →
- (1 g) baking sodaShop →
- (30 ml) ghee · make your ownShop →
- warm water(as needed)
- ghee (enough for deep frying) · make your ownShop →
Instructions
- 1
Add enough ghee or oil in a large wok for deep frying and start heating it until the ghee just starts to smoke.
Add enough ghee or oil in a large wok for deep frying and start heating it until the ghee just starts to smoke.
- 2
In the meantime, add flour, semolina, baking powder and salt (if using) to a large bowl and mix the dry ingredients really well. Add yogurt, mix until lumpy and gradually add water as you start kneading the dough together. Knead until you get a smooth but hard dough. (A hard dough helps the bhature to puff up completely). Cover the dough with a damp kitchen towel.
In the meantime, add flour, semolina, baking powder and salt (if using) to a large bowl and mix the dry ingredients really well. Add yogurt, mix until lumpy and gradually add water as you start kneading the dough together. Knead until you get a smooth but hard dough. (A hard dough helps the bhature to puff up completely). Cover the dough with a damp kitchen towel.
- 3
Portion out the dough to 5-6 balls and for each, roll them between your hands until smooth. Then press it down on your work surface to flatten. Roll out with an even hand using a rolling pin until thin. Take care to ensure the disk isn’t too thin or too thick.
Portion out the dough to 5-6 balls and for each, roll them between your hands until smooth. Then press it down on your work surface to flatten. Roll out with an even hand using a rolling pin until thin. Take care to ensure the disk isn’t too thin or too thick.
- 4
Carefully add the rolled out dough into the hot ghee and swiftly using a slotted spoon, carefully slosh and pour the oil over the surface of the bhature as you wait for it to puff. Flip, cook for 20-30 seconds on the other side and once a light golden brown, strain out any excess ghee and place the bhature on paper towels to absorb any excess ghee.
Carefully add the rolled out dough into the hot ghee and swiftly using a slotted spoon, carefully slosh and pour the oil over the surface of the bhature as you wait for it to puff. Flip, cook for 20-30 seconds on the other side and once a light golden brown, strain out any excess ghee and place the bhature on paper towels to absorb any excess ghee.
- 5
Serve hot right away and enjoy!
Serve hot right away and enjoy!
Notes
- •You can cook for longer if desired, the darker the pooris, the crispier they will be. While the poori is frying, work on the next portion and continue with this process.
Nutrition per bhature
366
Calories
5g
Protein
36g
Carbs
22g
Fat
1g
Fiber
1g
Sugar
397mg
Sodium
Did you make this recipe? Tag @cooking.with.anadi on Instagram and hashtag it #cookingwithanadi

Tested & written in Anadi’s kitchen
Recipe history
- April 16, 2026 — Reworked and refreshed for the 2026 relaunch — new photography, restructured and standardized ingredients & instructions.
Filed under
You might also like
Fried to Perfection: Ultimate Puffy Poori Bread Recipe
Master the art of perfectly puffed poori with this authentic Indian bread recipe. Crispy, light, and golden every time — your go-to guide for foolproof homemade poori from scratch.

Quick Cast Iron Naan: Easy Homemade Recipe in Just One Hour!
Make soft, pillowy homemade naan bread in just one hour using a cast iron skillet. This easy recipe delivers authentic restaurant-style results right from your own kitchen.

How to Make The Best Punjabi Lachha Paratha
Crispy, flaky, and buttery Punjabi Lachha Paratha made right at home. Master this beloved Indian bread with simple steps and pantry staples for perfect layers every time.
Rumali Roti Recipe - Soft and Thin "Handkerchief" Roti
Make soft, paper-thin Rumali Roti at home with this easy recipe. These delicate handkerchief flatbreads are perfectly pliable and ideal for scooping up your favorite curries.

Classic Layered Paratha | Triangular Paratha Recipe
Make perfectly flaky, layered triangular paratha at home with this easy whole wheat Indian bread recipe. Soft, crispy, and delicious — ideal for any meal of the day.
Restaurant-Style Homemade Tandoori Naan Recipe
Make restaurant-style tandoori naan at home with this easy, authentic recipe. Soft, pillowy, and perfectly charred — just like your favorite Indian restaurant bread.


Comments
No comments yet — be the first to share your thoughts!
Leave a review
Be the first to share how it went — your note helps other cooks (and earns the recipe its stars).