This post may contain affiliate links. Read our disclosure policy
Watch the recipe
One of summer’s most essential foods is a good burger. When I worked as a line cook, sliders were frequently ordered, and I’ve always personally thought of them as some great party and summer food! I love all things cheeseburger, from Cheeseburger Mac and Cheese to a great Classic American Cheeseburger.
I can’t believe it’s already halfway through August, which means that it’s almost the end of summer here in Canada. What a shame! If you ask me, it really does not last long enough! Well, I could sit here and sulk about it, or I could make the most out of summertime fun! If you’re in a climate where it’s always summer, then lucky you! You can try these Fired Up Bacon Sliders whenever you want since you will have summer parties all year around.
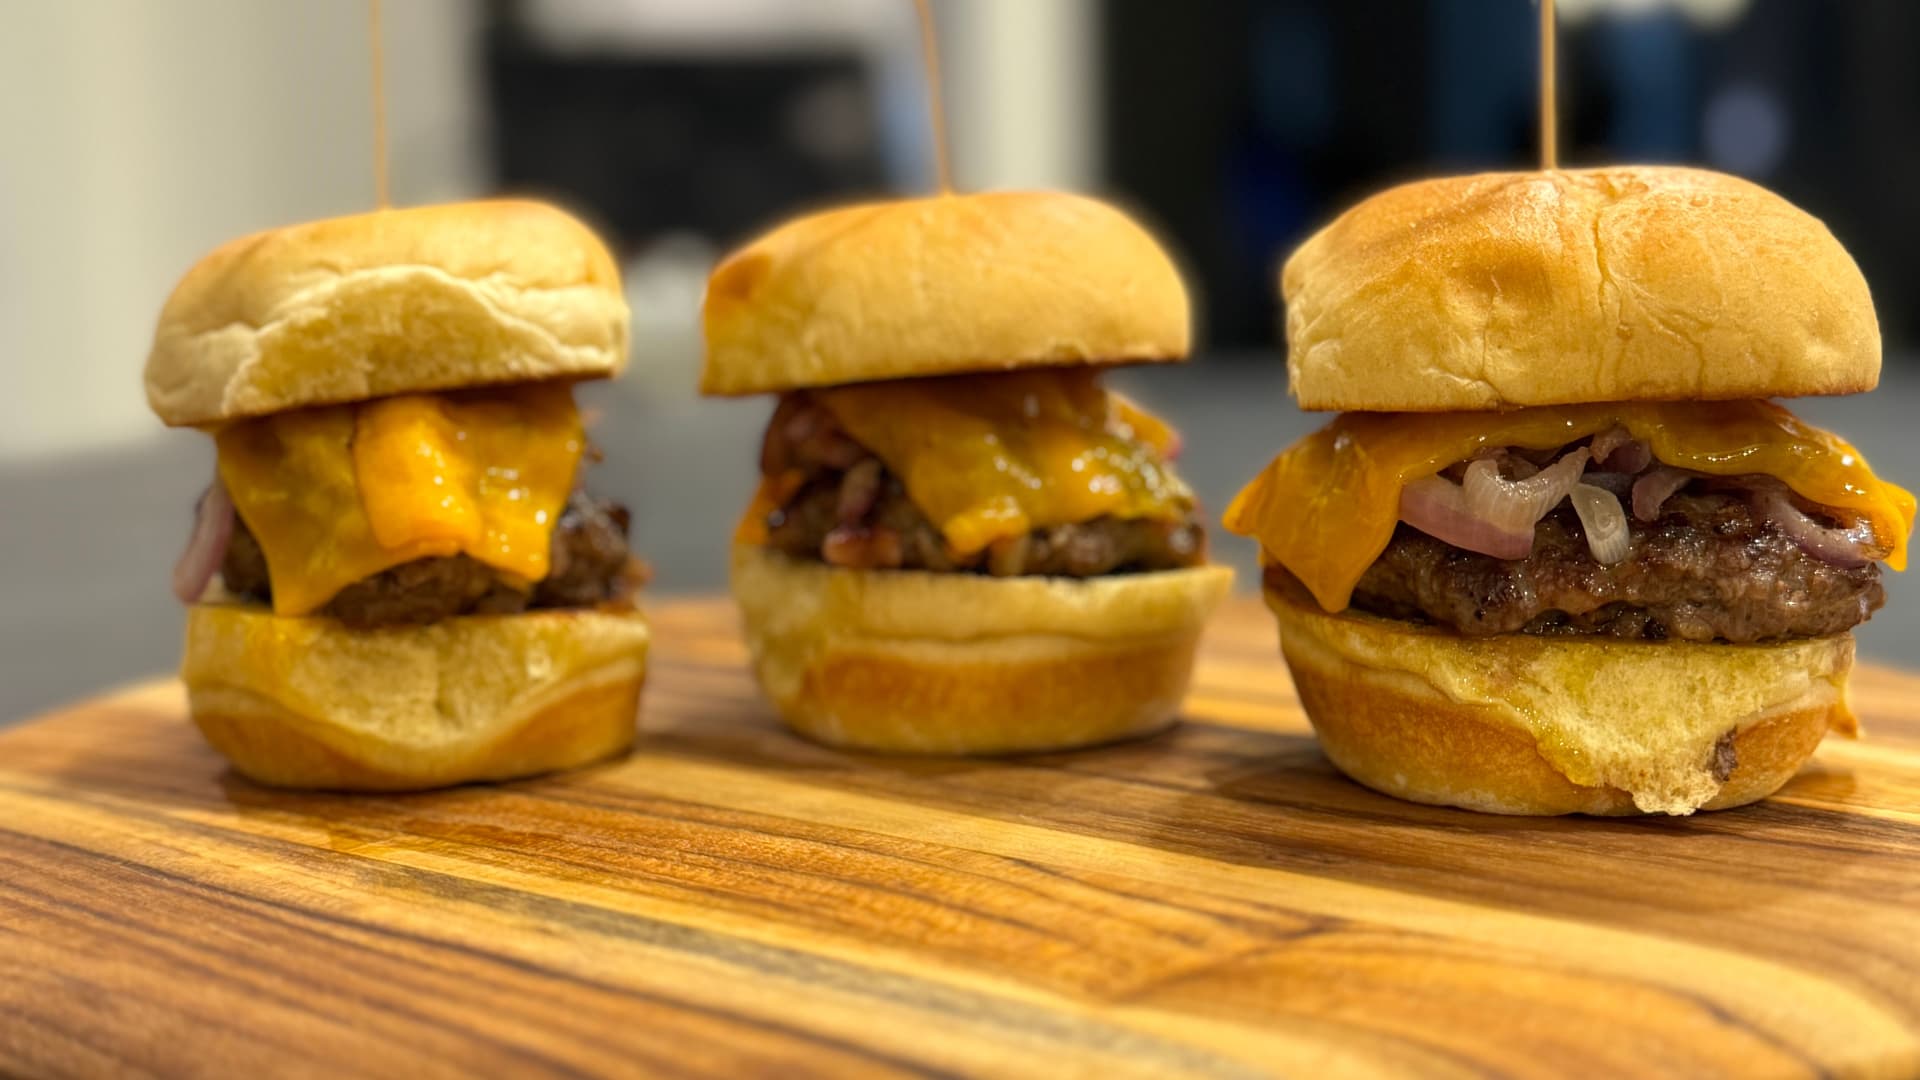
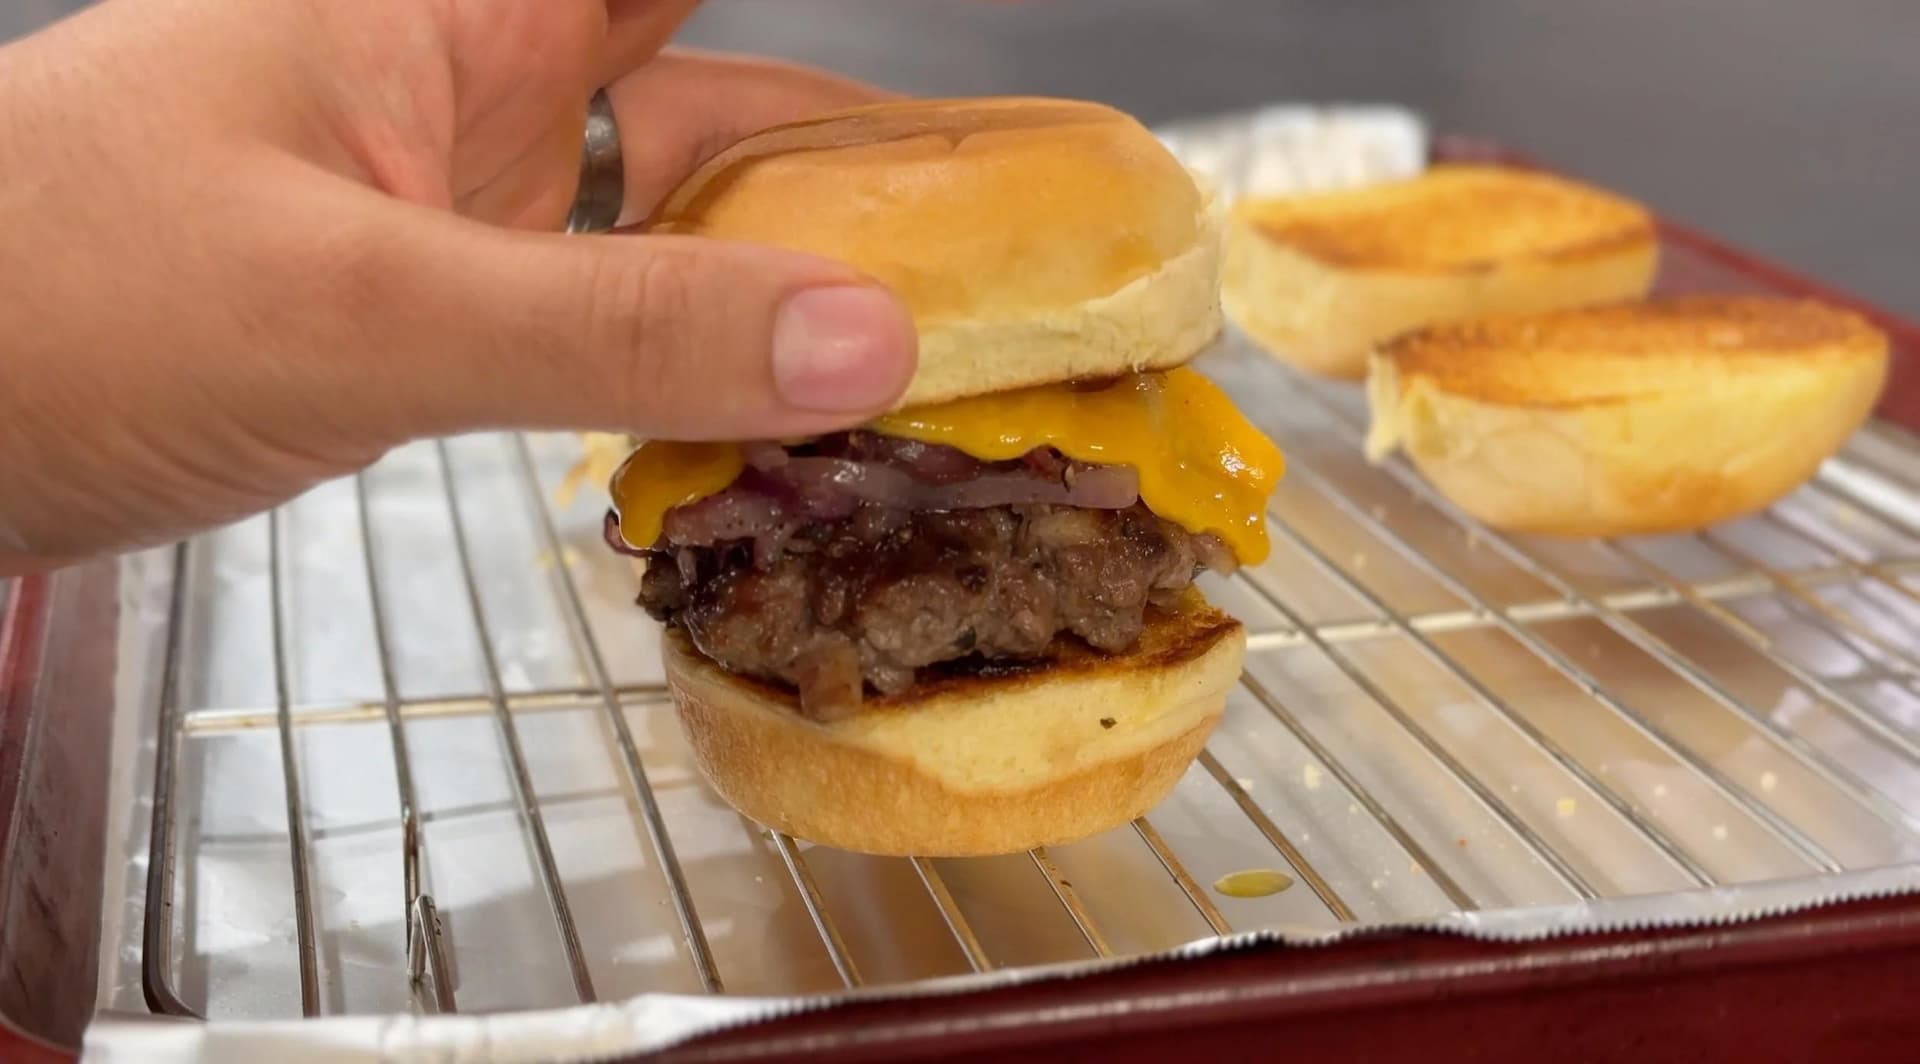
You may be wondering why I’m calling up these sliders “fired up.” Well, as you’ll see, these are some very special sliders because we’re going to torch our cheese for some AMAZING smokiness! I was having some fun with my kitchen torch some time ago but blow torching the cheese on my wife’s omelette, and I knew right away how good the torched cheese would be over some juicy beef patties in a burger or slider. Now here we are!
For a visual demonstration on how to make the perfect slider patties and of course how we’re going to blow torch our cheese for a very unique slider experience, be sure to watch the video! It would mean a lot if you would please subscribe to my YouTube channel if you’re not already, and be sure to press the bell button to be notified when all of my video recipes are live! Let’s get cooking!

What’s The Difference Between a Slider and a Hamburger?▼
A slider is different from a hamburger because they are essentially mini burgers! Sliders are handhelds and can be served as a main or even as an appetizer, if splitting them with a group. Typically, sliders are kept quite simple in terms of their toppings, usually with only beef and cheese and perhaps one or two other toppings. On the other hand, burgers can be quite loaded with all the fix-ins! You can find other slider recipes on the blog including Leftover Thanksgiving Dinner Roll Smash Burgers or McDonald’s McAloo Tikki Sliders for a vegetarian option.

What Bread Do I use for This Bacon Cheeseburger Sliders recipe?▼
The bread that you will want to use is any type of mini burger buns for sliders. As I mention in my free motivational guide to explore your potential in the kitchen, Make Cooking Fun!!, if there’s a suitable substitute that you already have on hand or you just prefer the taste of, then go ahead and use it! Typically, Hawaiian rolls are used for sliders, but quite frankly the choice of mini burger bun does not matter so much here, as our focus is going to be on the torched cheese at the end of the day! With that being said, here are some options that you can pick from to mix and match your sliders or just for you to keep trying something different each time you prepare these Fired Up Bacon Sliders!
- Potato buns: What I used here, baked from my local grocery store!
- Soft and Fluffy Dinner Rolls: If you’ve baked some dinner rolls for guests but there’s extra, then you can certainly repurpose them into dinner rolls!
- Mini burger buns: Just regular white or whole wheat mini burger buns will do the trick!
- Mini pretzel buns: If you can find mini-sized pretzel buns, then be sure to try those out! They will add a really nice flavour and add to your overall eating experience!
Why You’ll Love These Fired up Bacon Cheese Sliders!
- Juicy and flavorful beef patty: These slider patties are full of flavor and extremely juicy! You won’t need much to make a delicious and juicy patty as you’ll find out soon, so these sliders are an excellent option!
- Torched cheese: This is the main seller for the sliders! Not only is torching the cheese really fun to do, but it adds so much flavor you like you can’t believe! The smoky flavor from the torched cheese will go through the entire burger, so you’ll have it in every bite!
- Easy to make: The main steps here are preparing the burger patties, caramelizing the onions, and blow torching the cheese. It’s fairly simple to execute, and I’ll give you tips and tricks on how to most effectively manage your time to ensure nothing gets cold!
- Minimal ingredients: As mentioned earlier, you don’t need much to make flavorful and juicy beef patties, but we’re also going to let simplicity shine in the sliders themselves! We’re going to let the meat, caramelized onions, and cheese be the stars here, and we won’t require many seasonings other than the essentials. No need to dig into your fridge and pantry for a ton of ingredients - it should only take a minute or two to gather all that you’ll need!
When to Serve Fired up Sliders
Well, there’s no real answer here! You can make this Fired Up Bacon Slider recipe whenever you feel like! I’ll be honest with you and admit that I made them for breakfast! Needless to say that they gave me a great start to the morning!
However, if you’ve got ground beef in the fridge and you’re looking for a reason to use it, then these Fired Up Bacon and Cheese Sliders are an excellent way to do that!
- Sports parties: If you’ve got a gathering for football, soccer, hockey (hello Canadians!) or whatever sports you watch, then these sliders are awesome to serve up because you can cook many at a time and serve these hot and fresh for people to grab and enjoy!
- Outdoor/summer parties: If you’re going out to the beach, for a picnic, a barbecue, or a pool party, then some sliders are a perfect choice! You could barbecue them if there’s an outdoor grill outside and it will be easy to pack up all the ingredients since you won’t need much, plus the ingredients wouldn’t take up too much space in a pack!
- Buffet parties: Sliders are awesome for buffets! Again, since it’s easy to make many of them at a time, you can have a great display of sliders for guests to adore and easily grab and go to their seats. I’m sure these will fly off the display table, so be sure to consider enough sliders for your guests so no one misses out!
- Fun lunch or dinner: If you’re looking to switch up your usual lunch or dinner routine, then you definitely must make these Fired Up Bacon Sliders! They don’t take too long to make at all and it’s very likely you already have all the ingredients in your fridge and pantry already. If you’re in a rut but you want to put the best sliders forward for a burger lover, then I certainly recommend you try these bacon cheeseburgers out to put your heart on a plate as part of your Live to Cook one-month challenge, which you can get started on for free today by signing up for my email newsletter!
- Breakfast: Well, I did it! I definitely disagree that you should have breakfast food at breakfast time or dinner food for dinner. You can eat whatever you want whenever you want! If you want an epic savoury breakfast, then why not try out these sliders! If you want to throw in some scrambled eggs in there for the ultimate breakfast, then by all means go for it!
How Many Bacon Burger Sliders Per Person?▼
If you see sliders served at a restaurant, they will serve three sliders per person. This is what I did here, and three was very satisfying for me! However, if you think someone has a smaller appetite, then this person should be okay with two. If uncertain, you’re safest bet would be three. If you’re very hungry, there’s no harm in making a fourth slider! If you need assistance on how to scale the recipe based on how many sliders you want to make, then be sure to refer to the recipe card down below that will help you scale how much ground beef and caramelized onions you’ll need for any amount of sliders you want to make!
How Do I know the Patties are Fully Cooked?▼
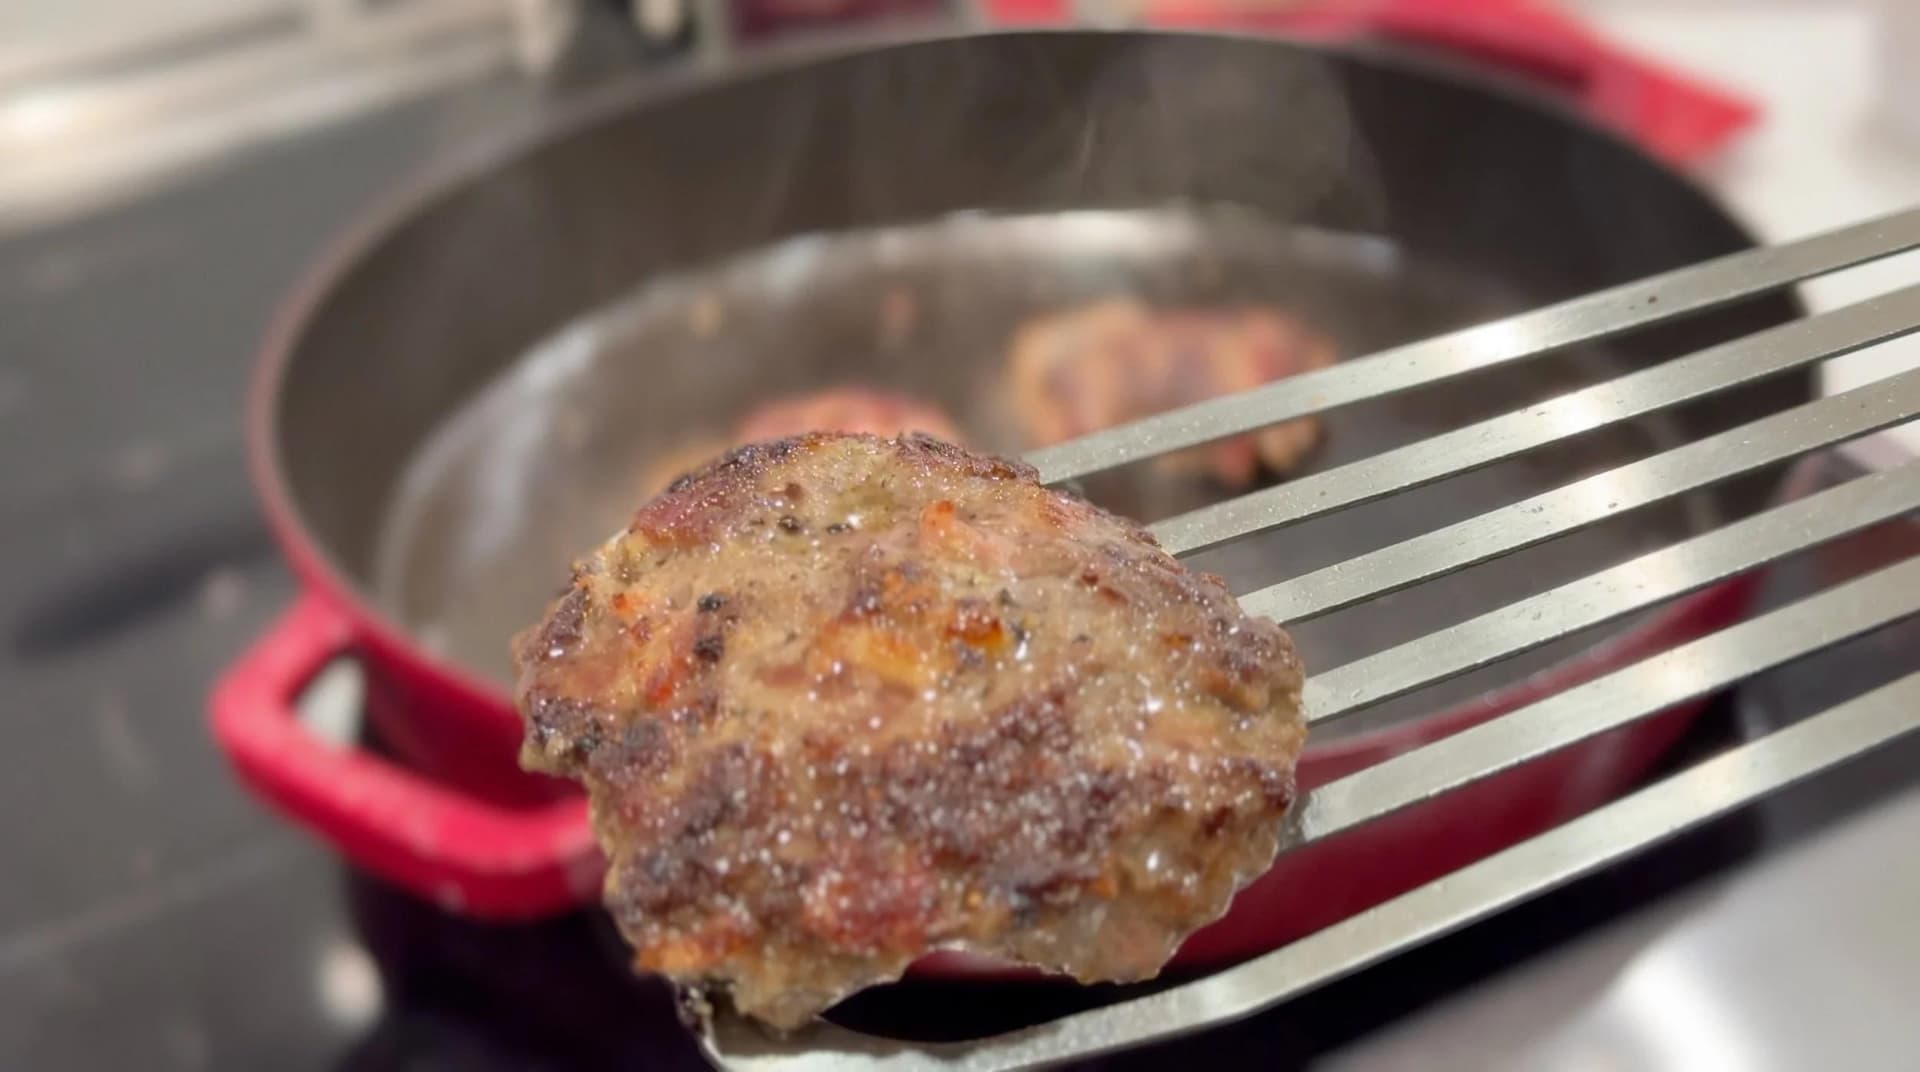
It always serves me well to cook the patties mostly on the first side for as long as I can. Not only is that the key for an amazing crust, but you can visually see the colour changing and climbing as it cooks. When it comes down to it, cook on medium heat, on a well heated pan for 4-5 minutes. And once the patties have shrunken a bit and browned on the edges, as well as they are able to be scraped off easily, flip the burgers to finish cooking them. On the other side, since most of the cooking has been completed, it takes a matter of 1-2 minutes to fully cook, as in until the meat browned throughout.
This advice is for readily available ground beef at supermarkets that should generally be cooked well done since ground beef can harbour bacteria such as E.coli. However, if you have a ground beef that has been prepared from higher-quality beef or cuts of meet like chuck, brisket or ribeye, this should be safer to cook to different temperatures. Here is some guidance:
- Rare: Feels soft and squishy. (120-125°F)
- Medium-Rare: Slightly less squishy but still soft. (130-135°F)
- Medium: The burger should feel firm but still have some give when pressed. (140-145°F)
- Well-Done: The burger will feel firm with little to no give. (160°F)
Other Topping Ideas for Sliders
I kept my sliders very simple, with the only toppings being the caramelized onions and cheese. No need for bacon since it was included in the burger patty! Additionally, in my opinion, I thought that lettuce or pickles would just ruin the ooey goodness of the cheese and meat that I wanted to highlight! However, if you want to add a little more to your sliders, then why not! Here are some ideas that would pair really well with these bacon sliders:
- Raw onions
- Pickled jalapeños
- Lettuce
- Sauerkraut
- Pickles
Here are some dips that you could have on the side with your sliders:
- Mayonnaise
- Mustard
- Ketchup
- Garlic Truffle Aioli
- Ranch
- Your favourite hot sauce

Serving Suggestions for Fired up Sliders
To be honest there are so many sides & starters that you could serve with your sliders with! Here are only a few ideas for you to pick from that would pair really great with these sliders for a complete meal:
- Fried Mozzarella Sticks
- Homemade Chick-Fil-A Waffle Fries
- Spicy Air Fryer BBQ Chicken Wings
- Crispy Popcorn Shrimp
- Cajun Potato Wedges
- Extremely Cheesy Baked French Fries
- Super Easy Potato Salad
- Classic Baked Macaroni and Cheese
- Baked Beans
Can I Make Fired UP Bacon Cheesy Sliders Ahead oF Time?▼
No ways! I don’t know who eats burgers in advance. However, here are some preparation ideas for you to get ready:
- Cut your cheese slices into strips that will be topped over the patties. You can store your cheese strips in an airtight container in the fridge until ready to top over the sliders.
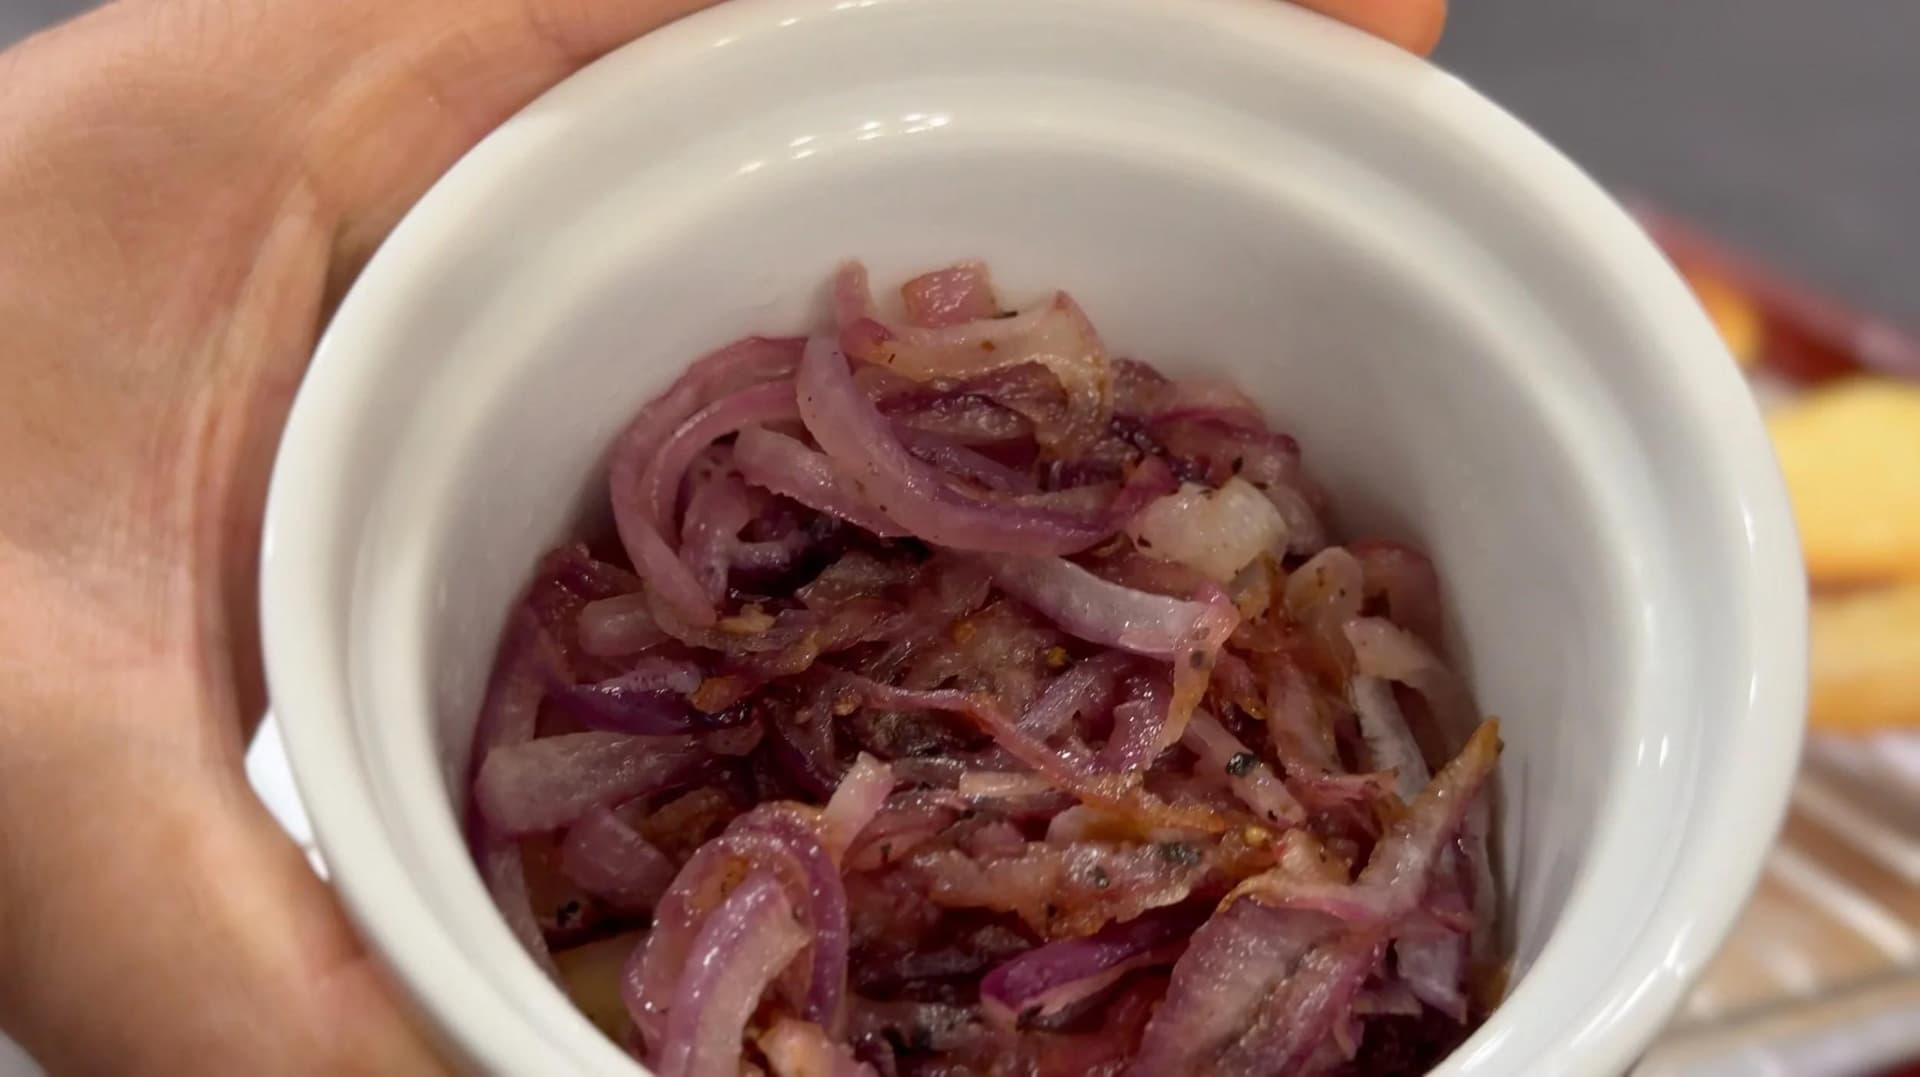
- You can prepare the caramelized onions in advance. Store the caramelized onions in an airtight container in the fridge until ready to use.
- Cut your parchment paper into squares - or alternatively purchase pre-cut parchment patty paper, which helps you hand and manoeuvre the patties.
- You could form the slider patties in advance, but to slow down oxidization, you’ll need to cover the patties with the parchment paper squares. You can stack multiple patties once covered with parchment squares, and easily store them in the fridge until you’re ready to cook. I recommend you use your patties within two to three days, but remember - the fresher the better!

Tools Needed to Make Sliders
- Spatula
- Garlic press
- Salt crock
- Pepper mill
- Butter block
- Bench scraper
- Parchment paper
- Cast iron pan
- Non-stick pan
- Cutting board
- Bread knife
- Sharp chef’s knife
- Mixing bowl
- Fish spatula
- Baking sheet
- Wire rack
- Kitchen torch
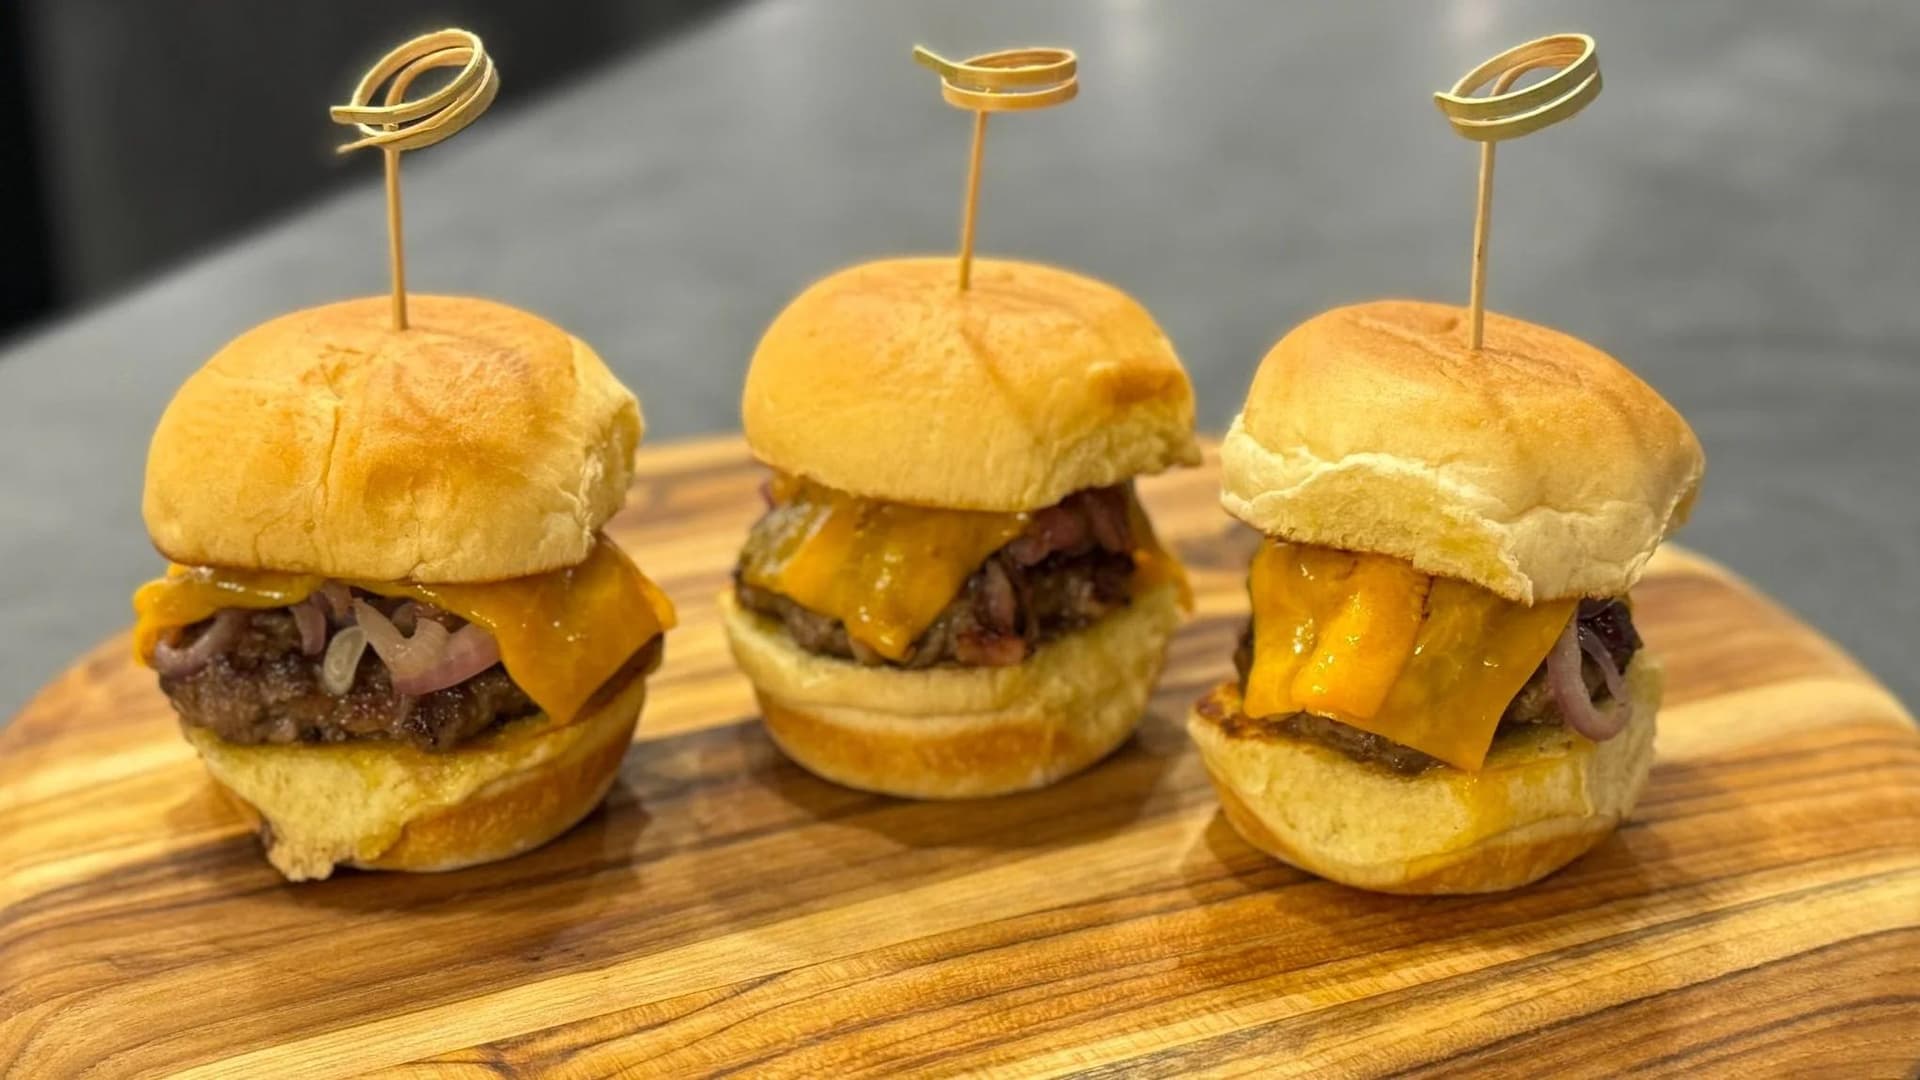
- Bamboo skewers
Ingredients for Sliders
Be sure to scroll to the bottom of this post or press the “Jump to Recipe” button for the FULL PRINTABLE RECIPE CARD with all ingredients and their quantities along with the instructions that can be saved for later.

For the Slider Patties
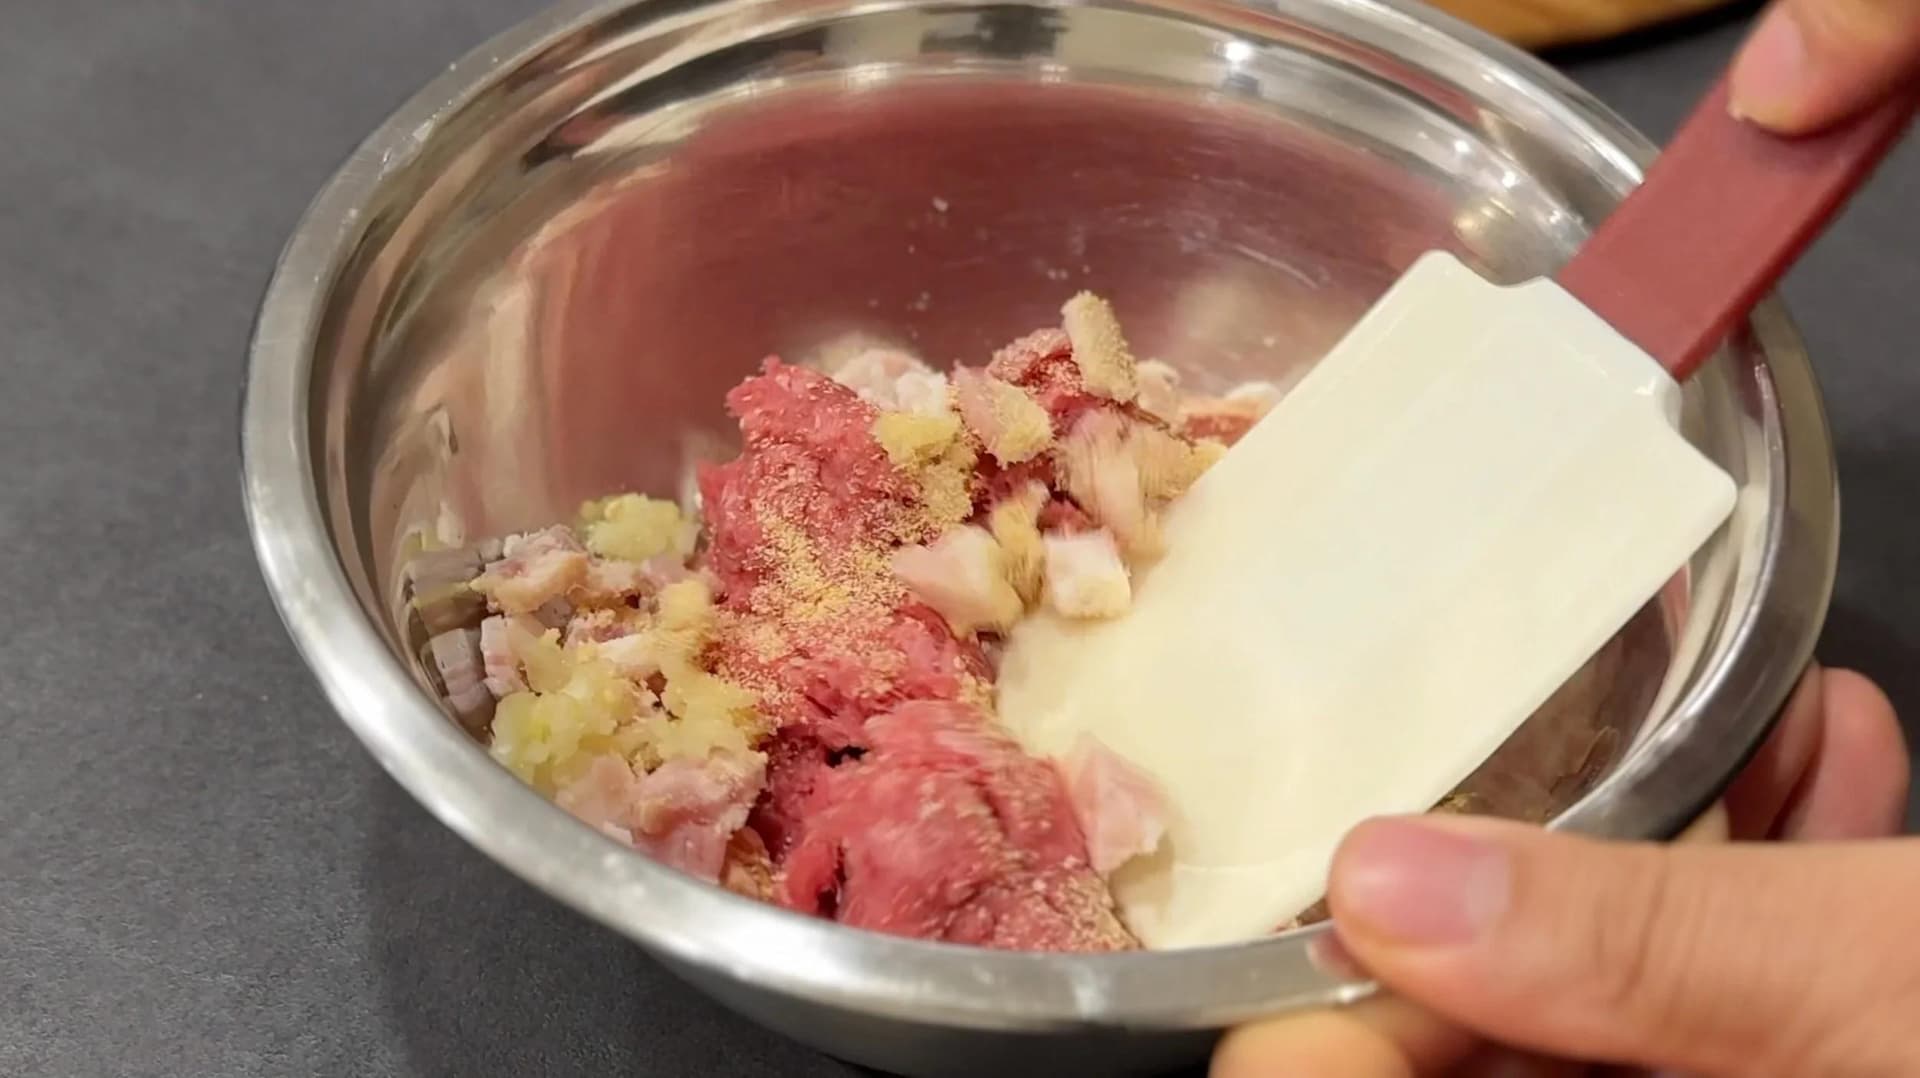
- Ground beef: My recommendation is lean ground beef for lots of juiciness. You could even use medium ground beef if you want. I wouldn’t recommend extra lean ground beef or else your burgers may get a bit dry.
- Garlic cloves: Freshly minced garlic cloves.
- Bacon: Use whatever kind of bacon you want to add some extra flavor and smokiness to the burger patty! The bacon will be chopped here.
- Onion powder: Seasoning to enhance the patties.
- Salt and pepper: Essential seasoning that you’ll add while the smash burger patties are cooking.
For the Sliders
- Buns: In this case, the burger buns will actually be the dinner rolls. Otherwise, use mini burger buns to make sliders.
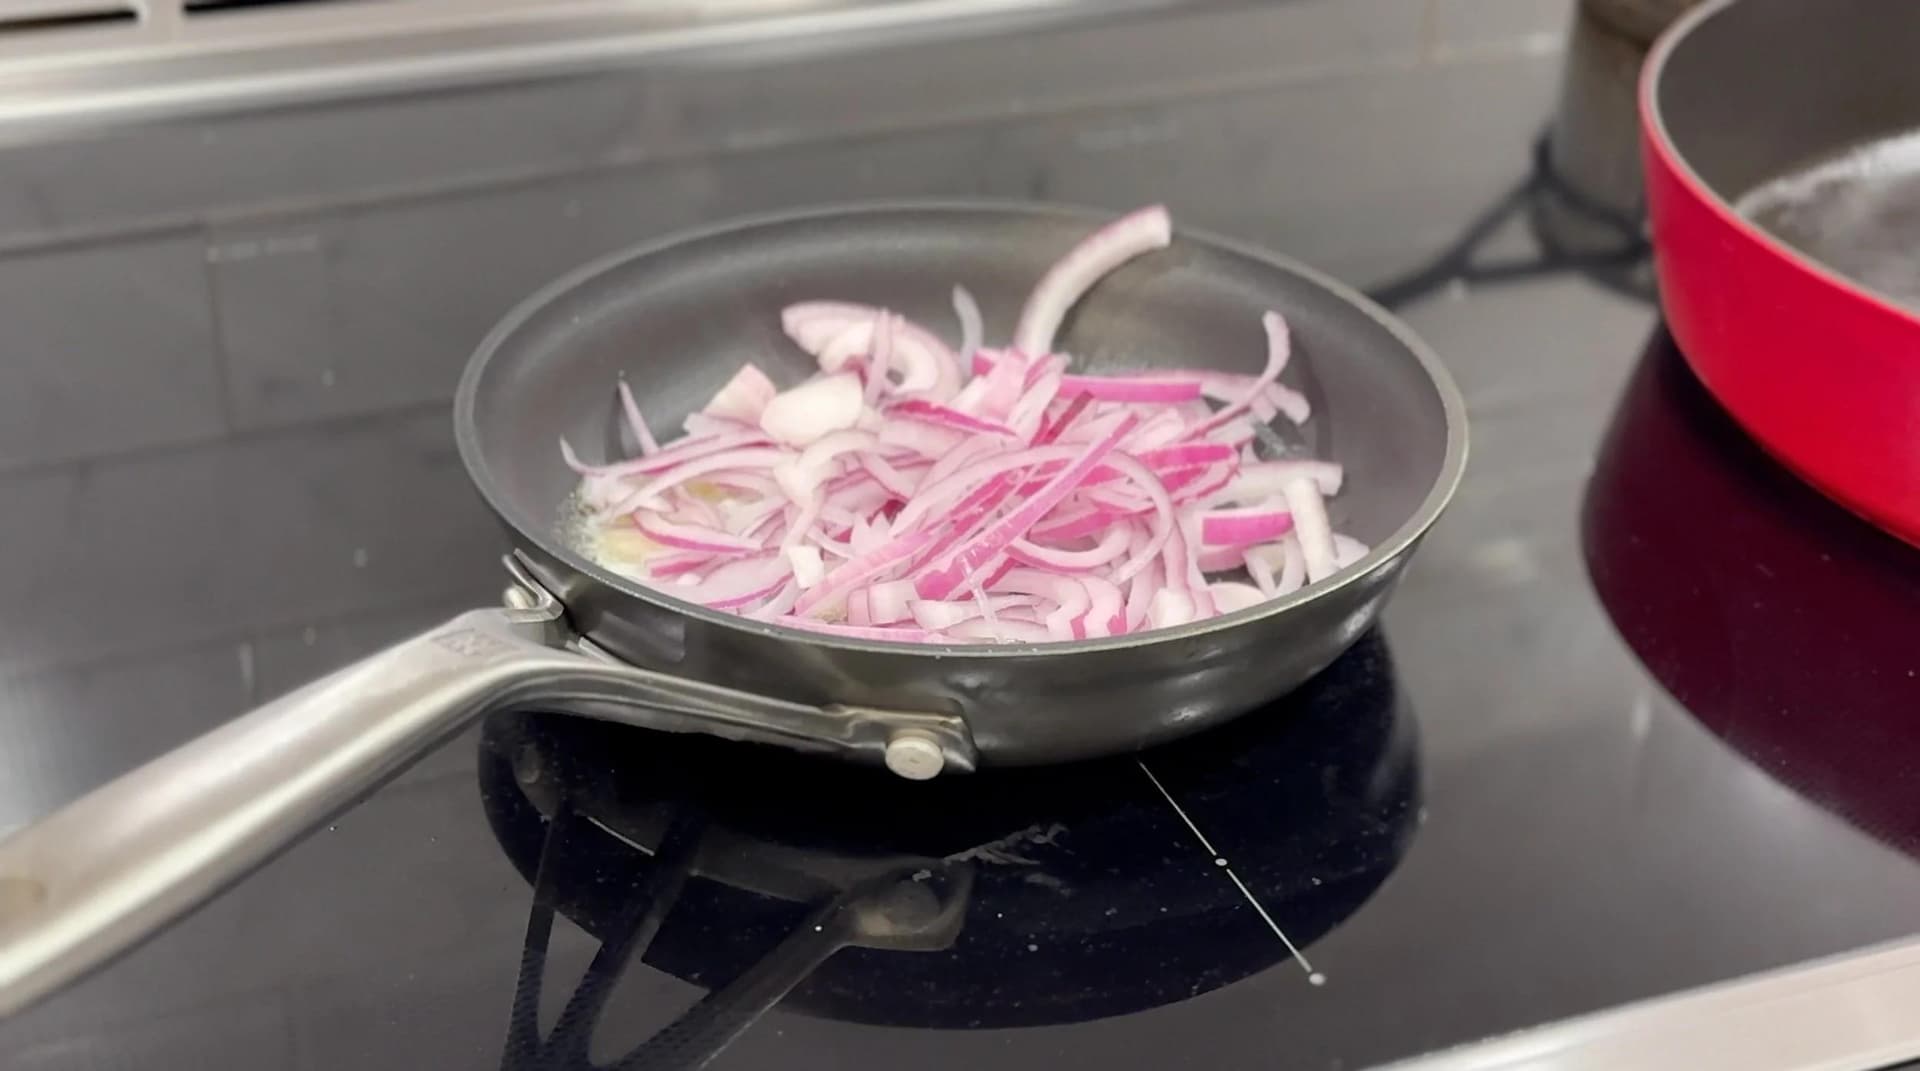
- Onion: We’ll be caramelizing our onions to add with the patty.
- Butter: To make the caramelized onions.
- Cheese: If you can use American cheese then that would probably be the best choice! However, where I am, I can’t find it anywhere, so I opted for old yellow cheddar. For a classic cheeseburger appearance and flavour that is ready to be torched up, then this is an excellent option!
- Olive oil: To toast the buns.
How to Make Fired up Bacon Cheese Sliders
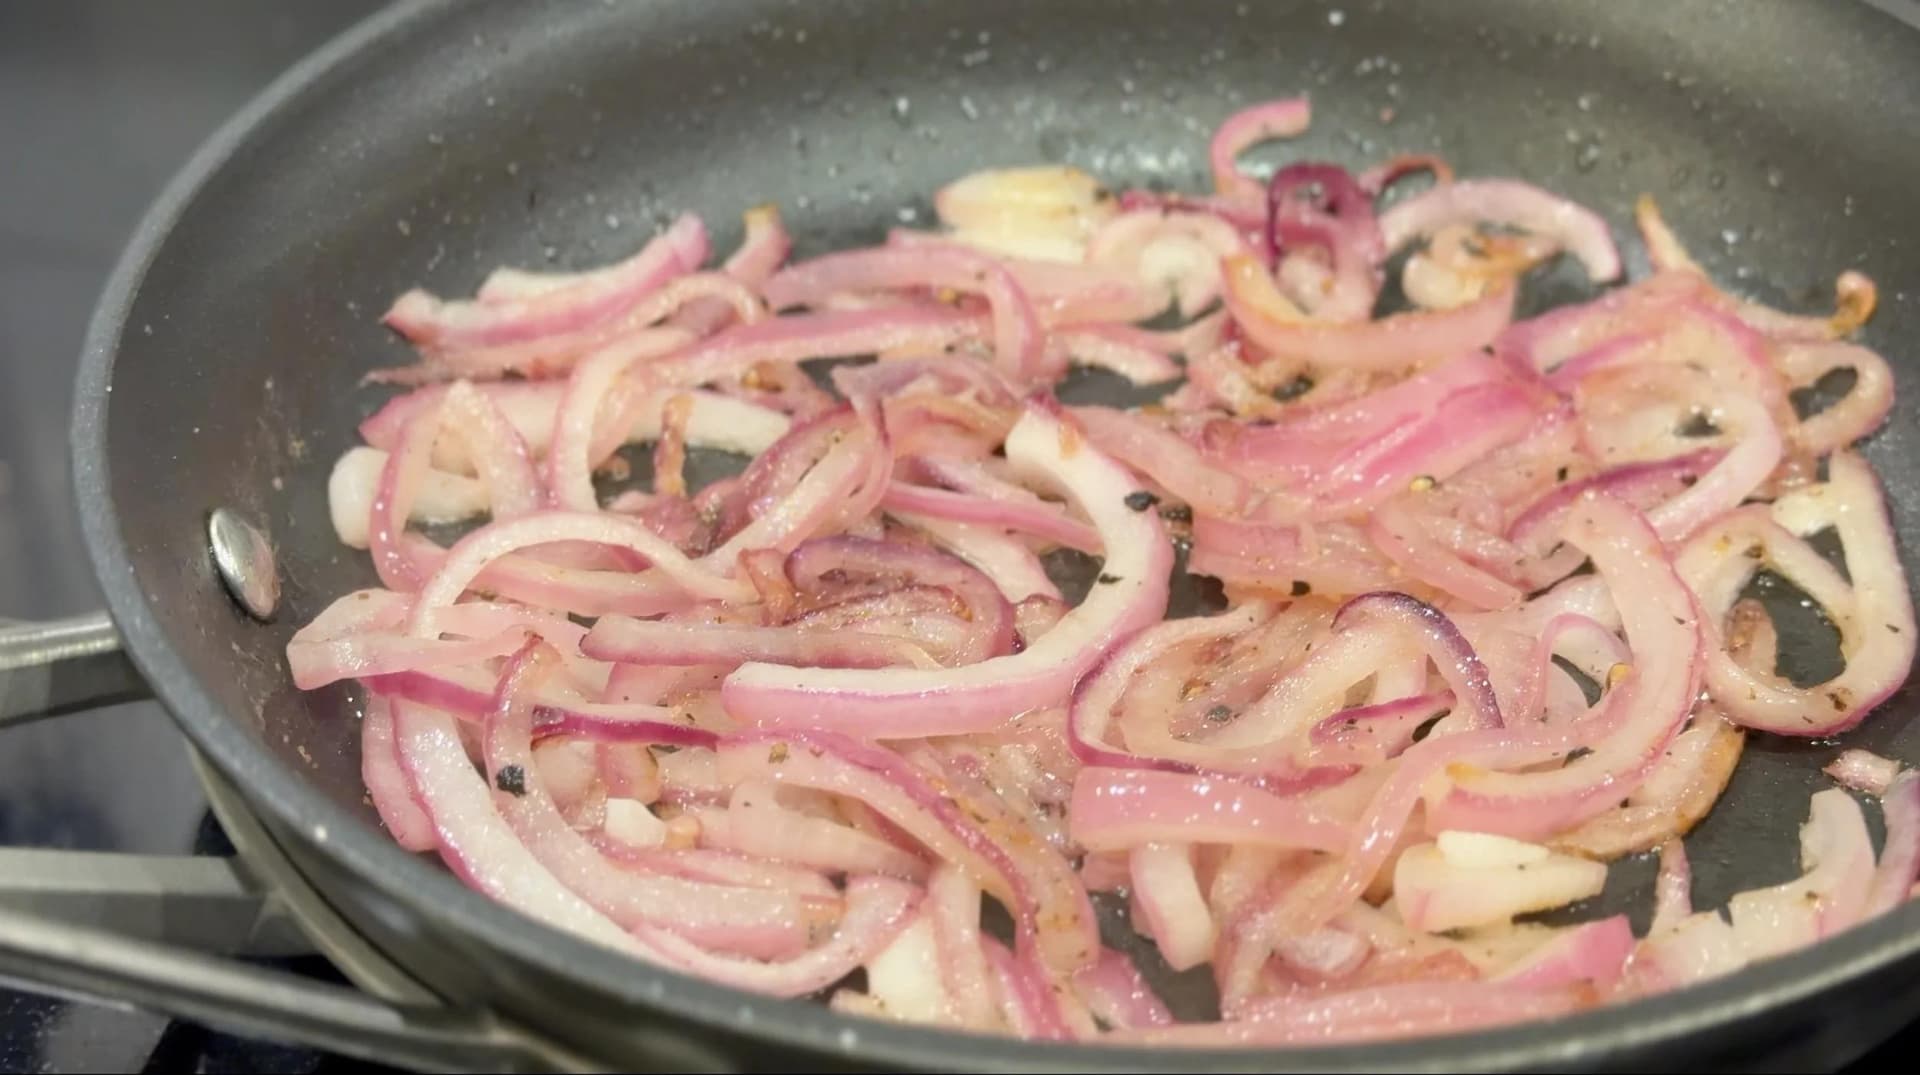
Heat a pan on medium heat, add butter, sliced onions and pinch of salt. Mix well and once the butter is molten, lower the heat so that the onions very slightly sizzle and cook for 20-25 minutes or until they are completely caramelized.


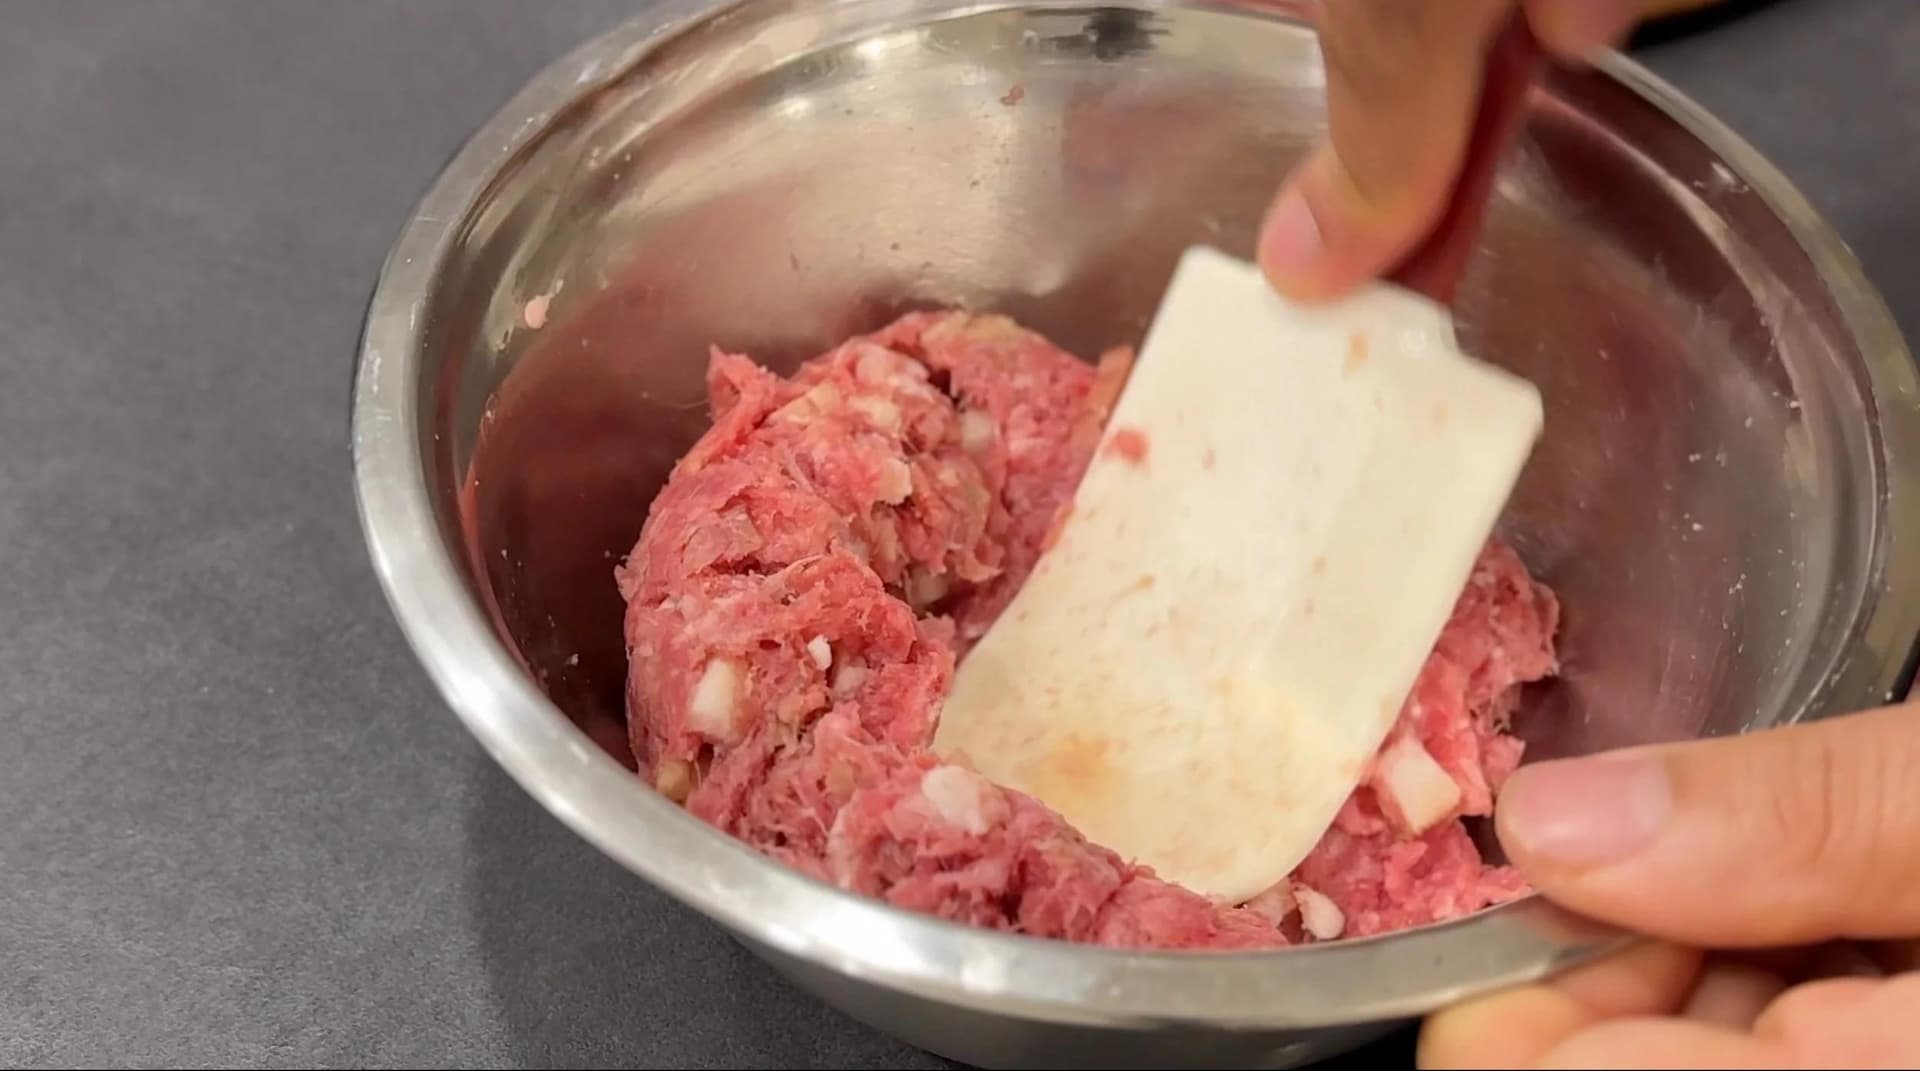
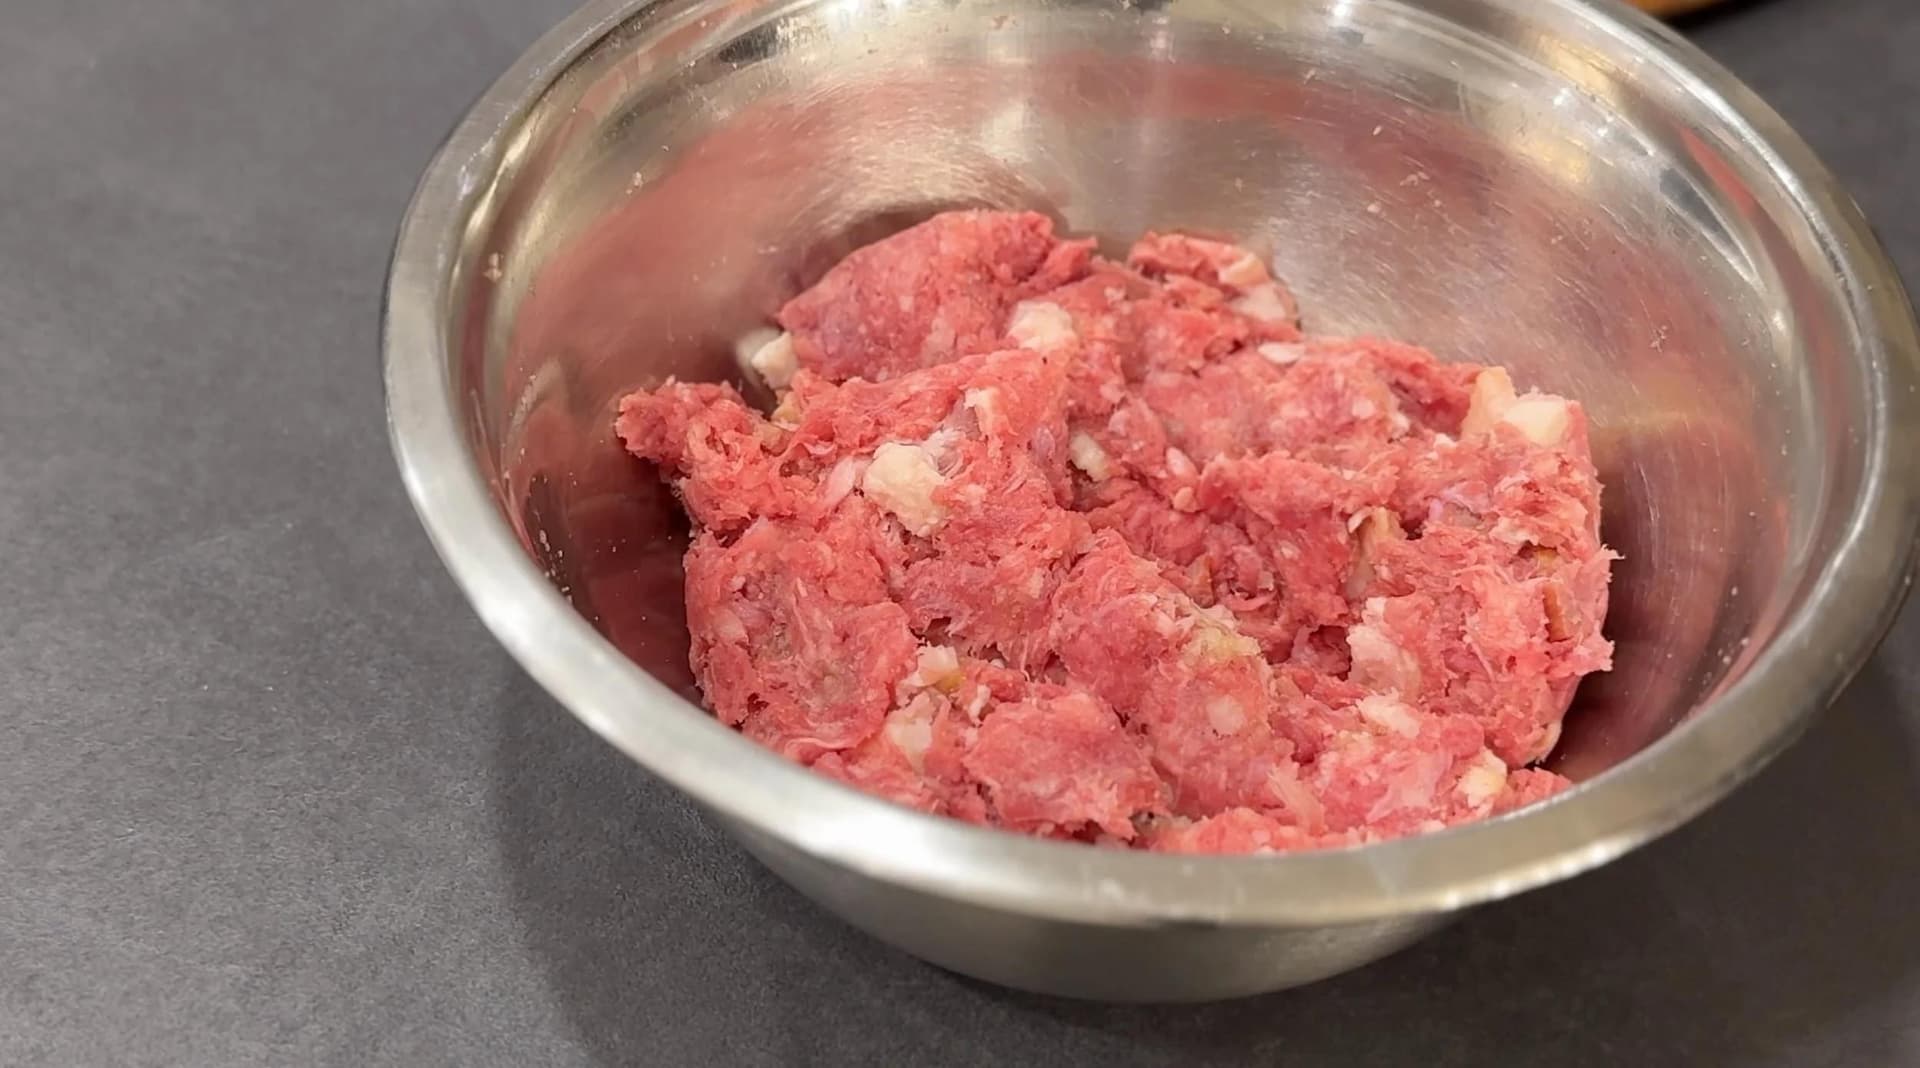
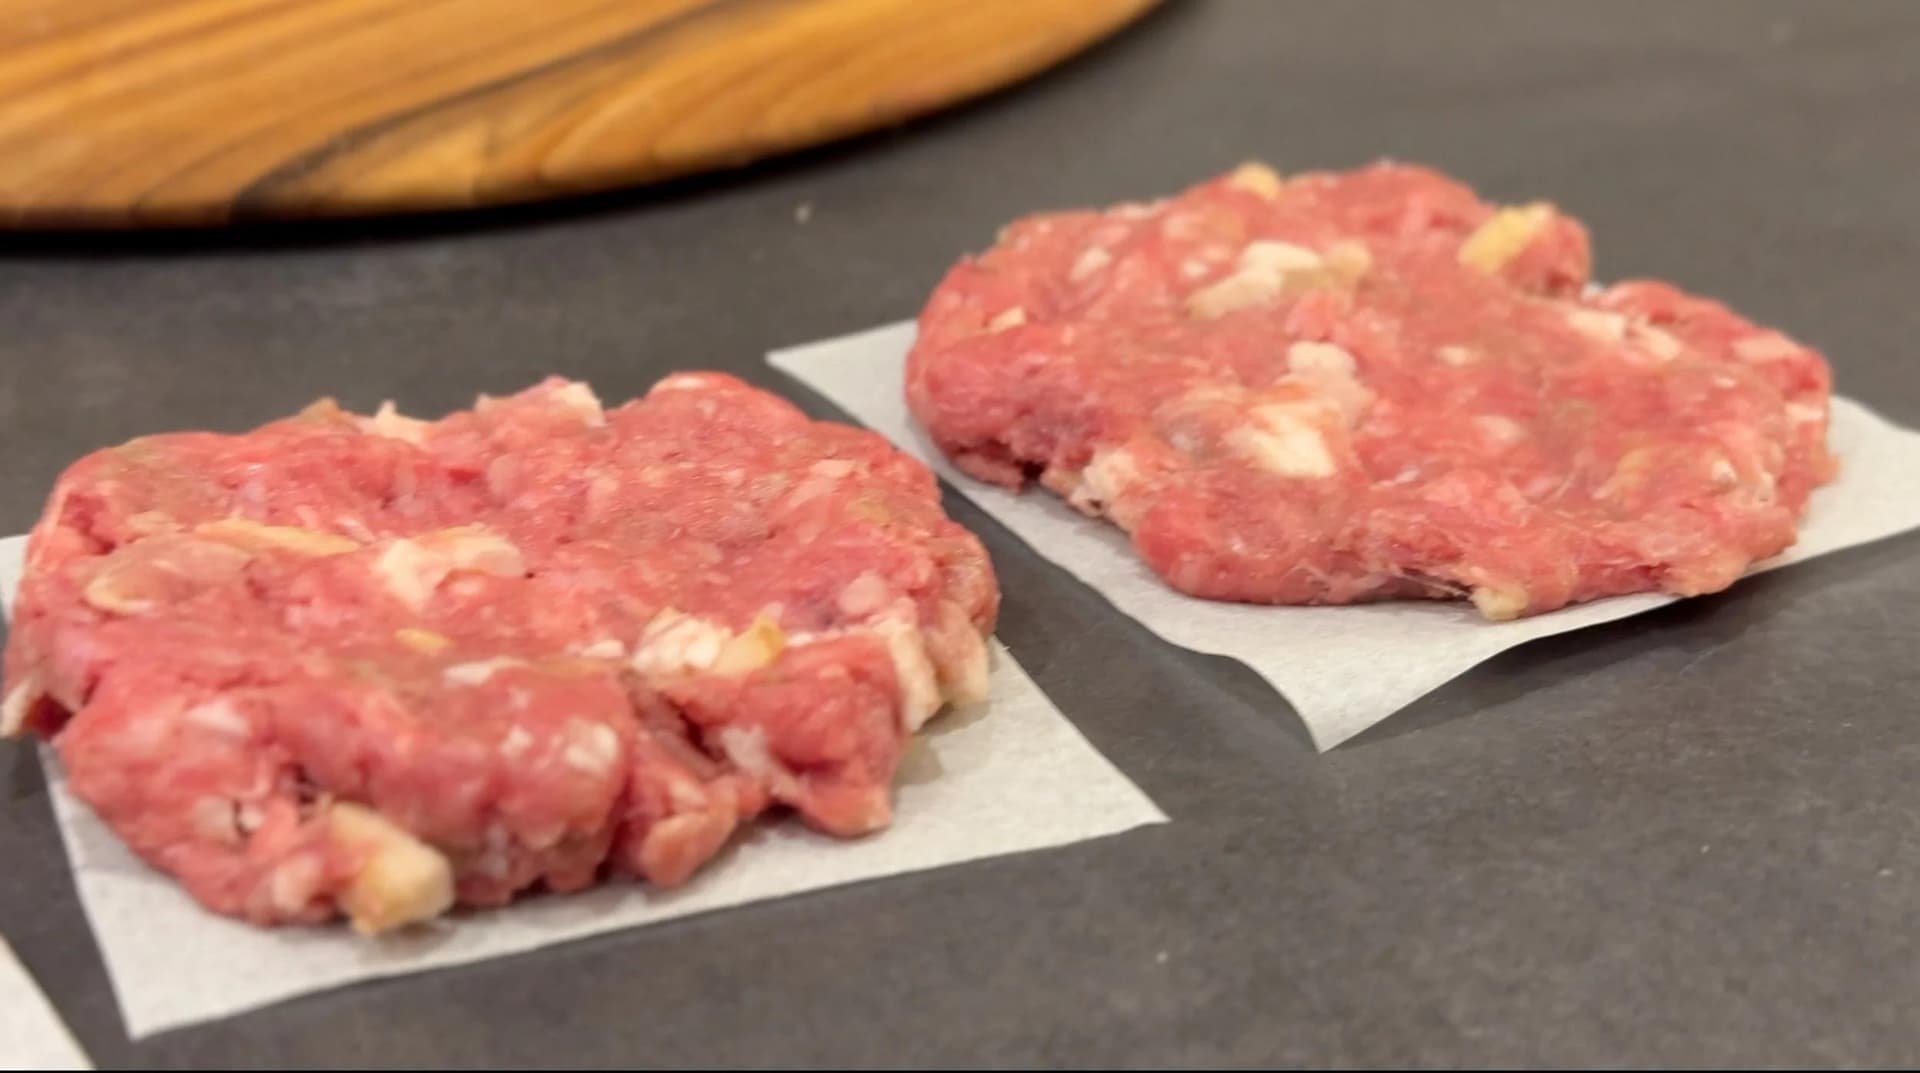
In the meanwhile, add the ground beef to a bowl and add the bacon, minced garlic and onion powder. Mix well to combine, taking care not to overmix as this can change the texture of the final burger.


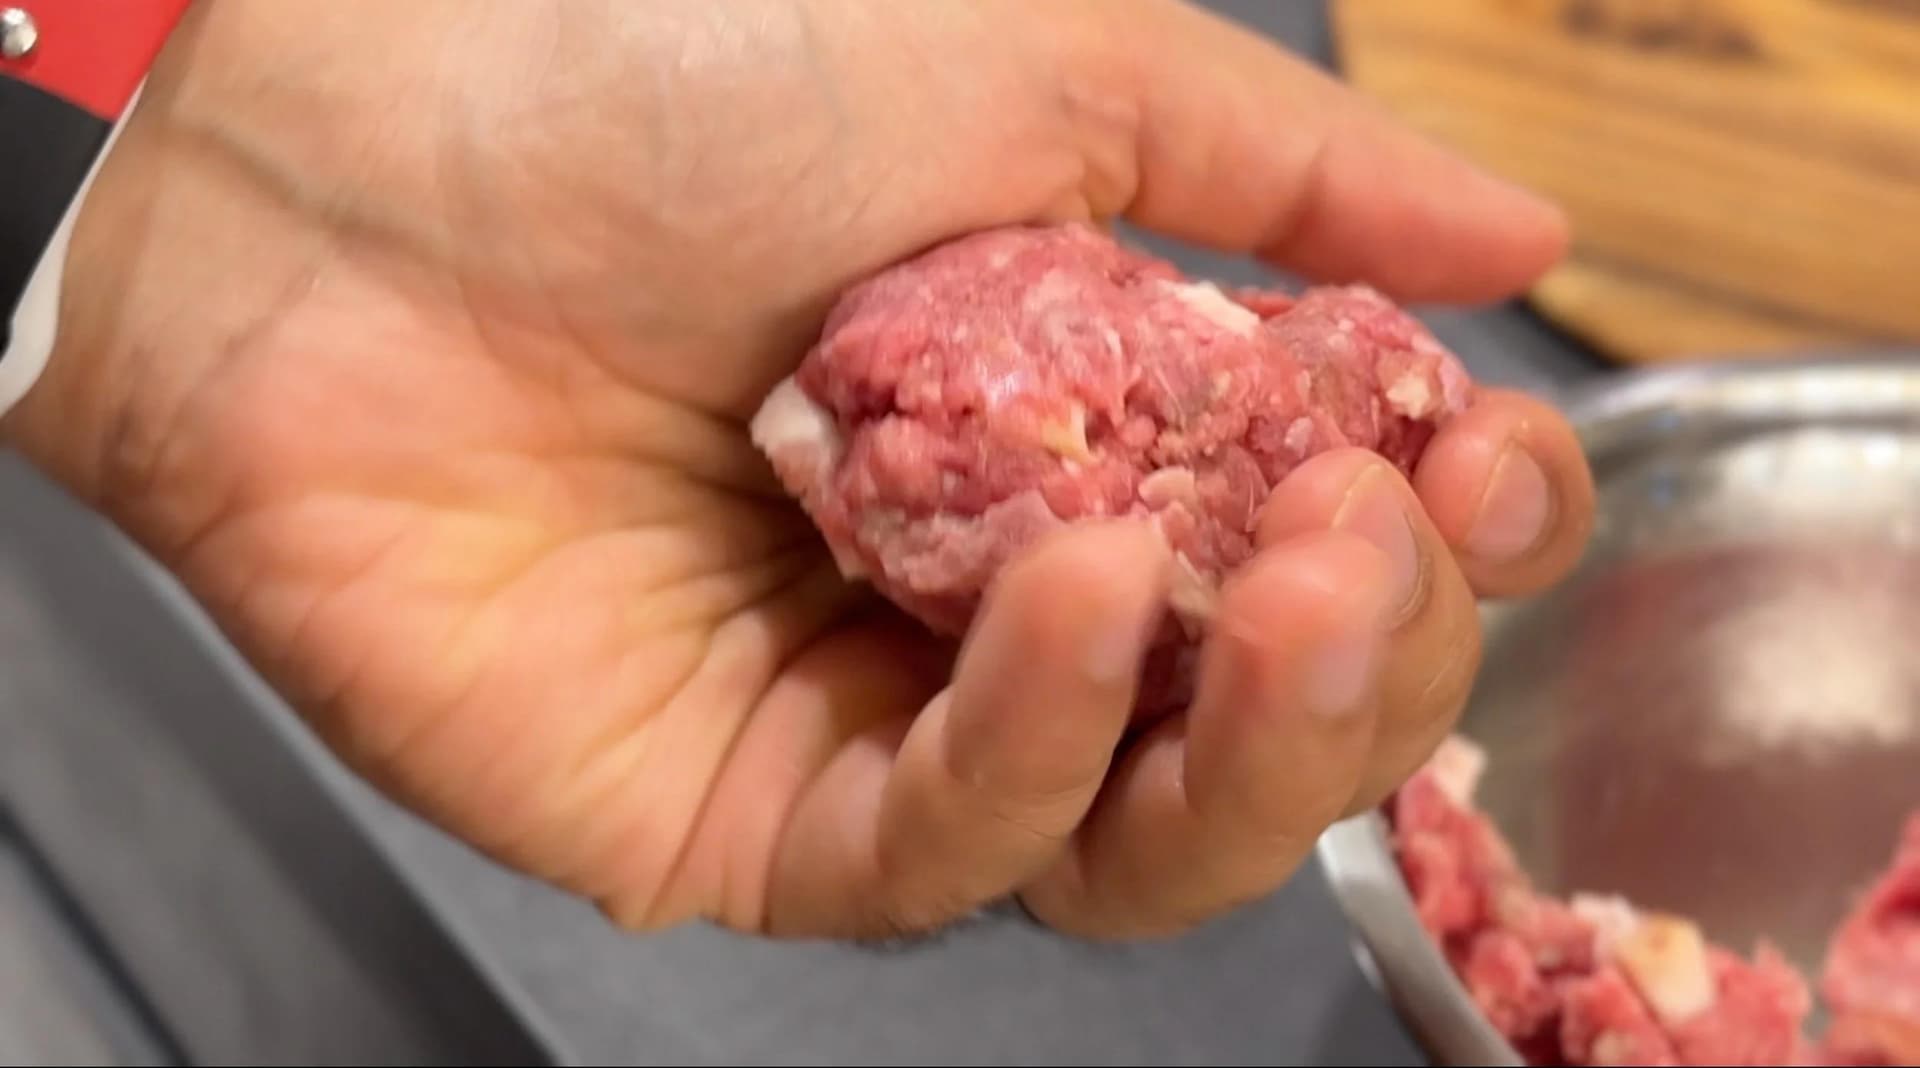
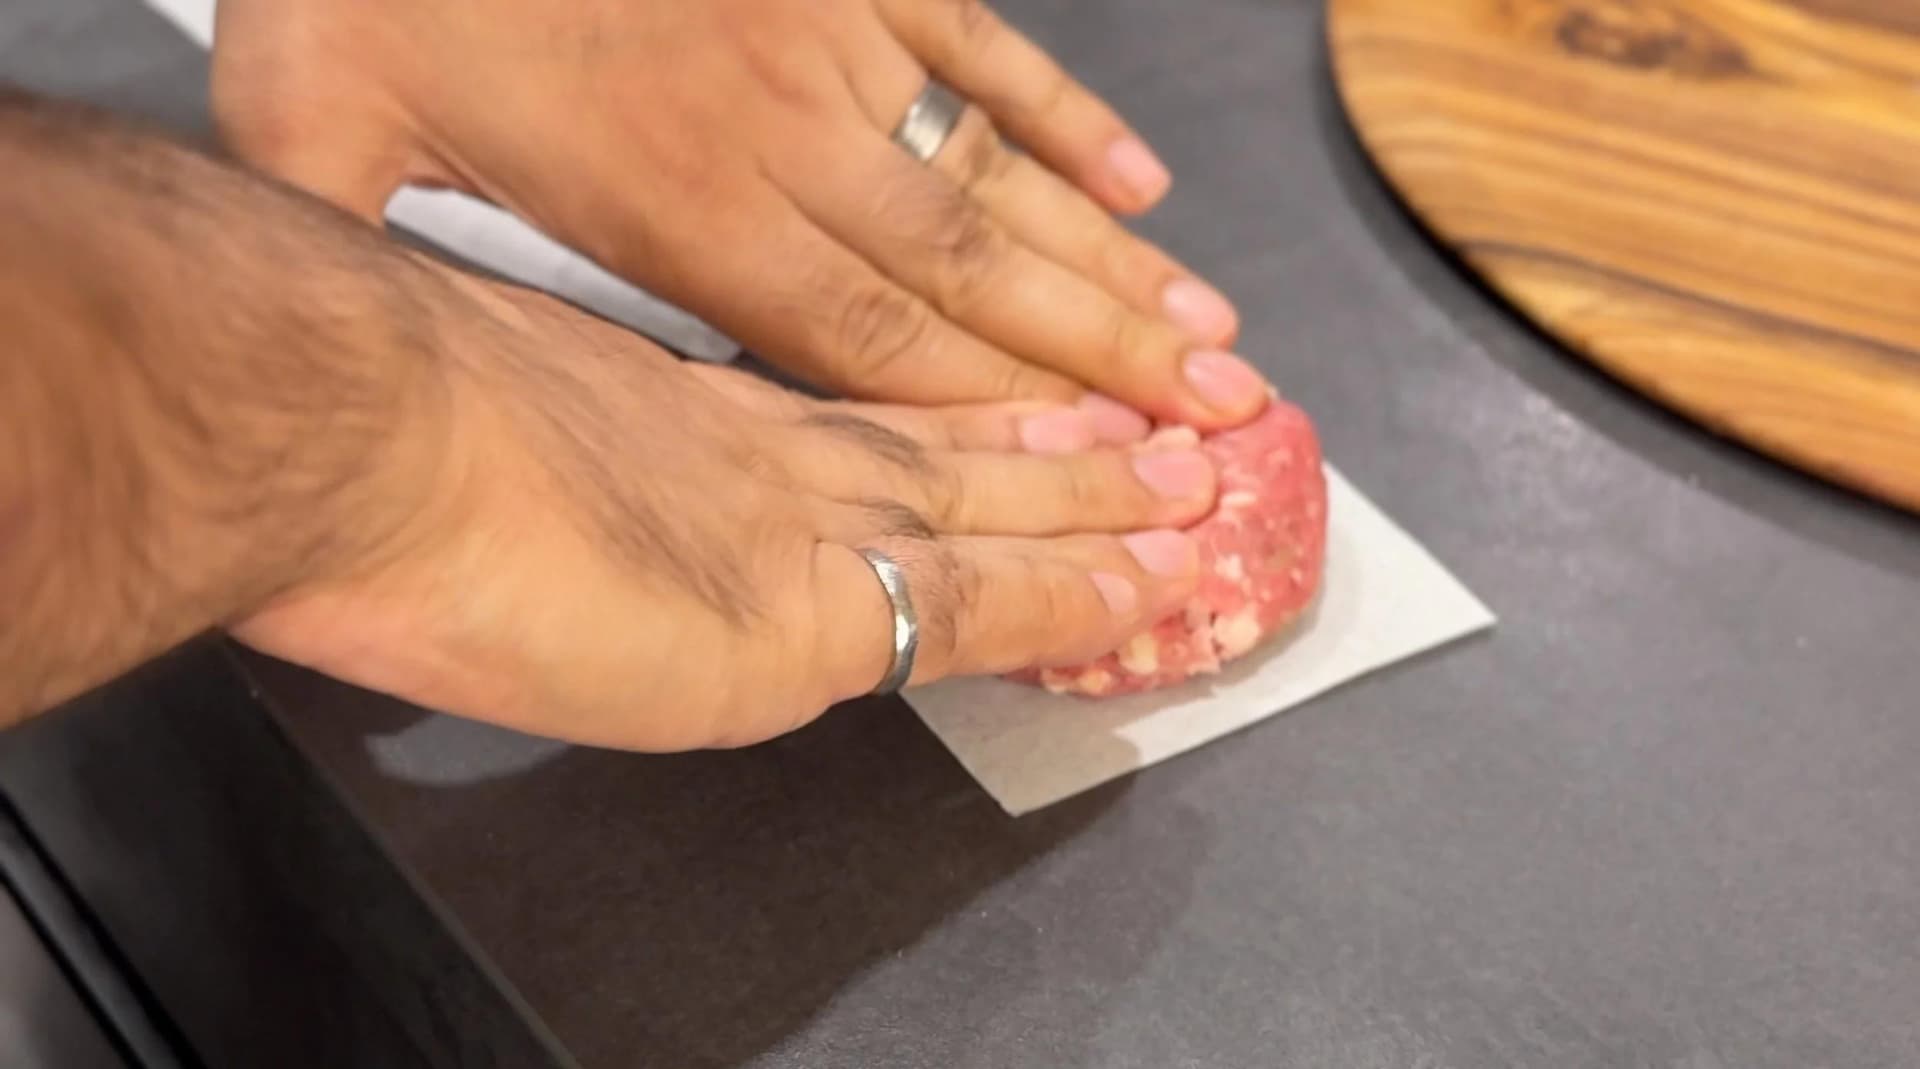
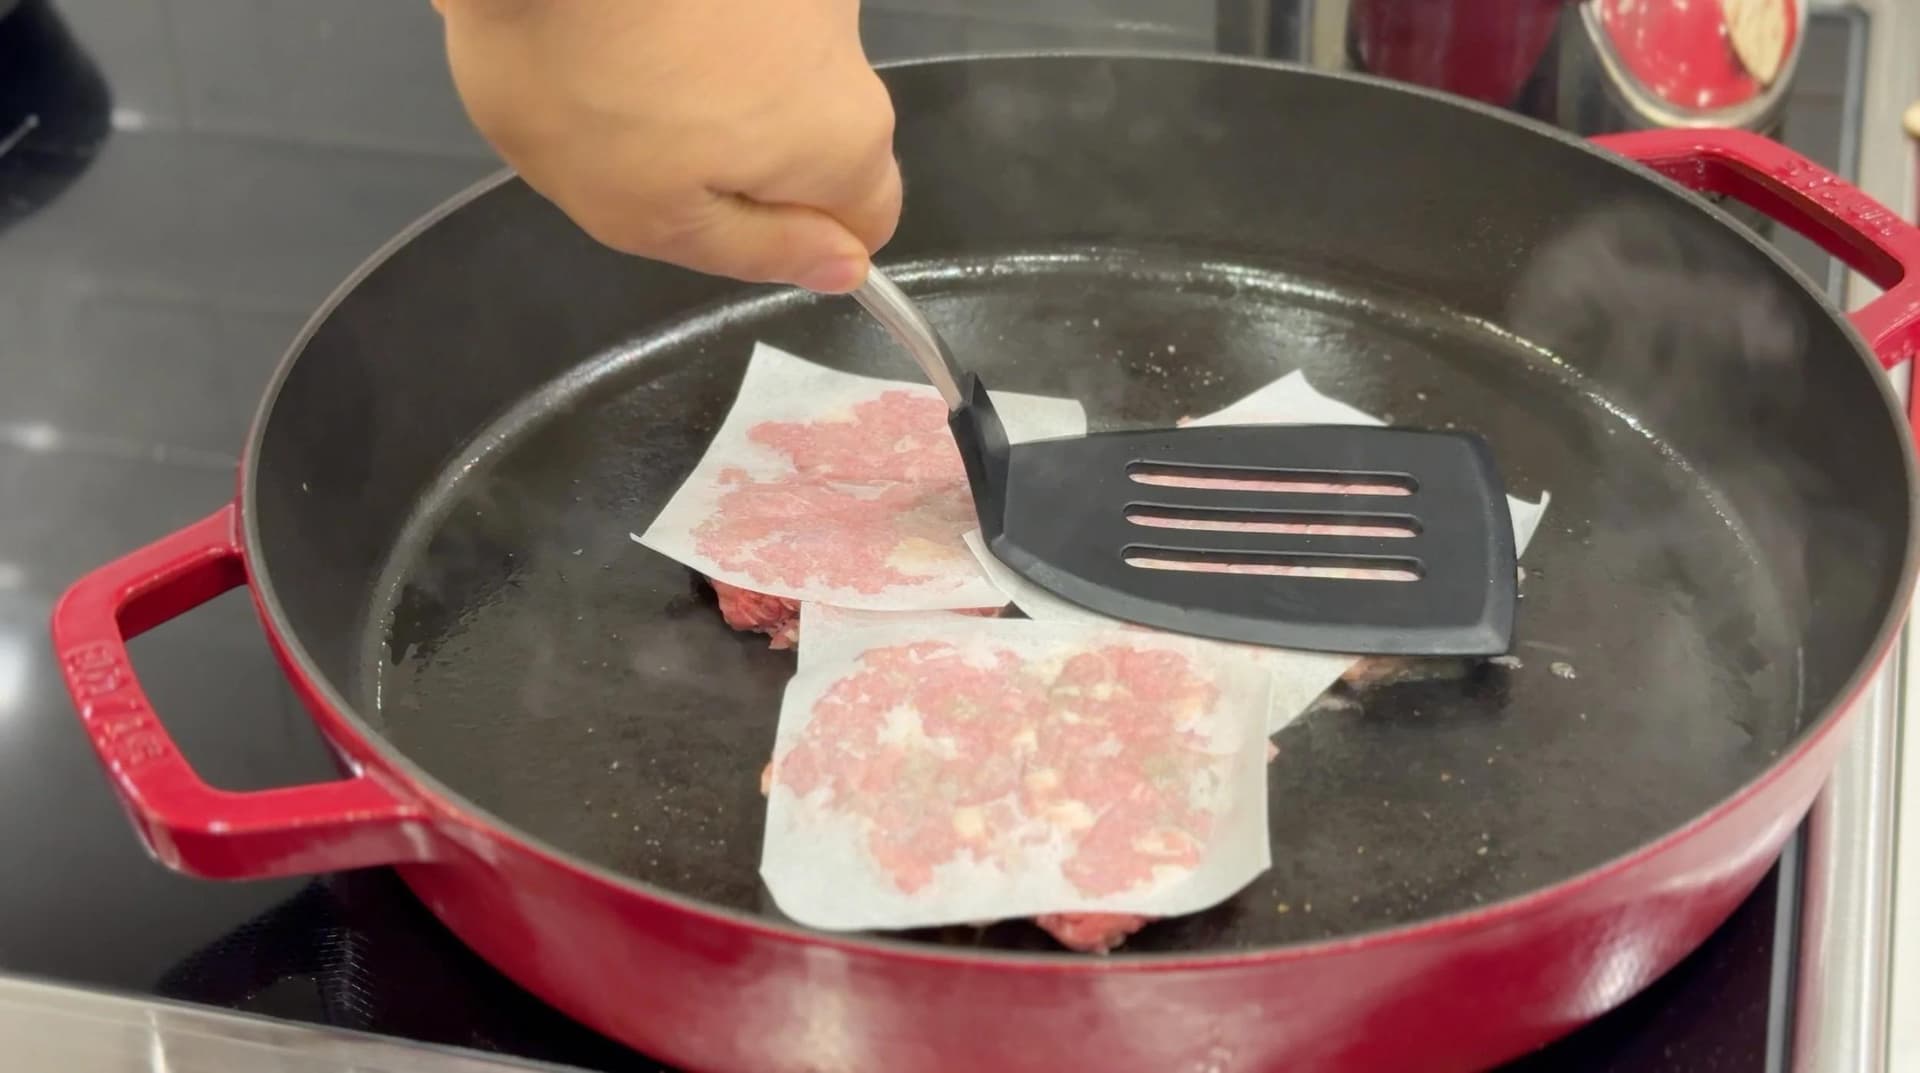
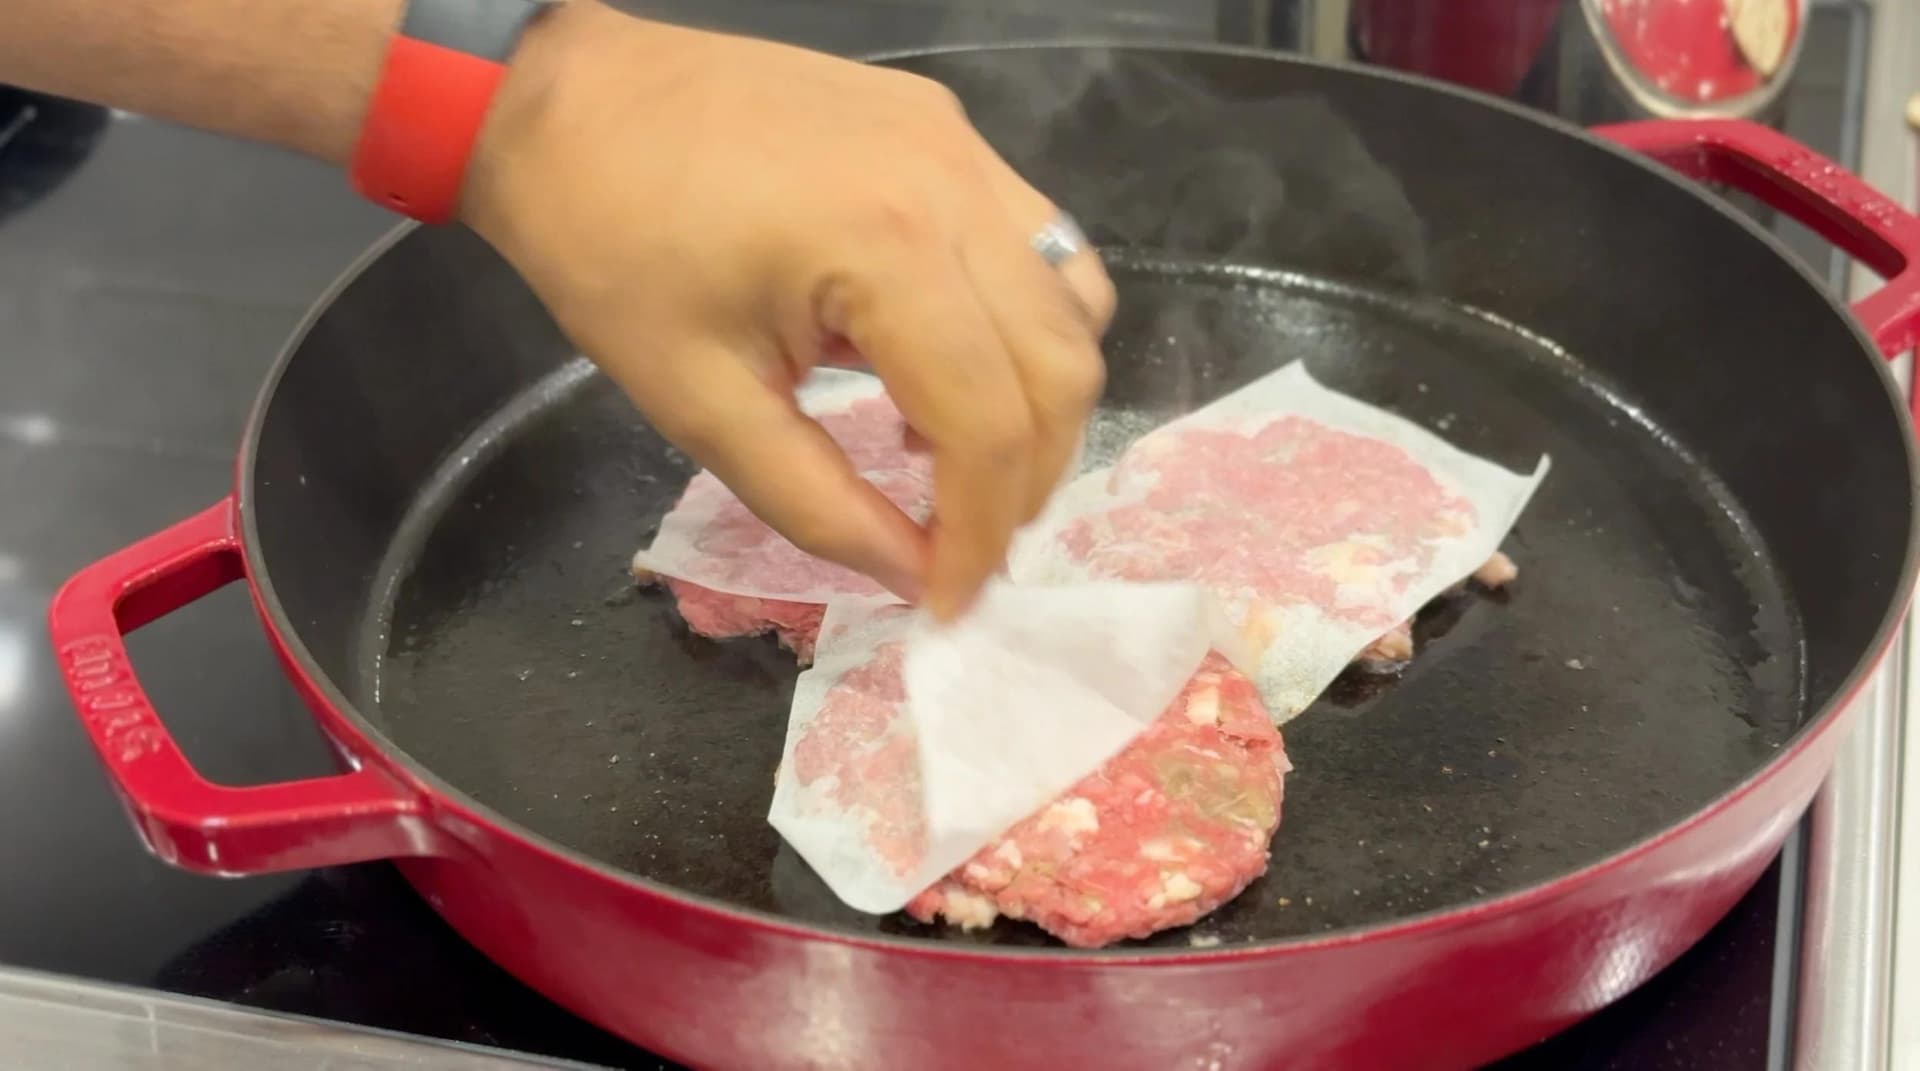
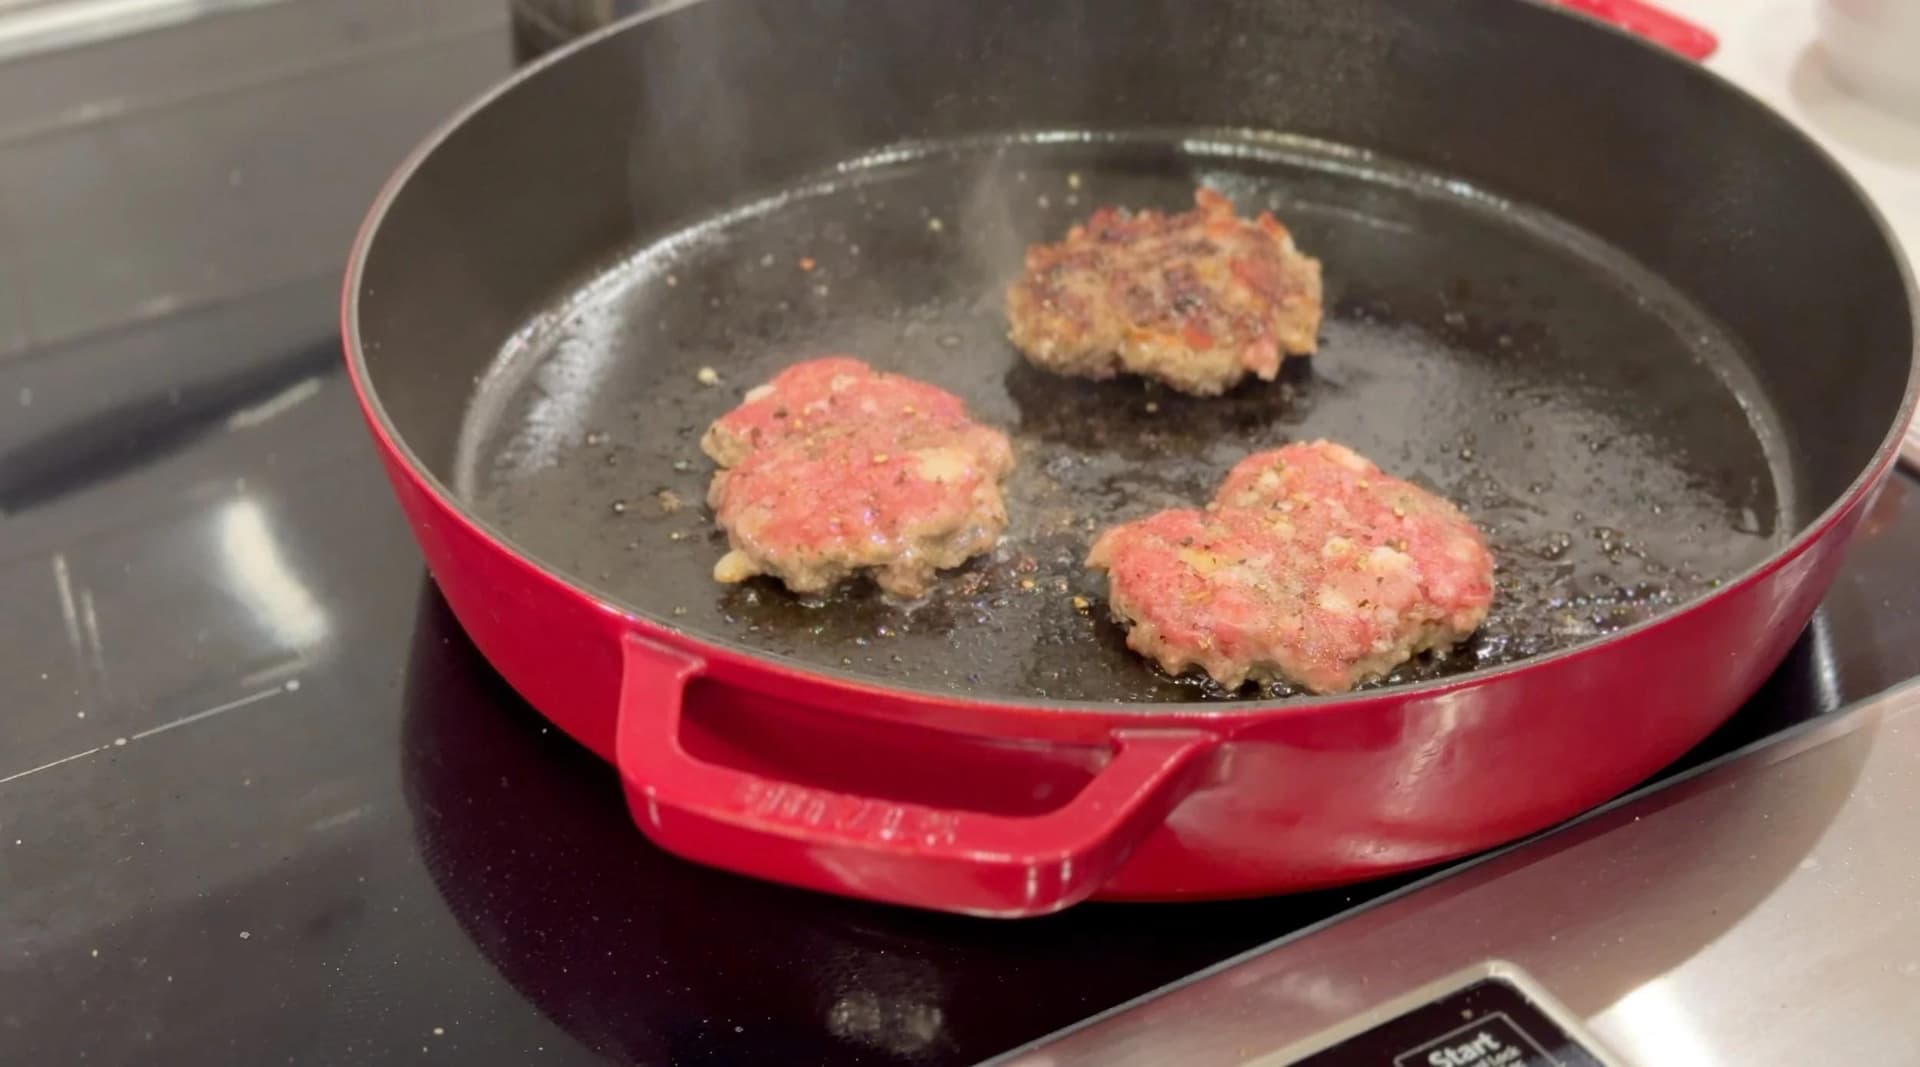
Portion this minced into 3 equal sized balls and place on parchment paper squares. Lightly press to form a roughly flat patty and season the top side of the patty with salt and pepper.


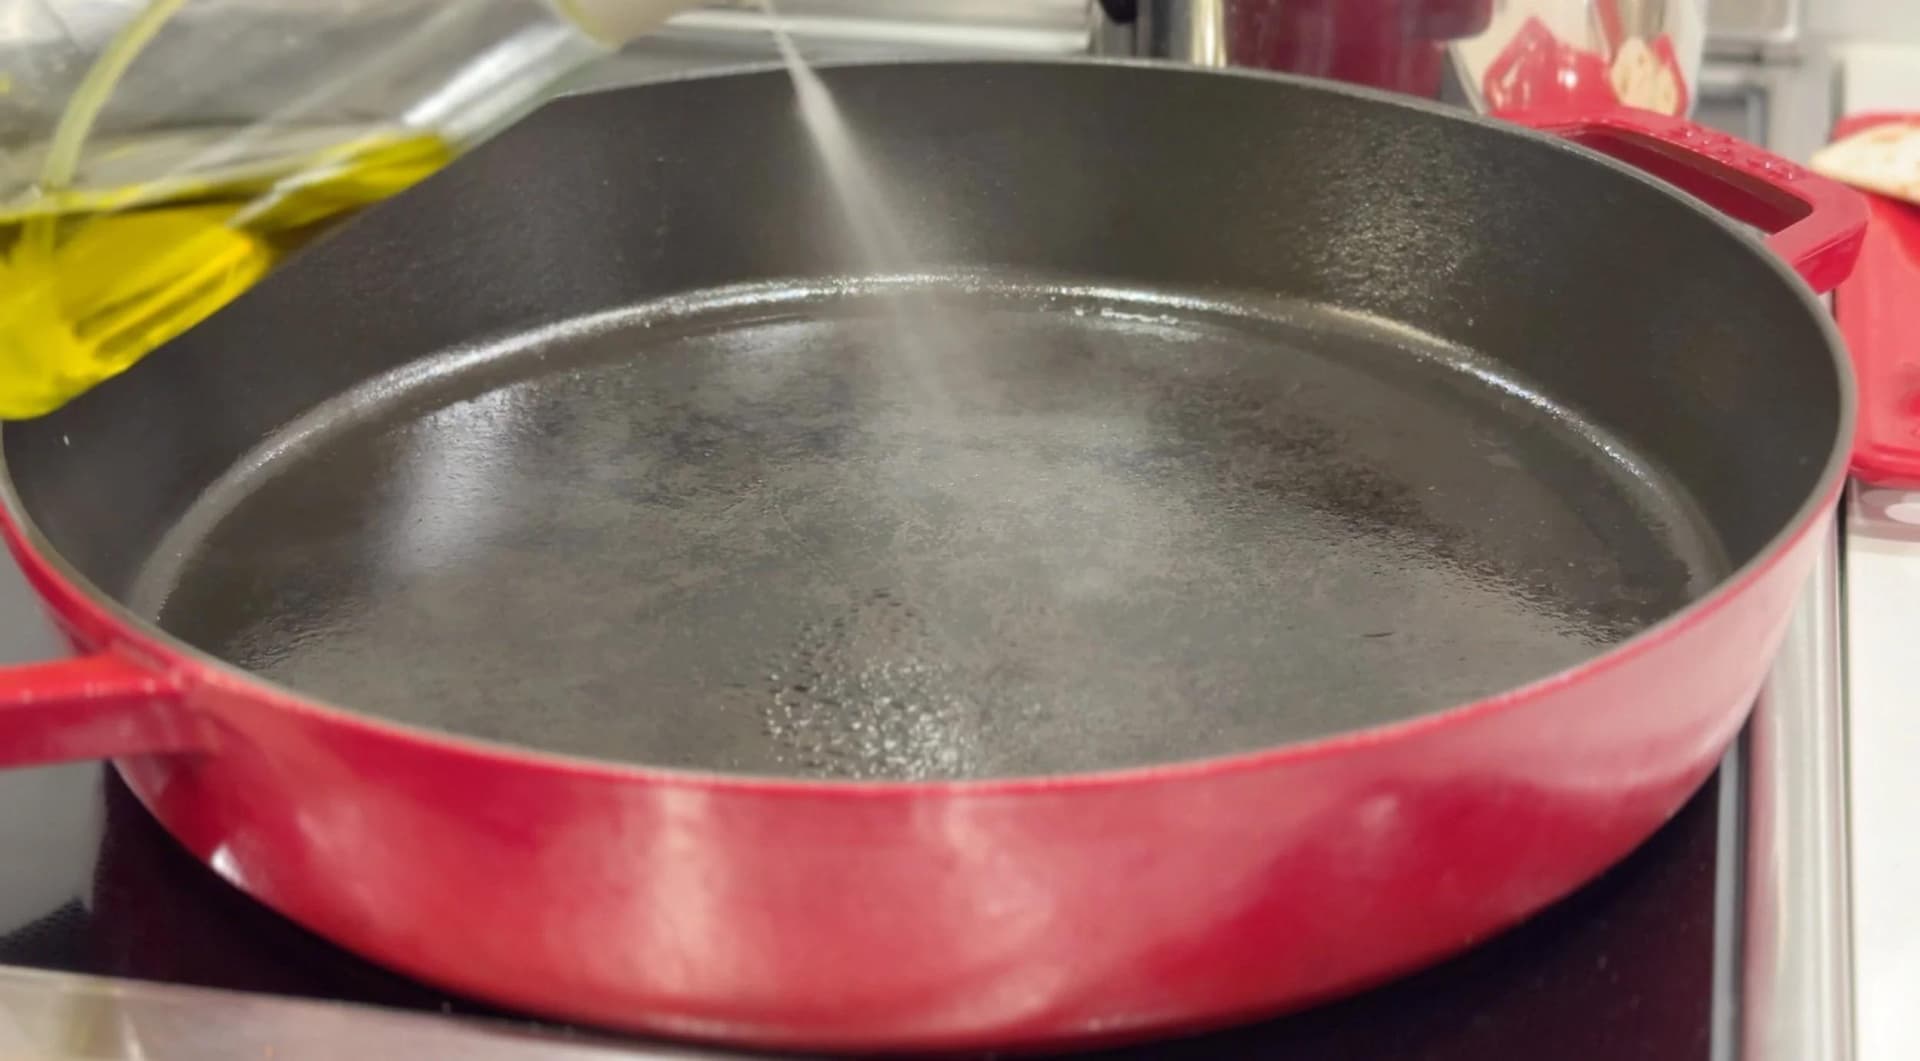
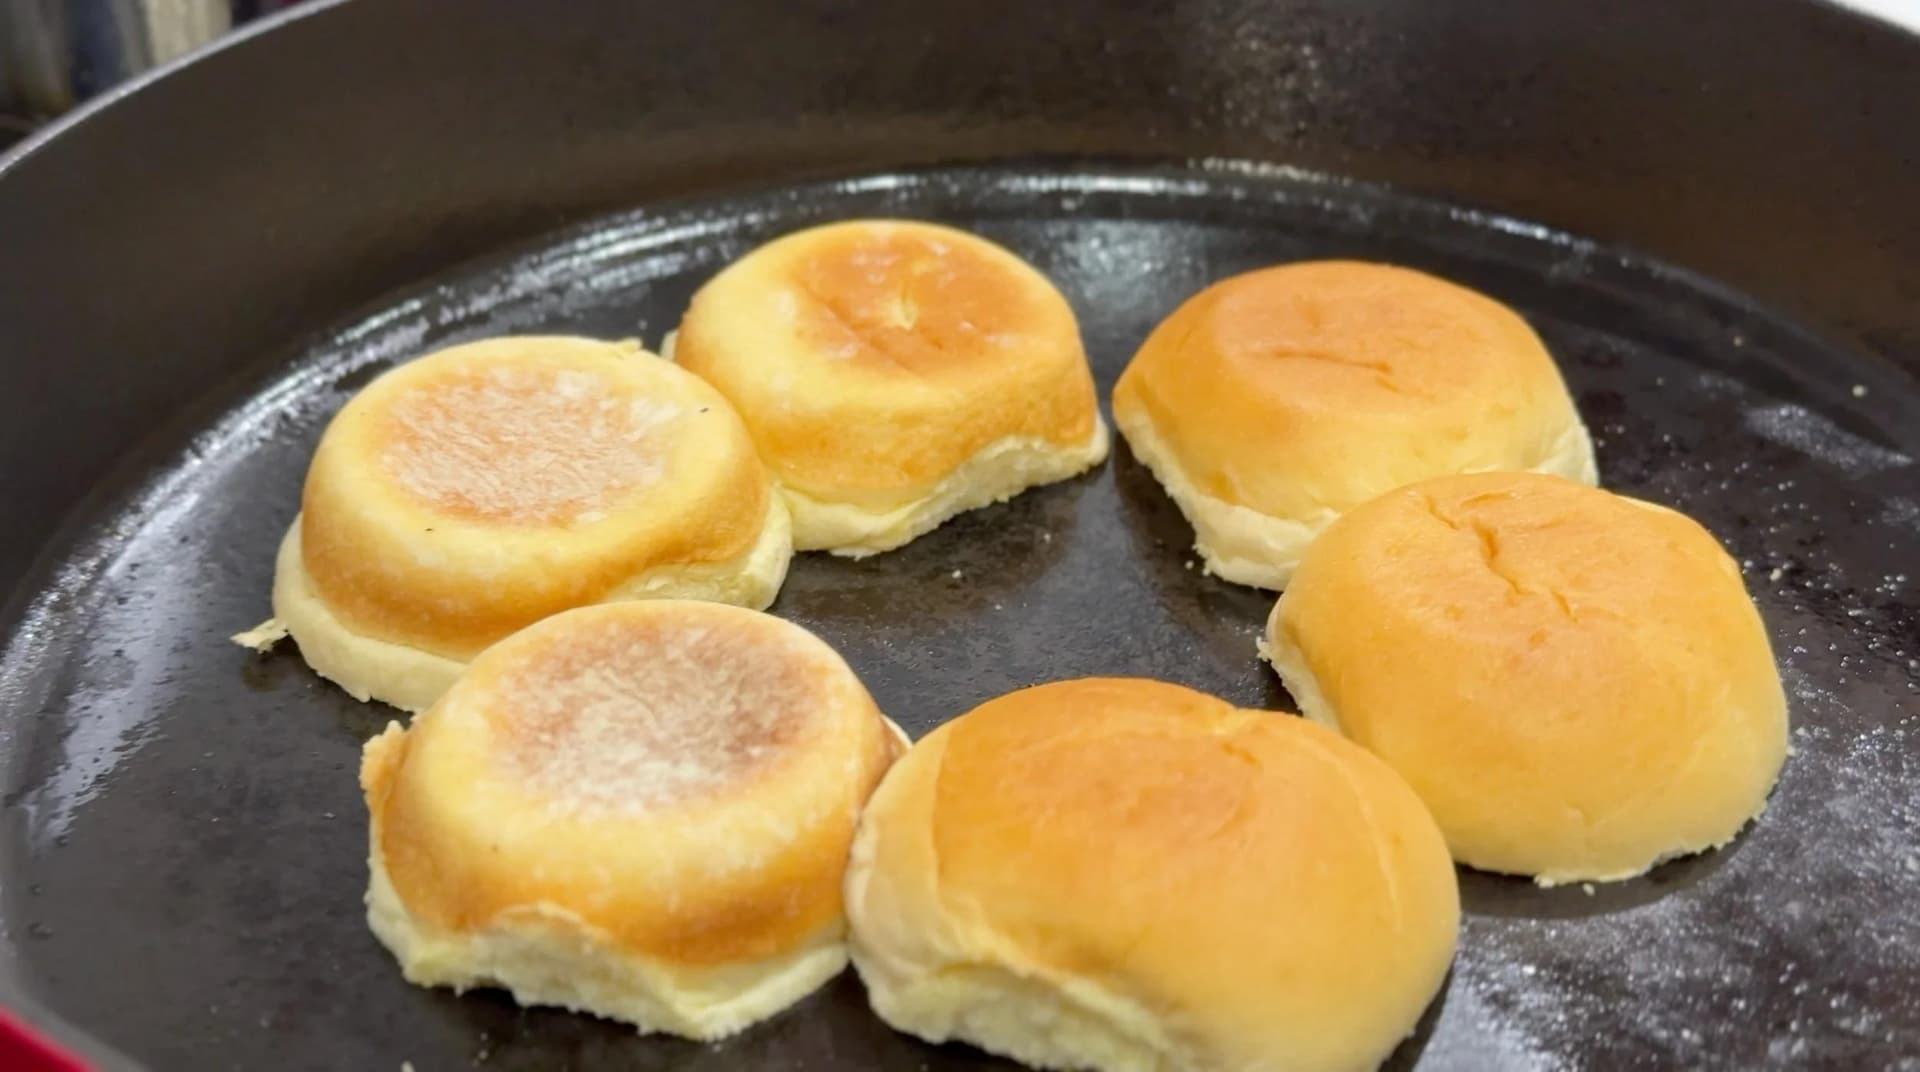
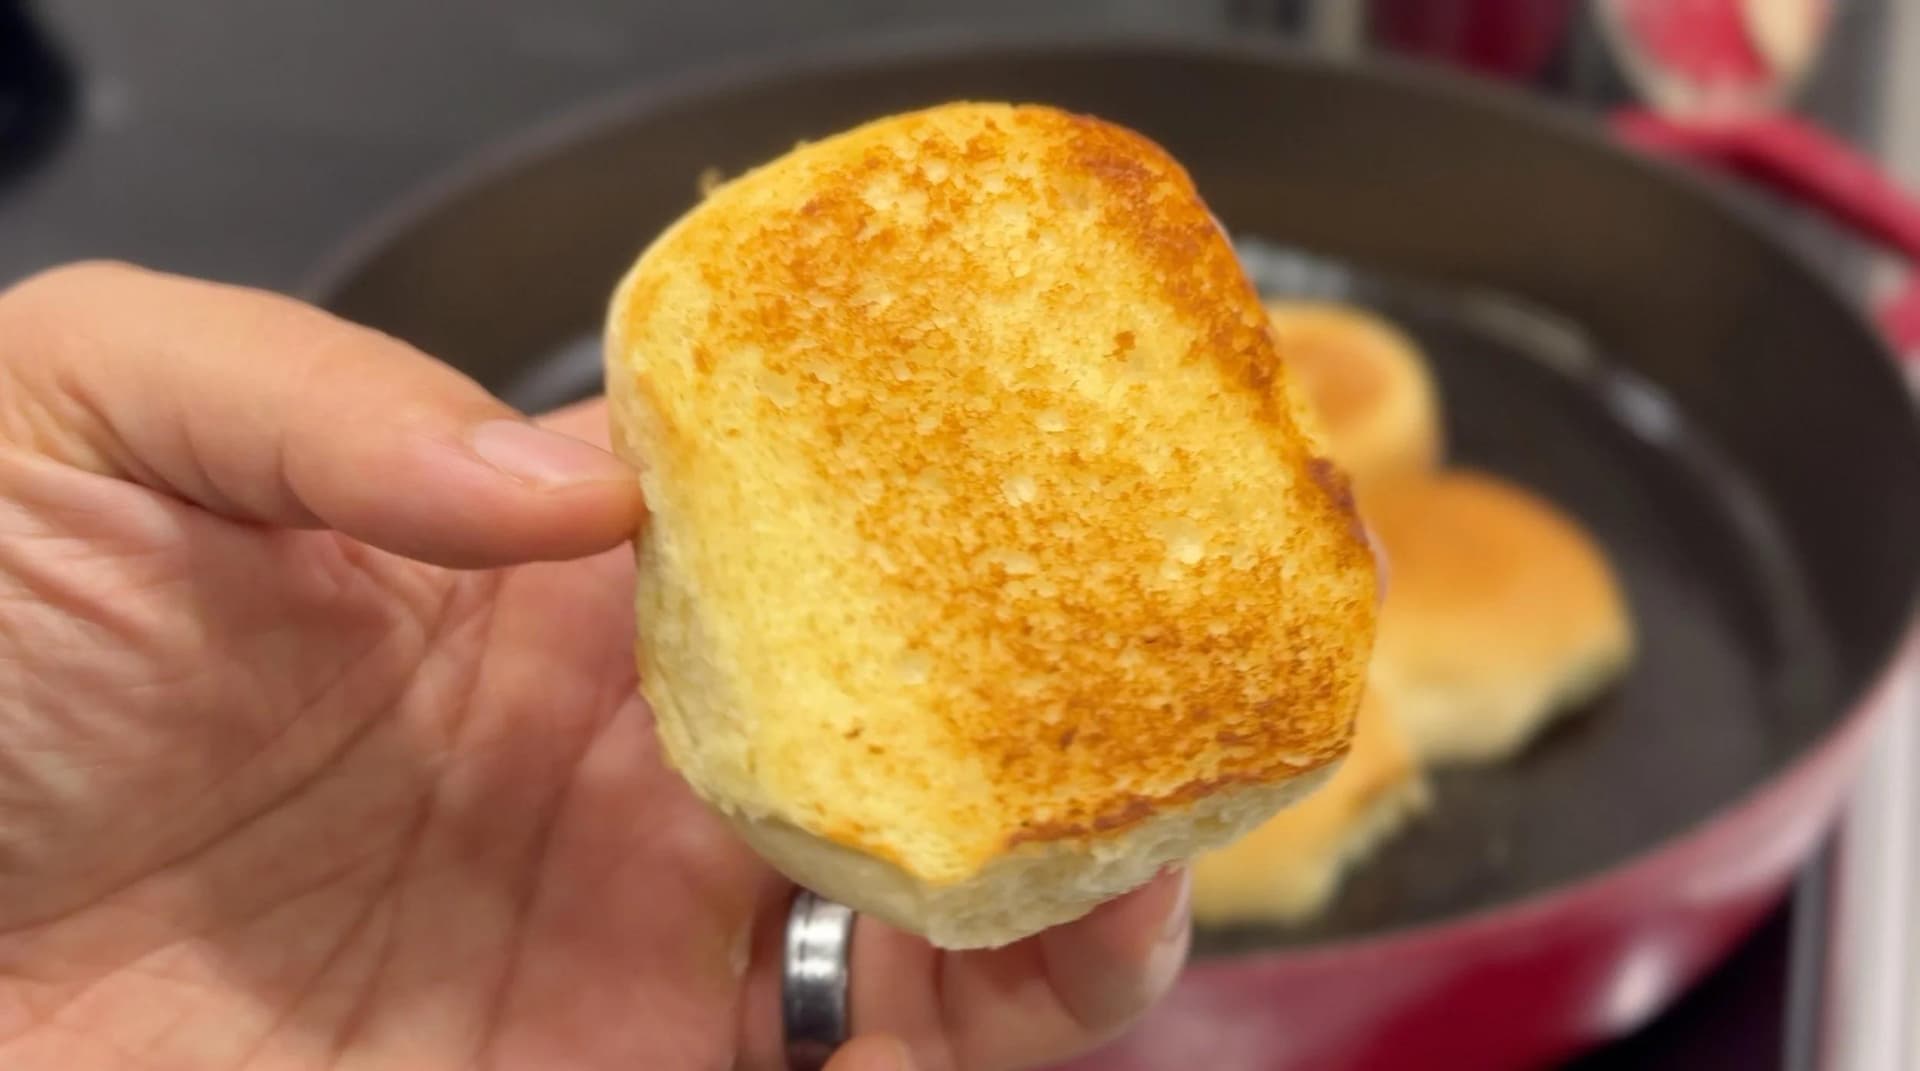
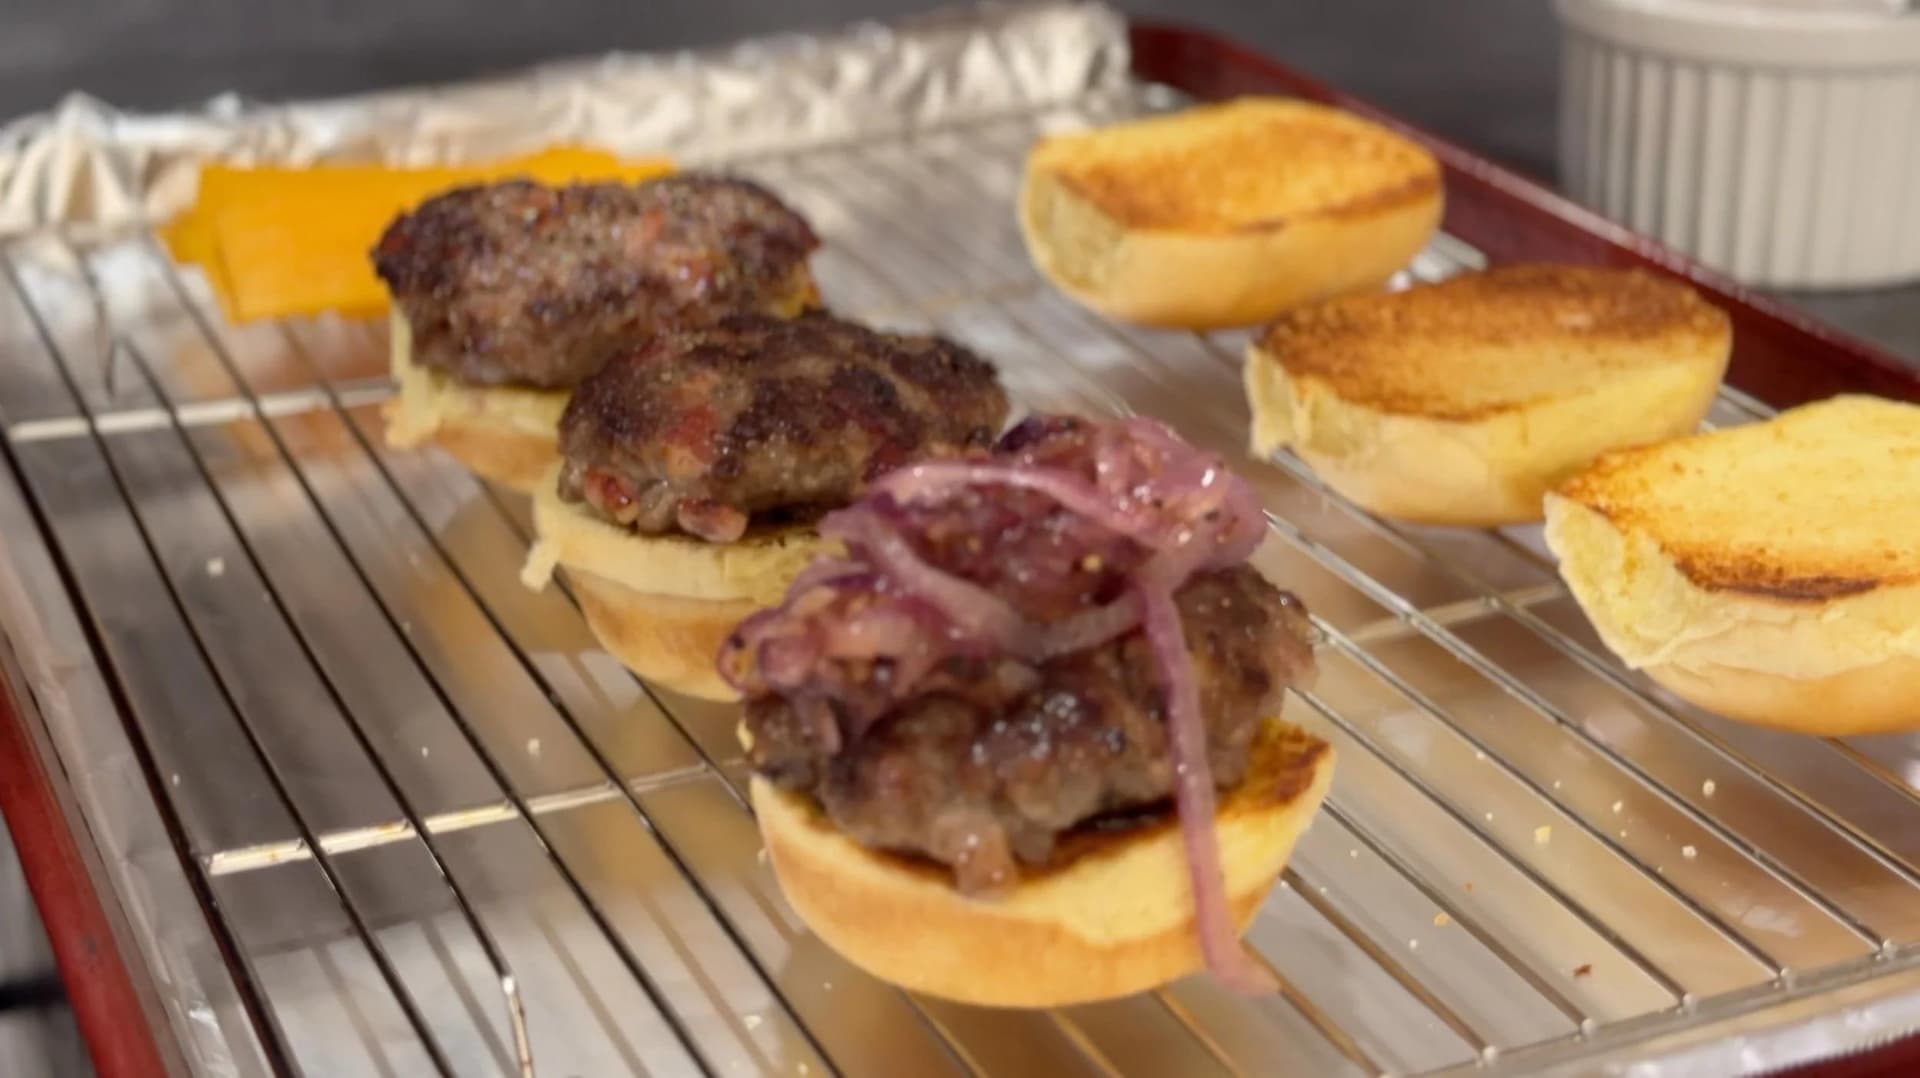
Heat a cast iron pan on medium heat and add some olive oil. Toast the buns with a drizzle of olive oil and then place the tops and bottoms of the toasted buns on a wire rack that has been placed atop a baking sheet.

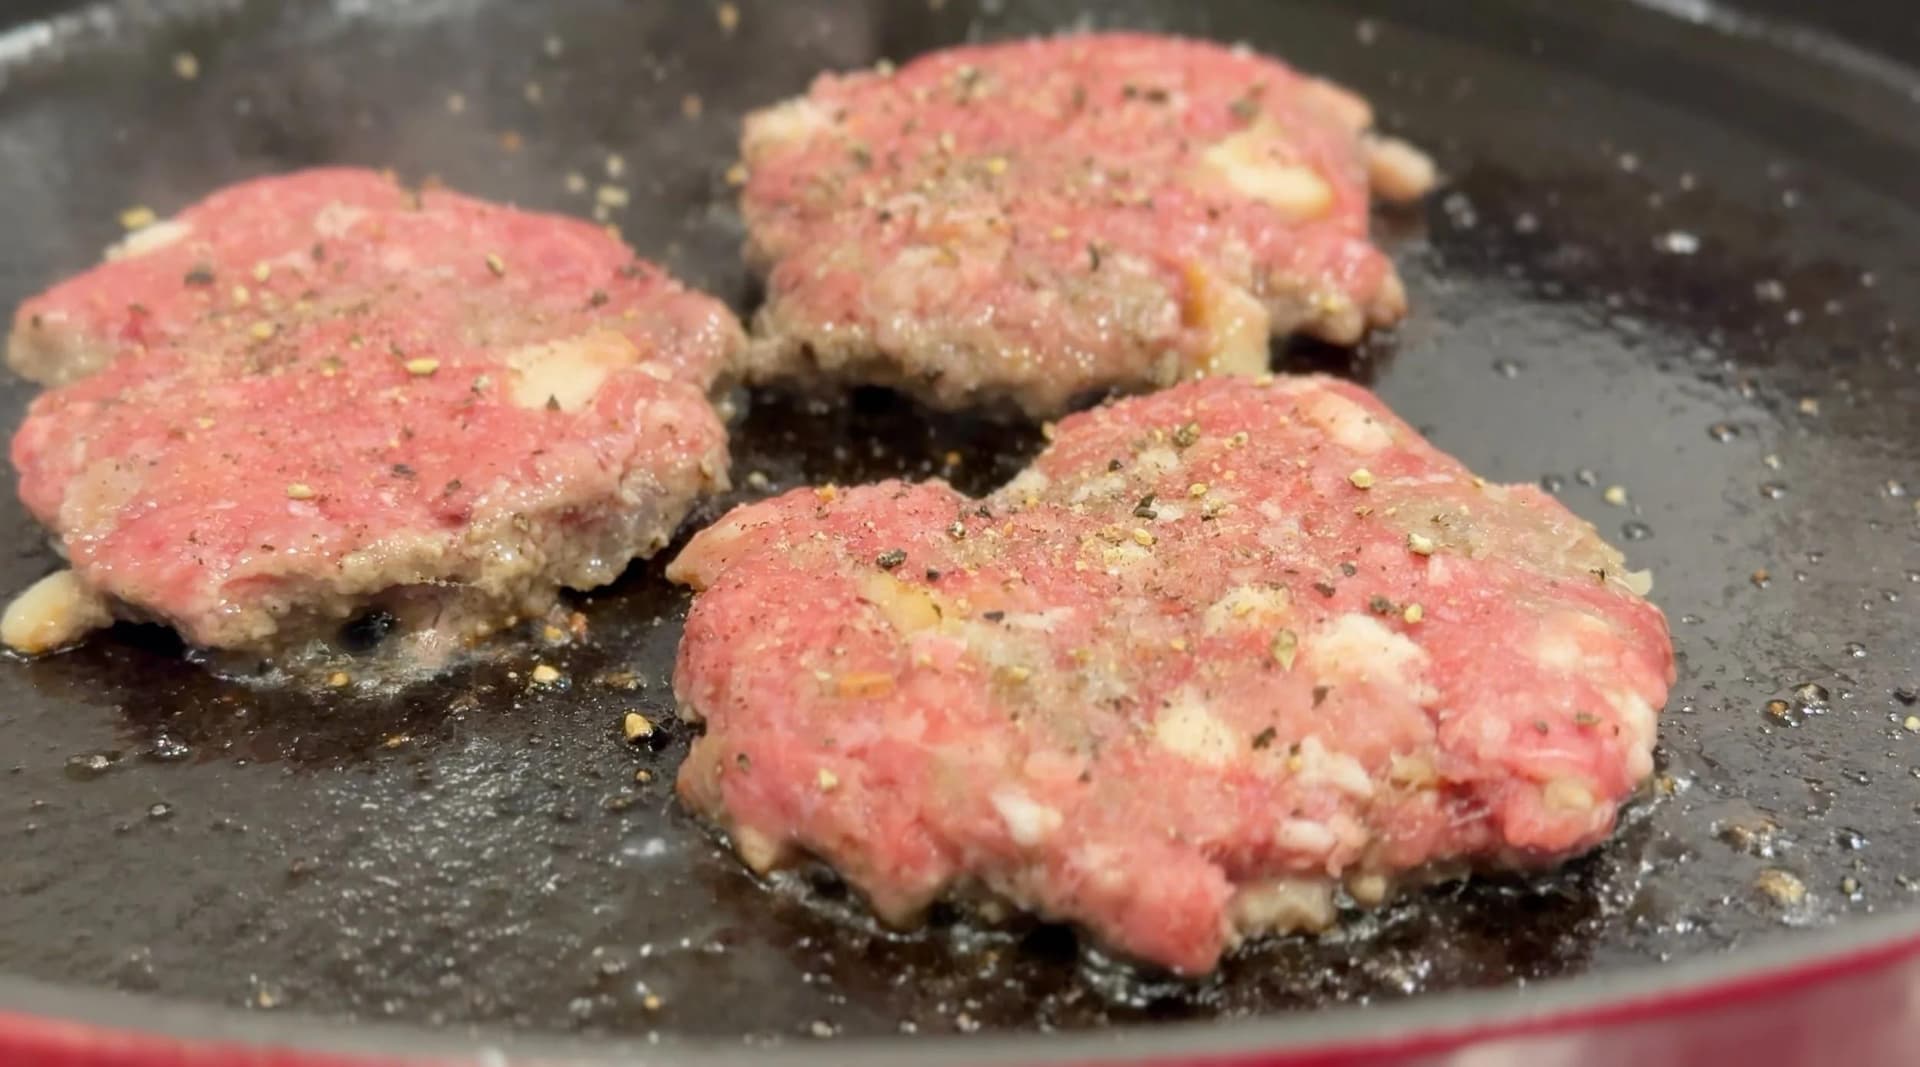
Place the patties on the cast iron pan and then press with a spatula or hamburger press until slightly flattened. Remove the parchment and season with salt and pepper. Cook for 4-5 minutes and use a scraper or a thin metal spatula to scrape the patties and flip them - this will ensure the crispy crust is not lost in the pan. Cook for 1-2 more minutes to finish cooking the patties.


Remove the patties and place on the bottom bun. Divide the caramelized onions evenly between each slider and then top each slider with 2 strips of cheese (1 slice of cheese, cut into thirds to form strips). Turn the blow torch setting to max and ignite the flame over the cheese. Blowtorch using the tip of the flame to melt the cheese and ever so slightly char it. Once done, place the burger tops over the cheese.


Secure with skewers. Serve immediately and enjoy!


Tips for Crazy Good Fired up Cheeseburger Sliders
- Avoid overworking the meat while mixing the ingredients or forming the balls. Over-mixing can actually affect the proteins in the burgers at the molecular level, causing them to bind together resulting in chewy firm texture.
- Make use of parchment paper squares, either store-bought or cut them out yourself. You can use them to prep the patties ahead of time and they are useful while smashing the burgers on the pan.
- There’s no need to add oil to the cast iron for the patties. A well seasoned cast iron, along with the natural fats in the ground beef and bacon will be more than sufficient to deliver excellent juicy burgers.
- A bench scraper is the best way to get all the good crispiness off the pan to get maximum flavour. Alternatively, a metal spatula can be used as-well.


Comments
No comments yet — be the first to share your thoughts!
Leave a comment