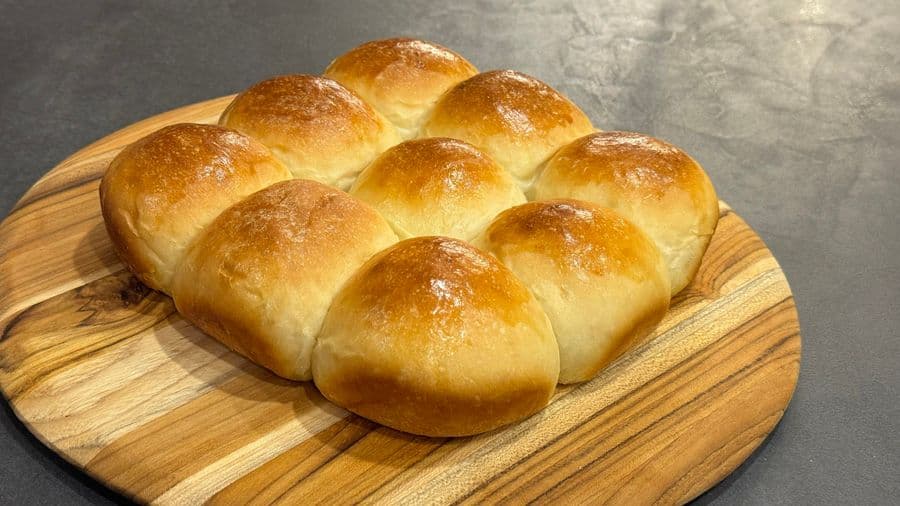
Soft, fluffy dinner rolls that will impress every guest at your holiday table. This easy vegetarian bread recipe delivers perfect results every time. Make your best dinner rolls yet!
Do you love bread as much as I do? In my opinion, one of the most special ways to put your heart on a plate is by accompanying a meal with homemade bread! If it’s been on your bucket list to make Soft and Fluffy Dinner Rolls Recipe that will be incredible for your holiday meal, then you’ve come to the right place! This dinner rolls recipe is a perfect introduction to bread-making, and you can prepare it as part of your Live to Cook one-month challenge! Get started for free today by signing up to my email newsletter, plus all of my exciting new recipes will be sent straight to your inbox!
5 hr 40 min
18 rolls
medium
Elevate Your Holiday Dinner with This Dinner Rolls Recipe
To grasp all the concepts to ensure you have the best possible results when baking bread, be sure to watch the video that will highlight all of the essential tips and tricks to guarantee success! Don’t forget to please subscribe to my YouTube channel if you haven’t already, and be sure to hit the bell button to be notified when all of my video recipes are live! Let’s get baking!
Tools Needed to Make This Soft Dinner Rolls Recipe
What flour should I use to make This Dinner Rolls recipe?▼
My recommendation would be bread flour if you’re serious about making the best dinner roll recipe at home. This is because there is a higher protein content in the flour. As a result, your bread will rise even more than all-purpose flour. However, if you don’t have bread flour, then simple all-purpose flour will do the job fine, but your dinner rolls won’t be so airy and fluffy.
What Milk Should I use to make this Dinner Rolls recipe?▼
Whole milk: The high fat content will really make your dinner rolls super soft and airy, so I recommend it!
Buttermilk: This is what I used here! I like the sourness of buttermilk and it really enhances the flavour of homemade bread. Furthermore, it will give a rich creaminess to the bread.
Other alternatives: If nothing else, use a lower-fat dairy milk if this is all you have. I describe in my motivational guide to explore your potential in the kitchen, Make Cooking Fun!!, how you should use what you already have if it’s appropriate to substitute! In this case, using 1% or 2% milk will be fine, while not the best, but don’t let go out of your way just to buy whole milk in this case! I’ve made dinner rolls with lower fat milk and they’ve turned out fine. HOWEVER, I wouldn’t recommend using dairy-free milk unless you really need to. I’ve never done it, so I cannot comment on the taste or texture.
What Yeast Should I use For This Soft Dinner Rolls Recipe?▼
The yeast that you want to use is regular instant dry yeast or active dry yeast. Here are the four different types of yeast:
Instant dry yeast: This is what I’m using. You can buy this in bulk and it has a long shelf-life, plus it will be ready to use directly from the package as it is always active. Furthermore, what makes this yeast excellent is that you can add it to your dry ingredients and not mix it with water first.
Active dry yeast: This yeast is pricey and does not have a long shelf-life as the instant dry yeast. What you need to do with this yeast is mix it with warm water first. It is easy to mess this up if your water is not at the correct temperature, and your yeast will dry. That’s a waste of a pricey package of yeast and you’ll have to start over! I used to get this type of yeast and it was a bit of a pain to use.
Quick-rise yeast: This yeast will speed up the proofing time of your dough, so it’s great to use this when you’re in a pinch for time. However, I cannot recommend alternative instructions in terms of timing as I’ve not used it. My opinion is to use one of the other two yeasts and allow the appropriate proofing time to get more flavour in your bread.
Bread machine yeast: As the name suggests, this type of yeast is designed to be used if you’re making bread using a bread machine. While the label says you can also use it if you’re making bread in the oven, I’ve never used this yeast myself, so I don’t know how effective it would be.
You can learn more about the different types of yeast by reading this article.
What if I don’t have a stand mixer to knead the dough?▼
In case you are kneading by hand, you need to first bring the ingredients together until you have a loose ball and then start kneading on a clean work surface. Kneading the dough is as simple as pushing the dough away with the heel of your hands and then folding the dough over itself with your fingers as you pull the dough back. This push-pull movement works the proteins in the dough that helps develop the gluten in the bread.
How do I Shape Round Dough Balls?▼
The shape for buns and rolls is call the boule or ball. This is one of the most fundamental shape for baking breads and other shapes can be formed from this boule. The key to getting the right shape is to develop surface tension on the boule portion as you are shaping it. This allows the buns or rolls to rise evenly and helps to limit air pockets. There are a number of ways to shape a boule and here’s two methods you can pick from. I will be using the second method:
Starting from a rough 2 oz ball shape, stretch the outside of the dough into an oblong, without squeezing the gas in the dough excessively. Repeat this action by bringing the opposite ends together to make a ball and repeat. Each time pinch the bottom edge as you use that pinch to push out the dough. Do this until the portion appears smooth.
Cup a 2-ounce portion of the dough with your hands and quickly move your hand in circles over a clean worktop as you put slight pressure to seal the bottom and push the dough outwards with the help of friction between the surface of the worktop and the underside of the dough. Once done, you should have a boule with surface tension that should resemble a mozzarella ball.
How Do I know That the Dough Balls Have Risen?▼
Once the dough is done bulk rising in the bowl, it will visibly appear double in size. Proofing at room temperature and in a spot without drafts of cold air is important to get the right results. You can expect the same with the dough ball “boule” portions once they are done rising.
How Long Do I Bake Dinner Rolls For?▼
These dinner rolls will take approximately 25 to 30 minutes to bake, depending on your oven. Be sure to keep an eye on the dinner rolls, and they’ll appear airy and golden brown.
Extra Tips for the Fluffiest Dinner Rolls Recipe
Proofing temperature: “Room temperature” is defined as 20 to 25 degrees Celsius, or 68 to 72 degrees Fahrenheit. If you live in a cold climate, then you should use the “proof” setting of your oven, if it has it. Otherwise, try to find a warm spot to proof your dough. On the other hand, if you are in a hot climate, then try to keep the dough away from an area that has too much heat.
Kneading: You need to make sure the texture of your dough is perfect. If it is too dry, then add some extra milk and continue kneading. On the other hand, if your dough is too wet, then add some flour to dry it out. You want to look for a dough that will have the edges of the bowl clean but have a bit of tackiness. When you push on it, it should bounce back.
Weighing ingredients: Baking involves chemistry to yield the desired results, so you have to be precise (even if you think your scale eye are great!). A kitchen scale really is key to ensure you have the exact amount of ingredients as listed so that your dinner rolls are delicious and look great!
Patience - shaping the dough: I know it seems like there are a lot of steps and it will take a couple of hours before your dinner rolls are finally ready, but the patience is worth it! You really want to give the dough the time to rise so that it is not only tasty but soft and airy. The two rounds of proofing really makes the difference! Bread baking is supposed to be relaxing, not rushed, so be sure to plan accordingly.
Baking position: Be sure to bake the dinner rolls in the middle rack of your oven so that they get fully cooked through with a wonderful golden brown color.
Ingredients for the Softest Holiday Dinner Rolls Recipe
To save the recipe for later and for the ingredient list with their quantities, scroll to the bottom of this post or press the “Jump to Recipe” button for the FULL PRINTABLE RECIPE CARD! You can scale the dinner rolls recipe based on how many dinner rolls you feel like making, and you’ll know exactly how much of each ingredient you’ll need for perfect results!
Topping: garlic butter, honey butter or garlic-herb butter. You can use any of these, or just regular butter, for topping if desired.
How to Make Super Soft Dinner Rolls Recipe
In a large bowl or the bowl of your stand mixer, measure out the flour, salt, yeast and sugar.
Give a quick stir to combine.
Then, add the butter, milk and egg, Reserve about a 1/4 cup of milk for later.
If using a stand mixer, mix on low speed with the paddle attachment until the dough comes together. Then, switch to the dough hook and mix on low speed until the dough is soft and tacky, about 5-6 minutes. The dough should not be sticky to the touch, and it should clear the sides of the mixer bowl, while some dough should be sticking at the bottom of the mixer. Add more flour as required to get the required consistency.
If kneading manually, mix with a wooden spoon until the dough comes together. Then, transfer the dough to a clean work surface and begin kneading until the dough is soft, tacky but not sticky - about 5-6 minutes. Add more flour as required to get the required consistency.
Spray or brush a clean large bowl with olive oil and then form the kneaded dough into a ball and place in the prepared bowl. Roll around in the oil to coat, cover with plastic wrap and allow dough to proof for 1 1/2 to 2 hours - or until the dough doubles in size.
For dinner rolls, portion out the fermented dough into 2-ounce portions using a dough cutter and a scale. One at a time, cup the portion of dough with your hands and quickly move your hand in circles to create a boule - a taut ball of dough that should resemble a mozzarella ball.
Place each portion to a casserole sprayed or brushed with olive oil, spacing them at least 1 inch apart.
Spray or brush the top of the portions with olive oil and cover the casserole with plastic wrap. Proof for another 1 1/2 to 2 hours or until the portions double in size.
Preheat the oven to 400 F and adjust the oven rack to the middle position. Prepare the egg wash by whipping the egg and water until frothy.
Then, brush the egg wash over the buns, coating them evenly. Bake for 20-25 minutes or until the tops are golden brown.
Remove from the oven and allow the casserole to cool down slightly. Once the dinner rolls have cooled down and become soft (about 1 hour), use a thin spatula to remove the rolls from the casserole.
Top with your preferred butter topping from above and serve fresh.
How to Keep Dinner Rolls Warm?▼
You can either wrap it in aluminum foil or with a kitchen towel or cloth. Ideally, you would place the dinner rolls in a bread basket and cover them there.
Otherwise, you can place your bread in the oven when it is off and mostly cooled down. It will do the job just fine!
Flavor Variations of This Soft Dinner Rolls Recipe
Coq au Vin: Another recipe where you’ll want soft dinner rolls to scoop up that amazing sauce!
Smash Burger Sliders: Got leftover dinner rolls from your holiday meal? Use them up in a creative way for a quick and incredible meal!
How to Freeze Dinner ROlls▼
I would recommend that you freeze the raw dough as opposed to the baked rolls. To do this, after you have let the dough complete the first bulk rise and portioned the individual dough balls, you can place any extra boules/dough portions on a baking sheet and wrap with 2-3 layers of plastic wrap and set it in the freezer. You may also individually pack the portions in Ziploc bags once they have been frozen on the baking sheet for easy access.
Technically you can also freeze the dinner rolls once they are baked, however, this does not mean that you should! In my experience, freezing the baked rolls then thawing results in the bread drying out, so I would avoid doing that.
Thawing Dinner Rolls
Allow the dough to thaw naturally in the fridge overnight or for about 8 hours.
Let me know what you think of this recipe in the comments! If you’ve tried this recipe, be sure to post it on social media and tag it with #cookingwithanadi and mention me @cooking.with.anadi. Thank you!
Recipe by Anadi Misra
Elevate Your Holiday Dinner with This Dinner Rolls Recipe
Soft, fluffy dinner rolls that will impress every guest at your holiday table. This easy vegetarian bread recipe delivers perfect results every time. Make your best dinner rolls yet!
In a large bowl or the bowl of your stand mixer, measure out the flour, sugar, salt and yeast. Give a quick stir to combine. Then, add the egg, butter and milk (reserve about a ¼ cup of milk for later).
In a large bowl or the bowl of your stand mixer, measure out the flour, sugar, salt and yeast. Give a quick stir to combine. Then, add the egg, butter and milk (reserve about a ¼ cup of milk for later).
2
If using a stand mixer, mix on low speed with the paddle attachment until the dough comes together. Then, switch to the dough hook and mix on low speed until the dough is soft and tacky, about 5-6 minutes. The dough should not be sticky to the touch, and it should clear the sides of the mixer bowl, while some dough should be sticking at the bottom of the mixer. Add more flour as required to get the required consistency.
If using a stand mixer, mix on low speed with the paddle attachment until the dough comes together. Then, switch to the dough hook and mix on low speed until the dough is soft and tacky, about 5-6 minutes. The dough should not be sticky to the touch, and it should clear the sides of the mixer bowl, while some dough should be sticking at the bottom of the mixer. Add more flour as required to get the required consistency.
3
If kneading manually, mix with a wooden spoon until the dough comes together. Then, transfer the dough to a clean work surface and begin kneading until the dough is soft, tacky but not sticky - about 5-6 minutes. Add more flour as required to get the required consistency.
If kneading manually, mix with a wooden spoon until the dough comes together. Then, transfer the dough to a clean work surface and begin kneading until the dough is soft, tacky but not sticky - about 5-6 minutes. Add more flour as required to get the required consistency.
4
Spray or brush a clean large bowl with olive oil and then form the kneaded dough into a ball and place in the prepared bowl. Roll around in the oil to coat, cover with plastic wrap and allow dough to proof for 1 1/2 to 2 hours - or until the dough doubles in size.
Spray or brush a clean large bowl with olive oil and then form the kneaded dough into a ball and place in the prepared bowl. Roll around in the oil to coat, cover with plastic wrap and allow dough to proof for 1 1/2 to 2 hours - or until the dough doubles in size.
5
For dinner rolls, portion out the fermented dough into 2-ounce portions using a dough cutter and a scale. One at a time, cup the portion of dough with your hands and quickly move your hand in circles to create a boule - a taut ball of dough that should resemble a mozzarella ball. Place each portion to a casserole sprayed or brushed with olive oil, spacing them at least 1 inch apart.
For dinner rolls, portion out the fermented dough into 2-ounce portions using a dough cutter and a scale. One at a time, cup the portion of dough with your hands and quickly move your hand in circles to create a boule - a taut ball of dough that should resemble a mozzarella ball. Place each portion to a casserole sprayed or brushed with olive oil, spacing them at least 1 inch apart.
6
Spray or brushed the top of the portions with olive oil and cover the casserole with plastic wrap. Proof for another 1 1/2 to 2 hours or until the portions double in size.
Spray or brushed the top of the portions with olive oil and cover the casserole with plastic wrap. Proof for another 1 1/2 to 2 hours or until the portions double in size.
7
Preheat the oven to 400 F and adjust the oven rack to the middle position. Prepare the egg wash by whipping the egg and water until frothy. Then, brush the egg wash over the buns, coating them evenly. Bake for 20-25 minutes or until the tops are golden brown.
Preheat the oven to 400°F (204°C) and adjust the oven rack to the middle position. Prepare the egg wash by whipping the egg and water until frothy. Then, brush the egg wash over the buns, coating them evenly. Bake for 20-25 minutes or until the tops are golden brown.
8
Remove from the oven and allow the casserole to cool down slightly. Once the dinner rolls have cooled down and become soft (about 1 hour), use a thin spatula to remove the rolls from the casserole.
Remove from the oven and allow the casserole to cool down slightly. Once the dinner rolls have cooled down and become soft (about 1 hour), use a thin spatula to remove the rolls from the casserole.
9
Top with your preferred butter topping from above and serve fresh.
Top with your preferred butter topping from above and serve fresh.
Nutrition per serving
171
Calories
6g
Protein
27g
Carbs
4g
Fat
1g
Fiber
3g
Sugar
271mg
Sodium
Share This Recipe
Did you make this recipe? Tag @cooking.with.anadi on Instagram and hashtag it #cookingwithanadi
Tested & written in Anadi’s kitchen
Free weekly newsletter
Like this recipe? Get more every week.
New recipes, cooking tips, and behind-the-scenes from Anadi's kitchen.
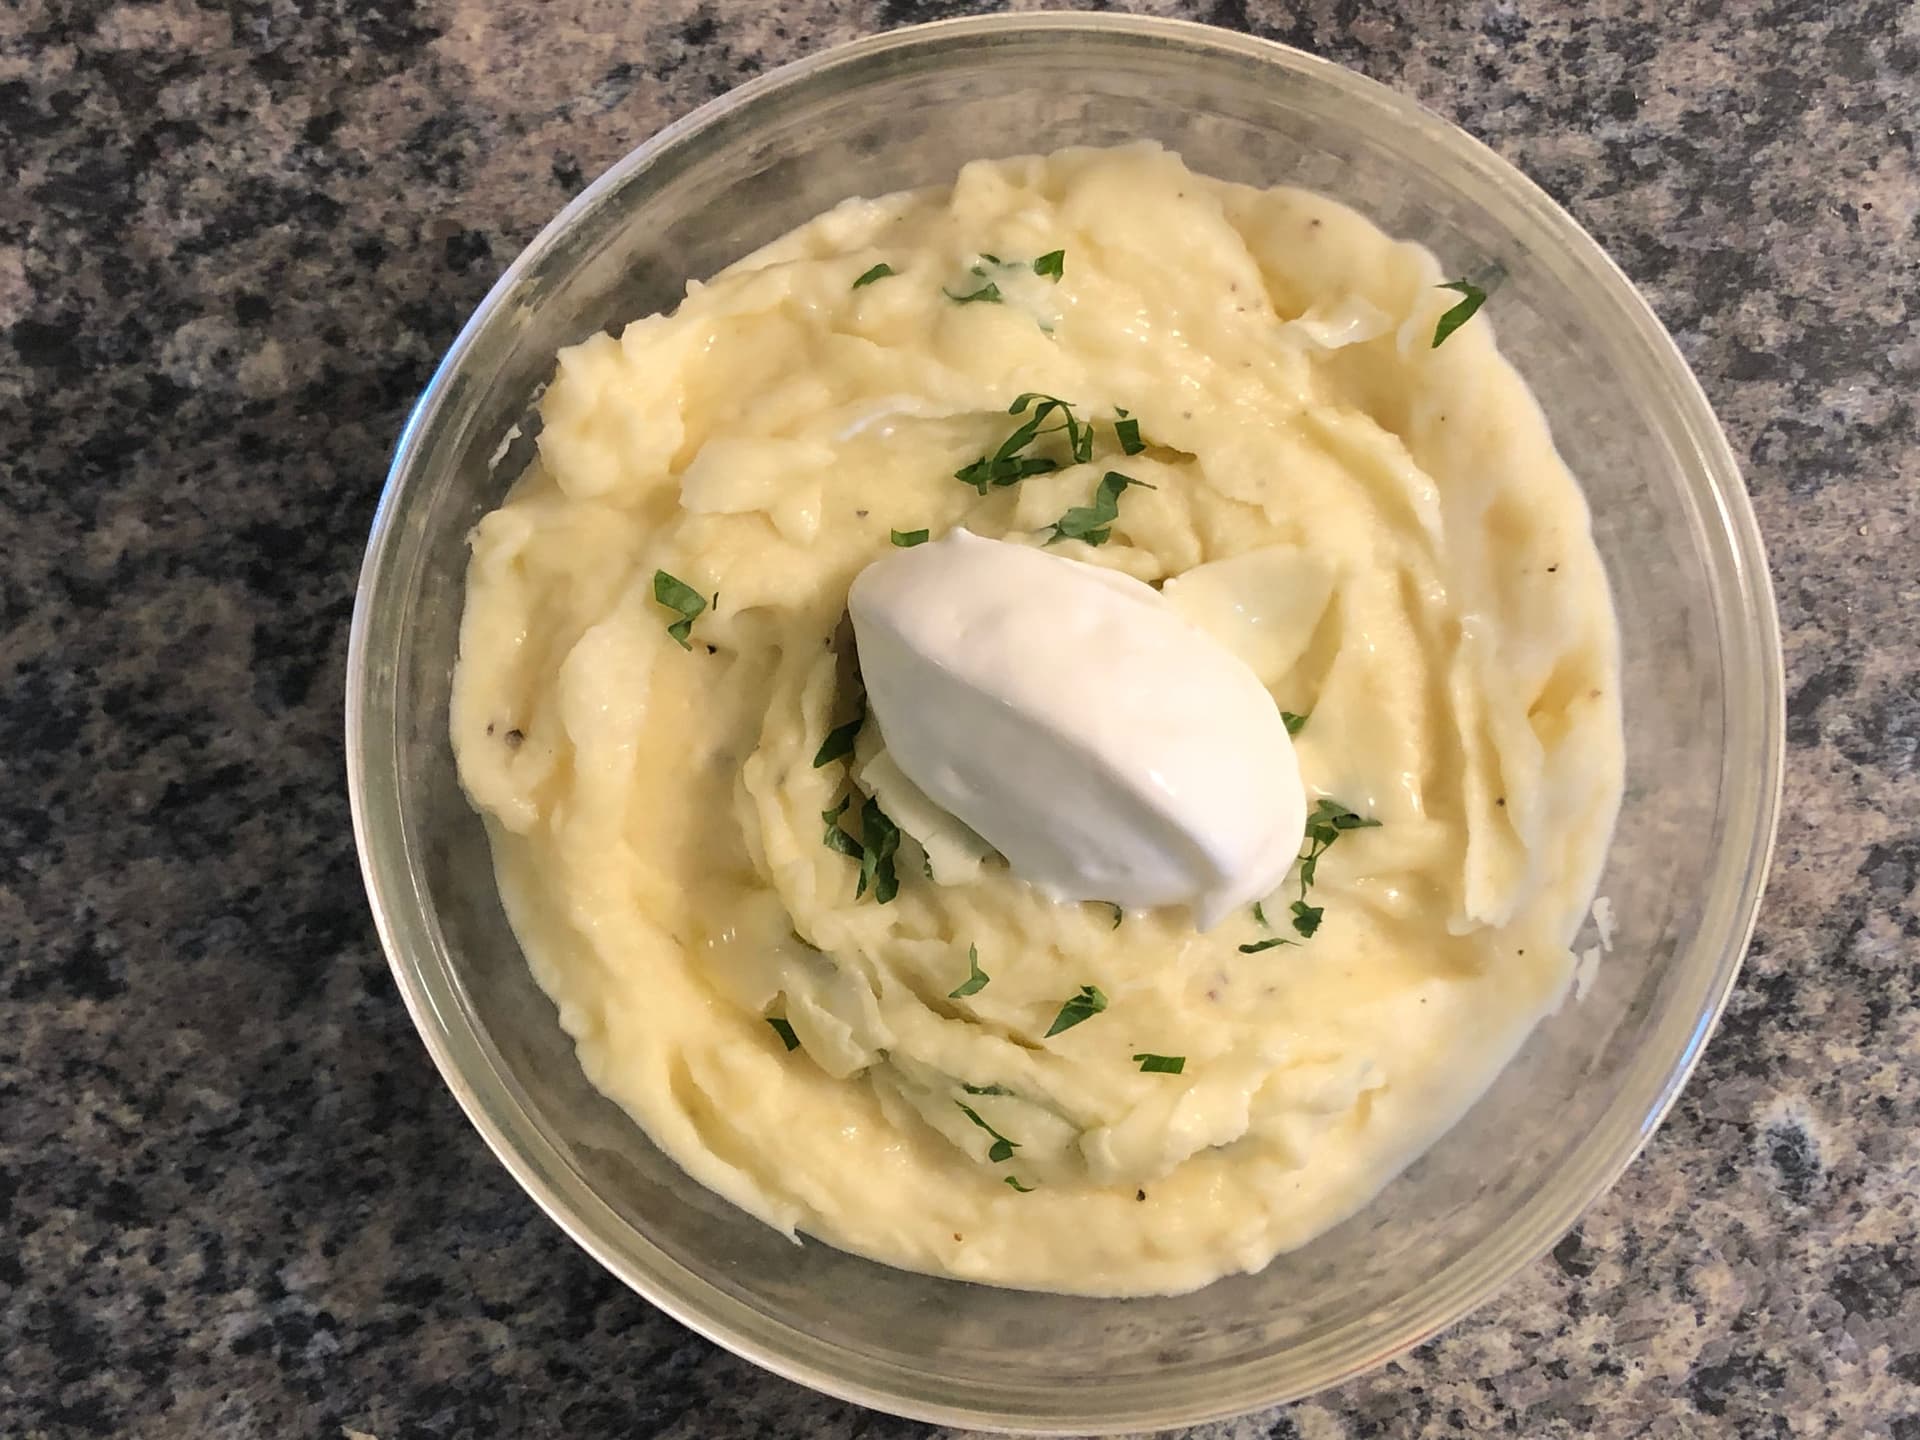
Make the creamiest homemade mashed potatoes with this easy, foolproof recipe. Rich, buttery, and perfectly smooth every time. Your new go-to comfort side dish starts here.
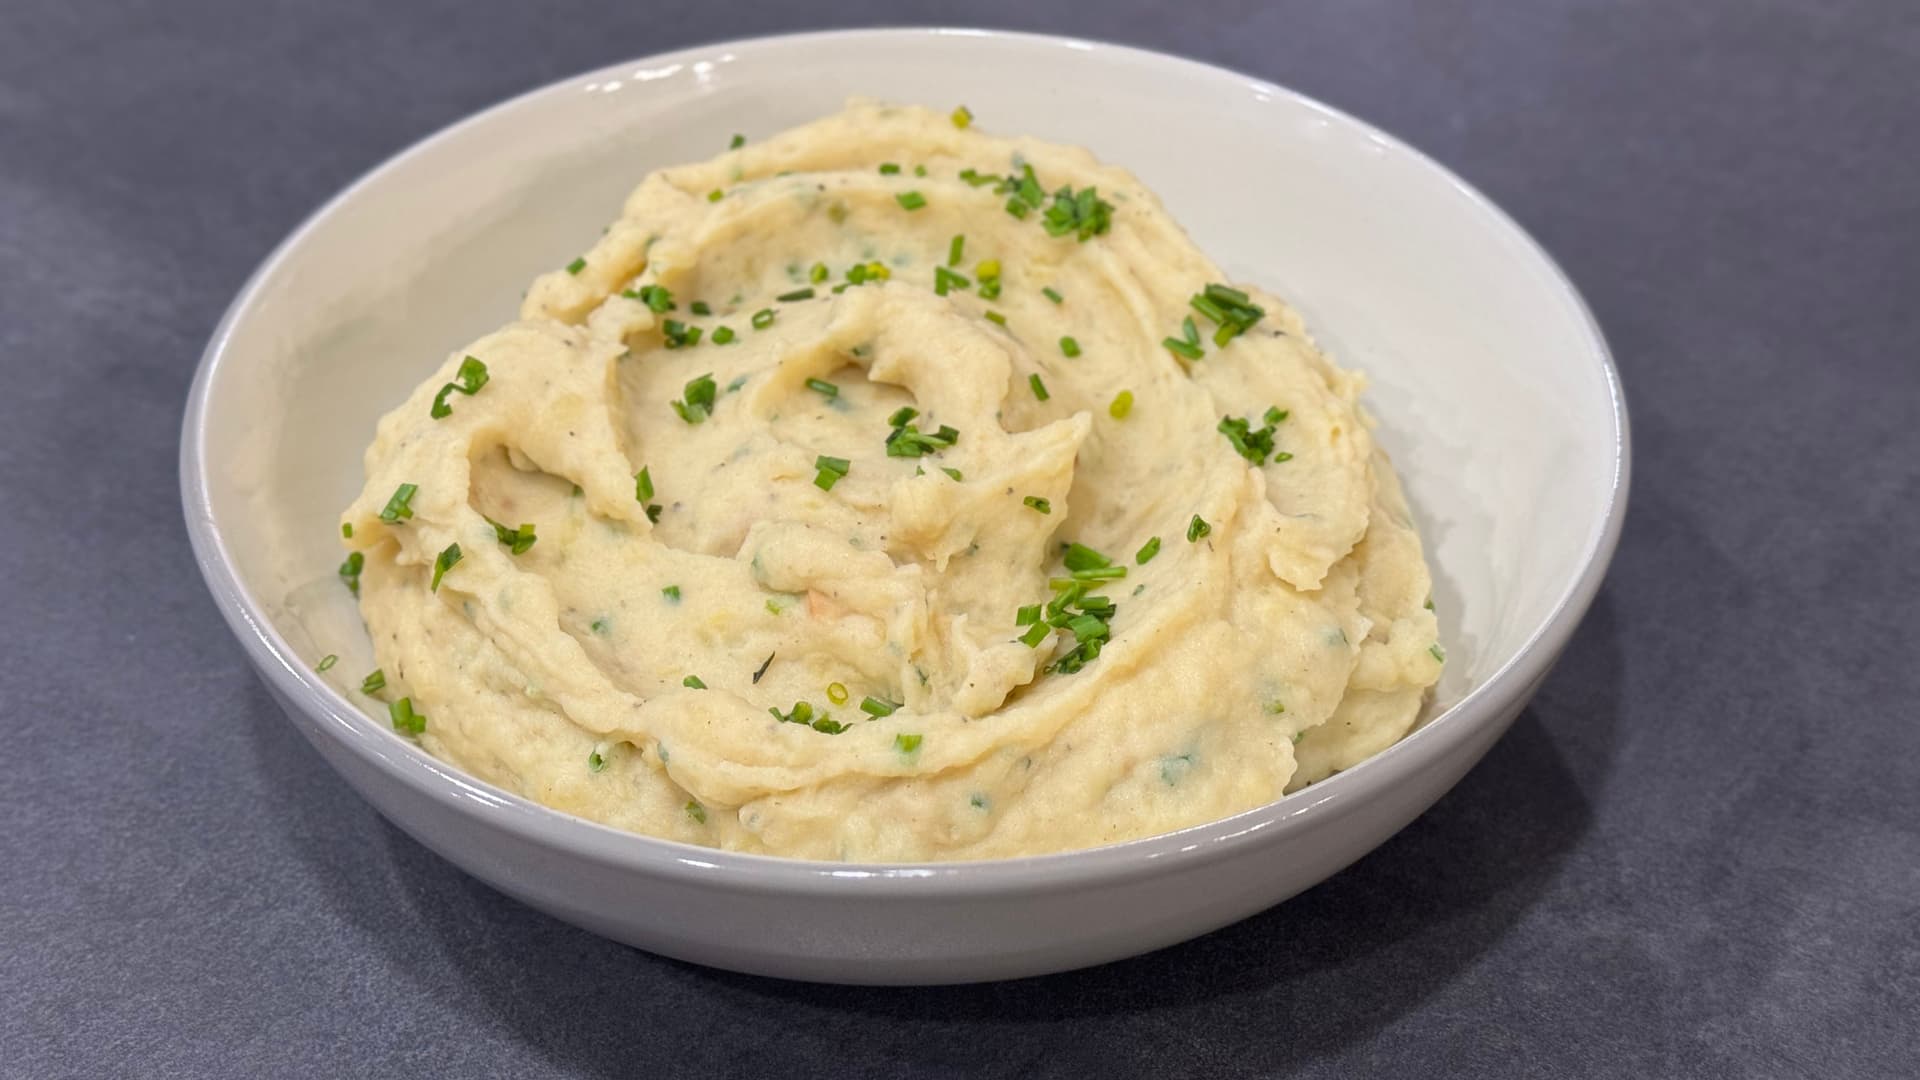
Make the creamiest, most buttery garlic-herb mashed potatoes of your life. This foolproof recipe delivers ultra-smooth results every time. Perfect for weeknights or holidays alike.
Creamy, savory-sweet mashed potatoes made with simple ingredients for the perfect fall side dish. Your new go-to homemade recipe that delivers rich, velvety results every time.
Make the best creamed spinach in minutes! Rich, garlicky, and irresistibly creamy, this easy side dish is perfect for any meal. A vegetarian recipe the whole family will love.
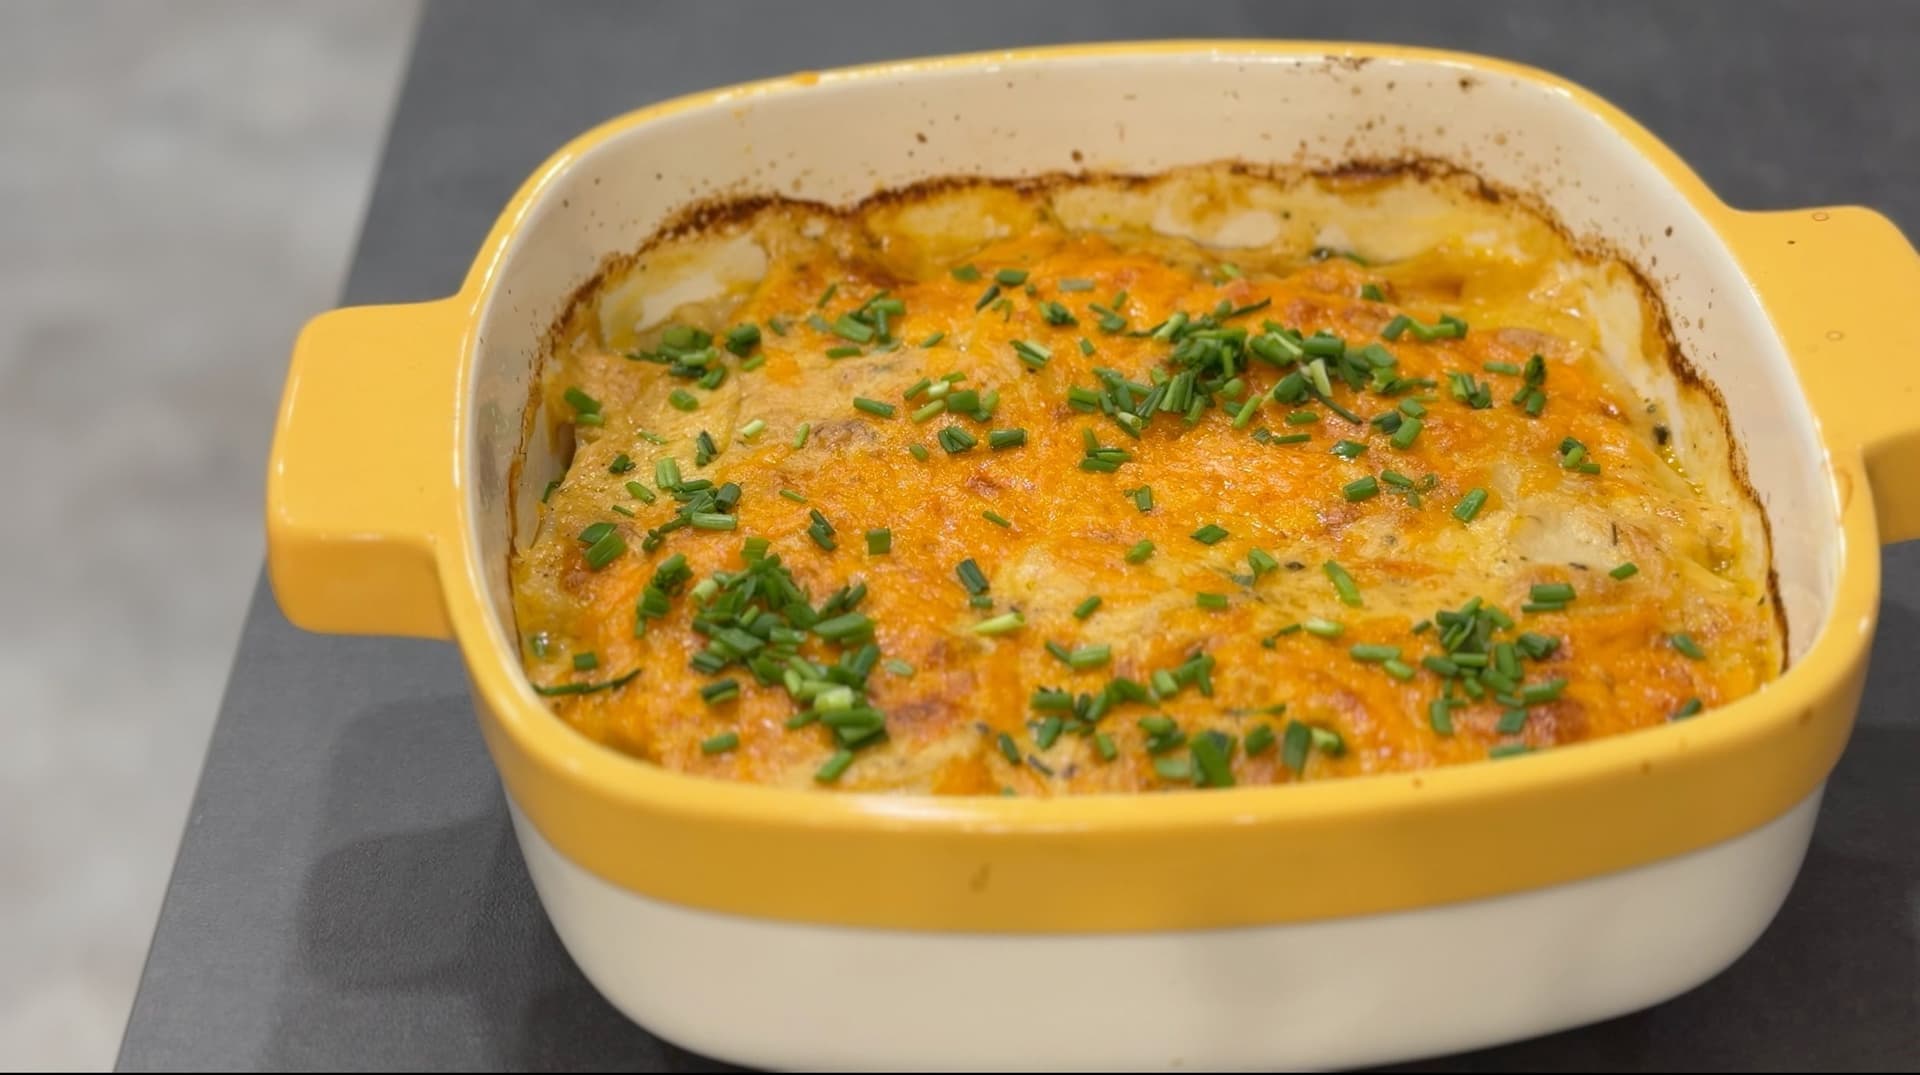
Make the best scalloped potatoes of your life with this ultra-creamy, cheesy recipe. Perfectly layered and bubbling with flavor, it is the ultimate vegetarian side dish for any dinner table.
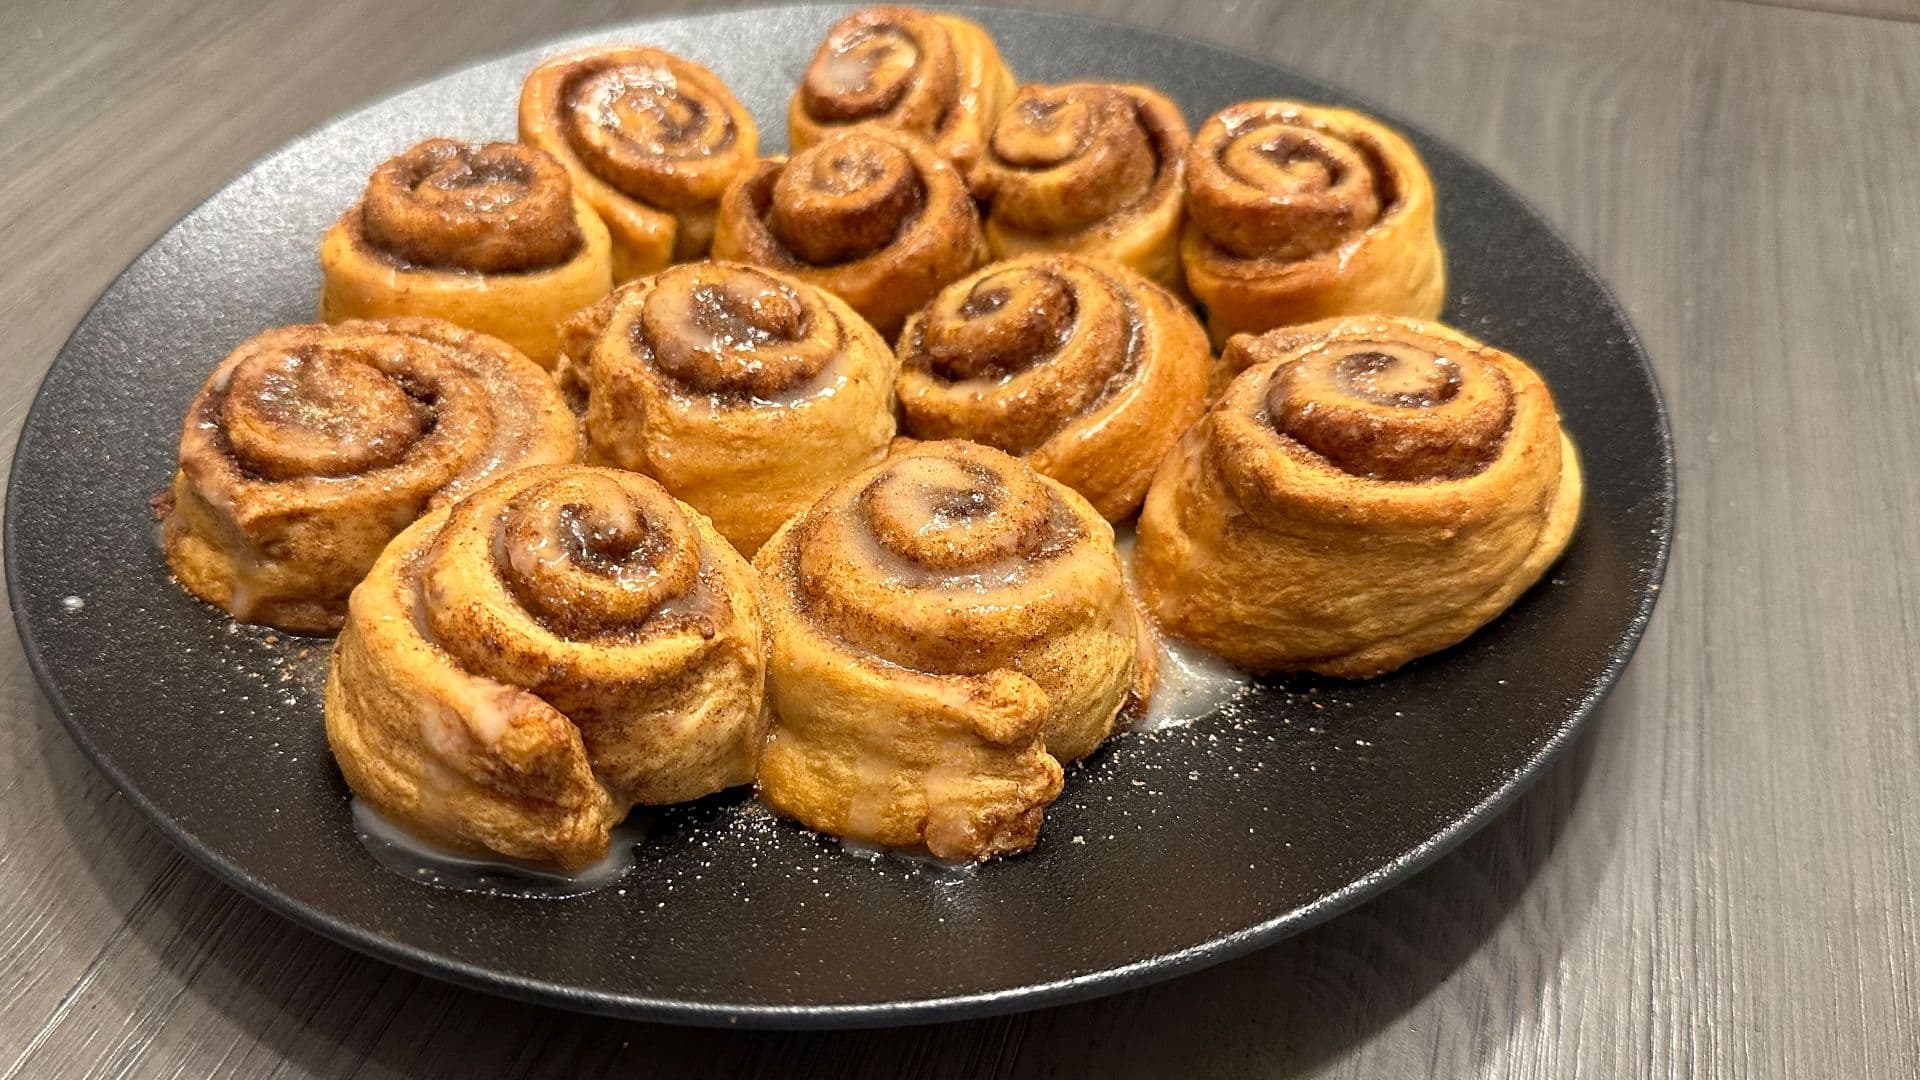
Fluffy, gooey crescent roll cinnamon rolls made right in your air fryer in minutes. An easy shortcut dessert the whole family will love with minimal cleanup required.
28 minEasy12 rolls
Comments
No comments yet — be the first to share your thoughts!


Comments
No comments yet — be the first to share your thoughts!
Leave a comment