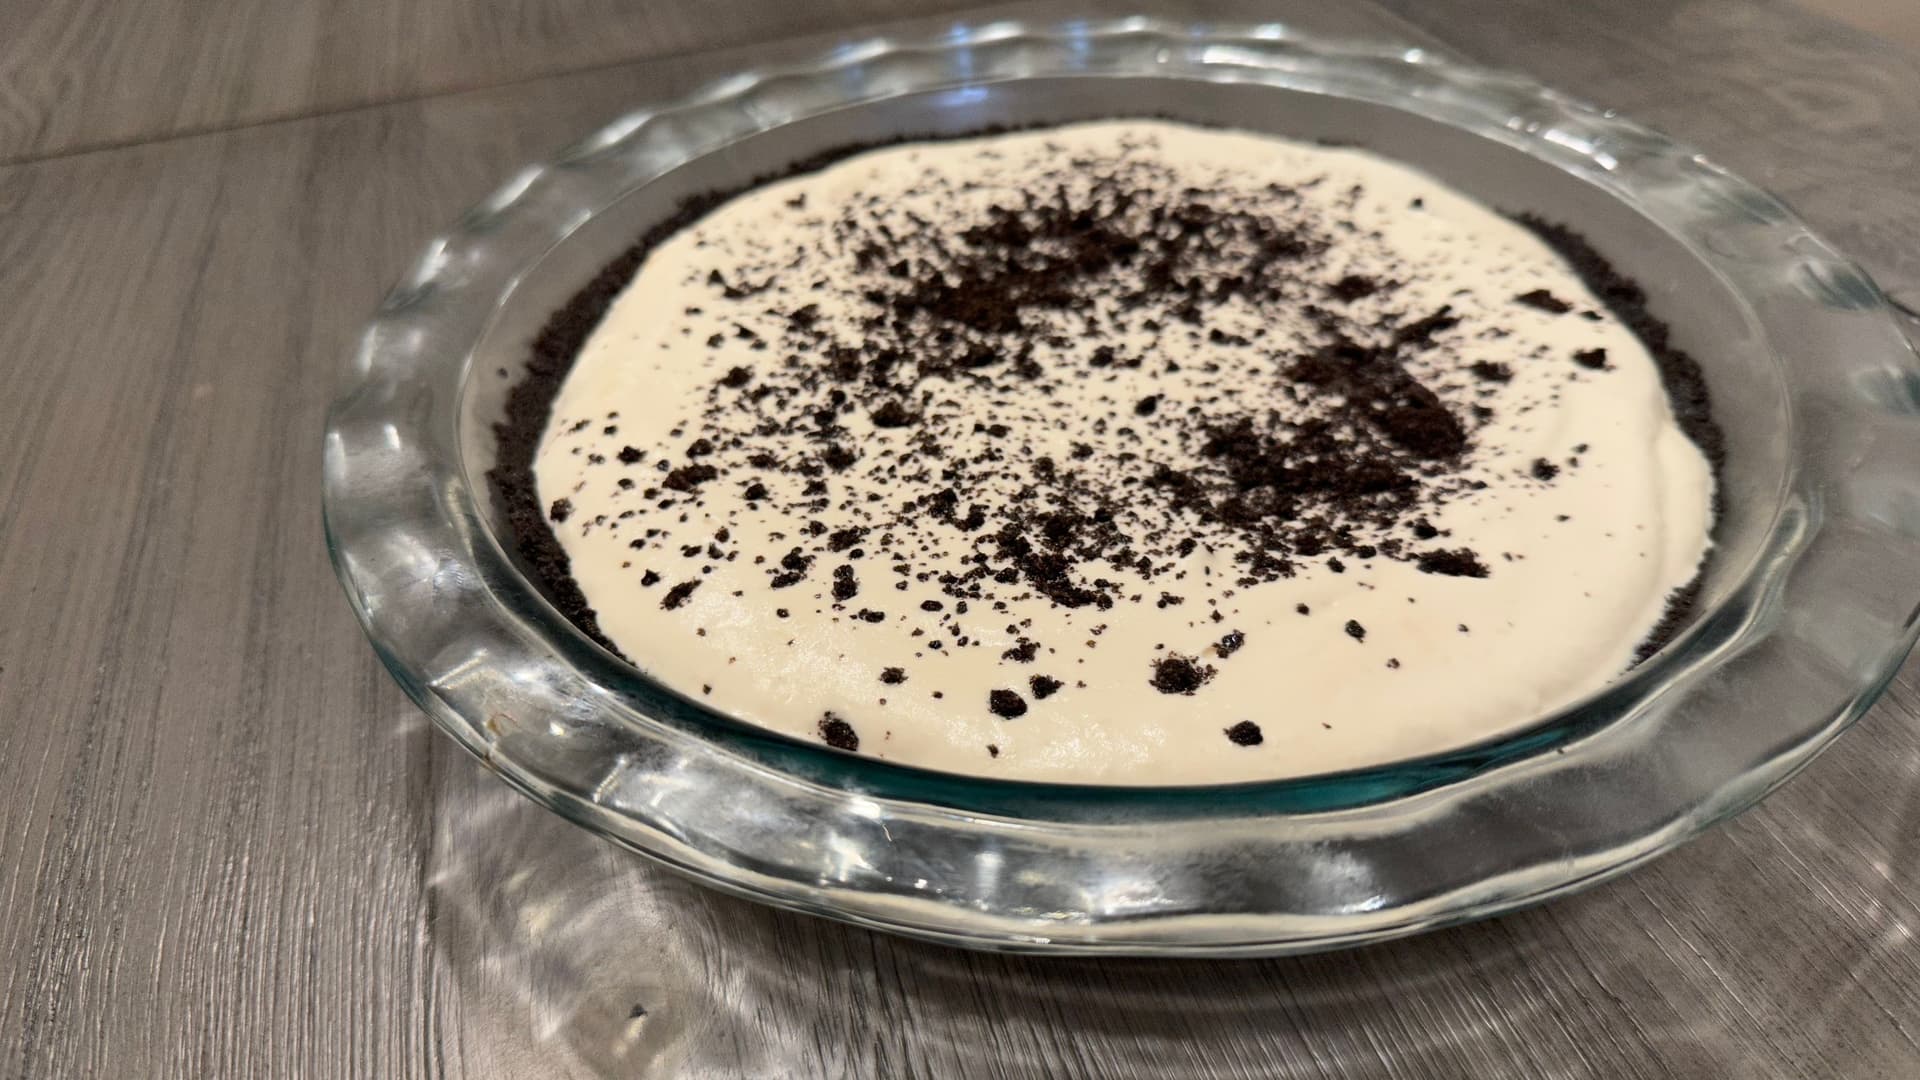
Creamy, indulgent, and ready without turning on the oven! This no-bake Oreo mud pie is the ultimate easy dessert that comes together fast and disappears even faster.
A mud pie, also known as a “Mississippi mud pie” is a chocolatey pie that consists of cake, cookies, ice cream, whipped cream, and pudding over a cookie crust. There are many variations of Mississippi mud pies, and there is not a clear history about it. However, it is believed that the pie originates from the Mississippi mud cake in the 1970s. There are also beliefs that because the Mississippi river was the coolest place around, the pie was enjoyed along with watermelon. Whatever the origin is, the one thing that there is consensus on is that the name refers to the dark mud that’s found along the Mississippi river! If you want to learn more about the debate about the Mississippi mud pie, check out this article by Eater!
36 hr 45 min
8 slices
medium
Dive into Oreo Goodness with this Easy No Bake Oreo Mud Pie!
Before making this No Bake Oreo Mud Pie, I’ve never had a no-bake pie. In fact, I’ve never actually had a pie before until my Deep Dish Pumpkin Pie recently! I loved that pie so much that I knew I had to make another, and try a no-bake version for a chilled treat and so it’s nice and easy. What’s your favourite no-bake pie? Let me know in the comments so I can try a new one!
I share more details in my 5 Tips To Make Cooking Fun! free guide how having a theme can inspire you to get creative in the kitchen. If you’re looking to explore new pie recipes, then this Mud Pie with Oreos is totally for you! Serve this for your loved ones over the holidays to put your heart on this pie dish as part of your one-month Live to Cook challenge! Sign up for my email newsletter to get these free goodies and to kick start your cooking journey!
If you want to see the breakdown of all the steps in how to assemble this kid-friendly No Bake Oreo Cream Pie, then don’t forget to watch the video! If you’re not already, please subscribe to my YouTube channel and press the bell button to receive the notifications when all my video recipes go live! I love sharing video recipes along with the written ones so you’ve got a visual representation of everything and all the pieces really come together! Let’s get cooking!
Why You’ll Love Mud Pie with Oreos!
Oreo goodness: If you love Oreos, then this is definitely the dessert for you!
Chocolate mousse: Who doesn’t love chocolate mousse? It’s one of my favourite recipes ever! We’ll have one layer of smooth, rich chocolate mousse to cover our pie crust.
Whipped cream: We finish up our cream pie with some smooth and sweet homemade whipped cream. You can never have too much cream!
Chilled and layered: This is awesome when it’s a hot day out or you’re just craving a cold dessert! It really is the softest dessert I’ve ever had, and it’s so good at room temperature or directly from the fridge! Plus, all the layers just work so well together! I love the nice cookie crust, the rich and chocolatey mousse, and the whipped topping with more Oreo goodness. It’s hard to stop at one slice for sure!
Get the kids involved: Our No BakeOreo Mud Pie would be so amazing to make over the holidays or summer vacation when the kids are out of school so they can join in! Not only does this pie contain all of kids’ favorites, but they can help mash up the Oreos for the crust and crumble topping, and they can help with applying the layers over the pie!
For all measurements and the full recipe instructions, make sure you scroll down to the bottom of this post for the FULL PRINTABLE RECIPE CARD! You can also scale the recipe if you want to make two or more pies! Keep in mind that this makes for one pie that is 9.5 inches by 9.5 inches.
For the Crust
Oreos: You’ll need to crush them with a rolling pin. No need to remove the filling!
Butter: I like to use unsalted butter so it doesn’t affect the flavor. This will be used to make the Oreo crust.
For the Mousse
Semi-sweet baker’s chocolate: For a rich and creamy chocolate mousse! You can substitute with chocolate chips if you don’t have baker’s chocolate. I’ve used chocolate chips as well and they work just fine!
Egg whites & egg yolks: Separate whites from yolks and you’ll whip them separately with sugar.
More Oreo cookies: Crushed on top of the whipped cream.
How to Make No-Bake Oreo Mud Pie
For the Oreo Crust
Prepare the crust by blending all of the Oreos until they are broken down completely. Add the Oreos to a bowl and then pour in the melted butter and mix well.
Add the Oreo mixture to the 9 inch pie dish and pat the crust evenly so that it is even at the bottom and has a slight lip on the edges. Add to the freezer and chill for at least 1-2 hours, preferably overnight.
For the Mousse
Prepare the chocolate filling by creating a double boiler. Do this by heating a large pot of water to a simmer and adding a bowl over the top. Then, add the butter and chocolate for the chocolate filling to the bowl and let it melt completely.
In the meanwhile, add egg yolks and the sugar for the yolks to the bowl of your stand mixer and whisk on high speed until the yolks have reached the ribbon stage and are very pale.
Set that aside, clean the bowl and then add the egg whites and the sugar for the whites. Whisk them as well on high until the egg whites have a soft peak.
Once the chocolate has molten, allow it to cool down slightly and thenadd a spatula of the cooled chocolate into the yolk mixture. Gently fold. Repeat until fully incorporated.
Add a spoonful of whipped egg whites to the chocolate-yolk base and gently whisk to lighten. Then fold in the rest in two additions, keeping as much air as possible.
Pour this chocolate mousse mixture to the pie dish containing the oreo crust after it has chilled.
Place the pie dish in the fridge for at least 2-3 hours.
For the Whipped Cream
For more details on my Homemade Whipped Cream, check out the complete recipe here!
To serve, prepare whipped cream by adding heavy cream, powdered sugar and vanilla extract to a large bowl and whipping them until you have soft peaks.
Gently spread the whipped cream to the pie dish and sprinkle the top with crushed Oreo.
Slice and enjoy!
Tips for a Perfect No Bake Oreo Mud Pie
Ensure the Oreo crust is evenly patted out as you don’t want holes or an uneven surface for the crust. This would make serving the pie complicated.
Keep a close eye on the texture of the egg yolk and white that is required. The video should help guide you to identify the right spot.
Don’t add all of the hot chocolate at once to the egg yolk mixture. Adding it gradually is essential to ensure excess heat does not scramble the eggs. Gradually adding the chocolate tempers the egg and prevents it from scrambling.
Slicing and serving the pie once the pie has been frozen is easier than when it is refrigerated.
How Can I Make a Thicker Oreo Crust?▼
All you need is more oreo and butter to make the crust thicker. Alternatively, you can use a smaller pie dish to use the same amount of ingredients for a thicker crust.
Variations for Oreo Mud Pie
Crust: Oreo actually makes a pre-made pie crust that you could use to save a step, and you can directly apply your toppings on top of this.
Use chocolate pudding: If you need this ready quickly, then you can save a step and instead of making the chocolate mousse, use instant chocolate pudding mix for the chocolatey layer. However, I really do recommend you give the mousse a go, it’ll really be worth it! You can even experiment with other different types of puddings such as vanilla or butterscotch.
Make it a cheesecake: You could combine the whipped cream topping with my Cream Cheese Glaze!
Nutella: Similar to the peanut butter idea, try slathering on some Nutella. You could even make your own!
Use cool whip: Again, another time saving tip if you don’t want to make your own whipped cream from scratch. The homemade whipped cream does get ready so quickly though, so again I do hope you try it!
Ice cream: The cream layer can also be made with vanilla ice cream or just your favourite ice cream if you want!
Sauce: If you want more chocolate goodness then top with a drizzle of syrup! You could add my Cafe Mocha Sauce or any chocolate syrup of choice. If you’re craving caramel, try drizzling my Simple Caramel Sauce!
Toppings: I simply topped my Oreo Mud Pie with more Oreo crumbles. However, feel free to experiment with some more toppings! You may want chocolate chips or shaved chocolate using a peeler. If you want to turn this pie into a dirt cake, then top with gummy worms! Other great options are fruit, such as bananas or raspberries, or even nuts, such as walnuts, sliced almonds, peanuts, hazelnuts or pecans. Of course, you can add whole Oreos to make this a very special Oreo Cream Pie or top with mini Oreos!
For one: To make this dish for a single portion, make it in a trifle dish.
Do You Serve Oreo Cream Pie at Room Temperature or cChilled?▼
You can do whatever you prefer! I like it both ways, but I find it even more delicious chilled or even almost directly out of the freezer! Keep in mind that if you want your pie gooier and creamier when you serve, then you should leave it at room temperature for a few minutes.
How to Store No-Bake Oreo Pie▼
Simply put the pie dish with the pie in the refrigerator, covered with plastic wrap. You can also place sliced pie in an airtight container in the refrigerator. This No-Bake Oreo Mud Pie will stay good in the fridge for up to 2 days. This is because the fresh whipped cream will lose its airiness and fluffiness and it will flatten out, which won’t be as delicious or creamy!
Can I Freeze No-Bake Oreo Mud Pie?▼
For sure you can! If you’ve made extra and can’t finish it, then you can freeze your pie for about 3 to 4 months. To defrost your pie, simply place it in the refrigerator overnight before serving.
If you liked this recipe please let me know in the comments. Tag your post on social media using #cookingwithanadi and mention me @cooking.with.anadi. Thank you!
Recipe by Anadi Misra
Dive into Oreo Goodness with this Easy No Bake Oreo Mud Pie!
Creamy, indulgent, and ready without turning on the oven! This no-bake Oreo mud pie is the ultimate easy dessert that comes together fast and disappears even faster.
Prepare the crust by blending all of the Oreos until they are broken down completely. Add the Oreos to a bowl and then pour in the molten butter and mix well.
Prepare the crust by blending all of the Oreos until they are broken down completely. Add the Oreos to a bowl and then pour in the molten butter and mix well.
2
Add the Oreo mixture to the 9 1/2 by 9 1/2 inch pie dish and pat the crust evenly so that it is even at the bottom and has a slight lip on the edges. Add to the freezer and chill for at least 1-2 hours, preferably overnight.
Add the Oreo mixture to the 9 1/2 by 9 1/2 inch pie dish and pat the crust evenly so that it is even at the bottom and has a slight lip on the edges. Add to the freezer and chill for at least 1-2 hours, preferably overnight.
3
Prepare the chocolate filling by creating a double boiler. Do this by heating a large pot of water to a simmer and adding a bowl over the top. Then, add the butter and chocolate for the chocolate filling to the bowl and let it melt completely. Let it cool slightly.
Prepare the chocolate filling by creating a double boiler. Do this by heating a large pot of water to a simmer and adding a bowl over the top. Then, add the butter and chocolate for the chocolate filling to the bowl and let it melt completely. Let it cool slightly.
4
In a stand mixer, combine the egg yolks and the granulated sugar for the yolks. Whisk on high until pale and thick (ribbon stage). Set aside.
In a stand mixer, combine the egg yolks and the granulated sugar for the yolks. Whisk on high until pale and thick (ribbon stage). Set aside.
5
Clean the mixer bowl and whisk. Add the egg whites and the granulated sugar for the whites. Whip on high until soft peaks form.
Clean the mixer bowl and whisk. Add the egg whites and the granulated sugar for the whites. Whip on high until soft peaks form.
6
Add a spatula of the cooled chocolate into the yolk mixture. Gently fold. Repeat until fully incorporated.
Add a spatula of the cooled chocolate into the yolk mixture. Gently fold. Repeat until fully incorporated.
7
Add a spoonful of whipped egg whites to the chocolate-yolk base and gently whisk to lighten. Then fold in the rest in two additions, keeping as much air as possible.
Add a spoonful of whipped egg whites to the chocolate-yolk base and gently whisk to lighten. Then fold in the rest in two additions, keeping as much air as possible.
8
Pour this chocolate mousse mixture to the pie dish containing the Oreo crust after it has chilled. Place the pie dish in the fridge for at least 2-3 hours.
Pour this chocolate mousse mixture to the pie dish containing the Oreo crust after it has chilled. Place the pie dish in the fridge for at least 2-3 hours.
9
To serve, prepare whipped cream by adding heavy cream, powdered sugar and vanilla extract to a large bowl and whipping them until you have soft peaks. Gently spread the whipped cream to the pie dish and sprinkle the top with powdered Oreos.
To serve, prepare whipped cream by adding heavy cream, powdered sugar and vanilla extract to a large bowl and whipping them until you have soft peaks. Gently spread the whipped cream to the pie dish and sprinkle the top with powdered Oreos.
Nutrition per serving
374
Calories
6g
Protein
26g
Carbs
28g
Fat
2g
Fiber
18g
Sugar
186mg
Sodium
Share This Recipe
Did you make this recipe? Tag @cooking.with.anadi on Instagram and hashtag it #cookingwithanadi
Tested & written in Anadi’s kitchen
Free weekly newsletter
Like this recipe? Get more every week.
New recipes, cooking tips, and behind-the-scenes from Anadi's kitchen.
Fluffy, creamy, and loaded with Oreo goodness, these Oreo Cheesecake Pancakes make the ultimate indulgent breakfast. Get the best pancake recipe that will satisfy every sweet tooth.
Make giant Oreo stuffed chocolate chip cookies from scratch! Thick, gooey, and loaded with a whole Oreo inside — these bakery-style stuffed cookies are easier to make than you think.
Fluffy cinnamon pancakes packed with protein and topped with a cookies and cream glaze. A healthy, delicious breakfast that tastes indulgent without the guilt. Your new favorite pancake recipe.
Make Halloween magic with pumpkin Rice Krispies treats 5 fun ways! Easy, festive, and no-bake, these cute squares are perfect for parties, kids, and spooky season snacking.
Satisfy your cookie dough cravings safely with this easy edible chocolate chip cookie dough recipe. Quick to make, no baking required, and absolutely delicious every time.
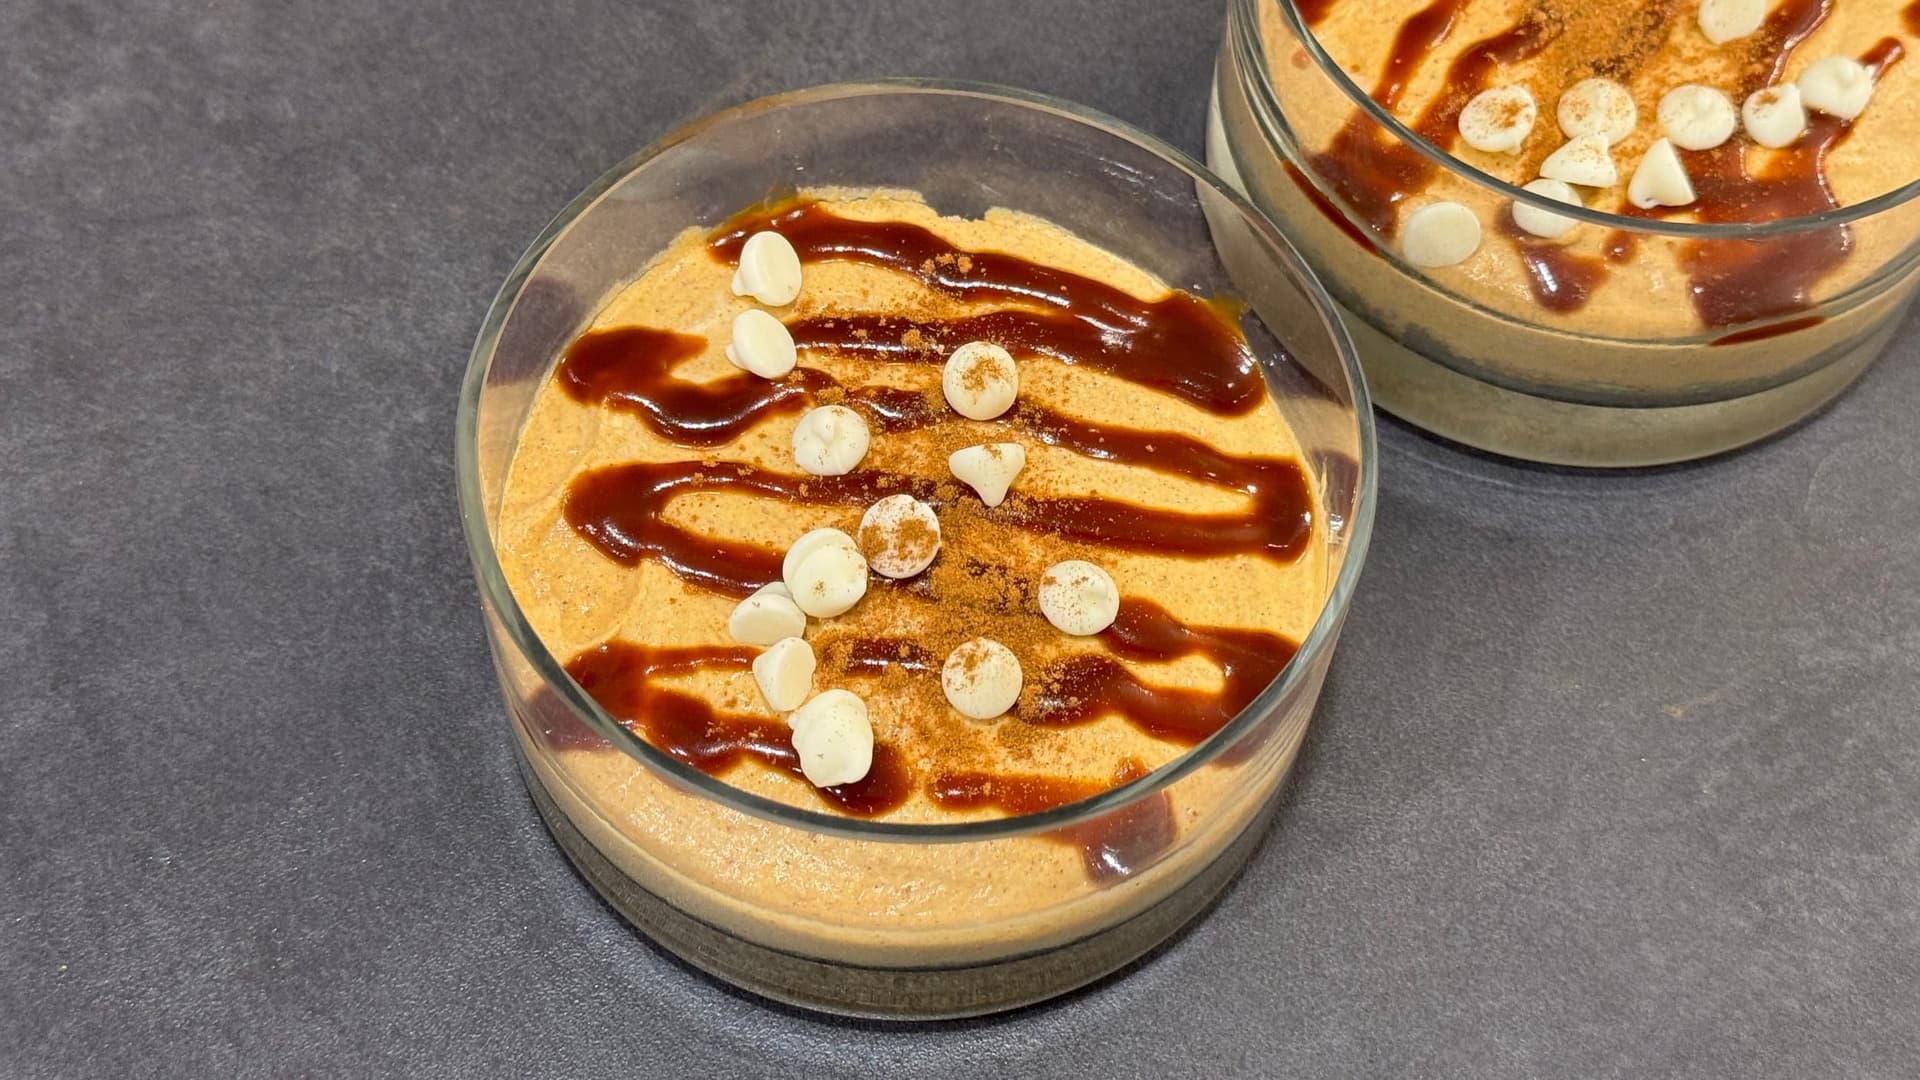
Creamy, spiced, and ready without turning on the oven. This easy no-bake pumpkin cheesecake recipe is perfect for fall and comes together in minutes. Mini size, maximum flavor.
20 minHard2 cheesecakes
Comments
No comments yet — be the first to share your thoughts!


Comments
No comments yet — be the first to share your thoughts!
Leave a comment