Make Halloween magic with pumpkin Rice Krispies treats 5 fun ways! Easy, festive, and no-bake, these cute squares are perfect for parties, kids, and spooky season snacking.
Are you looking for a delicious and easydessert to take to your next Halloween party? Even if you’re staying in, do you just want to have a fun family event where you can prepare something delicious and allows plenty of room for creativity? These Halloween Rice Krispies Treats are perfect for all ages, and they really celebrate fall by being pumpkin pie flavored and being shaped into some spooky Halloween shapes!
I have to admit I didn’t get in the spirit of Halloween very much until recently. Last year, I totally had a fun time making my Spooky Halloween Pizza recipe, plus it was one of the best pizzas I’ve ever had! When I was thinking of doing something creative for dessert, I wanted to have a base that was simple enough that you could make in a jiffy without too many ingredients, and have plenty of opportunity for creativity, fun, and flavor. I really enjoyed making my Chocolate-Covered Protein Rice Krispies Treats, so it was time to make another Rice Krispies Treats recipe!
To bring the family together and to impress guests at a Halloween party, then you’ll definitely want to put your heart on a plate with these Halloween Rice KrispiesTreats as part of your Live to Cook one-month challenge and you can put your heart on a plate for someone else who loves the squares so much! You can get started on your cooking journey for free by signing up to my newsletter, plus you’ll get all of my new recipes delivered right to your inbox!
For a step-by-step visual guide on how to make the Rice Krispies treats base, how to make the shapes, and for decoration inspiration, join me in this Halloween-themed recipe video! I would really appreciate it if you could please subscribe to my YouTube channel if you’re not already, and don’t forget to press the bell button so you’re notified when all of my video recipes are going live! Let’s get to it!
Why You’ll Love These Halloween Rice Krispies Treats!
Fun for kids: Children will love to help decorate these adorable little treats for Halloween! It will allow them to be creative and get involved in the kitchen! Of course, they’re super delicious, so they’ll love that too!
Lots of decoration possibilities: I’ll give a few ideas with the variations of shown here, but the possibilities are endless!
Simple to make: Rice Krispies treats themselves are quite easy and don’t take too much time or equipment. The main steps in this recipe are making the Rice Krispies treats base, dividing them up and coloring portions, spreading and cooling, then finishing it off with decorating!
Perfect for parties: Not only are these Halloween Rice Krispies Treats absolutely tasty, but they will totally stand out at parties with all the unique designs and eye-catching colors! They’ll disappear right off the table!
Few ingredients: The Rice Krispies treats base itself does not require too many ingredients - the key items are Rice Krispies, pumpkin, butter, and marshmallows. It may seem like a lot of ingredients since I wanted lots of variety with my Halloween Rice Krispies Treats, but if you don’t want to be so lavish, then there’s no need to be! You can go as crazy with the decorations as you want!
How Do I Prevent The Halloween Rice Krispies Treats from Getting Soggy?▼
The Rice Krispies cereal can go soggy as a result of humidity. Therefore, I recommend that you store the finished Rice Krispies Treats in an airtight container to retain the crispiness and freshness. The cereal can also become mushy while mixing with the marshmallows. That’s why it’s crucial to be careful and gently fold the cereal with the marshmallows to prevent breaking the cereal, which can ultimately destroy the crispiness in the squares.
How Come My Halloween Rice Krispies Treats Turned Out Hard?▼
There are a few reasons why the Halloween Rice Krispies Treats turned out hard, and this is due to either the marshmallows being hard, the cereal being hard, or both.
Firstly, your marshmallows could have been old and dried out. If you need help storing your marshmallows, I recommend storing them in a glass jar. This method has kept my marshmallows soft the longest!
Otherwise, you cooked the marshmallows on too high of a heat, causing them to dry out as a result.
Another culprit of hard prepared pumpkin rice krispies treats is that you used stale Rice Krispies cereal.
Are These Halloween Rice Krispies Treats Gluten-Free?▼
If you’re using the brand name of Rice Krispies, then they are not gluten-free because they contain malt. However, you can purchase the gluten-free version of Rice Krispies if you have a gluten intolerance, or you can use an off-brand crispy rice cereal that is certified gluten-free. If you’re using icing, you’ll need to buy a brand that is certified gluten-free. The icing that I used is not because it was made in a facility that contains wheat, and there is a risk of cross-contamination.
Can I Make These Halloween Rice Krispies Treats Vegan?▼
In the Rice Krispies, pumpkin, and marshmallow base, the only dairy we have is the butter. You can melt the marshmallows with coconut oil or a dairy-free butter. Depending on the type of marshmallows you’re using, they may contain gelatin, so ensure to use a vegan type or marshmallow.
There is also dairy in the white chocolate topping for the ghosts, which is the milk and white chocolate chips. In this case, I would recommend you use dairy-free white chocolate chips and melt those with coconut oil. If you’re using mini chocolate chips for the faces and decorations of the Rice Krispies treats, ensure you’re also using dairy-free semi-sweet chocolate chips.
Tools Needed for Spooky Halloween Rice Krispies Treats
Cookie cutters: I’m using a bat cookie cutter, a coffin cookie cutter, a witch’s hat cookie cutter, and a ghost cookie cutter. Use whichever shapes you can find that are Halloween-themed!
Ingredients for the Scariest Halloween Rice Krispies Treats
Scroll to the bottom of this post or press the “Jump to Recipe” button for the FULL PRINTABLE recipe card, which has all ingredients and their quantities, plus you can save the recipe for later. The recipe cards will also allow you to scale the recipe based on how many Halloween Rice Krispies Treats you want to make - whether you want a small batch to enjoy or you want to make a large batch for a potluck, everything will automatically be adjusted for you so you don’t need to calculate anything, and you’ll achieve perfect chewy and thick Rice Krispies!
For the Rice Krispies Treats Base
Mini marshmallows: These are the yummy and fluffy bundles of goodness that melt with our butter. Mini marshmallows are recommended because they will melt faster, but as I mention in my free motivational guide to explore your potential in the kitchen, Make Cooking Fun!!, if you do happen to only have large marshmallows on hand, then don’t worry about it! Since we’re going to melt our marshmallows anyway, preserving the shape doesn’t really matter, so you can cut them into small pieces so that they melt faster and more evenly.
Rice Krispies: I’m using the classic Rice Krispies cereal. You can use a flavoured one if you like, but to be honest there’s not really any point to because we’re going to add pumpkin pie flavours into our marshmallow and cereal mixture, so the standard plain Rice Krispies is recommended!
Pumpkin puree: For convenience, I’m using canned pumpkin puree. However, if you bought pumpkins and want to cook them, then I certainly encourage you tomake your own pumpkin puree!
Vanilla extract: You may notice that I didn’t add it into my base. This is because my marshmallows were actually vanilla-flavoured! If yours don’t have a flavour, then I recommend a bit of vanilla into your Rice Krispies base to add some extra fragrance.
Butter: I recommended salted butter to enhance the pumpkin flavour. If you’re using unsalted butter, then I recommend adding a pinch of salt as well.
Food coloring: We’ll divide the Rice Krispies base with some mixed in with blue food coloring and some mixed in with orange food coloring.
Olive oil: Spray some over parchment paper to prevent the Rice Krispies from sticking as they set. I also recommend you spray some on your hands when making your shapes.
For the Decorations
Milk: We’ll need a touch of milk to mix with the white chocolate for the ghosts’ chocolate topping. I recommend starting out with less milk and gradually add more if your chocolate topping is too thick.
White chocolate chips: I actually did a mix of white chocolate chips and cream cheese chips since I ran out of white chocolate chips! This mix was super good, but if you don’t have cream cheese chips, then white chocolate on its own will do the job!
Vanilla extract: A bit to add some aroma to the white chocolate topping.
Blue icing: On the witches’ hats and I used this for eyes on the bats.
White icing: To outline our Rice Krispies treats and for design on the witches’ hats.
Black icing:I used this to design the bats, coffins, ghosts and witches’ hats.
How to Make 5 Spooky Halloween Rice Krispies Treats
For the Pumpkin Rice Krispies Treats Base
Heat a pan or pot on medium heat and then melt the butter. Add the marshmallows and stir until the marshmallow melts completely.
Add the pumpkin puree and pumpkin spice. Stir until well combined and smooth and then set the pan off the heat.
Quickly divide the mixture evenly into separate bowls, determined by any that you are adding food color to. (3 bowls, if doing natural, dark blue and orange). Make sure to evenly divide the Rice Krispie portion as well in the following steps:
For the Pumpkins
Add a few drops of orange food colour to one bowl of marshmallow mixture and stir until it’s fully blended. Add an appropriately divided portion of Rice Krispies cereal and mix until evenly coated. Pour over a parchment-lined baking sheets.
Form balls with the mixture, about 3-4 inches in diameter and allow the portions to cool slightly.
Once cooled, decorate with frosting, you can use green frosting and mini chocolate chips to draw out the top of a pumpkin.
Black/Dark Blue Witch Hat/Ghost/Bat/Coffin Krispies
Add a few drops of black or dark blue food colour to another bowl of marshmallow mixture and stir until it’s fully blended. Add an appropriately divided portion of Rice Krispies cereal and mix until evenly coated. Pour over a parchment-lined baking sheets and press down to pack it down. Choose a thickness that works for you.
Allow to cool down for at least 30 minutes.
Once the 30 minutes are over, use the cookie cutter moulds for a Witch Hat/Bat/Coffin Krispiesto cut out these shapes and then place them over parchment-lined baking sheets.
Once cooled, decorate with frosting, you can use white/blue/black/green frosting and chocolate chips to come up with cool designs.
Natural Witch Hat/Ghost/Bat/Coffin Krispies
Add an appropriately divided portion of Rice Krispies cereal and mix until evenly coated. Pour over a parchment-lined baking sheets and press down to pack it down. Choose a thickness that works for you.
Allow to cool down for at least 30 minutes.
Once the 30 minutes are over, use the cookie cutter moulds for a Witch Hat/Ghost/Bat/Coffin Krispiesto cut out these shapes and then place them over parchment-lined baking sheets.
For the Ghost Krispies, you can prepare and spread the white chocolate spread/glaze as described in the next section before finishing with frosting.
Once cooled, decorate with frosting, you can use white/blue/black/green frosting and chocolate chips to come up with cool designs.
For the White Chocolate Topping
Melt the chocolate either in the microwave with some milk and mix well until you get a smooth, thick and spreadable chocolate mix. Gradually add more milk if needed to achieve the correct consistency.
Tips for Spooky Rice Krispies Treats
Heat the marshmallows gently. Heating the marshmallows on too high of a heat will result in the marshmallows drying out. If they dry out, it will be more difficult to mix the cereal with the marshmallows, and the final product will not be chewy and it will become too hard.
Spray the spatula with spray oil or brush on butter or olive oil. Because the marshmallow mixture is so sticky, if the spatula is not greased, a large amount will be on the spatula and it will be difficult to get off.
Work fast when mixing the Rice Krispies base with food coloring so that the marshmallow mixture does not end up sticky.
Rotating the bowl as you mix will help evenly coat the marshmallow mixture in the food colour
If you don’t want overly heavy and dense Rice Krispies treats and instead are looking for a lighter texture, then ensure not to pack the marshmallow mixture too tightly, especially when forming the pumpkins.
Wearing gloves is recommended so that you can easily manipulate the Rice Krispies treats without having them stick to your hands and make a mess!
Wet your hands when patting the Rice Krispies on the pan. This will allow you to easily shape the Rice Krispies Treats into the pan.
Line the baking sheet with parchment paper to make it easier to remove the squares when it’s time to cut them.
Even More Halloween Rice Krispies Ideas
We’ve got quite a lot of ideas here, but here are a few more you could try out!
Spiders: If you find a spider cookie cutter, you can shape the Rice Krispies base into spiders. Alternatively, you could make a ball out of the base, then stick chocolate-covered pretzels onto the ball. Design a face with icing or with chocolate chips.
Spider web: Take a ball and design a cobwebs using black icing.
Dracula: With the base, you can cut a circular shape. Design fangs with the white icing and draw the face with black icing.
Blood: Add blood on any one of your Rice Krispies treats by loosely applying red icing, giving the appearance of blood dripping.
Monster slime: You could make the white chocolate topping as described, and add green food colouring to that. This would require freezing the Rice Krispies base prior to decorating, as you’ll be dipping the treats into the chocolate. Add a face if desired for some scary monsters!
Mummies: Cut the Rice Krispies cereal base into a rectangular shape. Make criss-crosses using white icing, and you could draw eyes with black and white icing, or add chocolate chips to make eyes!
Sprinkles: Add an extra pop of colour with sprinkles on your witch’s hats or coffins, or any of the treats if you really want to!
Candy eyes:If you wanna really step up the faces on your Rice Krispies treats, then you could give them some candy eyes! I worked with what I had and designed the faces with my icing, but candy eyes would be awesome!
Mini M&Ms: For colour, you could also use M&M’s to design your eyes and mouths!
Tootsie rolls: For the pumpkins, made little stems with the mini chocolate chips. However, if you have tootsie rolls, you can make taller stems by sticking the tootsie rolls over the green leaves. You could also use a mini Reese’s peanut butter cup.
Storing Pumpkin Rice Krispies Treats
To ensure that these Pumpkin Rice Krispies Treats stay fresh, you’ll want to store them in an airtight container in the fridge. I recommend that you place parchment paper greased with olive oil or butter on the bottom of the container, then place the Rice Krispies treats on top of the parchment paper so that they don’t stick onto the base of the container. Due to the butter in ourRice Krispies Treats, I wouldn’t keep them longer in the fridge than 3 to 4 days.
Let me know what you think of this recipe in the comments! If you’ve tried this recipe, be sure to post it on social media and tag it with #cookingwithanadi and mention me @cooking.with.anadi. Thank you!
Recipe by Anadi Misra
Halloween Pumpkin Rice Krispies Treats 5 Ways
Make Halloween magic with pumpkin Rice Krispies treats 5 fun ways! Easy, festive, and no-bake, these cute squares are perfect for parties, kids, and spooky season snacking.
Heat a pan or pot on medium heat and then melt the butter. Add the marshmallows and stir until the marshmallow melts completely.
Heat a pan or pot on medium heat and then melt the butter. Add the marshmallows and stir until the marshmallow melts completely.
2
Add the pumpkin puree and pumpkin spice. Stir until well combined and smooth and then set the pan off the heat.
Add the pumpkin puree and pumpkin spice. Stir until well combined and smooth and then set the pan off the heat.
3
Quickly divide the mixture evenly into separate bowls, determined by any that you are adding food colour to. (3 bowls, if doing natural, dark blue and orange). Make sure to evenly divide the Rice Krispie portion as well in the following steps:
Quickly divide the mixture evenly into separate bowls, determined by any that you are adding food colour to. (3 bowls, if doing natural, dark blue and orange). Make sure to evenly divide the Rice Krispie portion as well in the following steps:
4
Pumpkin Krispies : Add a few drops of orange food colour to one bowl of marshmallow mixture and stir until it’s fully blended. Add an appropriately divided portion of Rice Krispies cereal and mix until evenly coated. Pour over a parchment-lined baking sheets.
Pumpkin Krispies : Add a few drops of orange food colour to one bowl of marshmallow mixture and stir until it’s fully blended. Add an appropriately divided portion of Rice Krispies cereal and mix until evenly coated. Pour over a parchment-lined baking sheets.
5
Form balls with the mixture, about 3-4 inches in diameter and allow the portions to cool slightly.
Form balls with the mixture, about 3-4 inches in diameter and allow the portions to cool slightly.
6
Once cooled, decorate with frosting, you can use green frosting and mini chocolate chips to draw out the top of a pumpkin.
Once cooled, decorate with frosting, you can use green frosting and mini chocolate chips to draw out the top of a pumpkin.
7
Black/Dark Blue Witch Hat/Ghost/Bat/Coffin Krispies : Add a few drops of black or dark blue food colour to another bowl of marshmallow mixture and stir until it’s fully blended. Add an appropriately divided portion of Rice Krispies cereal and mix until evenly coated. Pour over a parchment-lined baking sheets and press down to pack it down. Choose a thickness that works for you.
Black/Dark Blue Witch Hat/Ghost/Bat/Coffin Krispies : Add a few drops of black or dark blue food colour to another bowl of marshmallow mixture and stir until it’s fully blended. Add an appropriately divided portion of Rice Krispies cereal and mix until evenly coated. Pour over a parchment-lined baking sheets and press down to pack it down. Choose a thickness that works for you.
8
Allow to cool down for at least 30 minutes.
Allow to cool down for at least 30 minutes.
9
Once the 30 minutes are over, use the cookie cutter moulds for a Witch Hat/Bat/Coffin Krispies to cut out these shapes and then place them over parchment-lined baking sheets.
Once the 30 minutes are over, use the cookie cutter moulds for a Witch Hat/Bat/Coffin Krispies to cut out these shapes and then place them over parchment-lined baking sheets.
10
Once cooled, decorate with frosting, you can use white/blue/black/green frosting and chocolate chips to come up with cool designs.
Once cooled, decorate with frosting, you can use white/blue/black/green frosting and chocolate chips to come up with cool designs.
11
Natural Witch Hat/Ghost/Bat/Coffin Krispies : Add an appropriately divided portion of Rice Krispies cereal and mix until evenly coated. Pour over a parchment-lined baking sheets and press down to pack it down. Choose a thickness that works for you.
Natural Witch Hat/Ghost/Bat/Coffin Krispies : Add an appropriately divided portion of Rice Krispies cereal and mix until evenly coated. Pour over a parchment-lined baking sheets and press down to pack it down. Choose a thickness that works for you.
12
Allow to cool down for at least 30 minutes.
Allow to cool down for at least 30 minutes.
13
Once the 30 minutes are over, use the cookie cutter moulds for a Witch Hat/Ghost/Bat/Coffin Krispies to cut out these shapes and then place them over parchment-lined baking sheets.
Once the 30 minutes are over, use the cookie cutter moulds for a Witch Hat/Ghost/Bat/Coffin Krispies to cut out these shapes and then place them over parchment-lined baking sheets.
14
For the Ghost Kripsies, you can prepare and spread the white chocolate spread/glaze as described in the next section before finishing with frosting.
For the Ghost Kripsies, you can prepare and spread the white chocolate spread/glaze as described in the next section before finishing with frosting.
15
Once cooled, decorate with frosting, you can use white/blue/black/green frosting and chocolate chips to come up with cool designs.
Once cooled, decorate with frosting, you can use white/blue/black/green frosting and chocolate chips to come up with cool designs.
For the white chocolate topping
1
Melt the chocolate either in the microwave with some milk and mix well until you get a smooth, thick and spreadable chocolate mix. Gradually add more milk if needed to achieve the correct consistency.
Melt the chocolate either in the microwave with some milk and mix well until you get a smooth, thick and spreadable chocolate mix. Gradually add more milk if needed to achieve the correct consistency.
Nutrition per serving
395
Calories
6g
Protein
82g
Carbs
4g
Fat
1g
Fiber
13g
Sugar
39mg
Sodium
Share This Recipe
Did you make this recipe? Tag @cooking.with.anadi on Instagram and hashtag it #cookingwithanadi
Tested & written in Anadi’s kitchen
Free weekly newsletter
Like this recipe? Get more every week.
New recipes, cooking tips, and behind-the-scenes from Anadi's kitchen.
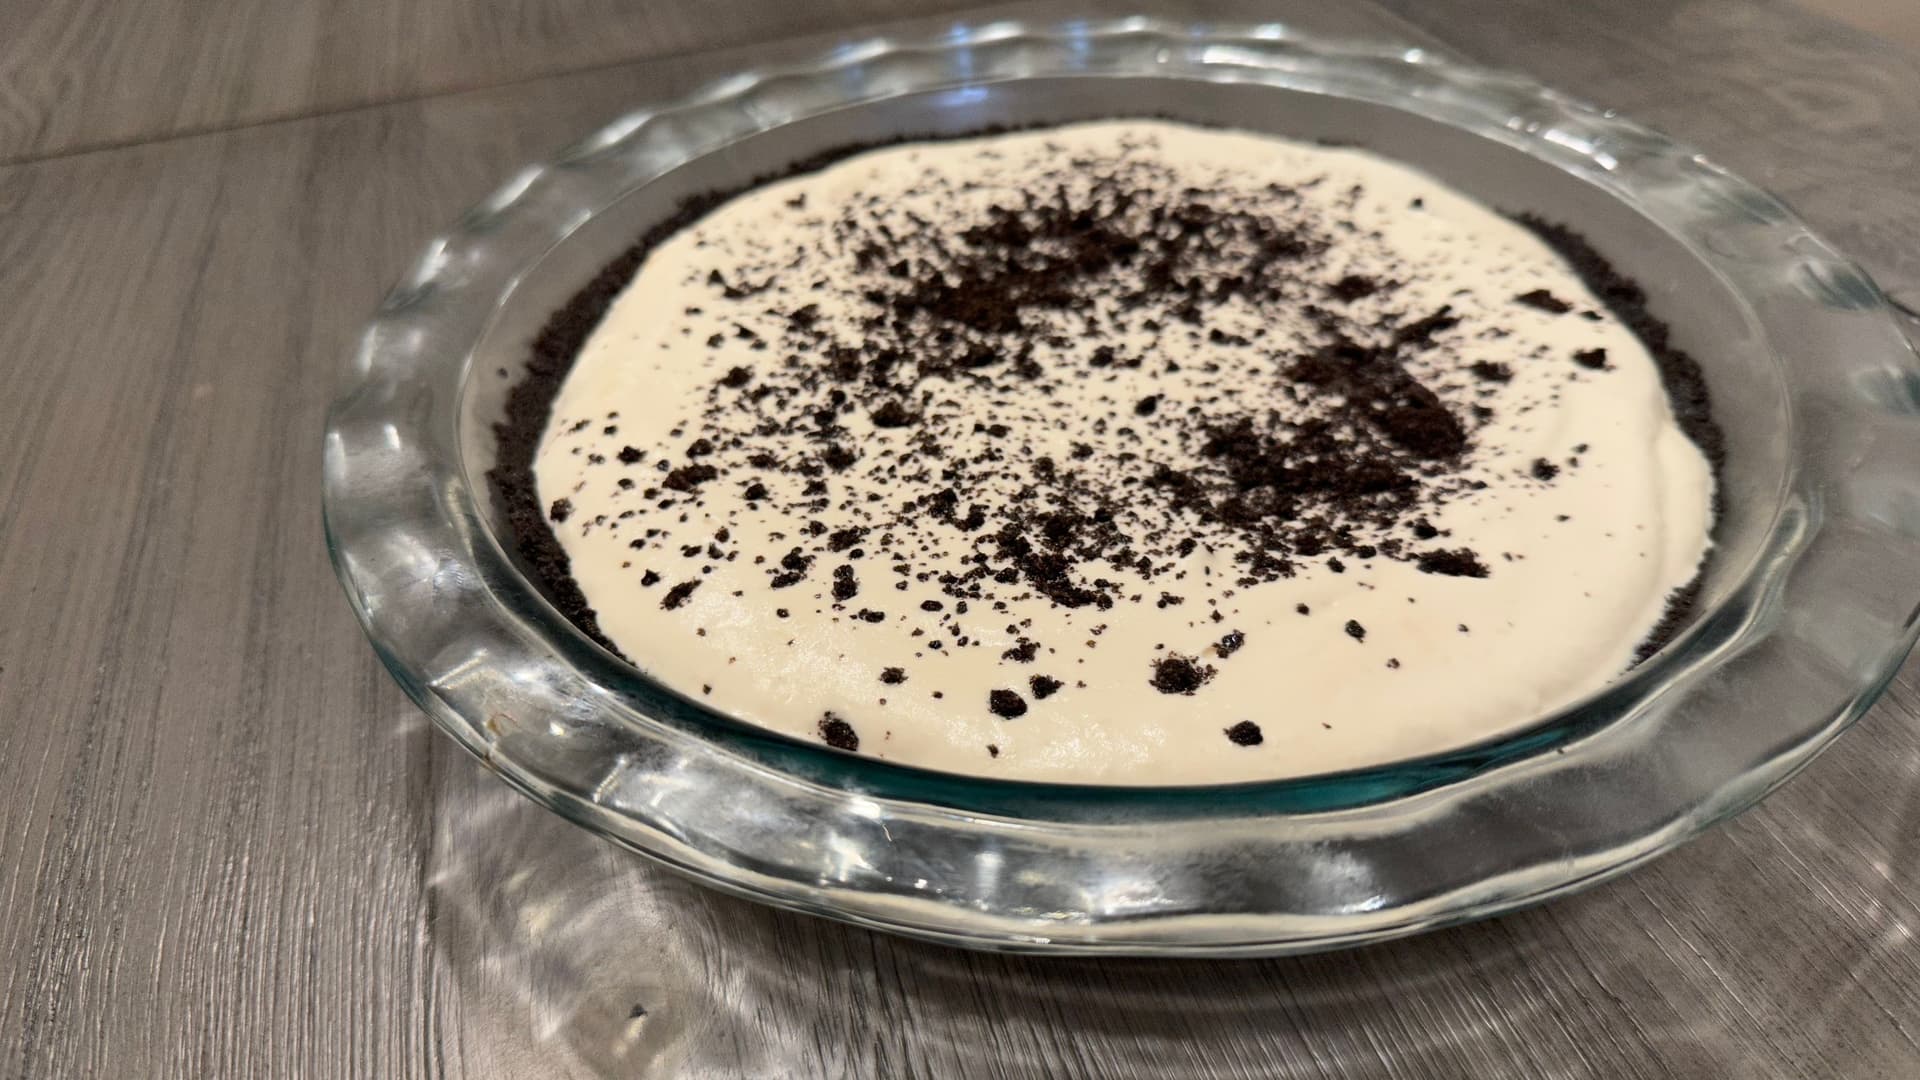
Creamy, indulgent, and ready without turning on the oven! This no-bake Oreo mud pie is the ultimate easy dessert that comes together fast and disappears even faster.
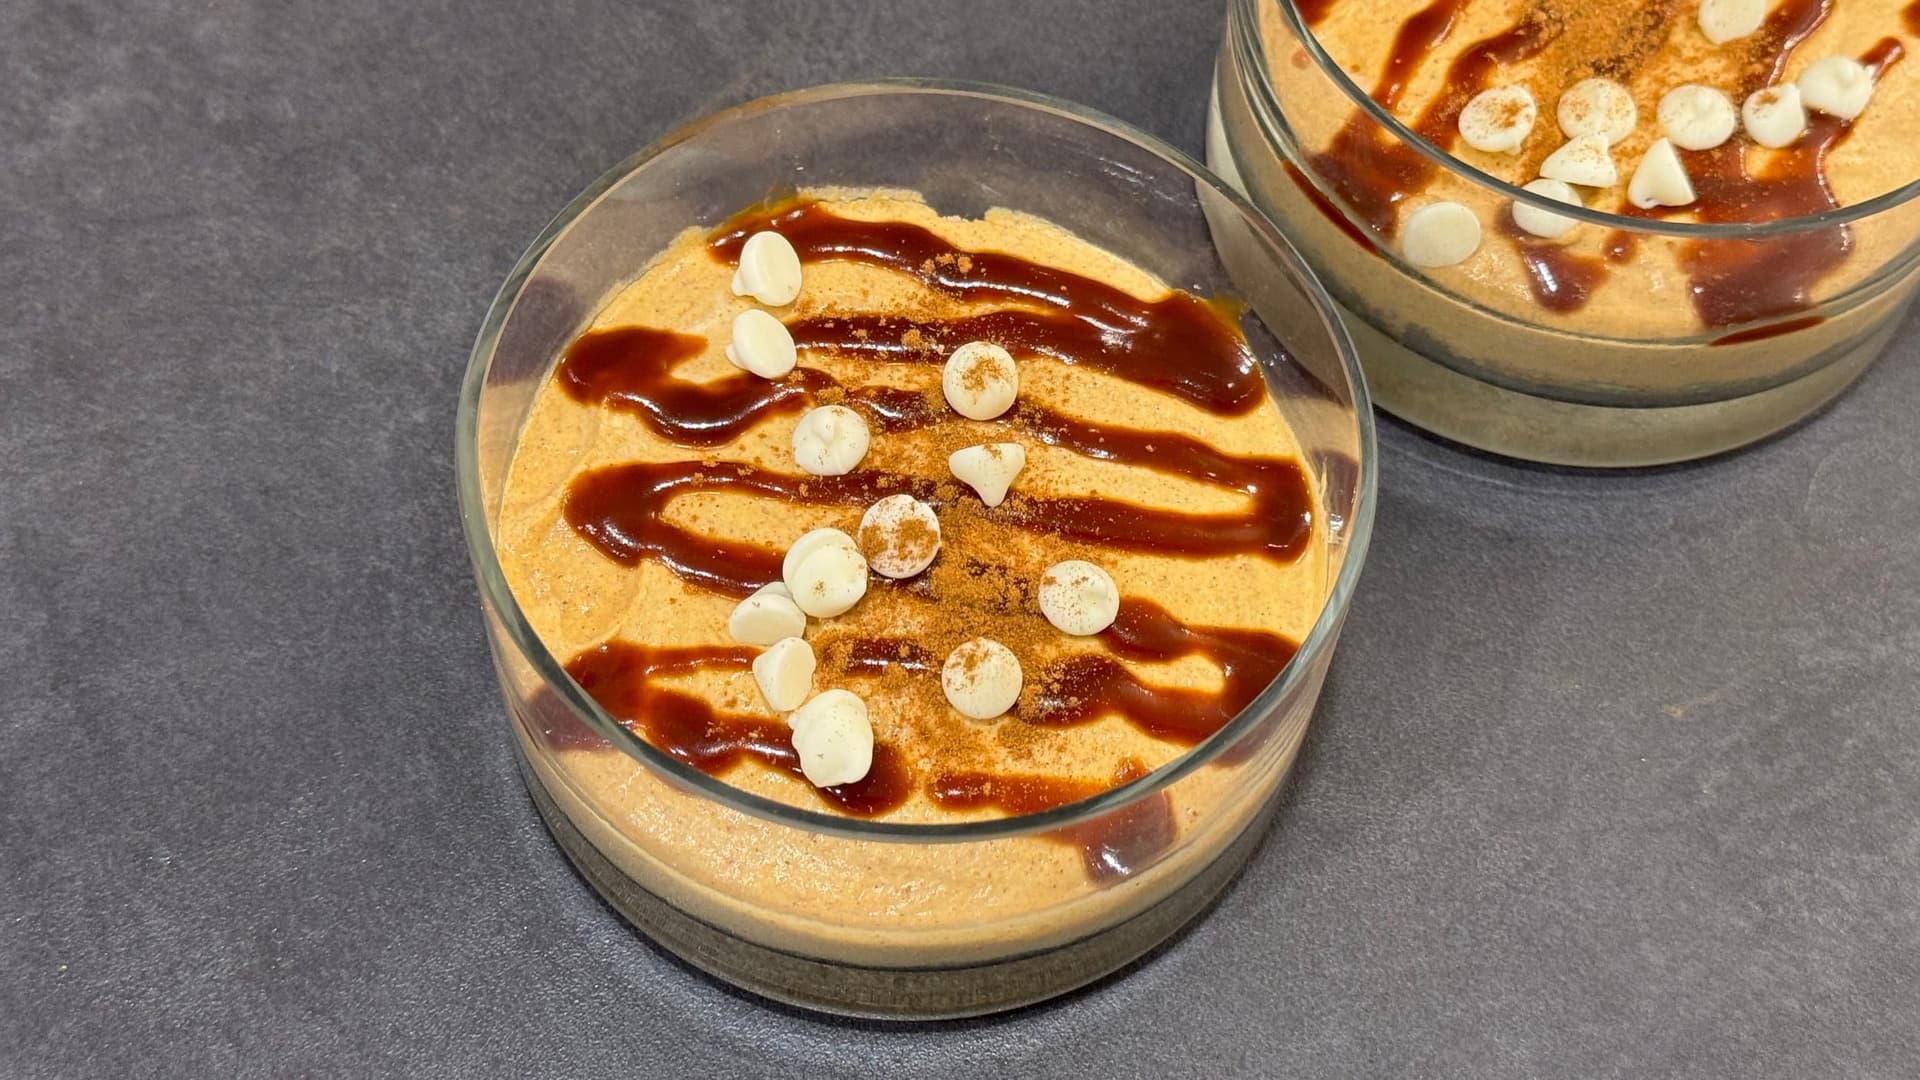
Creamy, spiced, and ready without turning on the oven. This easy no-bake pumpkin cheesecake recipe is perfect for fall and comes together in minutes. Mini size, maximum flavor.
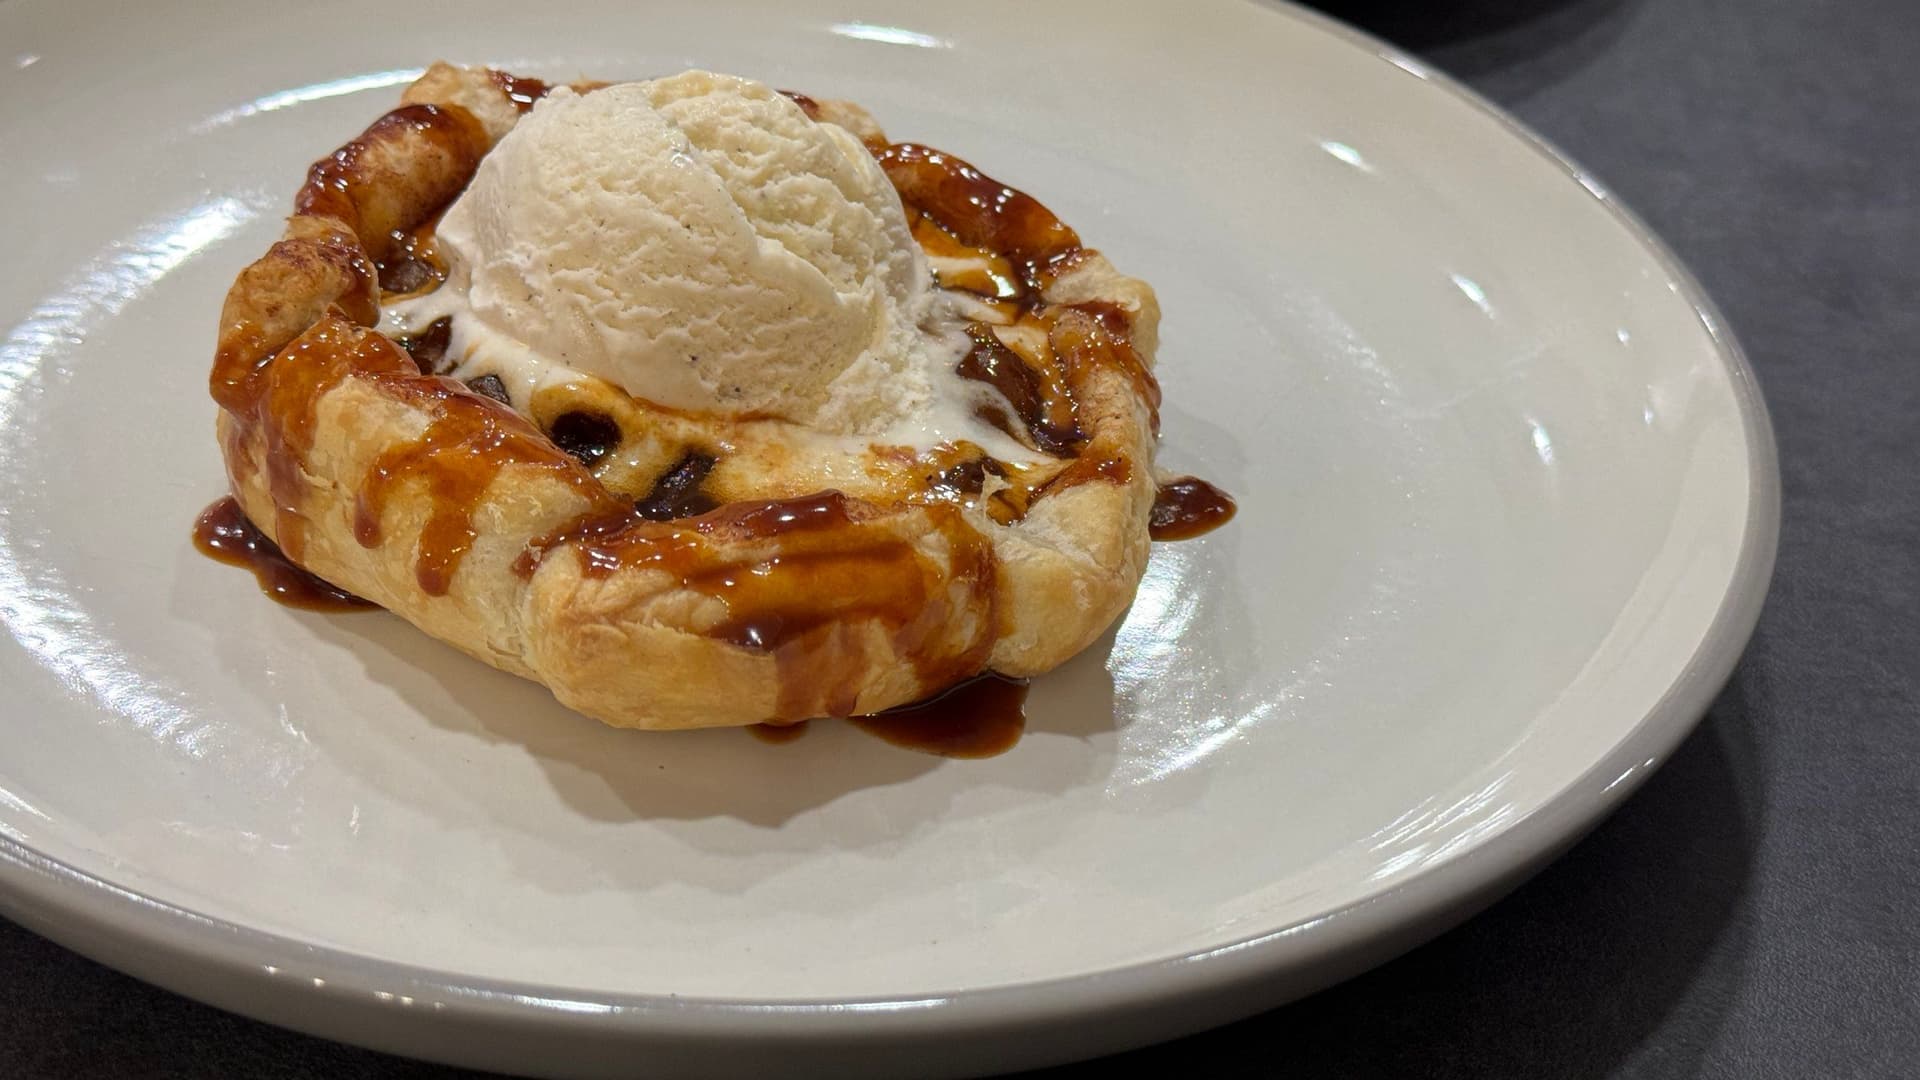
Flaky, golden mini puff pastry apple pies packed with warm cinnamon filling. Easy to make and perfectly portioned, these irresistible little treats are ideal for any occasion.
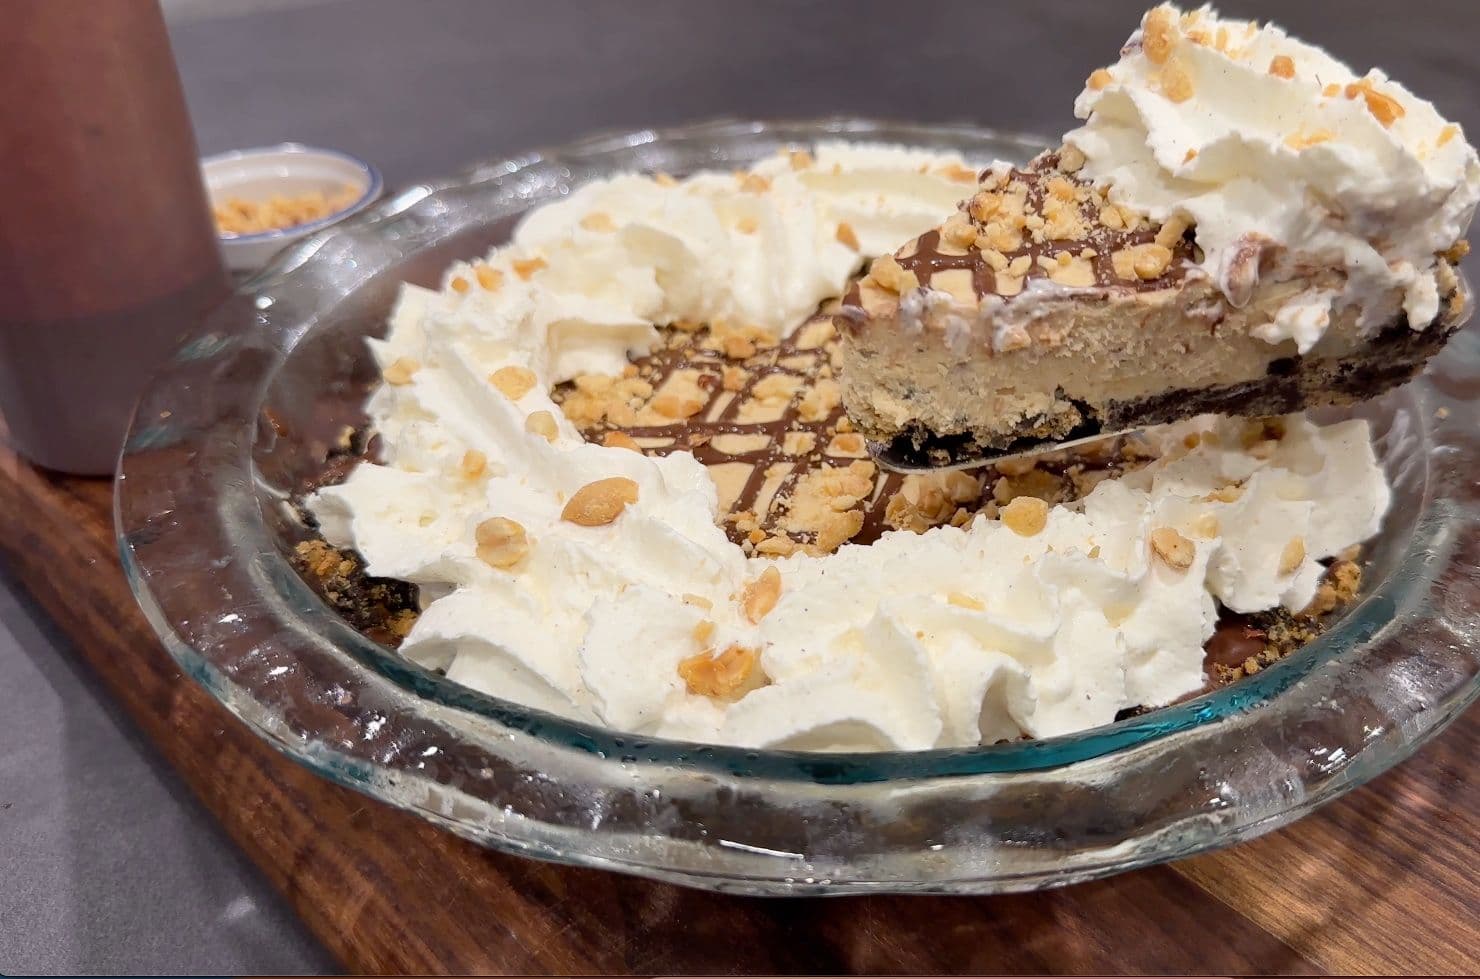
Creamy, dreamy no-bake peanut butter pie with a crispy Oreo crust. This easy dessert comes together in minutes with no oven required. The perfect crowd-pleasing treat every time.
Creamy, dreamy, and no-bake! This Nutella cream cheese pie comes together in minutes with a buttery graham cracker crust. The easiest crowd-pleasing dessert you will ever make.
Satisfy your cookie dough cravings safely with this easy edible chocolate chip cookie dough recipe. Quick to make, no baking required, and absolutely delicious every time.
19 minEasy16 dough balls
Comments
No comments yet — be the first to share your thoughts!
Leave a review
Be the first to share how it went — your note helps other cooks (and earns the recipe its stars).


Comments
No comments yet — be the first to share your thoughts!
Leave a review
Be the first to share how it went — your note helps other cooks (and earns the recipe its stars).