


This post may contain affiliate links. Read our disclosure policy
Watch the recipe

Happy Thanksgiving that’s just around the corner!
If you didn’t know, I live in Canada, so I had my Thanksgiving back in October. However, the Thanksgiving vibes really radiate from the US all the way to Canada, and I’m feeling them right now and wanted to get in the spirit of it from my kitchen!
No Thanksgiving gathering is complete without a very special dessert. While I’m normally a chocolate guy (helloooo all the chocolate recipes that are on the blog!), thanks to my grandpa’s influence, I’ve really developed a soft spot in my heart for apple pie. Me being stubborn, I’ve actually not tried an apple pie until recently. Fun fact, however, is that back in my restaurant days, I’d actually assemble and bake the pies all the time, though while I’ve snacked a lot at work, the apple pie is something I never had a taste of. Well, I’ll admit that I really missed out!
When my grandpa came to visit me this summer he was really enjoying his apple pies when we went to restaurants. Furthermore, growing up with him in India, he’d always order the apple pie, despite all of the “Indian dessert” options! Seeing my grandpa so happy enjoying his apple pie really made me want to take a stab at making my own and sharing the joy with him!
As a result, I took inspiration from the pies I made at the restaurant to make my own! If you want more details about how getting inspiration from restaurants can spark creativity in the kitchen, check out my Make Cooking Fun! free motivational guide! If making a wonderful apple pie to impress your guests has always been on your bucket list for Thanksgiving, now is the opportunity to check it off as part of your Live to Cook one-month challenge! You can get started on your cooking journey for free by signing up to my free email newsletter, plus all of my latest recipes will be sent straight to your inbox!
To visualize all of the tips and tricks I’ll be presenting in this post to guarantee a perfect mini apple pie with puff pastry, be sure to watch the video! It would mean a lot to me if you would please subscribe to my YouTube channel if you’re not already and don’t forget to press the bell button so you’re notified when all of my video recipes are live! Let’s get baking!
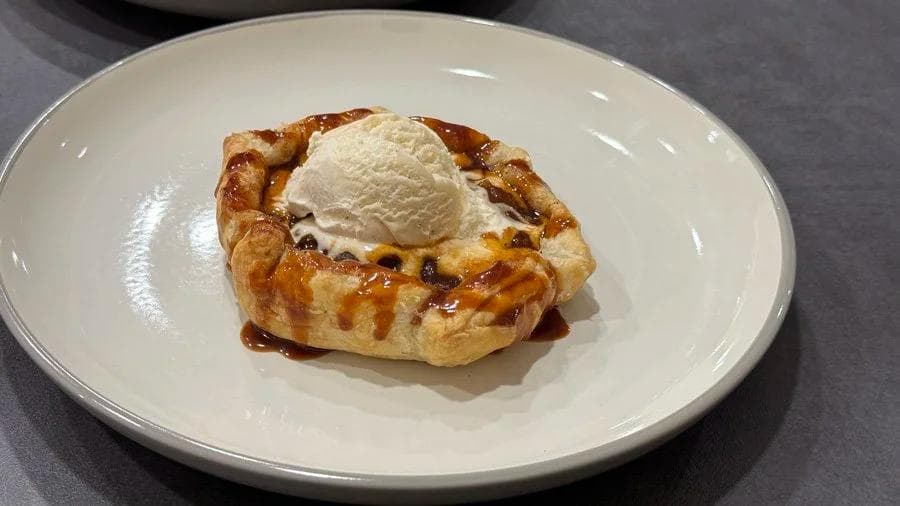
Why You’ll Love This Easy Mini Puff Pastry Apple Pies Recipe
- Simple process: Most of the work here is in making the apple pie filling. You don’t have to worry about taking the time to make the crust, but we’ve got home-cooked goodness in the filling!
- Flavorful: What’s great about making your own pie filling is that you can control the flavors. Add as much or as little sweetener and spices as you’d like.
- Flaky goodness: I love puff pastry because it’s so flaky and crispy, making it the perfect choice for this apple pie crust!
- Minimal ingredients: You’ll see later on in this post that you don’t need very many ingredients to make wonderful puff pastry mini apple pies! I’ll bet you already have everything in your kitchen already!
What Pie Crust are you using For This Apple Pie Recipe with Premade Pastry?▼
For the pie crust, I’m using frozen butter puff pastry. Most chefs and home cooks prefer using store bought frozen puff pastry for baking since making it from scratch is not ideal. Butter puff pastry will make the pie crispy and flaky, and it also saves you time by not having to make your own pie crust. Technically, you can use the apple pie filling with any sort of pie crust, but this recipe will show you how to shape the pie using butter puff pastry, in addition to providing oven temperatures and baking time using puff pastry. I really think the savory and neutral crispiness of puff pastry compliments the sweet apple filling really well.

What Apples are Good For Mini Puff Pastry Apple Pies?▼
For a pie filling you need apples that won’t turn into complete mush after we’re done with the preparing the filling and baking the pie. Instead, look for apples that are crisp so that they cook down, turn soft, yet hold their shape. You also need to think about the flavor of the apples you are using. I used a combination of Granny Smith and Honey Crisp apples which combines the tarty sweetness of the green granny smiths and the rich sweetness of Honey crisp. Other apples you can consider are:
- Pink Lady: My favorite apple! It’s sweet and tart and will hold its shape while cooking.
- Jonagold: These are fairly sweet apples that will complement more tart and sour ones.
- Golden Delicious: These have a subtle sweetness and will stay firm during cooking.
- Braeburn: Red apples with orange vertical streaks that are both mildly sweet and tart. Great to hold its shape.
- Fuji: Bright red Japanese apples that will stay firm and are super juicy!
How Many Apples Do I Need For These Mini Puff Pastry Apple Pies?▼
As the name suggest, this recipe will make small pies, so you won’t require too many apples. One roll of puff pastry will make 4 pies, which will use 2 apples.
What Temperature Is the Oven for Apple Pie?▼
We’ll be baking our mini apple pies at 400 F.
How Do You Know When the Puff Pastry Apple Pie Has Finished Baking?▼
Since the filling is already cooked, you are looking at the color of the pastry to indicate when to remove the pie from the oven. Look for a golden brown color on the puff pastry - this will also indicate that the pie pastry has become crisp.
Do I need to let the pie cool Down before serving?▼
Nope! Because these mini apple pies don’t require any slicing from a big pie, you can enjoy it immediately! Actually, it’s recommended to enjoy these as hot and fresh from the oven as possible!
How to prevent the crust from sticking?▼
Puff pastry generally is unlikely to stick - after all commercial puff pastry is made of between 64 to 100 layers of dough and butter. With the help of parchment paper placed underneath the apple pie, the likelihood of the dough sticking while baking is reduced even further.

Equipment to Make Easy Mini Apple Pies
- Measuring cups: To measure out sugar.
- Measuring spoons: To measure out cornstarch and apple pie spice.
- Cutting board: To cut your apples. Some people recommend a device to core the apples, but that’s really not necessary!
- Peeler: To peel the apples.
- Saucepan: To make your apple pie filling.
- Spatula: To mix everything in the filling together.
- Baking sheet: To bake the apple pie.
- Parchment paper: Place your apple pies on parchment paper so it’s easy to remove after baking.
- Ramekin: Handy to keep in your measured ingredients for easy preparation.
- Bowl: A medium-sized bowl to cut the puff pastry into circles for the pie.
- Cake cutter: A great way to transfer your baked pies from the baking sheet onto a plate!
Ingredients for Personal Puff Pastry Apple Pies
Time to see the ingredients that we’ll need for our mini apple pies which involves what we’ll need for the Apple Pie Filling and Apple Pie Spice. If you want more details, be sure to check out those individual recipes! You can get the complete instructions to save for later and full ingredient quantities by scrolling to the bottom of this post for the FULL PRINTABLE RECIPE CARD or press the “Jump to Recipe.” You can also scale the recipe based on how many pies you want to make or to know how many pies you’ll be able to make based on the apples you have on hand.

For the Homemade Apple Pie Spice
For the Apple Pie Filling
- Apples: Use 2 apples of your choice, ideally one sweet and one tart
- Butter: To cook the apples. My preference is unsalted butter.
- White sugar: You can use any sweetener of your choice, but regular table sugar was my preference.
- Apple pie spice: Using the ingredients above.
- Water: Added to the apple mixture.
- Corn starch: To thicken the apple filling mixture so that it is saucy and smooth.
For the Apple Pies
- Puff pastry: Frozen butter puff pastry. Ensure it thaws before using.
- Caramel sauce: Store-bought or homemade, but I really recommend homemade! Check out my recipe for caramel sauce here.
How to Make Super Easy Mini Puff Pastry Apple Pies
For the Homemade Apple Pie Spice
To make this apple pie spice recipe, all you need to do is mix all the spices together in a plate or shake the ingredients together in an airtight jar.


For the Apple Pie Filling
Peel, core and dice the apples.


Heat a saucepan on medium heat and add butter. Once the butter is molten, add the apples, sugar and apple spice and mix well to combine.


Add 1/4 Cup of water, mix and put the lid on the saucepan. Lower the heat to low and cook with the lid on until the apples have softened. Once ready, the apples should be easy to cut with a spoon, yet have the slightest bite to maintain the correct texture.
Add a splash of water to the bowl with the cornstarch, mix to create a slurry and add to the apples. Once the mixture thickens up, remove the heat and allow for it to cool down before preparing the apple pie.


For the Mini Puff Pastry Apple Pies
Preheat oven to 400 F in convection mode.
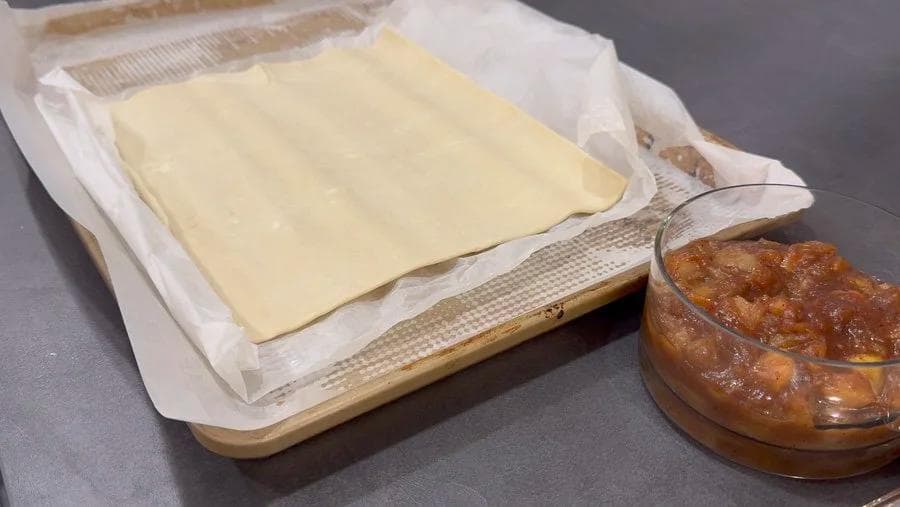
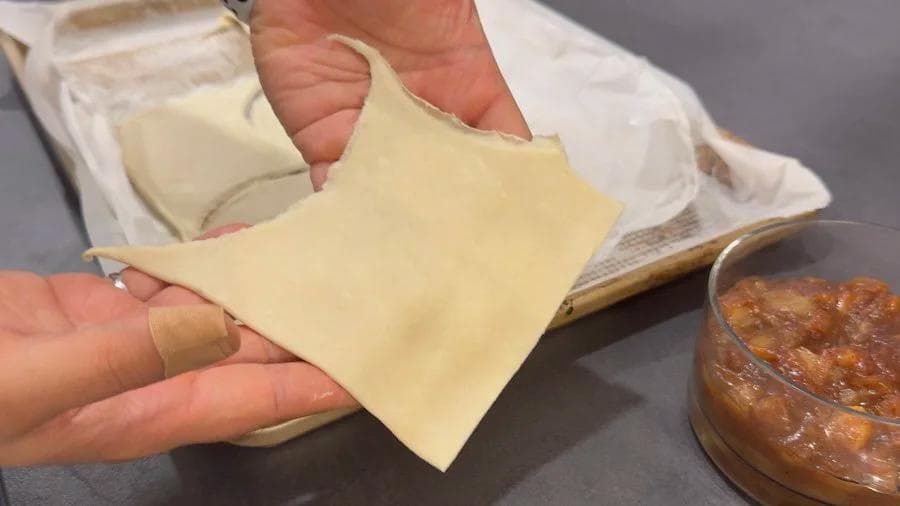
Prepare a baking sheet lined with parchment and roll out the thawed puff pastry over the prepared baking sheet. Using a bowl or a round cutter with a 6-inch diameter, cut circular disks. Trim the excess dough - they can be reused to make other desserts.


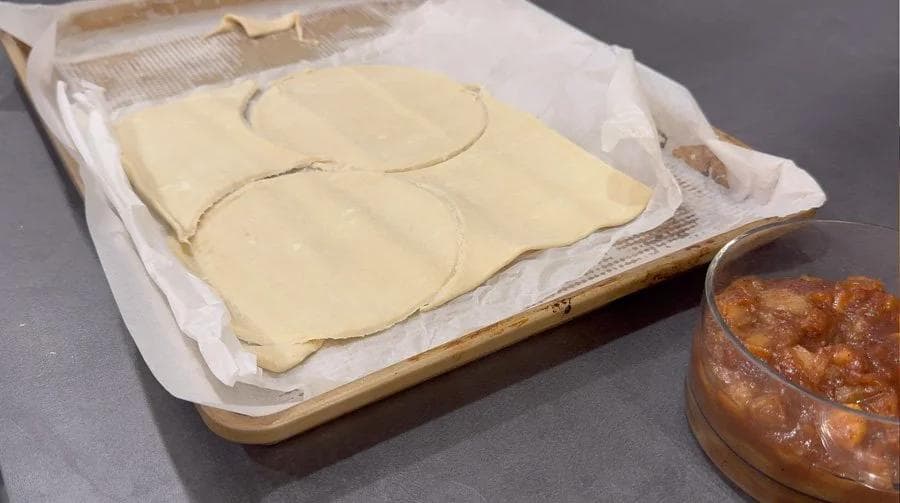

Add 3-4 Tbsp of the apple pie filling (room temperature) at the center of the disks, leaving a 1 inch border around the filling. Create pleats all around the filling as you fold the outside edge of the pastry towards the filling as you go around the circumference.


Transfer the prepared pies to the baking sheet (if not already), and then bake in the oven for 15-20 minutes. In my oven, it took 18 minutes for the pastry to become a light golden brown.


Remove from the oven and set aside. Warm the caramel mixture if chilled - if using a squeeze bottle for the caramel, you can microwave the bottle itself.
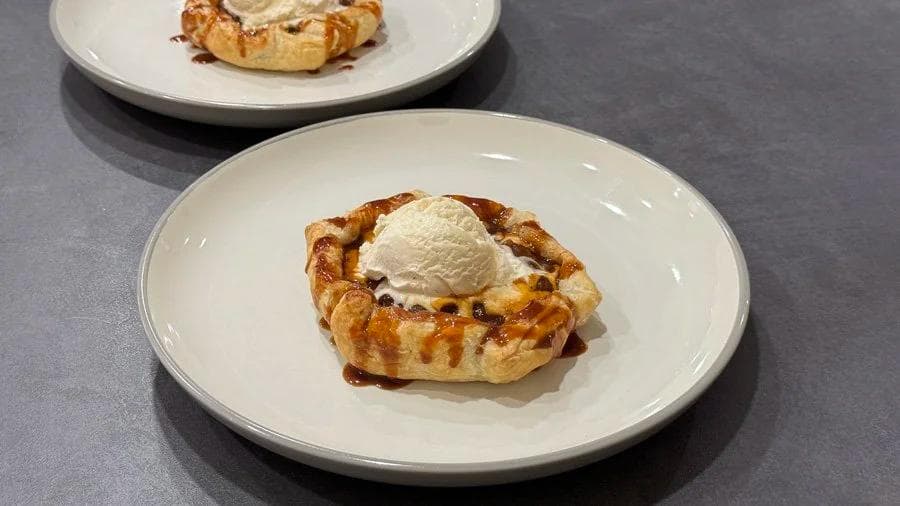
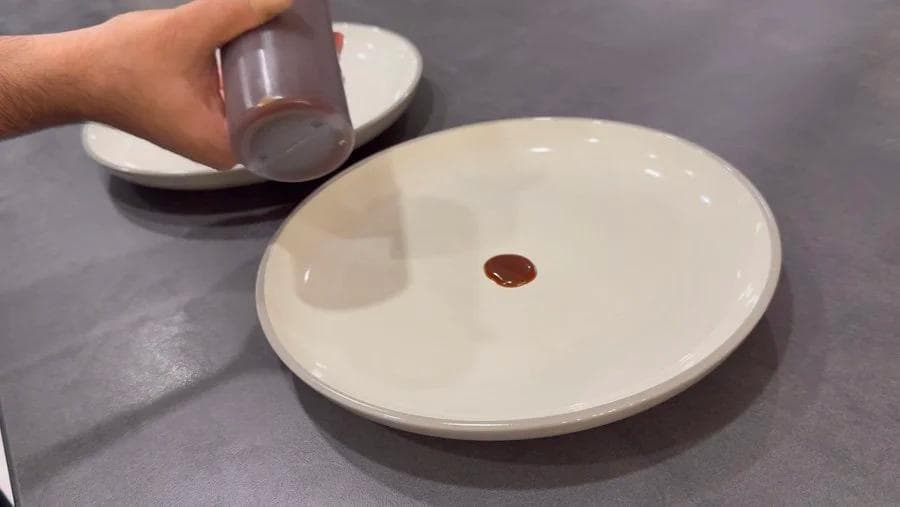
Add a small dot of caramel down the center of the serving plate. Place the baked pie over the caramel and drizzle more caramel all across the pie. Top with vanilla ice cream.


Serve immediately and enjoy!

Tips for the Perfect Puff Pastry Apple Pies
- Allow the apple pie filling to completely cool down before adding it into a pie otherwise the puff pastry will melt.
- Make sure that your mise en place is ready BEFORE you start working with the puff pastry. The heat from your fingers will quickly thaw out, making it harder to work with. Be quick for the least frustrating experience!
- Keep a close eye as the puff pastry is baking to ensure that it does not darken too much.
- While I don’t use egg wash when baking the puff pastry, I find that the natural golden color complements the pie well. However, you can use it if desired for a different look.

What Ice Cream Is Best For Puff Pastry Apple Pies?▼
I always say that there aren’t really any rules in the kitchen! While classic vanilla ice cream will complement the apple pie and caramel sauce nicely, you can really use whatever ice cream you feel like! I’ve had my apple pie with chocolate ice cream (my favorite!), and it was absolutely delicious!
Can I Bake these Mini Puff Pastry Apple Pies ahead of time?▼
No, I really would advise against baking the pie ahead of time! There really is no need to do that as it bakes so quickly due to the small size. What you can do is assemble the pie ahead of time so that all you need to do is bake it when it’s ready. Alternatively, you can prepare just the apple pie filling in advance and then defrost your puff pastry the day before you want your pies. Apple Pie Filling can stay fresh for about 2 weeks, so you can save yourself time that way!
Storage Instructions
If storing assembled and prepped pies, place them in an airtight container, or place the pies on a plate and cover with plastic wrap, storing them in the fridge. Due to the puff pastry, you shouldn’t keep prepped apple pies in the fridge for longer than 2 days.

Working With the Puff Pastry Sheets
A single sheet of butter puff pastry is all this recipe asks for, and it gives you four pies. Thaw it in the refrigerator rather than on the counter, and unroll it while it is still cold and firm. Warm puff pastry dough turns slack and the butter starts working its way into the flour, which is exactly what you do not want when the whole appeal of the crust is those separate layers. Roll the sheet straight onto the parchment-lined baking sheet so you never have to move the disks afterward, dust with the barest amount of flour only if it is tacky, and cut your six-inch circles with a bowl or a round cutter. Do not stretch the dough to reach the cutter, because pastry that has been pulled will shrink back in the oven and pull your pleats open. Keep the trimmings: they re-roll happily into palmiers or cheese straws.
Leave the full inch of border around the filling that the recipe calls for, since that rim is what you are pleating and it needs somewhere to go. If you want the bakery-window finish, brush the pleated edge with a little beaten egg using a pastry brush and scatter over some coarse sugar before it goes in the oven. Neither is in the recipe as written and the pies are lovely without them, but the egg gives you a deeper gloss and the sugar a faint crackle against the soft apples. Then it is 400 F in convection mode for fifteen to twenty minutes, and you are watching the pastry rather than the clock: mine took eighteen.
Easy Add-Ins and Swaps for the Filling
The filling is deliberately plain so the apples and the warm spice come through, but it takes changes well. None of the following are in the recipe as written:
- Brown sugar in place of the quarter cup of white sugar gives the filling a darker, more molasses-y edge that leans toward the caramel sauce you are drizzling over the top anyway.
- A squeeze of lemon juice over the diced apples keeps them from browning while you get the pan hot, and a little acidity stops the finished filling from tasting flat.
- A pinch of salt with the sugar sharpens the sweetness rather than reducing it. Easy to forget in a dessert, and you notice when it is missing.
- Chopped pecans or walnuts folded through the cooled filling add crunch against all that softness. Toast them first in a dry pan for a couple of minutes.
- Apple juice instead of the quarter cup of water gives you a more concentrated apple flavor as the filling reduces. Cut the sugar back slightly if you do, since the juice brings its own sweetness.
- Going dairy-free? Plenty of supermarket puff pastry is made with oil rather than butter, which works here even though you lose some of the richness. Swap the butter in the filling for a plant-based alternative, and finish with a dairy-free vanilla ice cream instead.
Storing and Re-Crisping Baked Pies
As the storage note above says, these are at their best straight from the oven, and unbaked assembled pies are the ones you want to be keeping. But if you do end up with baked leftovers, let them cool completely first so trapped steam does not soften the pastry from the inside, then keep them in an airtight container in the refrigerator for up to two days. Reheat them in a 350 F oven or an air fryer for five to eight minutes, tenting loosely with foil if the pleats are already dark enough. Skip the microwave entirely. Those sixty-plus layers of dough and butter are held apart by steam, and a microwave puts the steam straight back in, which turns a crisp, flakey crust limp in about thirty seconds. Add the caramel and the scoop of vanilla ice cream after reheating, never before.
If you liked this recipe please let me know in the comments. Tag your post on social media using #cookingwithanadi and mention me @cooking.with.anadi. Thank you!
Recipe by Anadi Misra
Flaky, golden mini puff pastry apple pies packed with warm cinnamon filling. Easy to make and perfectly portioned, these irresistible little treats are ideal for any occasion.
Stovetop
Rate this recipe ✦
30 min
Prep
30 min
Cook
1 hr
Rest
2 hr
Total
2
pies
medium
Level
Ingredients
Ingredients
Tap any quantity to scale
For the mini apple pies
- butter puff pastry(thawed if frozen)
- (65 g) Apple pie filling (see below) · make your own
- caramel sauce (for serving) · make your ownShop →
- vanilla ice cream(for serving)
For homemade apple spice
For homemade apple pie filling
- Honeycrisp apple
- Granny Smith apple
- (35 g) butter
- (50 g) sugarShop →
- (8 g) Apple Pie Spice · make your own
- (60 ml) water
- (8 g) cornstarchShop →
Instructions
For the apple pie spice
- 1
To make this apple pie spice recipe, all you need to do is mix all the spices together in a plate or shake the ingredients together in an airtight jar.
To make this apple pie spice recipe, all you need to do is mix all the spices together in a plate or shake the ingredients together in an airtight jar.
For the apple pie filling
- 1
Peel, core and dice the apples. Heat a saucepan on medium heat and add butter. Once the butter is melted, add the apples, sugar and apple spice and mix well to combine. Add ¼ cup of water, mix and put the lid on the saucepan.
Peel, core and dice the apples. Heat a saucepan on medium heat and add butter. Once the butter is melted, add the apples, sugar and apple spice and mix well to combine. Add ¼ cup of water, mix and put the lid on the saucepan.
- 2
Lower the heat to low and cook with the lid on until the apples have softened. Once ready, the apples should be easy to cut with a spoon, yet have the slightest bite to maintain the correct texture.
Lower the heat to low and cook with the lid on until the apples have softened. Once ready, the apples should be easy to cut with a spoon, yet have the slightest bite to maintain the correct texture.
- 3
Add a splash of water to a bowl with the cornstarch, mix to create a slurry and add to the apples. Once the mixture thickens up, remove from heat and allow for it to cool down before preparing the apple pie.
Add a splash of water to a bowl with the cornstarch, mix to create a slurry and add to the apples. Once the mixture thickens up, remove from heat and allow for it to cool down before preparing the apple pie.
For the mini apple pies
- 1
Preheat oven to 400°F in convection mode.
Preheat oven to 400°F (204°C) in convection mode.
- 2
Prepare a baking sheet lined with parchment and roll out the thawed puff pastry over the prepared baking sheet. Using a bowl or a round cutter with a 6-inch diameter, cut circular disks. Trim the excess dough - they can be reused to make other desserts.
Prepare a baking sheet lined with parchment and roll out the thawed puff pastry over the prepared baking sheet. Using a bowl or a round cutter with a 6-inch diameter, cut circular disks. Trim the excess dough - they can be reused to make other desserts.
- 3
Add 3–4 tbsp of the apple pie filling (room temperature) at the center of the disks, leaving a 1 inch border around the filling. Create pleats all around the filling as you fold the outside edge of the pastry towards the filling as you go around the circumference.
Add 3–4 tbsp of the apple pie filling (room temperature) at the center of the disks, leaving a 1 inch border around the filling. Create pleats all around the filling as you fold the outside edge of the pastry towards the filling as you go around the circumference.
- 4
Transfer the prepared pies to the baking sheet (if not already), and then bake in the oven for 15-20 minutes. In my oven, it took 18 minutes for the pastry to become a light golden brown.
Transfer the prepared pies to the baking sheet (if not already), and then bake in the oven for 15-20 minutes. In my oven, it took 18 minutes for the pastry to become a light golden brown.
- 5
Remove from the oven and set aside. Warm the caramel mixture if chilled - if using a squeeze bottle for the caramel, you can microwave the bottle itself.
Remove from the oven and set aside. Warm the caramel mixture if chilled - if using a squeeze bottle for the caramel, you can microwave the bottle itself.
- 6
Add a small dot of caramel down the center of the serving plate. Place the baked pie over the caramel and drizzle more caramel all across the pie. Top with vanilla ice cream and serve right away.
Add a small dot of caramel down the center of the serving plate. Place the baked pie over the caramel and drizzle more caramel all across the pie. Top with vanilla ice cream and serve right away.
Did you make this recipe? Tag @cooking.with.anadi on Instagram and hashtag it #cookingwithanadi

Tested & written in Anadi’s kitchen
Recipe history
- April 16, 2026 — Reworked and refreshed for the 2026 relaunch — new photography, restructured and standardized ingredients & instructions.
Filed under
You might also like
This Flaky Deep Dish Pumpkin Pie Is Perfect For Fall!
Flaky, creamy, and packed with real pumpkin flavor, this deep dish pumpkin pie is your new fall favorite. Made with fresh pumpkin and condensed milk for the perfect rich filling.
Crowd-Pleasing Nutella Cream Cheese Pie Recipe
Creamy, dreamy, and no-bake! This Nutella cream cheese pie comes together in minutes with a buttery graham cracker crust. The easiest crowd-pleasing dessert you will ever make.
Creamy No-Bake Peanut Butter Pie with Oreo Crust
Creamy, dreamy no-bake peanut butter pie with a crispy Oreo crust. This easy dessert comes together in minutes with no oven required. The perfect crowd-pleasing treat every time.
Dive into Oreo Goodness with this Easy No Bake Oreo Mud Pie!
Creamy, indulgent, and ready without turning on the oven! This no-bake Oreo mud pie is the ultimate easy dessert that comes together fast and disappears even faster.
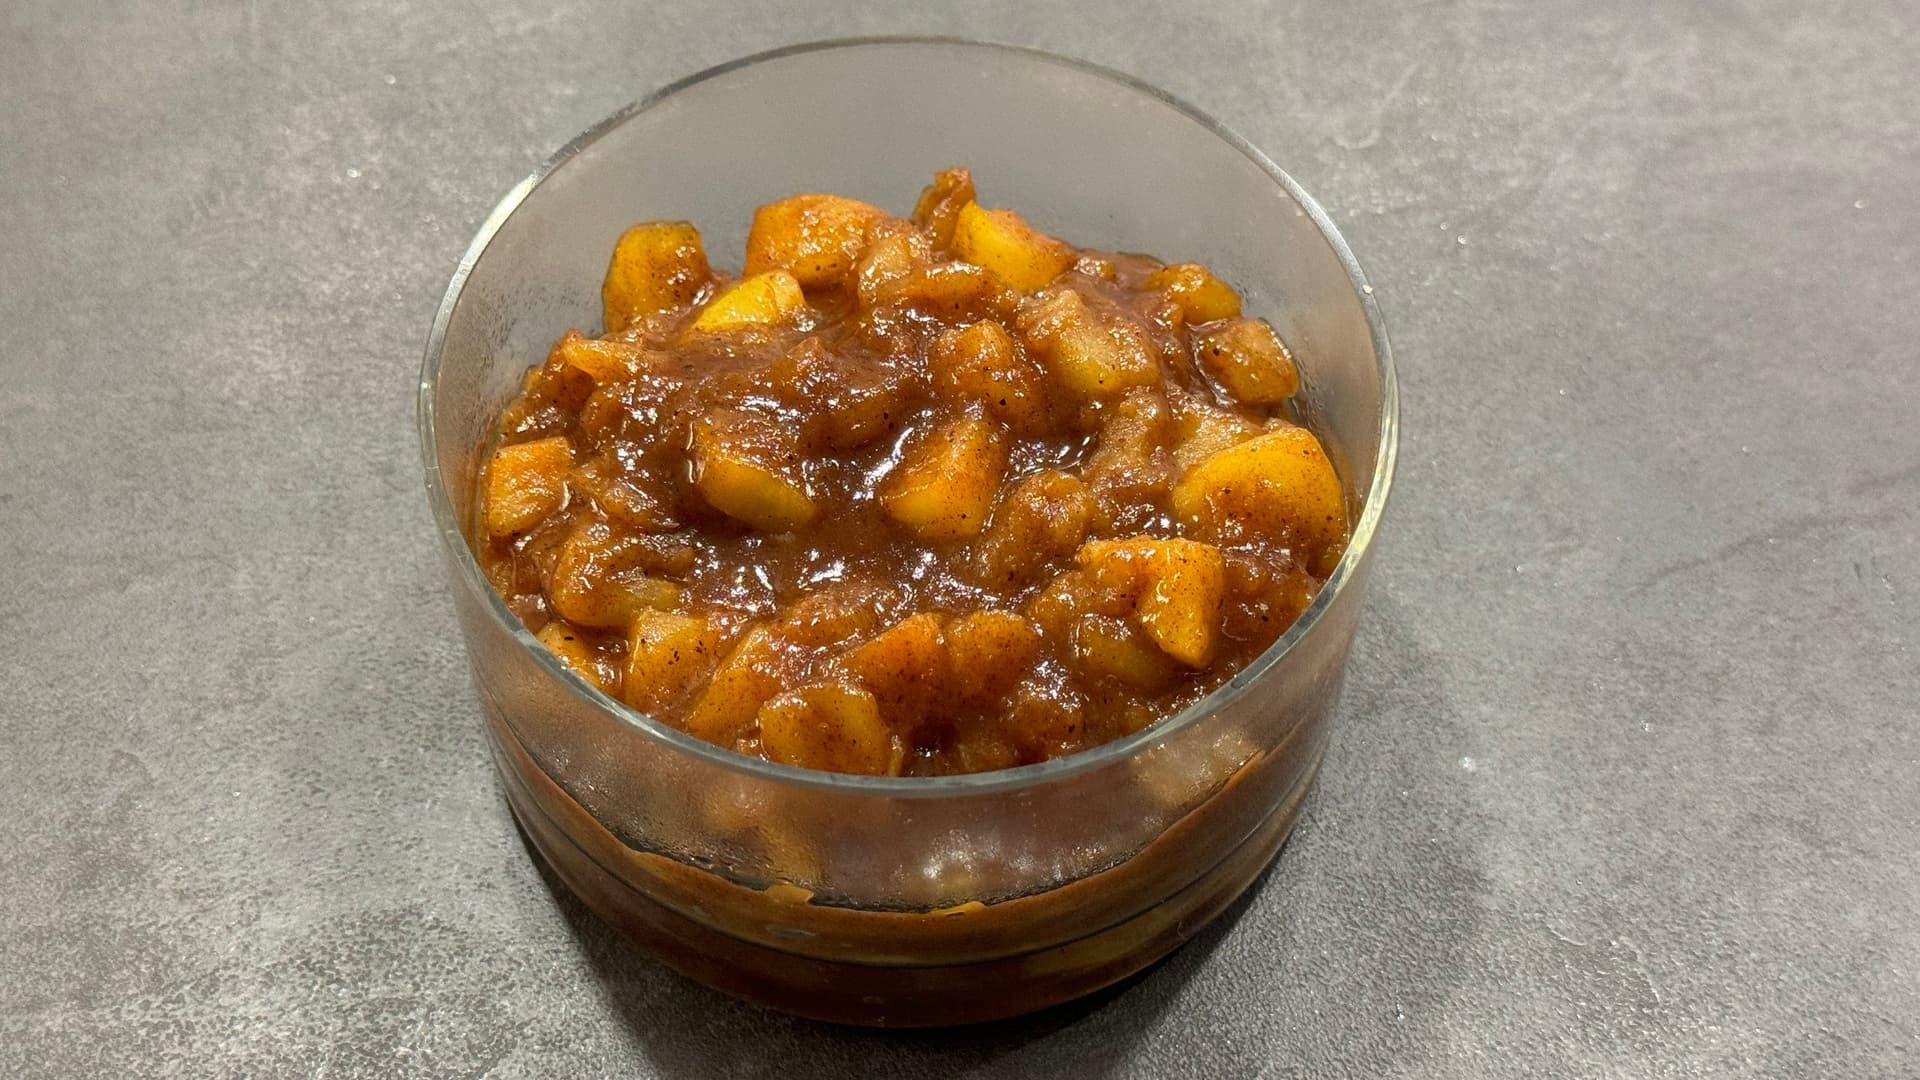
Delicious Apple Pie Filling Recipe: Quick and Easy!
Make the perfect apple pie filling in minutes! This quick and easy recipe delivers warm, spiced apples bursting with flavor. Your homemade apple pie will never taste better.
Easy Apple Pie Spiced Caramelized Banana Recipe
Warm caramelized bananas with apple pie spice make the easiest banana dessert you will ever make. Ready in minutes with simple ingredients, this sweet treat is pure comfort in every bite.


Comments
No comments yet — be the first to share your thoughts!
Leave a review
Be the first to share how it went — your note helps other cooks (and earns the recipe its stars).