


This post may contain affiliate links. Read our disclosure policy
Watch the recipe

Cooking With Anadi
12K subscribers · spiced mashed potatoes and peas, buttery on toasted bread
Pav bhaji is near and dear to my heart, and I think all North Indians will agree on this! I like to call pav bhaji an “Indian sloppy joe” because I really think it is! Although this is meatless, you have a thick and rich gravy and you serve it up on some toasted bread! I’ve never actually had a real sloppy joe’s, but I’m sure the satisfaction of enjoying it is exactly the same as indulging in some pav bhaji!
You’ll see that this recipe is actually incredibly easy! I’m keeping it very simple here by mainly focusing on the tomato and potato goodness! As I’ll discuss later in this post, there are many variations that you can experiment with by switching up the ingredients. But here we’ll stick to the basics, and this is my favorite way to prepare pav bhaji!
Pav bhaji can be enjoyed as a fantastic brunch or as a satisfying dinner. Growing up, no matter what time of day you’re having pav bhaji, you’re going to fall in love with this recipe and want to make it again!
What Is Pav BHaji?▼
Pav bhaji simply translates to “pav,” which is the bread that’s served, and “bhaji” refers to the curried vegetables. Pav bhaji is a popular street food item served in North India. The main flavor profile comes from the tomato-rich gravy with some mashed potatoes! We’re also going to be adding some traditional Indian spices.
As mentioned earlier, you can add a variety of veggies to your pav bhaji. However, on the streets, the main focus is in the potatoes and in onions. I’ll be preparing mine in a similar fashion in this recipe!

Tips for Making the Best Bombay Style Pav Bhaji
- Butter is your best friend when it comes to pav bhaji, so don’t skimp out on it.
- Pav bhaji is great to hide lots of veggies in a delicious dish. If you want, add in cauliflower, and more peppers to really get the veggies in for stubborn eaters, adults or children!
- Deggi mirch is great to add lots of bright red color to the dish without as much spice. So don’t feel the need to add red food coloring to this street side favorite.
- A potato masher is a must to get that classic smooth texture. Don’t use a food processor, the texture will not be as desirable.
- Butter both sides of the buns/pav and warm lightly, there is no need to toast the buns any longer.
- Serve with fresh slices of lemon or lime and sliced onions if desired.
- Most of all, enjoy this treat!
Tools Needed
Ingredients for Pav Bhaji

Here’s what you’ll need to prepare an excellent pav bhaji:
- Potatoes
- Tomatoes
- Onion
- Green pepper
- Butter
- Garlic paste
- Pav bhaji masala
- Deggi Mirch
- Cumin seeds
- Green peas
- Water
- Salt
- Lemon wedge
- Cilantro
- Buns (to serve)

How to Make Homemade Pav Bhaji
To Prepare the Potatoes and Peas
1. Boil the potatoes and peas in a pressure cooker. If using an Instant Pot, slice potatoes in half, insert a trivet to the pot and add the potatoes and peas directly on the trivet.

2. Set the Instant Pot to Sealing mode and cook in Steam mode for 11-12 minutes. Let pressure release naturally.
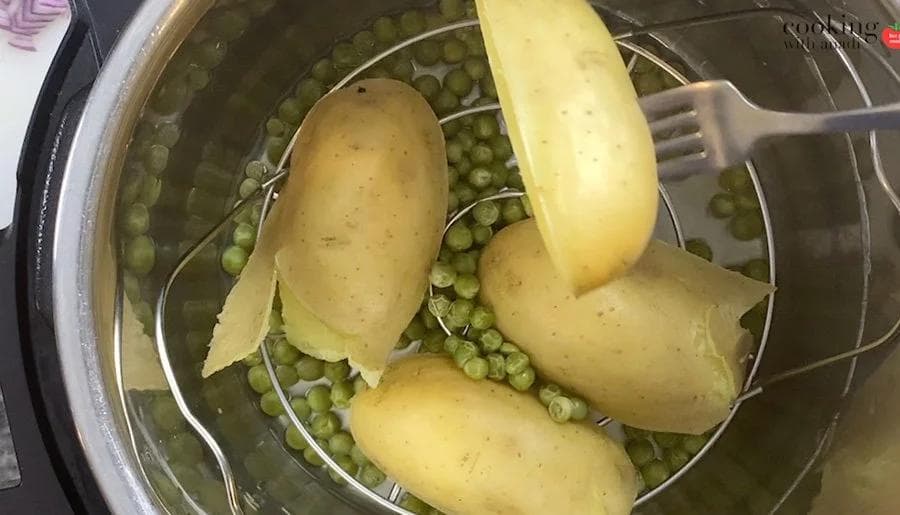
3. Peel the potatoes and transfer both potatoes and peas to a large bowl. Lightly mash the potatoes and peas and set aside for use later.

To Prepare the Pav Bhaji
1. Heat 2 Tbsp of butter in a pan and once molten, add cumin seeds and onions. Sauté until onions become soft and turn a light golden brown.

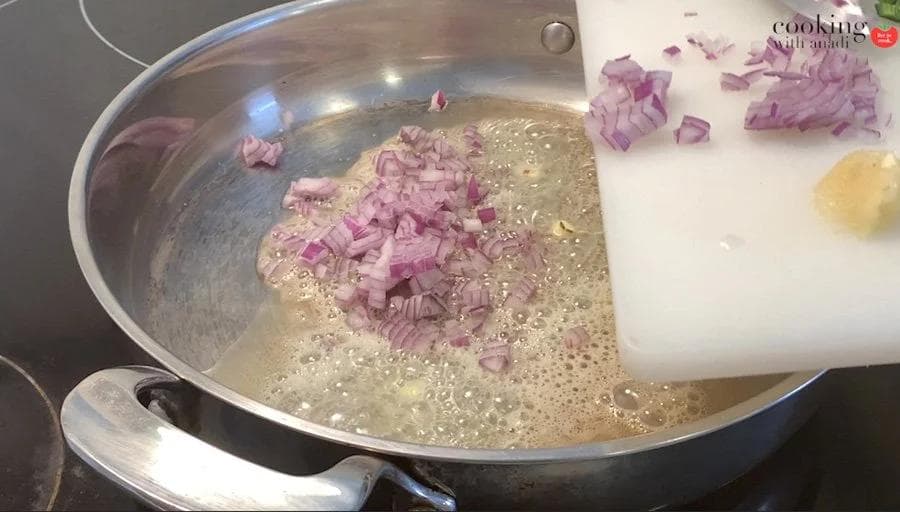
2. Add garlic paste and green pepper and sauté until peppers have softened, and rawness of the garlic has cooked off.


3. Add tomatoes, salt and half of the deggi mirch. Mix well and continue cooking until tomatoes cook down and become soft. Stir ever so often to ensure they don’t stick to the pan and burn.


4. Add the mashed potatoes and peas and mix well to combine. Then, make a well at the center of the pan and add 2-3 Tbsp of butter. Add the rest of the deggi mirch and mix in with the butter.


5. Cook the spice until fragrant, about 30 seconds and then mix in with the bhaji.
6. Add water, about 1/2 Cup at a time until you have a wet consistency. Mix well and then start mashing the bhaji with a potato masher until completely smooth.


7. Turn heat to low and simmer, add more water if required to match the consistency of your liking. Taste and adjust for seasoning.
8. Sprinkle with pav bhaji masala and mix well. Let bhaji simmer while you prepare the pav.

9. Heat a tawa pan on medium low heat and add 1-2 Tbsp of butter and let it melt. Slice the pavs in half and add to the pan. Coat each side with butter, adding more as necessary to completely butter the pav. Toast lightly, until pavs are warmed through.

How to Serve This Bombay Pav Bhaji
Top your pav bhaji with a generous dollop of butter on top! Add a squeeze of lemon juice and top with a lemon wedge. Finish with some freshly chopped cilantro, and your pav bhaji is complete and ready to indulge in!

Breads to Serve with Pav Bhaji
You can use many breads to serve your pav bhaji. “Pav” is actually a type of bread, which is a type of bun. Now, I don’t get pavs here in Canada, so there are other options you can serve with! Here are some ideas:
- dinner rolls
- burger buns (as I do here!)
- sliced bread
- potato rolls
Pav Bhaji Variations
I kept my recipe very simple to make with minimal ingredients. However, if you’re looking to add more vegetables to your pav bhaji, here are some ideas of vegetables you can incorporate:
- cauliflower
- eggplant
- beetroot
- cabbage
- carrot
- broccoli
Was there a vegetable I missed in this list? Let me know in the comments if you prefer your pav bhaji with veggies or plain! I’ve also seen cheesy pav bhaji! I’ve never tried it myself, but Instagram pictures definitely make my mouth water! I’m a sucker for going by what I know and the tradition, but perhaps one day I’ll try adding cheese to my pav bhaji and see how it goes! If you’re not already following me on Instagram, I recommend that you do because you’d be first to see when I do add some cheese to my pav bhaji as I share all of my cooking experiments and recipe sneak peeks in my stories and posts!

What Is Pav Bhaji?
The name is as plain as the dish is generous: pav is the soft dinner roll, bhaji is Hindi for vegetables. Bread and veg. Pav bhaji started as Mumbai fast food in the 1850s, a quick meal option for the city's textile workers who had a short lunch break and needed something hot they could eat standing up. Cooks mashed whatever vegetables were on hand into a spiced onion tomato masala, buttered a couple of rolls on the griddle, and that was lunch. From the mills it moved to the beach, and the Juhu Beach stalls are what made it famous. Today it turns up everywhere from street carts to upscale restaurants, alongside vada pav and bhel puri in the Mumbai street food canon. Of the three, pav bhaji is the one that travels best to a home kitchen, which is why this is the homestyle version rather than the griddle-sized street one.
About Pav Bhaji Masala, the Spice Mix That Makes It
The tablespoon of pav bhaji masala in this recipe is doing more work than anything else in the pan. It is a blend of spices built for this one dish, and most versions lean on coriander and cumin as the base, with dried mango powder for a sour edge, black cardamom for a little smoke, and ground red chilies for heat and colour. You will find it in Indian grocery stores and most Indian stores online; some cooks grind their own in a spice grinder, but a good store-bought blend is consistent and I use it happily. Deggi mirch is a separate ingredient and does a different job, adding a bright red colour with only mild heat, and it is the reason there is no food colouring anywhere near this recipe. If you cannot find deggi mirch, Kashmiri red chili powder is the closest swap. Grating a small piece of ginger in with the garlic paste is a common addition too, and adds extra flavor if you like the aroma of it.
Storing and Reheating Pav Bhaji
Bhaji keeps beautifully, and like most tomato-based curries it tastes better the next day once the aromatics have settled. Let it cool, transfer it to an airtight container with the lid on, and refrigerate for up to four days. It will thicken as it sits, so loosen it when you reheat: in the microwave, one to two minutes with a stir halfway, or on the stove over low heat with a splash of water stirred through until you are back to a hot bhaji at the consistency you want. Add a fresh tablespoon of butter as it warms, because that is the part that fades in the fridge. Toast the pav fresh on the tawa rather than reheating it with the bhaji, and finish the bowl the way you would on day one, with a generous amount of butter, a squeeze of lemon and crunchy onions if you like them. Bhaji also freezes for up to two months; thaw it overnight in the refrigerator before reheating.
Let me know what you think of this recipe in the comments! If you’ve tried this recipe, be sure to post it on social media and tag it with #cookingwithanadi and mention me @cooking.with.anadi. Thank you!
Recipe by Anadi Misra
Make authentic homestyle Bombay Pav Bhaji at home with this easy recipe. Buttery, spiced vegetables served with toasted pav make the perfect Indian brunch everyone will love.
Instant Pot
Rate this recipe ✦
15 min
Prep
40 min
Cook
55 min
Total
4
servings
medium
Level
Ingredients
Ingredients
Tap any quantity to scale
For the bhaji
To serve & garnish
- cilantro(for garnish)
- lemon wedge(for garnish)
- Pav(to preference)
Instructions
To prepare the potatoes and peas
- 1
Boil the potatoes and peas in a pressure cooker. If using an Instant Pot, slice potatoes in half, insert a trivet to the pot and add the potatoes and peas directly on the trivet.
Boil the potatoes and peas in a pressure cooker. If using an Instant Pot, slice potatoes in half, insert a trivet to the pot and add the potatoes and peas directly on the trivet.
- 2
Set the Instant Pot to Sealing mode and cook in Steam mode for 11-12 minutes. Let pressure release naturally.
Set the Instant Pot to Sealing mode and cook in Steam mode for 11-12 minutes. Let pressure release naturally.
- 3
Peel the potatoes and transfer both potatoes and peas to a large bowl. Lightly mash the potatoes and peas and set aside for use later.
Peel the potatoes and transfer both potatoes and peas to a large bowl. Lightly mash the potatoes and peas and set aside for use later.
To prepare the pav bhaji
- 1
Heat 2 tbsp of butter in a pan and once molten, add cumin seeds and onions. Sauté until onions become soft and turn a light golden brown.
Heat 2 tbsp of butter in a pan and once molten, add cumin seeds and onions. Sauté until onions become soft and turn a light golden brown.
- 2
Add garlic paste and green pepper and sauté until peppers have softened, and rawness of the garlic has cooked off.
Add garlic paste and green pepper and sauté until peppers have softened, and rawness of the garlic has cooked off.
- 3
Add tomatoes, salt and half of the deggi mirch. Mix well and continue cooking until tomatoes cook down and become soft. Stir ever so often to ensure they don’t stick to the pan and burn.
Add tomatoes, salt and half of the deggi mirch. Mix well and continue cooking until tomatoes cook down and become soft. Stir ever so often to ensure they don’t stick to the pan and burn.
- 4
Add the mashed potatoes and peas and mix well to combine. Then, make a well at the center of the pan and add 2–3 tbsp of butter. Add the rest of the deggi mirch and mix in with the butter.
Add the mashed potatoes and peas and mix well to combine. Then, make a well at the center of the pan and add 2–3 tbsp of butter. Add the rest of the deggi mirch and mix in with the butter.
- 5
Cook the spice until fragrant, about 30 seconds and then mix in with the bhaji.
Cook the spice until fragrant, about 30 seconds and then mix in with the bhaji.
- 6
Add water, about 1/2 Cup at a time until you have a wet consistency. Mix well and then start mashing the bhaji with a potato masher until completely smooth.
Add water, about 1/2 Cup at a time until you have a wet consistency. Mix well and then start mashing the bhaji with a potato masher until completely smooth.
- 7
Turn heat to low and simmer, add more water if required to match the consistency of your liking. Taste and adjust for seasoning.
Turn heat to low and simmer, add more water if required to match the consistency of your liking. Taste and adjust for seasoning.
- 8
Sprinkle with pav bhaji masala and mix well. Let bhaji simmer while you prepare the pav.
Sprinkle with pav bhaji masala and mix well. Let bhaji simmer while you prepare the pav.
- 9
Heat a tawa pan on medium low heat and add 1–2 tbsp of butter and let it melt. Slice the pavs in half and add to the pan. Coat each side with butter, adding more as necessary to completely butter the pav. Toast lightly, until pavs are warmed through.
Heat a tawa pan on medium low heat and add 1–2 tbsp of butter and let it melt. Slice the pavs in half and add to the pan. Coat each side with butter, adding more as necessary to completely butter the pav. Toast lightly, until pavs are warmed through.
- 10
Serve Pav Bhaji immediately, topping the bhaji with more butter, chopped cilantro, along with the pav and wedges of lemon.
Serve Pav Bhaji immediately, topping the bhaji with more butter, chopped cilantro, along with the pav and wedges of lemon.
Did you make this recipe? Tag @cooking.with.anadi on Instagram and hashtag it #cookingwithanadi

Tested & written in Anadi’s kitchen
Recipe history
- April 16, 2026 — Reworked and refreshed for the 2026 relaunch — new photography, restructured and standardized ingredients & instructions.
Filed under
You might also like
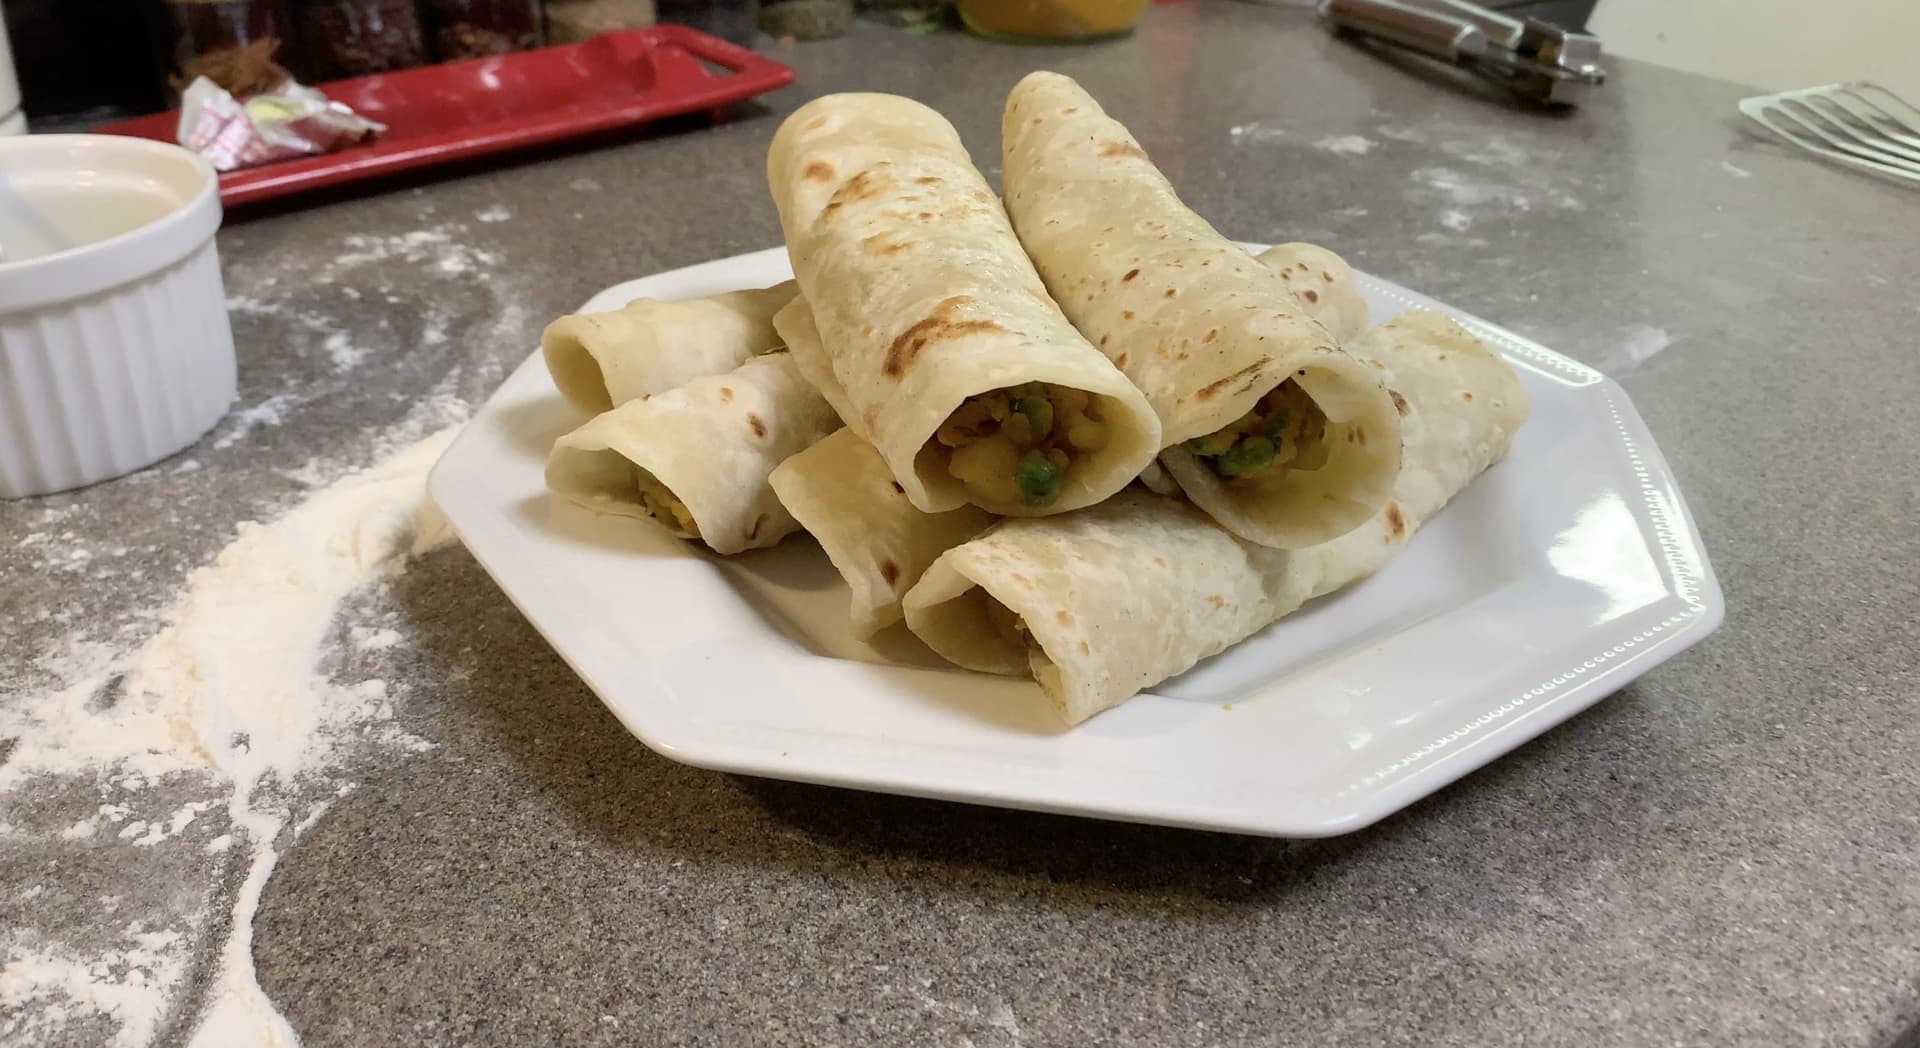
Delicious North Indian Potato Wrap Recipe
Crispy, spiced and utterly satisfying, this authentic North Indian Potato Wrap makes the perfect homemade brunch. Packed with bold flavors, it is a vegetarian recipe the whole family will love.

Gobi Paratha Recipe - Indian Stuffed Cauliflower Flatbread
Gobi Paratha is a crispy, golden Indian flatbread stuffed with spiced cauliflower. Made with whole wheat dough, this easy recipe delivers soft, flavorful parathas perfect for any meal.

Instant Pot Meetha Dalia - Cracked Wheat Porridge
Make creamy Instant Pot Meetha Dalia in minutes! This sweet cracked wheat porridge is wholesome, satisfying, and perfect for weight loss. A simple Indian breakfast the whole family will love.

The Ultimate Puffy Delhi-Style Bhature Recipe
Make perfectly puffy Delhi-style bhatura at home without yeast or baking powder! This easy bhatura recipe uses baking soda for soft, crispy results every time.

Crispy Aloo Cutlets Recipe - Perfect Snack for Any Occasion
Crispy Aloo Cutlets made with spiced mashed potatoes, golden-fried to perfection. A crowd-pleasing Indian snack ideal for parties, lunch, or dinner. Easy to make and impossible to resist.

Easy Instant Pot Kheer Recipe - Indian Rice Pudding
Make creamy Indian rice pudding in minutes with this easy Instant Pot Kheer recipe. Rich, aromatic, and perfectly sweet — a classic dessert made simple for any occasion.


Comments
No comments yet — be the first to share your thoughts!
Leave a review
Be the first to share how it went — your note helps other cooks (and earns the recipe its stars).