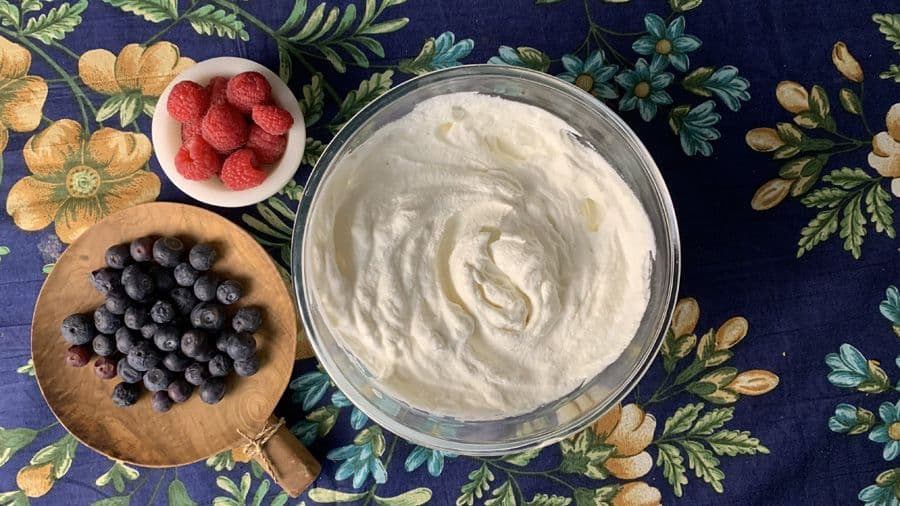
Make perfect chocolate whipped cream at home in minutes! Rich, fluffy, and incredibly easy, this recipe is the best way to elevate any dessert from scratch.
Chocolate is the key to my heart in any situation, as you may be able to tell from the amount of chocolate-based dessert recipes I have on the site! Additionally, I also love whipped cream. Whether I add it onto pies or onto hot drinks like hot chocolate or my favorite coffees (particularly a good Starbucks Cafe Mocha!), whipped cream makes everything better!
With that being said, what happens when you put chocolate and whipped cream together? Chocolate whipped cream! It’s not something I’ve made often, but when I make my regular whipped cream I most certainly do get tempted to throw in some chocolate. Today was the perfect day to do it!
This simple recipe can be prepared in a matter of minutes and you’ll get a cool chocolatey treat to top your favorite desserts any time you want! Check out the number of recipes you can use this easy Chocolate Whipped Cream recipe for later on in this post! If you’ve got a chocoholic in your household, then surprising them with this chocolate delight in a cup or on a plate will definitely put a smile to their face! This simple whipped cream with chocolate will enhance all of your sweet goodies that you can make as part of your Live to Cook one-month cooking challenge! Get your cooking journey started for free by signing up to my newsletter, plus you’ll have all of my new recipes sent right to your inbox!
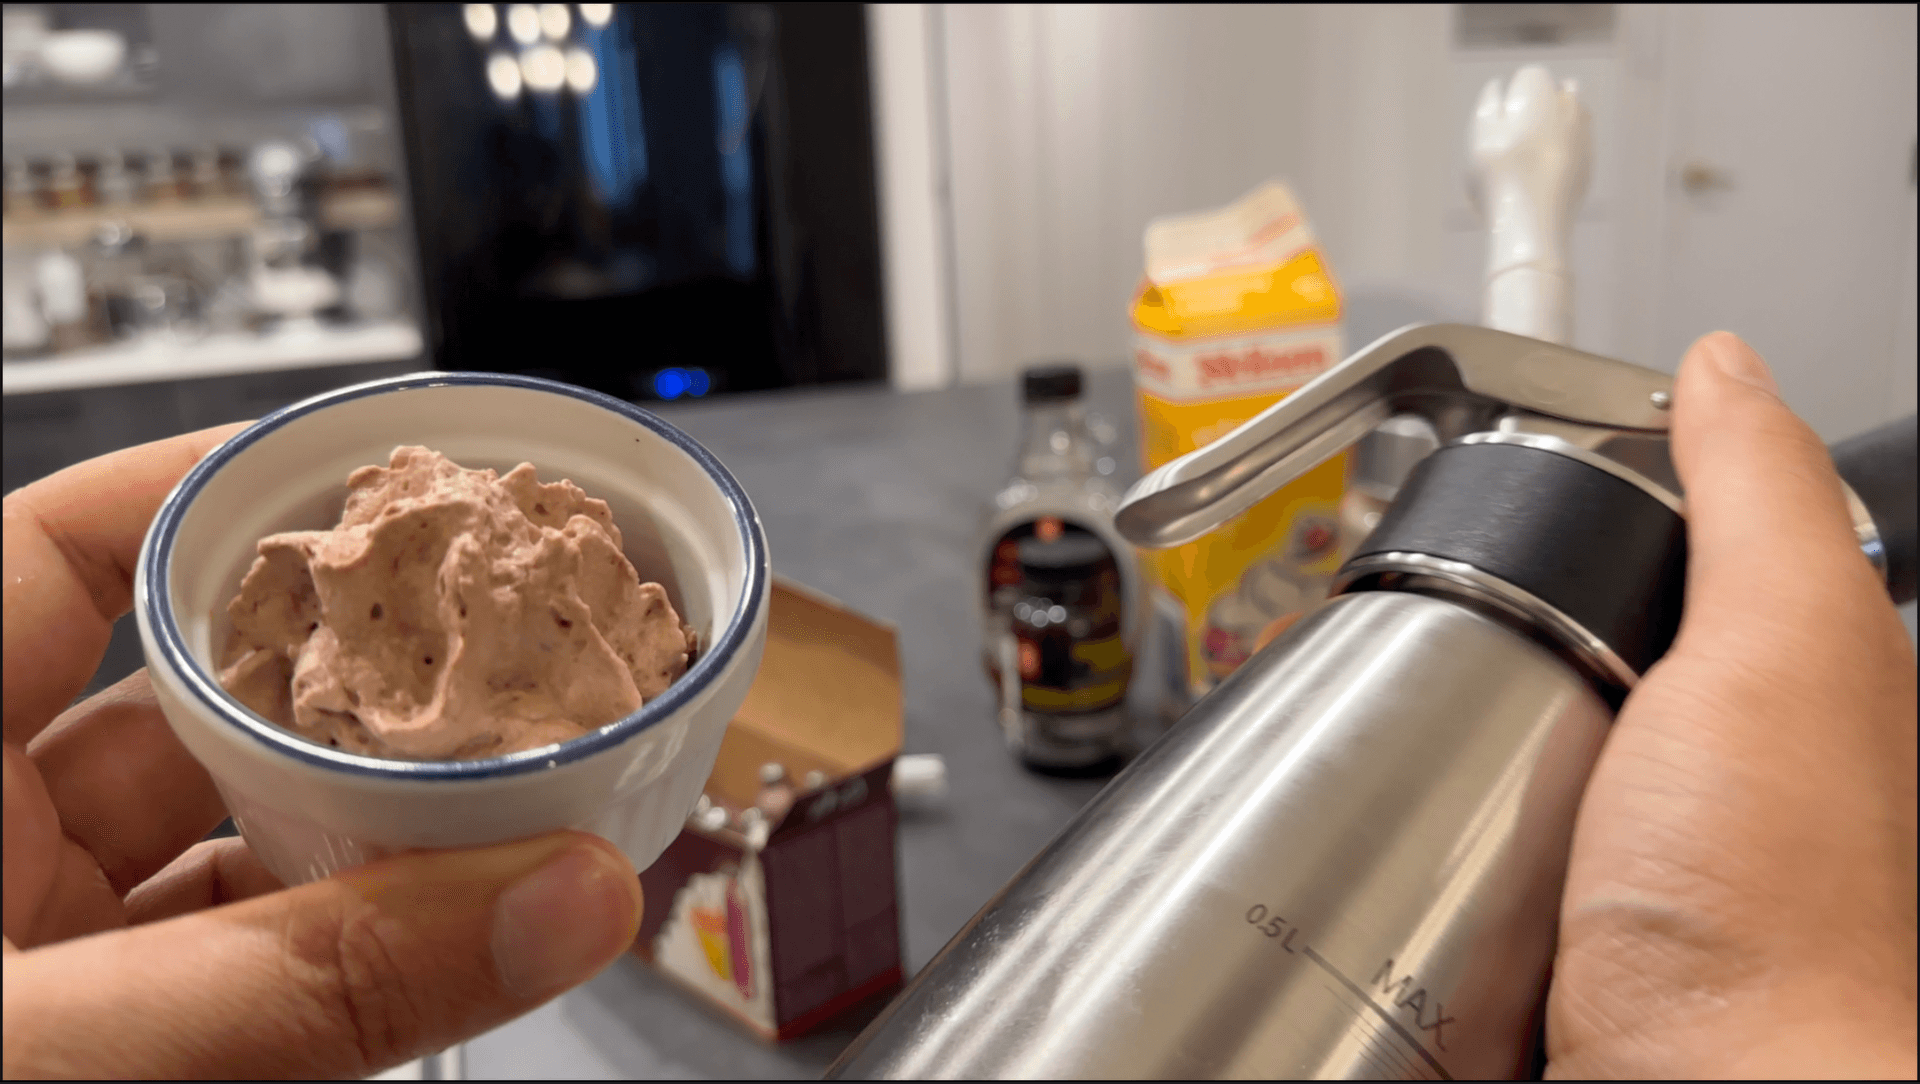
If you want to see how quickly this Chocolate Whipped Cream recipe comes together (especially if you have a whipped cream dispenser!), then be sure to watch the video! If you’re not already, please subscribe to my YouTube channel and press the bell button to be notified when all of my video recipes are live! Let’s get mixing!
Why You’ll Love This Chocolatey Whipped Cream Recipe
If you’re on the fence of why you need to make your own whipped cream today (especially chocolate!), then this list should really convince you!
Speedy: Of course the fastest method would be the whipped cream canister recipe, but even if you are making this whipped cream by hand or with a stand mixer, it should only take a few minutes to prepare!
4 staple ingredients: You most likely have everything on hand already, so you won’t have to run to the store to get anything!
Fun: I always find making my own whipped cream lots of fun, whether it’s by hand, in a stand mixer, or in a dispenser. Whipped cream makes everyone happy!
Versatile purposes: Check out later on in this post for plenty of ideas to use your whipped cream!
Natural ingredients: No chemicals or stabilizers are added here, and I don’t really think you need them!
Chocolate heaven: Oh goodness, there is an actual taste in homemade whipped cream! By using the vanilla bean paste, you see and taste the vanilla, so it’s like having French vanilla ice cream in the form of whipped cream. Yum!
Cocoa powder comes from fermented and roasted cacao beans. You get liquid that can be used to make fine chocolates or chocolate bars, or you can press out the majority of the fat (cocoa butter) to get cocoa powder. There are actually eight types of cocoa powder, which you can read about the more niche types here, but here are the three main types:
Dutch-processed cocoa powder: This is also known as alkalized cocoa. The difference here is that the cocoa powder is made from cocoa nibs that were treated with potassium carbonate to reduce the acidity - the nibs were “alkalized.” As a result of alkalizing the cocoa beans, you get a deeper rich red color, associated with being “more chocolatey” and of a dark chocolate flavor, with less fruity aroma than of the natural variety.
Black cocoa powder: Ever wonder how Oreo cookies get their color? This is because of the black cocoa! The alkalization process takes place later in the cocoa processing procedure, resulting in the super dark chocolate.
If you want to use cocoa powder, to be honest for the purposes of whipped cream it doesn’t really matter. You can experiment with them all and see which one is more delicious for you! Remember we’ll be adding sweetener, so don’t worry about using whatever you have on hand. As I describe in my Make Cooking Fun!free motivational guide to inspire you to get creative in the kitchen goes into detail about how you should use up what you have on hand. I really wouldn’t want you to go out to the store to buy some special type of cocoa just to make whipped cream! However, I do recommend the black cocoa powder for some Halloween-themed desserts in order to have black whipped cream!
How can you not? I think you could use it in pretty much any recipe that would call for “regular” vanilla whipped cream, just adding some chocolate goodness to switch things up! Here are just a handful of ideas!
FOUR common household ingredients are needed to make our whipped cream at home! The bottom of this post has the FULL PRINTABLE recipe card with the full list of ingredients and their quantities, plus you can save the recipe for later. You can also scale the recipe based on the portion of whipped cream you want to make. By default, the recipes makes 1 pint (500 mL) of whipped cream.
Whipping cream: Also known as “heavy cream.” You want a cream that is between 30%-35% milk fat or else it won’t whip.
Sweetener: Any sweetener here will do. I like to use maple syrup since I’m in Canada!
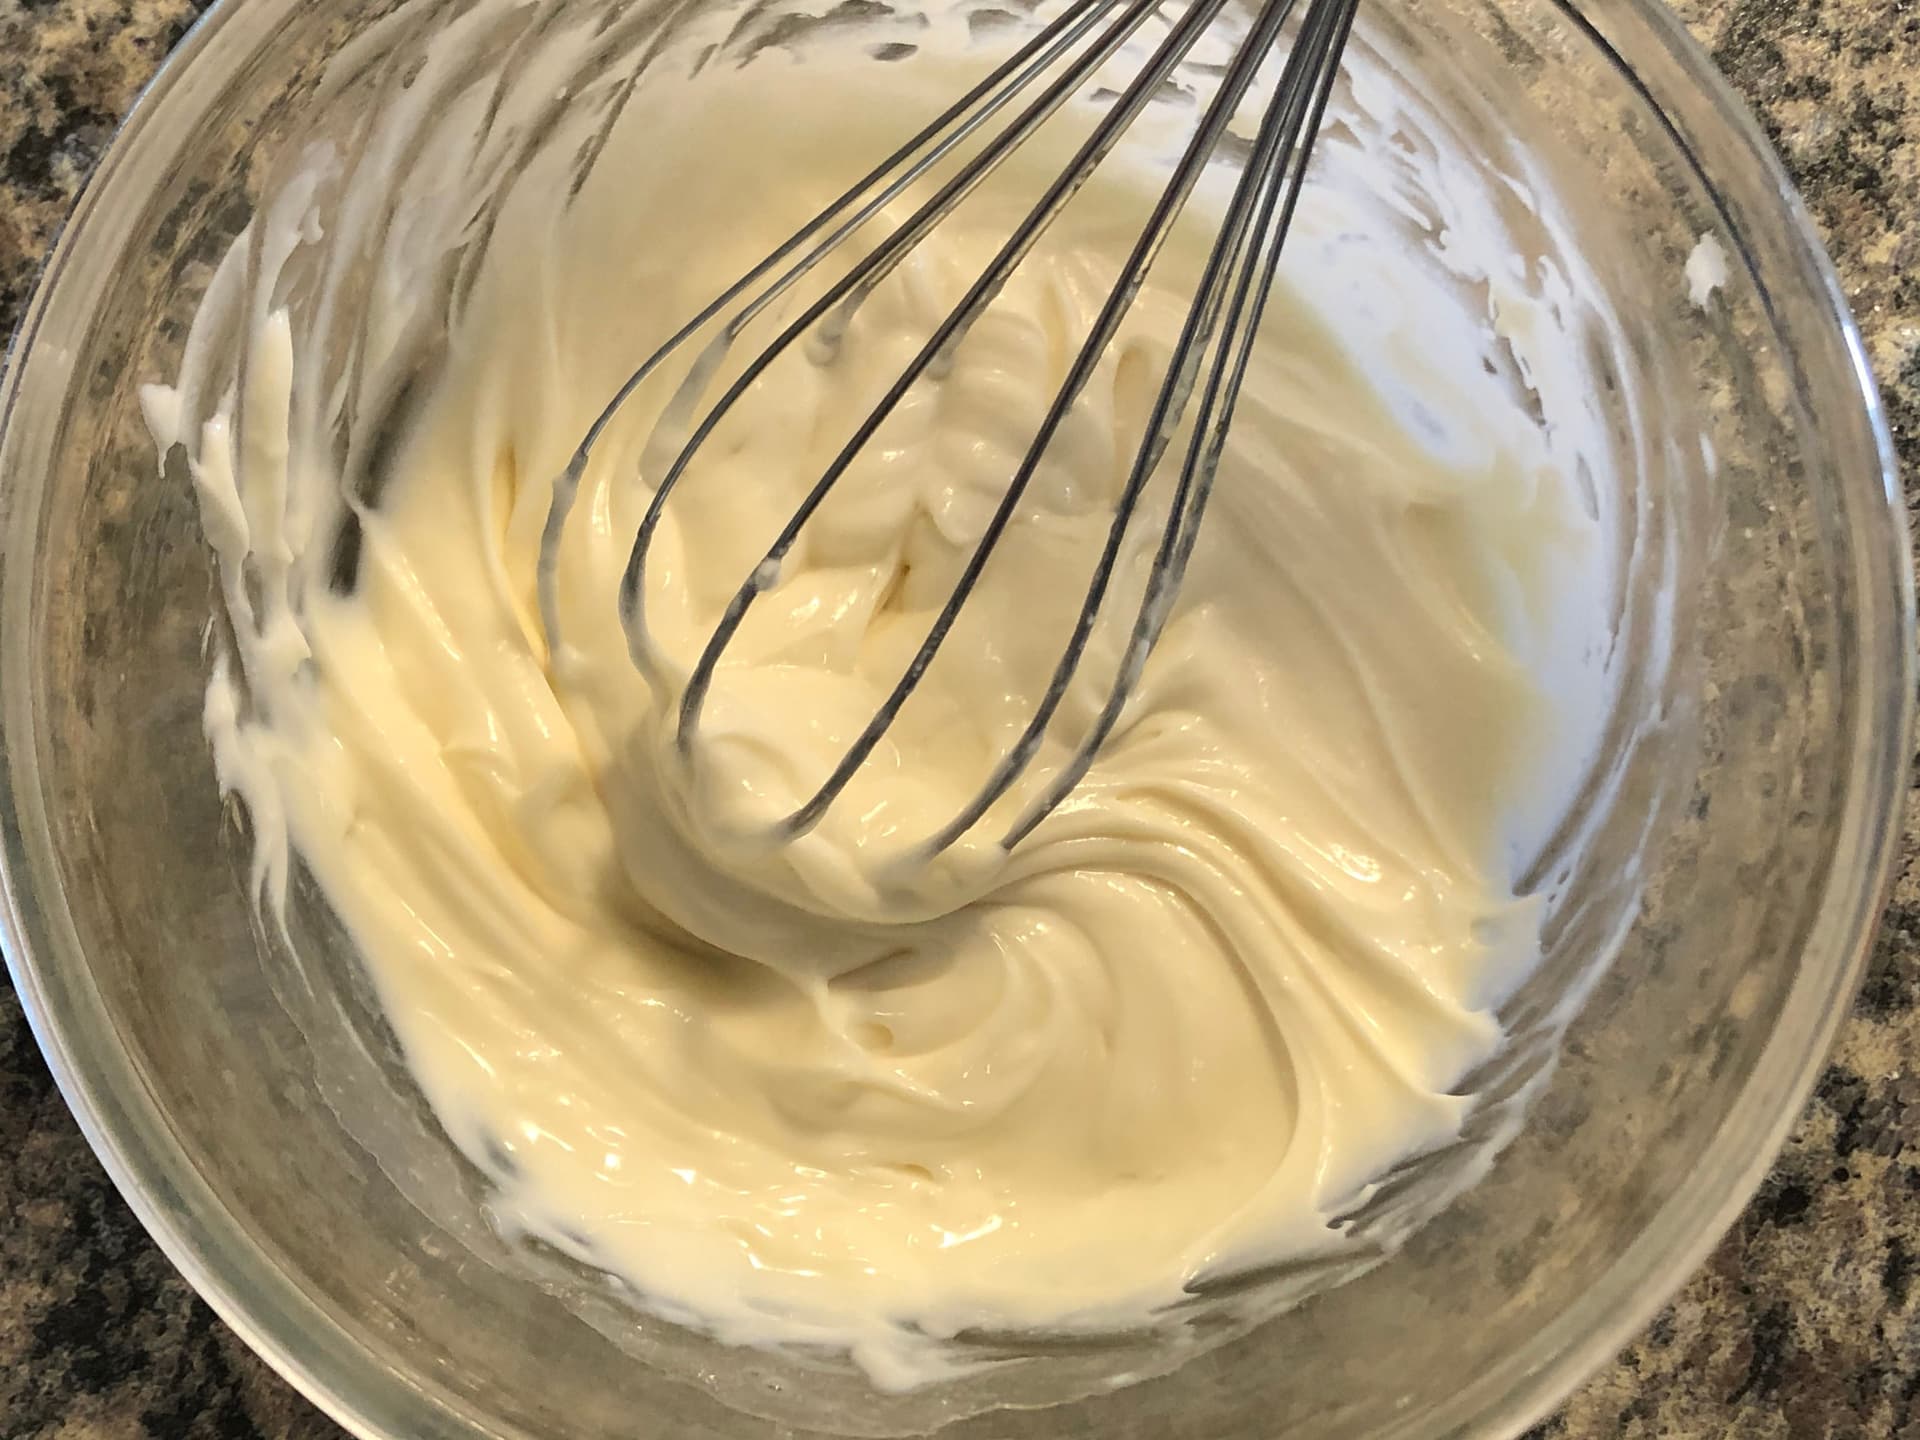
Add your whipping cream/heavy cream in a large mixing bowl.
Keep whisking and continue until the cream starts to thicken. Your arms may begin tiring out at this point.
Add sweetener of choice, vanilla of choice, and cocoa powder (or cacao powder) and continue whisking until you observe soft peaks. Lifting the whipped cream with the whisk should result in peaks that eventually points down.
Using a Stand Mixer
Pour the mixture to the bowl of a stand mixer and start whisking with the whisk attachment at medium speed. Gradually increase the speed of the whisk until the cream starts to thicken.
Add sweetener of choice, vanilla of choice, and cocoa powder (or cacao powder) and continue whisking until you observe soft peaks. Lifting the whipped cream with the whisk should result in peaks that eventually points down.
Chocolate Whipped Cream in a Can
For more details on whipped cream dispenser recipes and how to use a dispenser, be sure to check out my guide.
Add the cream, sweetener, and vanilla extract (or other vanilla), and cocoa powder (or cacao powder) in the bottle for your whipped cream dispenser.
Stir well with a spoon and taste for sweetness.
Ensure the head gasket is inserted in the head of the dispenser and prior to closing the bottle, screw in the tip on the head. Secure the head on the bottle and insert the Nitrous Oxide charger to the charger holder. Screw in the charger holder until tight, you will hear and quick discharge of gas as the charge gets secured to the head of the dispenser. Refrigerate until ready to use.
To make whipped cream, shake the bottle well, turn the bottle so that the tip is facing the dish/glassware you are topping with cream. Press the trigger and enjoy the whipped cream.
Tips for Perfect Chocolate Whipped Cream
Look for medium to soft peaks because over-whipping can give it an unpleasant texture.
Taste for sweetness after you’ve added the sugar to ensure that your whipped cream isn’t too bitter!
Ensure that your heavy cream is chilled for best results, especially when whipping by hand or in a stand mixer.
If making this whipped cream with chocolate using a whipped cream dispenser, pressing the trigger to create the whipped cream from the dispenser, ensure the tip is facing downwards and pointing towards the dish/glassware/container you are topping the whipped cream on.
How to Store Whipped Cream▼
If you’ve made your whipped cream by hand or with a stand mixer, then you can store it an airtight container. It will stay good in the fridge for up to 3 days. If it has been longer than 3 days and the whipped cream has become loose, whisk it again for a few seconds to refresh it.
If you’ve made cocoa whipped cream in a dispenser, then the beauty of that is that the dispenser also acts as a storage vessel. Furthermore, the lifespan of whipped cream prepared in the dispenser is significantly longer than that prepared by hand. Depending on your whipped cream dispenser model, you can store the whipped cream for a few days to even two weeks! It pretty much will last until you’ve finished it or until the gas runs out of the charger.
How Can I Prevent Over-Whipping?▼
As soon as the whipped cream starts to leave streaks during whisking, proceed carefully since the transformation to soft peaks is only a few seconds out. Keep lifting the cream with the whisk every 20-30 seconds. As soon as you see peaks that droop over, stop.
What if I Over-Whipped?▼
Sadly you will need to remake your whipped cream! I know it stinks! While you won’t have much of a different flavor in the over-whipped cream, the texture will be quite unpleasant. If you’re like me and don’t want to waste it, then I recommend that you store your over-whipped in a container and save it to top coffee or hot chocolate (or eat it with a spoon!). The flavor will not differ too much from properly whipped cream so it’s still edible, but if you need a beautiful texture for dessert, then you should remake the whipped cream. Another advantage of a dispenser is that over-whipping does not occur!
What if the Whipped Cream is Too Bitter?▼
If you find that your Whipped Cream isn’t sweet enough, then don’t worry if you are using the hand or stand mixer methods! Even if you realize it when it’s fully whipped, you can still adjust for sweetness by adding the sweetener, and then folding it into the whipped cream with a spatula, being delicate and ensuring you don’t whip it any more. Ideally, I recommend that you taste the cream and adjust for sweetness before you whip it.
If you liked this recipe please let me know in the comments. Tag your post on social media using #cookingwithanadi and mention me @cooking.with.anadi. Thank you!
Recipe by Anadi Misra
Easy Homemade Chocolate Whipped Cream Recipe
Make perfect chocolate whipped cream at home in minutes! Rich, fluffy, and incredibly easy, this recipe is the best way to elevate any dessert from scratch.
Add your whipping cream/heavy cream in a large mixing bowl.
Add your whipping cream/heavy cream in a large mixing bowl.
2
Keep whisking and continue until the cream starts to thicken. Your arms may begin tiring out at this point.
Keep whisking and continue until the cream starts to thicken. Your arms may begin tiring out at this point.
3
Add sweetener of choice, vanilla of choice, and cocoa powder (or cacao powder) and continue whisking until you observe soft peaks. Lifting the whipped cream with the whisk should result in peaks that eventually point down.
Add sweetener of choice, vanilla of choice, and cocoa powder (or cacao powder) and continue whisking until you observe soft peaks. Lifting the whipped cream with the whisk should result in peaks that eventually point down.
Hand mixer/Stand mixer method
1
Pour the mixture into the bowl of a stand mixer and start whisking with the whisk attachment at medium speed. Gradually increase the speed of the whisk until the cream starts to thicken.
Pour the mixture into the bowl of a stand mixer and start whisking with the whisk attachment at medium speed. Gradually increase the speed of the whisk until the cream starts to thicken.
2
Add sweetener of choice, vanilla of choice, and cocoa powder (or cacao powder) and continue whisking until you observe soft peaks. Lifting the whipped cream with the whisk should result in peaks that eventually point down.
Add sweetener of choice, vanilla of choice, and cocoa powder (or cacao powder) and continue whisking until you observe soft peaks. Lifting the whipped cream with the whisk should result in peaks that eventually point down.
Whipped Cream Dispenser
1
Add the cream, sweetener, and vanilla extract (or other vanilla), and cocoa powder (or cacao powder) in the bottle for your whipped cream dispenser. Stir well with a spoon and taste for sweetness.
Add the cream, sweetener, and vanilla extract (or other vanilla), and cocoa powder (or cacao powder) in the bottle for your whipped cream dispenser. Stir well with a spoon and taste for sweetness.
2
Ensure the head gasket is inserted in the head of the dispenser and prior to closing the bottle, screw in the tip on the head. Secure the head on the bottle and insert the nitrous oxide charger into the charger holder.
Ensure the head gasket is inserted in the head of the dispenser and prior to closing the bottle, screw in the tip on the head. Secure the head on the bottle and insert the nitrous oxide charger into the charger holder.
3
Screw in the charger holder until tight, you will hear a quick discharge of gas as the charge gets secured to the head of the dispenser. Refrigerate until ready to use.
Screw in the charger holder until tight, you will hear a quick discharge of gas as the charge gets secured to the head of the dispenser. Refrigerate until ready to use.
4
To make whipped cream, shake the bottle well, turn the bottle so that the tip is facing the dish/glassware you are topping with cream. Press the trigger and enjoy the whipped cream.
To make whipped cream, shake the bottle well, turn the bottle so that the tip is facing the dish/glassware you are topping with cream. Press the trigger and enjoy the whipped cream.
Nutrition per serving
1769
Calories
25g
Protein
48g
Carbs
181g
Fat
22g
Fiber
15g
Sugar
142mg
Sodium
Share This Recipe
Did you make this recipe? Tag @cooking.with.anadi on Instagram and hashtag it #cookingwithanadi
Tested & written in Anadi’s kitchen
Free weekly newsletter
Cook something new every week
One tested recipe and a real weeknight tip from my kitchen, every Friday.
Join 40,000+ home cooks who visit Cooking With Anadi every month.
Make the best homemade whipped cream from scratch in minutes. Light, fluffy, and perfectly sweet, this easy recipe delivers flawless results every time. Your desserts will never be the same.
6 minEasy24 servings
Recipe history
April 16, 2026 — Reworked and refreshed for the 2026 relaunch — new photography, restructured and standardized ingredients & instructions.
Make silky homemade caramel sauce with just sugar, water, and whipping cream. Quick, easy, and perfect for drizzling over ice cream or bread pudding. Your new favorite dessert topping.
Master the whipped cream dispenser with our easy, foolproof guide. Make light, fluffy homemade whipped cream from scratch in minutes with perfect results every time.
Make this easy cream cheese glaze in minutes with just a few simple ingredients. Thick, creamy, and versatile enough for pancakes, cakes, and more. Your new favorite topping awaits.
Make rich, creamy caramel sauce at home with just white sugar and whipping cream. Perfect for ice cream, cakes, and apples. Easy, quick, and absolutely indulgent.
Make creamy lactose-free sweetened condensed milk at home with just a few simple ingredients. Rich, smooth, and easy to prepare, this recipe is a must-have for all your favorite lactose-free desserts.


Comments
No comments yet — be the first to share your thoughts!
Leave a review
Be the first to share how it went — your note helps other cooks (and earns the recipe its stars).