
This post may contain affiliate links. Read our disclosure policy
Watch the recipe
Got some last-minute guests arriving to your door and you need a satisfying and elegant dessert in a jiffy! Make some kheer with your Instant Pot!
What is Kheer?▼
Kheer translates to an “Indian rice pudding.” Traditionally, the base for kheer requires only three components:
- Rice
- Milk
- Sweetener
If I had to describe my feelings toward kheer, I’d call each serving a big bowl of love. I really don’t know who doesn’t love it! Find me someone who doesn’t love it - I challenge you - and let me know in the comments if such a person exists! Kheer is wonderful because it doesn’t require many ingredients, but the simplicity of this dessert is just truly incredible.
For that reason, kheer was an awesome dessert option for my mom. My sister and I would have kheer whenever we felt like it or when my mom was in the mood to prepare it. The only downside of traditionally making kheer on the stove is that it takes some time to boil the milk, so there is some advanced planning involved when it comes to making kheer. If your sweet tooth has instant hit, then opting out for something a bit quicker was preferred, such as Sooji Halwa! Other than that, it’s a one-pot dessert and it is so easily made with some patience!
Kheer is an excellent dessert for parties because you can easily make a lot of it. Kheer uses pantry staples, so you won’t have to worry about running out of the ingredients. Kheer is traditionally prepared for special festivals, such as Navrartri, a Hindu festival that honors the Goddess Durga, spanning across 9 days; Diwali, the festival of lights; or Holi, the festival of colors. I honestly don’t remember any special occasions where we were served kheer, but I know it’s a thing to do!
While kheer is called an “Indian rice pudding,” I believe what actually makes kheer “Indian” is just the touch of saffron and the fact that only milk, sugar, and rice are used! I’ve never made or had a North American rice pudding, but it seems that heavy whipping cream, cinnamon, and eggs are also used. Correct me if I’m wrong here! However, if you have had a North American rice pudding, this will be similar because this will also be warm and creamy and will just make you feel super good!
When I came to Canada, I admit I’ve only made kheer a handful of times. As much as I love chocolate, kheer is near and dear to my heart, and I’ve made it whenever I was feeling some nostalgia. It’s always worth it!
Trust me, the Instant Pot will give you an amazing kheer. If you’re ready to satisfy your sweet tooth and enjoy a wonderful comforting bowl of rice porridge, let’s get to it!
Why Make kheer in the Instant Pot?
As I’ve mentioned earlier, while kheer uses minimal ingredients and in theory it is very easy to make, you need to baby the sauce pan the entire time because a common no-no that happens is the milk burning to your pan! That’s no fun to clean up! It’s never happened to me thankfully but I know it’s a bother. With the Instant Pot, you won’t have to worry about any burning! All the magic happens in the Instant Pot, and you can sit back and relax while your kheer is being prepared.
I had so much fun trying out this recipe! I’ll be honest, this was the first time I’ve ever made a dessert in my Instant Pot. Yes, after three or so years of having my Instant Pot, I’ve finally made a dessert! I discovered a new setting that I’ve never touched - Porridge! So don’t worry about attending to that milk, the Porridge setting will cook up your kheer like a charm! I sat on the couch and watched some TV while it was cooking!
Making kheer in the Instant Pot can also be beneficial if you’re preparing it for a dinner party. Not only do you have a huge pot so you can make as much as necessary, but this will free up a burner on your stove, so that you can cook your other dishes and have the dessert be prepared simultaneously. I think that’s a huge bonus!
What Kind of Rice Should I use to Make Kheer?▼
Traditionally, basmati rice is used to make kheer, and that’s what I’ll be using here. Any long grain white rice should work.
There are other versions of kheer that use brown rice. Keep in mind if you’re using brown rice the cooking times will be much longer. This recipe is designed for white rice, so for best results with this recipe I recommend you use white rice.
Tips for the Best Instant Pot kheer
Kheer is one of the easiest desserts under the sun! It’s a one-pot dessert which makes it super straight forward, and the Instant Pot makes it extremely accessible to all! However, as with anything, there are always little tricks for optimal results in the kitchen! Here are my tips for making the best kheer you’ve ever had right in your Instant Pot:
- The water is added to ensure that the milk doesn’t burn (too much) while cooking.
- We add the sweetener later to ensure everyone can have their Kheer the way they want it!
- Be careful not to scrape the bottom of the Instant Pot. A touch of milk will likely have burnt onto the Instant Pot during pressure cooking.
- Feel free to use any of your favorite dried fruits or nuts for garnish.
Tools Needed
Ingredients for Instant Pot Rice Kheer
As discussed, the rice, milk and sweetener are the core ingredients. I wanted to share a more elevated kheer recipe today, so we’ll be adding some really awesome goodies that will give you the best kheer you’ve ever had! Let’s review what we’ll be using in this kheer recipe:
- Rice
- Milk
- Cream
- Honey/Sugar/Stevia/Maple syrup or your favorite sweetener to taste
- Ground green cardamom
- Ghee
- Coconut flakes
- Saffron
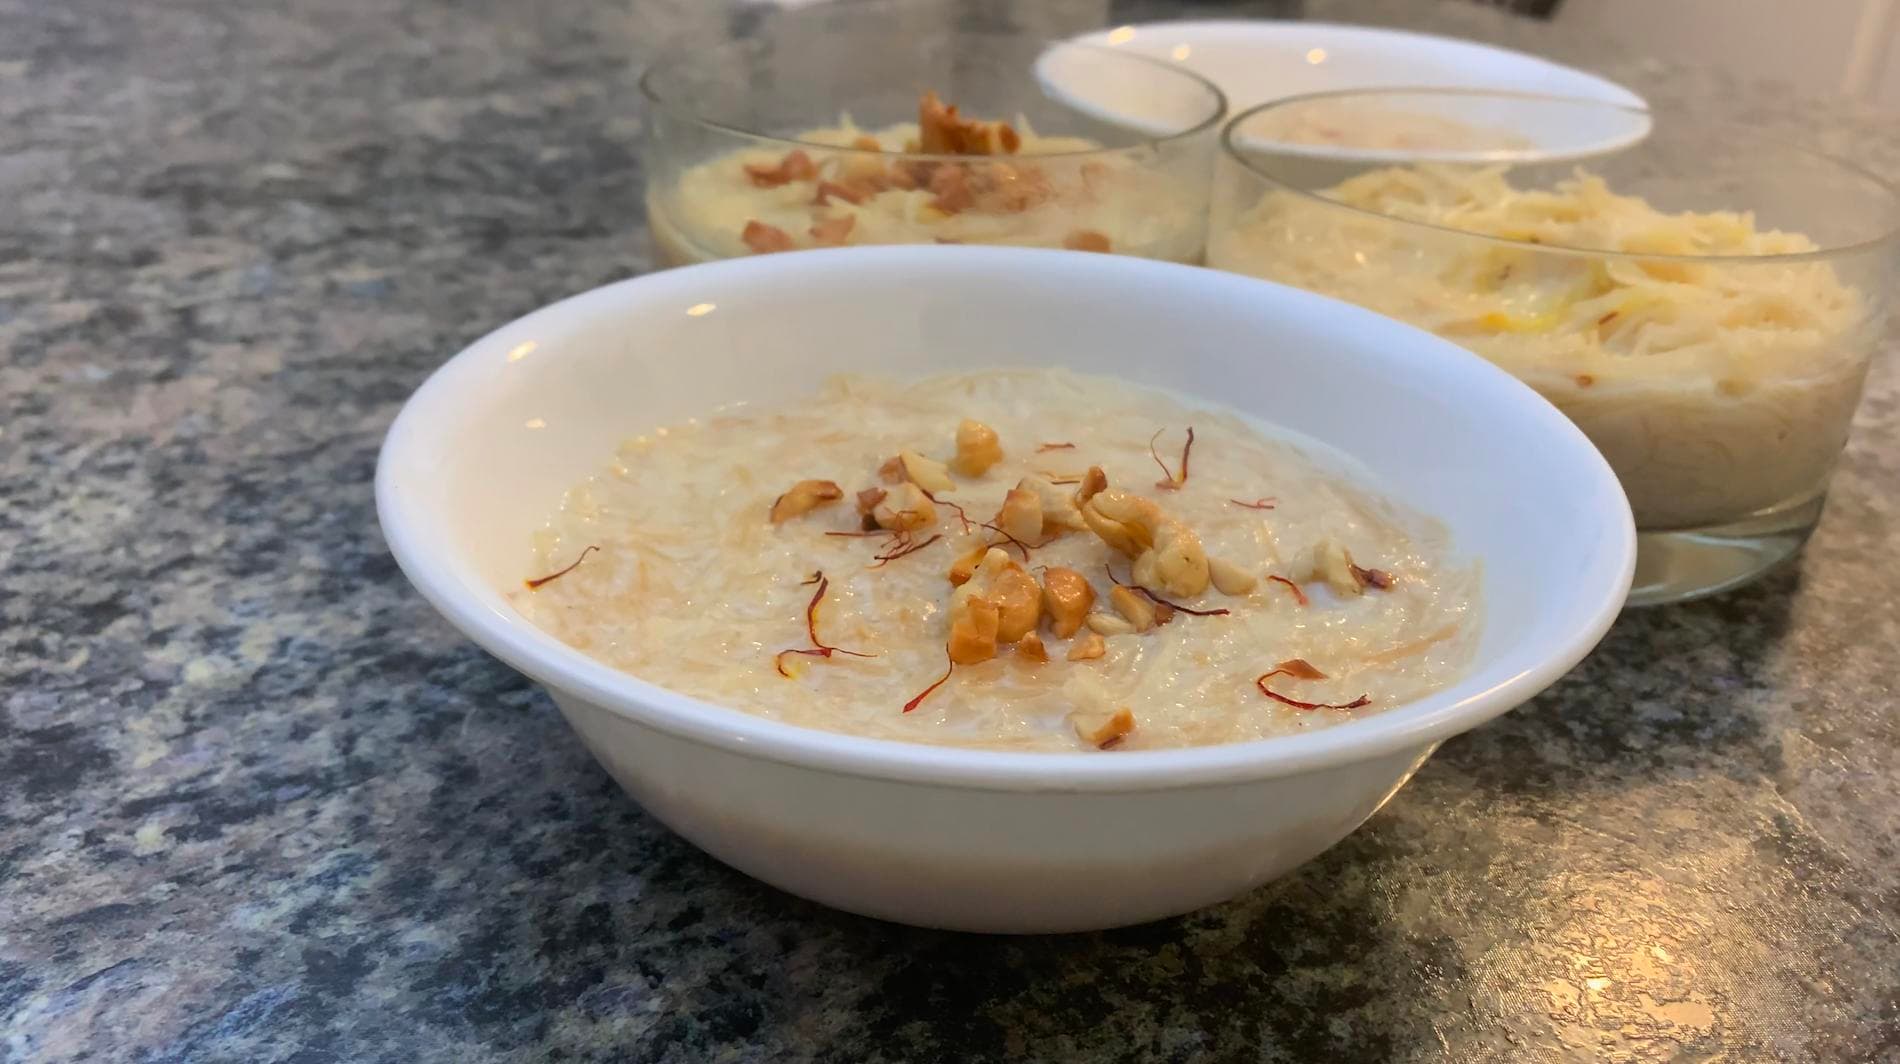
- Cashews & pistachios
The sweetener I’ve used in this recipe is honey. As you read on in the recipe, I’m actually not going to add the sweetener with the milk and rice to cook, as is traditionally prepared. Instead, I’ll be adding the honey at the end for garnish. This is to adjust for different individuals’ preferred level of sweetness. If you’re making a large batch of kheer for a party, some people may want their kheer sweeter than others. As a result, you can add as much or as little sweetener when serving the kheer for your guests and yourself! You may completely omit it if you like! The choice is up to you, and adding the sweetener at the end will give you that flexibility.
Many recipes use jaggery for the sweetener, but I don’t believe I can find it where I am. Other sweetener options include coconut sugar, maple syrup, table sugar, agave syrup or Stevia.
For the garnish, I’ll be roasting some cashews and pistachios with some coconut flakes in ghee. Feel free to use any dried fruit or nut you like! Almonds are a great option, or any combination of these three will work! All of these add-ons ultimately help to add texture to the kheer!
How to Make Instant Pot Rice Kheer
Note that the FULL PRINTABLE RECIPE is at the bottom of this post! Keep scrolling to save this for later! Here’s how to make your Instant Pot Rice Kheer:
- Set the Instant Pot to Saute Mode and add 1 Tbsp ghee. Once hot, add in pistachios, cashews and coconut flakes.
- Stir and cook until the mixture is aromatic and lightly browned. Set aside and wipe Instant Pot if required.
- Add the rest of your ghee, followed by the rice. Continue cooking on Saute mode and stir the rice until it is shiny and the ends of the rice grains start to turn translucent.
- Then add in milk and water, mix well and close the Instant Pot lid. Select Cancel on the Instant Pot, set the Valve to Sealing mode and set the Instant Pot to Porridge Mode. Set the timer to 20 minutes. The ratio of rice to milk to water is 1: 8: 2
- Once the timer is done, let the pressure release naturally.
- Stir well and set the Instant Pot to Saute Mode on Low to simmer and adjust the consistency.
- Add the cream, sweetener of choice and ground green cardamom. Stir well and then add in strands of saffron.
- Taste and adjust for sweetness, add in sautéed nuts and coconut flakes. Serve hot or chilled!
I Don’t have an instant Pot! What can I do?▼
No worries! You can make this over the stove in a similar method, and I’ll explain how to make it. However, keep in mind that you will need to pay extra attention to prevent your milk from burning and having to start over if you’re making kheer over the stove. The stove-top method will also take longer than if cooking in the Instant Pot. The steps are next to identical, however. Here’s what to do:
Repeat all steps 1-3 in a saucepan or pot. Then add in milk (no need for water) and bring it to a slow simmer. Lower the heat and then let the milk reduce until it has thickened completely and the rice is soft. Add more milk as required.
Then finish the kheer as directed in steps 7-8. Yum!
can I adjust the texture of kheer?▼
Yes you sure can! I love a really thick and creamy kheer, so I’ve added some 10% cream, also known as half and half cream, at the very end to make the kheer really fluff up. This is optional of course. If you’re satisfied with the kheer’s thinner texture when it has finished cooking, then you can leave it as is and finish flavoring the kheer.
Can I Make Instant Pot Rice Kheer Ahead of Time?▼
You sure can! I always say that Instant Pot recipes are perfect to make huge batches of whatever it is you’re whipping up. To store leftover kheer, transfer the contents into an airtight container. Allow the kheer to completely cool before storing in the fridge. Kheer will stay fresh in the fridge for up to three to four days.
You can reheat kheer in the microwave or over the stove. To reheat kheer in the microwave, heat it for about 3 minutes, and stir constantly to ensure it is evenly warmed through. To reheat kheer over the stove, transfer into a sauce pan on medium low heat. Stir occasionally until the kheer has completely warmed through.


Comments
No comments yet — be the first to share your thoughts!
Leave a review
Be the first to share how it went — your note helps other cooks (and earns the recipe its stars).